Software Catalog
The software catalog lists all installations found on the Client.
Inspect DNA2 detection patterns
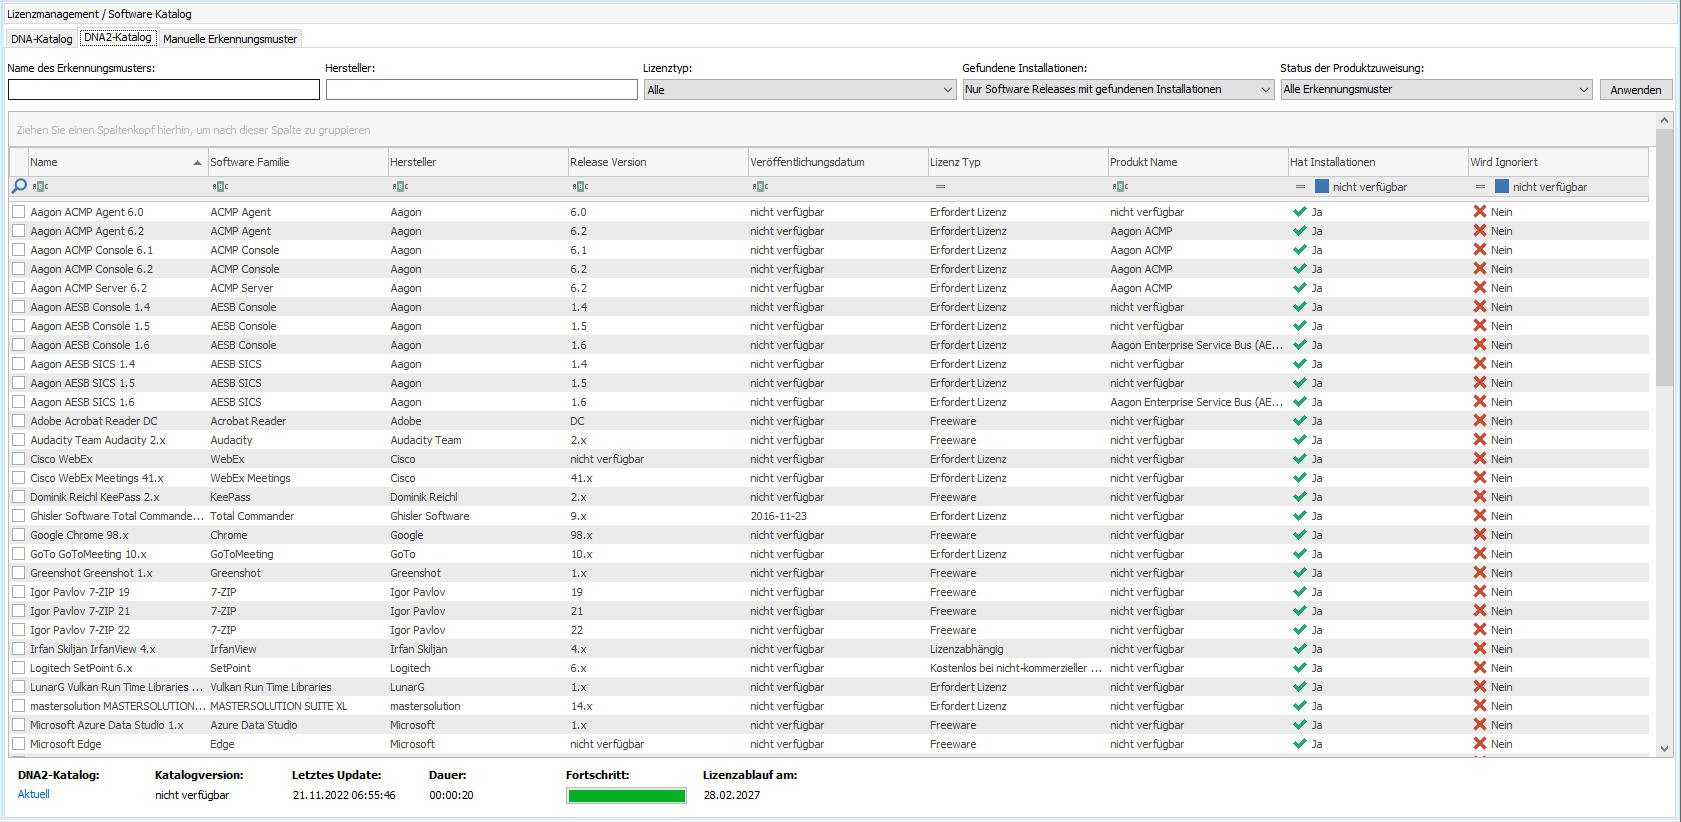
The DNA2 Catalogue tab provides an overview of the detection patterns for which installations have been found. The detection patterns can be filtered according to various criteria. A product should be assigned to each detection pattern so that it can be included in the compliance calculation. In the case of Freeware, you can ignore the entries without product assignment by right-clicking.
Under Product assignment state, filter for All detection patterns without product assignment to get an overview of which items you still need to assign a product to in the next step.
The software entries found for the Client appear in the Manual detection patterns tab. The list appears under item 2 in the workspace. By default, the unrecognised entries are displayed.
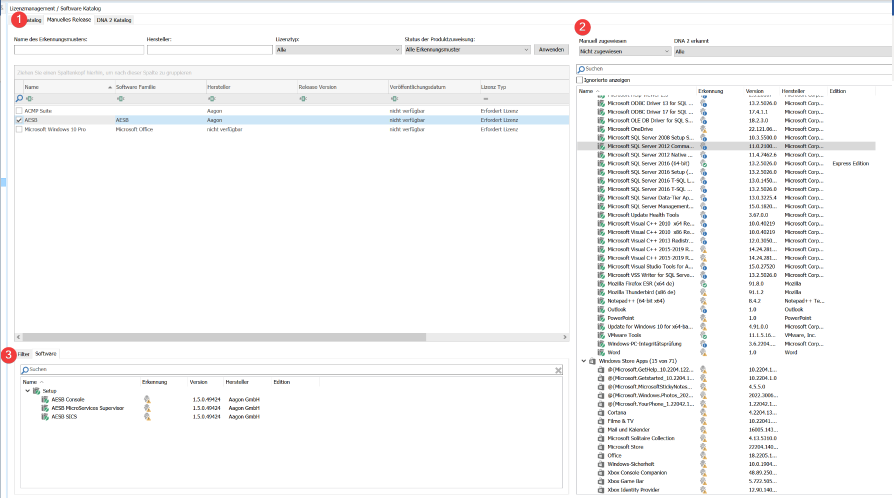
There, under DNA2 detected, you can filter for detection patterns that the DNA2 software catalog has detected as installed. These then also appear in the DNA2 catalog tab.
Secondly, you can filter for software that does not yet have a detection pattern and must be built as a manual detection pattern. You can recognise these options by the symbols:
| Symbol | Status | Explanation |
| Not detected | The entry is not in the DNA2 catalog. A manual detection pattern must be built here. | |
| Not relevant | The entry is in the DNA2 catalog. However, it has been classified as not relevant. Therefore, no link to a DNA2 detection pattern has been established. If you want to include this entry in the licence calculation, you must build a manual detection pattern for it. | |
| Relevant | The entry exists in the DNA2 catalog and a link to a product has been established. This entry has already appeared as a detection pattern in the DNA2 catalog tab as installed. |
You can also filter under Assigned manually whether a manual detection pattern has already been assigned to the entry.
You can also recognise the status by the row, which may then appear in colour:
| Line colour | Meaning |
| white | No manual detection pattern has yet been assigned to the entry. |
| blue | A detection pattern has been assigned to the entry. |
| yellow | Multiple detection patterns have been assigned to the entry. |
All manual detection patterns appear in the list of item 1. Under item 3, you can then see the filter set for the selected detection pattern as well as the software entries that run under the detection pattern.
Microsoft Exchange Server
You will also find an entry for the Microsoft Exchange Server, if there is one on your network. Below are the requirements that must be met in order to read the installed edition:
- A user can only successfully connect to Exchange if they have the Exchange Management role. There are 'Microsoft Exchange Security Groups' in Active Directory, where the built-in groups of the server are listed. The built-in group "Organisation Management" ensures that all AD users in the group have the rights to manage Exchange.
- The Windows services (IMAP, POP3) for the Server must be started.
The PowerShell CmdLet "Get-ExchangeServer", which is available in the "Exchange PowerShell", is required to read the correct edition of the server.
The computer must be in the AD group 'Organization Management' for the Exchange Server to have permission to run the 'Get-ExchangeServer' CmdLet. If you decide to allow ACMP to read the edition, there may be a lot of event log entries.
If an error occurs, you should remove the computer from the AD group.
To read out the correct edition, you can use the following inventory methods:
| Method | Condition |
|---|---|
| ACMP Agent | The machine on which the Exchange is installed must be added to the Organization Management AD group. |
| OneScanClient or OfflineScanner | The user performing the scan must be in the Organisation Management AD group. |
Create manual detection patterns
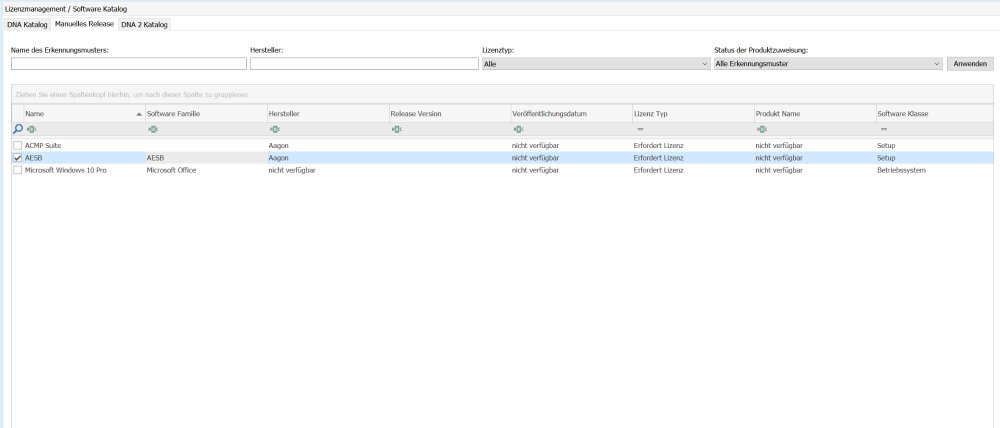
Select an entry from the list under item 2 and click Add in the ribbon bar.
Enter the name of the detection pattern, e.g. ACMP Suite.
Next, additional information of the detection pattern is required. The manufacturer's data either comes from master data already created in ACMP or you create new master data for the manufacturer, if necessary. The fields for software family, release version and publish date can be filled in if necessary. Then enter the licence type.
In the next step, you define a software class, in this case Setup, and a suitable filter. Here it would be filtered by Setup Software Name. Double-click to display the filter on the right. Then enter similiar to %ACMP%.
The affected software will then automatically appear in the fields on the right. Click on Done.
The detection pattern you created is now in the main list in the workspace.
To create a product from this, select the detection pattern and click on Create from detection pattern in the ribbon bar.
Follow this procedure until the software list is clear. You can also ignore items, e.g. freeware, by right-clicking.