


Creating Queries
You can create a query either centrally via Query Management (Client Management > Query Management) or via the ribbon bar under the Query Actions tab. If you want the query to be sorted in a specific folder, you can first select it and then add the new query there. To do this, click the Add button. A wizard will open that will guide you through the necessary steps for creating the query.
It is also possible to create a query without using the wizard. To do this, select Expert Mode. To select Clients in the Query or to open their Client Details, the Client ID must also be queried. By entering the SQL code directly, you can also access and execute the stored procedures of the ACMP Database. Stored procedures are instructions in the database system that can be used to call up complete sequences of commands from the client.
Create Query with the wizard
General properties
Select an output directory (![]() ) and enter a name for your query. Optionally, you can also add a description to the query if you want to store additional information for yourself or your colleagues. This description can help you choose the right query in the future. The next step is to select the query base. This determines the available query values, which are essential for you to continue. If you want to create a client based query, you will have different fields to those available for a query base based on cost centres or contracts.
) and enter a name for your query. Optionally, you can also add a description to the query if you want to store additional information for yourself or your colleagues. This description can help you choose the right query in the future. The next step is to select the query base. This determines the available query values, which are essential for you to continue. If you want to create a client based query, you will have different fields to those available for a query base based on cost centres or contracts.
Enable the Create advanced Query option only if you want to create a more complex, detailed query using SQL statements, for example with the help of the SQL Wizard. Otherwise, click Next >.
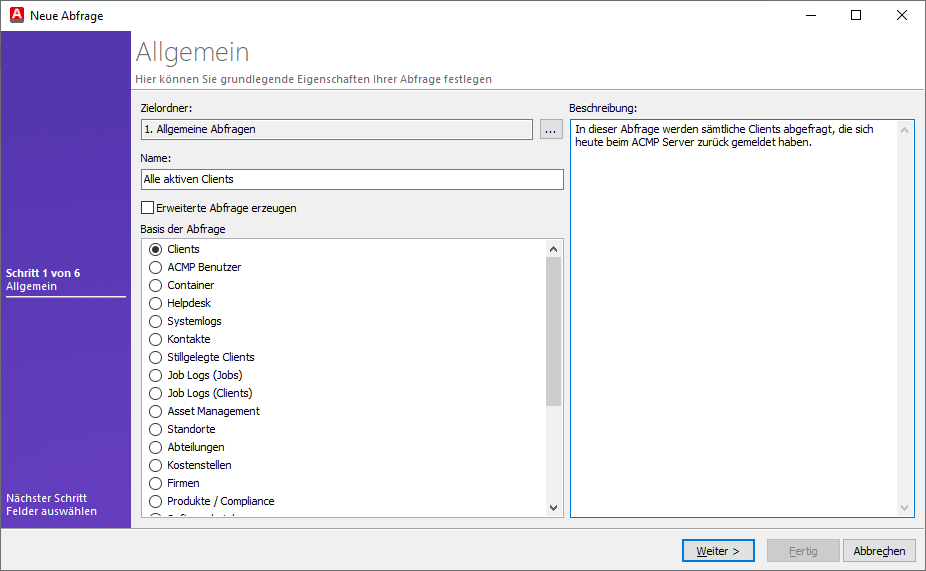
Create new Query (General)
Selecting fields
On the next page of the wizard, you need to select the fields you want to query. The available fields are sorted by categories. Depending on the selected query base, only selected fields will be displayed, not all. Drag and drop the required values into the right hand side of the dialogue and arrange them. Alternatively, you can use the search box, which will filter all fields containing your search term. The fields are divided into Single value fields ( ) und multi value fields (
 ).
).
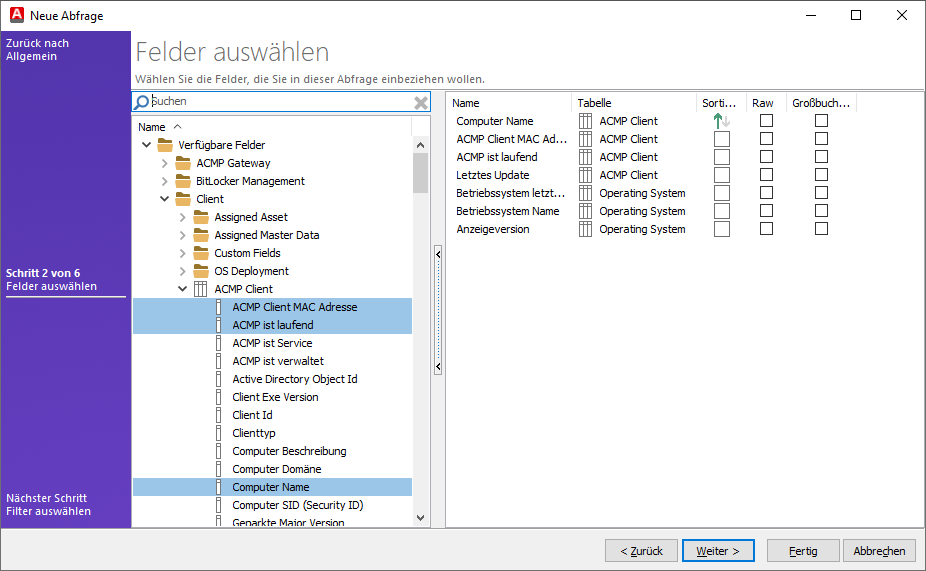
Create Query (Selecting fields)
In addition to the individual fields you can select, you can also influence the sorting of the results. To do this, tick the appropriate box next to the field; by clicking repeatedly, you can use the arrow directions to decide how the field is sorted. Tick the box if you want the dates to be output either in RAW form or in upper case. Click Next > again to move to the next page.
Select filter
To get the results of the Query to be displayed even more specifically, you can use filters on the following pages. The Query Results can be narrowed down using the operators and conditions that you can define here. The following operators are available:
| Operator | Description |
| OR | Using the OR operator, you can create conditions under which either value X or value Y should be used as a field. Example: If you want to create a query where the operating system Windows 10 OR Windows 11 is running. |
| AND | You can use the AND operator to create conditions in which multiple values should apply. Example: You only want to filter clients from a specific domain with the Windows 10 operating system. In this case, only clients within the results list where both conditions (domain and operating system) are met would be displayed. |
| NOT | If you do NOT select as a condition, you exclude values from the Query (e.g. you can call up all Clients in a Query except Clients with a certain operating system). You can use the negation operator to negate individual filters. |
Drag the field you want to filter into the field on the right, then enter your criteria in the input mask that appears.
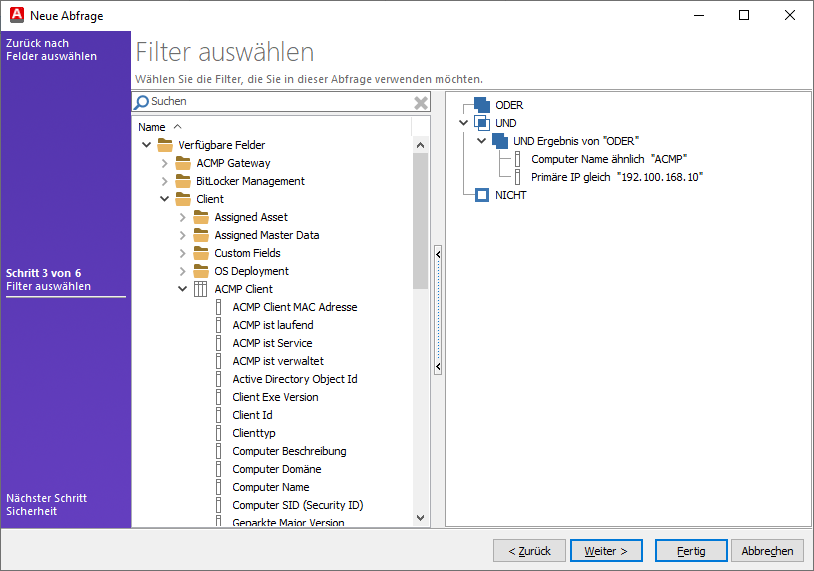
Selecting a filter for a query (example of a linked AND condition)
Depending on the type, you can also link multiple values together to create individual conditions. Linking multiple values and the resulting conditions (e.g. X OR (Y AND Z) condition) also allows you to combine existing conditions. To do this, drag a condition onto an existing AND condition. Both values are set in a combined AND condition. Drag another value onto the AND to create an OR link for the existing values. If the entries are dragged outside the condition, they are simply registered as two individual filters. If you want to edit entries, you can open them by double-clicking and delete them by pressing the Delete key. The following example shows what a filter looks like. In this case, the filter is set for the computer name and a primary IP address.
Once you have selected the filters, click Next > to continue.
Grouping tables
Depending on the query fields selected, there may be an additional step in the wizard. If you have selected a query field of type multi value (), a 1:n relationship is possible. This means that the alignment may affect the result. This is the case if you have selected one or more fields that can assign multiple results to a client, such as the number of printers. The logic behind this is that a printer can be selected by several clients. In everyday work, there is often only one printer available for an entire floor, so several people have to share it. If, for example, the result is aligned by client, the clients are listed and the multiple results are displayed in a sub-form. If you choose to sort by printer, all printers will be listed and clients will be listed in a sub-form.
Select the table entry by which you want to sort your query and click Next >.

Query alignment
Security and Permissions
The next page of the wizard allows you to make security settings. Specify which user or group has specific rights to this query.
To grant a group or user rights to the query, you must first add them to the selection by ticking the appropriate checkbox. By default, all rights are granted to both groups and users.
| Security option | Description |
| Editing | The user or group has the right to process the query. This also includes the execution and visibility of the query. |
| Execution | The right to execute and view Query Results is included in the Execution of Queries. If the view is disabled, the Query is not visible to the user or group. The activated option automatically includes visibility. |
| Visible | A user or group that is only allowed to see the Query cannot edit or execute it. |
Use the Add button to add more users or groups and the Remove button to delete saved users and groups. To do this, select the entry and confirm the prompt.
The users and groups stored here can be accessed in the User Management.
The available rights options are Allow, Deny and Neutral:
- Deny has the highest priority. Example: If you disallow a group from running a query, but allow an explicit user from that group, that user will still not be able to run the query. This is due to the priority of group permissions, which in some cases may be higher than that of an individual user.
- A neutral right is always based on other rights that have been granted. For example: If a user is allowed to do something through a group and you grant them a neutral right, they have received this right through the group.
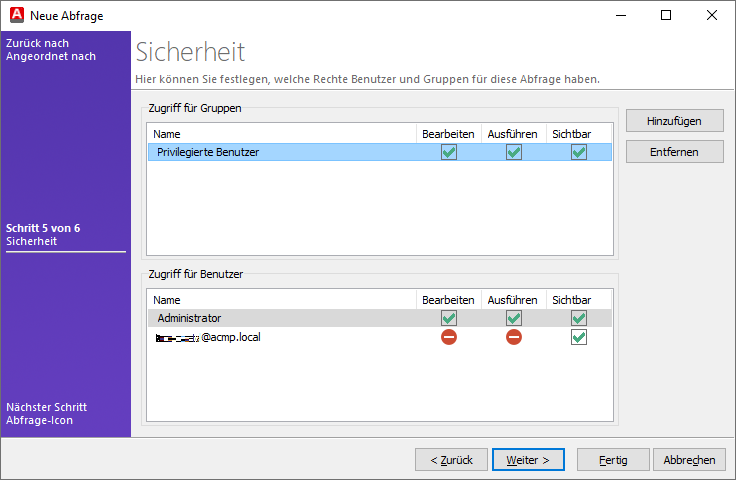
Manage user and group rights
Continue with your work and click Next > to proceed to the final step of creating a request.
Query icon
Under Query Icon you can assign a suitable icon to your query. Use one of the icons provided or upload your own. Note that icons must be in *.bmp or *.ico format and must not exceed 16x16 pixels in size, otherwise only part of the original file can be used. If you want to select a default icon again, click on  .
.
![]()
Assign Query icon
Exit the wizard and create the query by clicking Finish. The query is now available in the Query Management.