

Managing Assets
There are several actions available in the ribbon bar to manage your Assets. As well as adding new Assets (![]() ), you can also edit (
), you can also edit (![]() ) or delete (
) or delete (![]() ) them. You can also duplicate existing Assets (
) them. You can also duplicate existing Assets (![]() ), import them (
), import them (![]() ) or combine them into Asset Collections (
) or combine them into Asset Collections (![]() ).
).
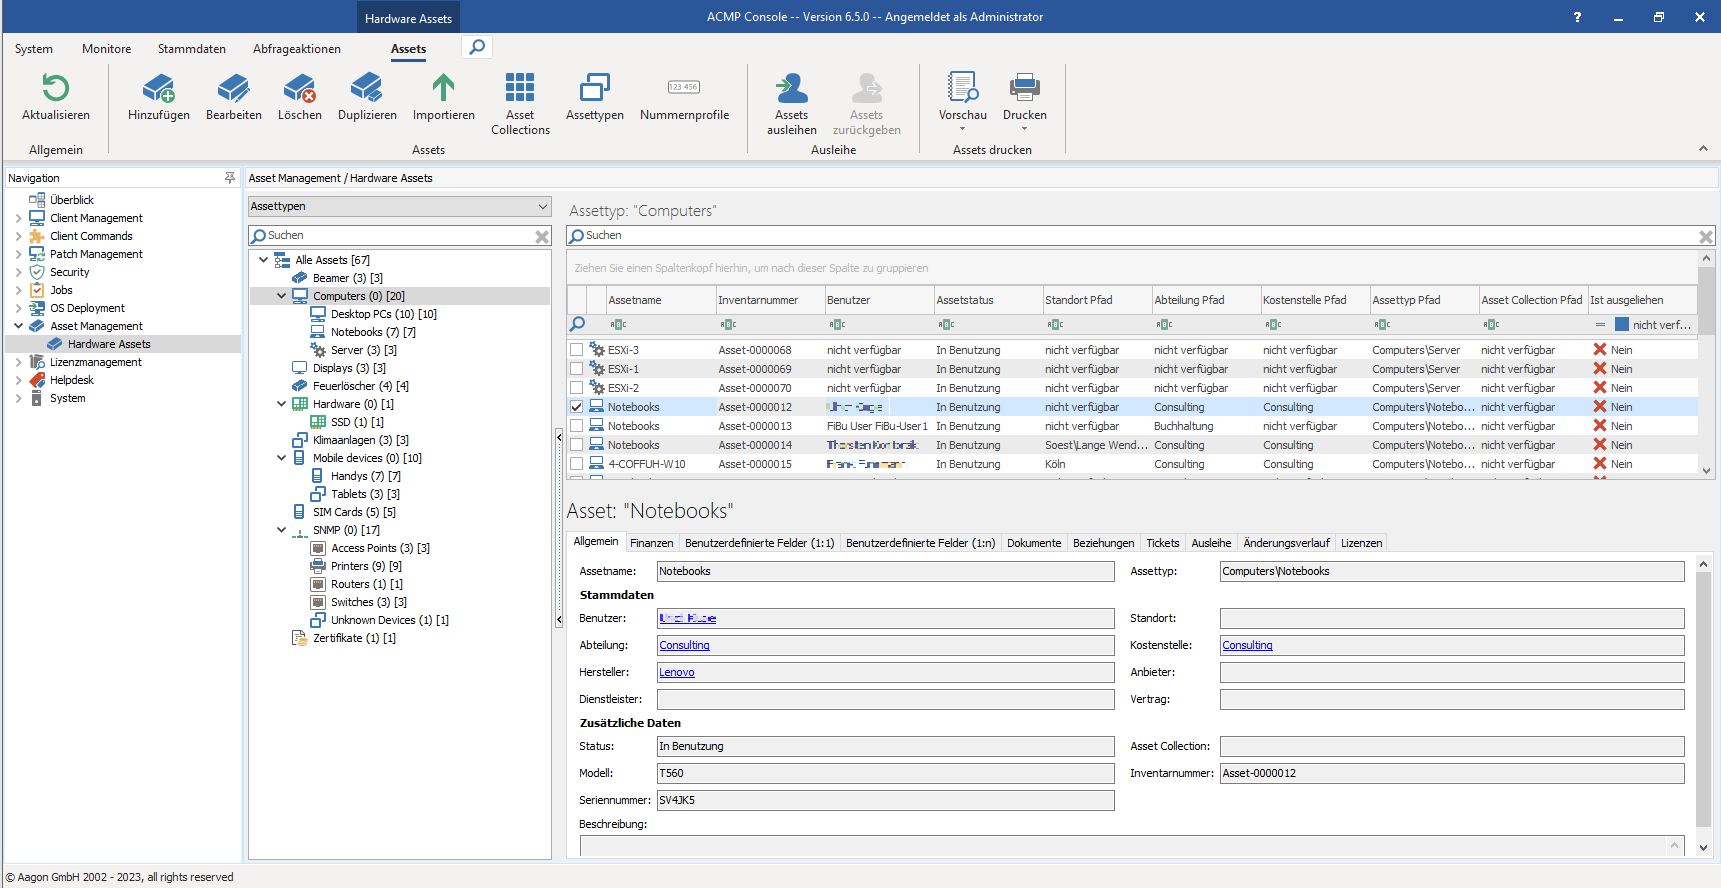
Overview of ACMP Asset Management
Add Assets
To add a new Asset, clock on the Asset button (![]() ) on the ribbon bar. A wizard will open and guide you through the following steps.
) on the ribbon bar. A wizard will open and guide you through the following steps.
Under General Information, first select an Asset Type under which the Asset will be created. To do this, select an Asset Type if you already have a correct one listed, or create a new one. In this example, the Asset will be listed under Notebooks. Optionally, change the Asset Name and enter a Description.
Then click Next > to proceed to the next page of the wizard.
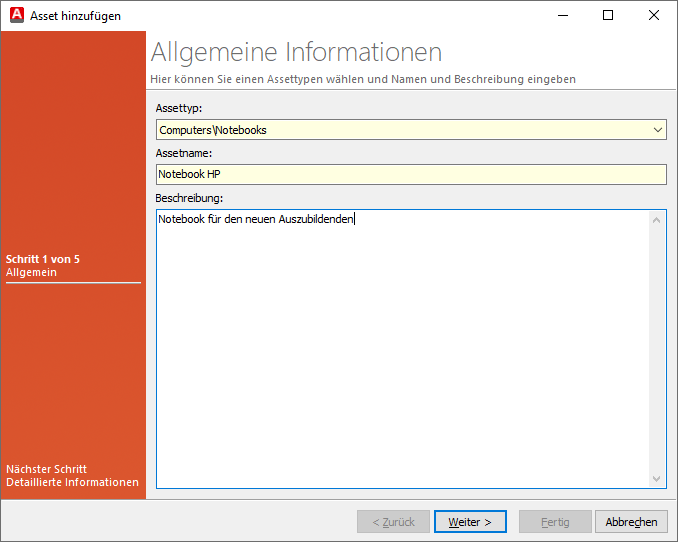
Provide general information about the asset
Under Detailed Information, enter the master data and additional data you want to store for the asset.
To do this, click on the individual drop down boxes and fill in all the relevant areas with the master data records. You can use existing data for each entry, or enter new information. Read here how to enter master data in the ACMP Console. Under Additional data you can select the status of the asset, as well as the model and serial number. The status will help you to keep track at a later date if you need to keep an accurate list of active and retired Assets.
Once all the relevant information has been entered, click Next >.
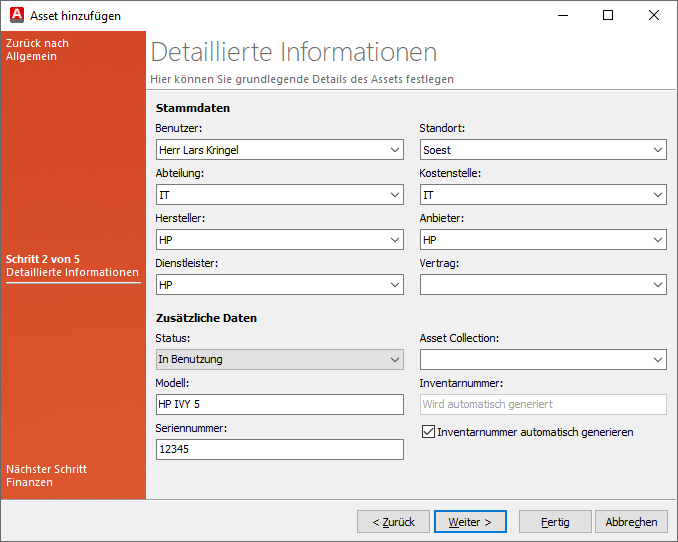
Define master data
Enter all relevant financial details for the asset on the next page. The purchase details can be entered separately from the warranty and service information. This data can be used, for example, if you want to allocate the information to a cost centre or department for correct invoicing. If it is not a purchase, you can also enter a different procurement type and depreciation period. The information entered here can also be edited and customised at a later date. Continue by clicking Next >.

Financial and guarantee information on the asset
Optionally, enter the documents you want to associate with the asset. Insert the appropiate documents using ![]() .
.
Then click Next >.
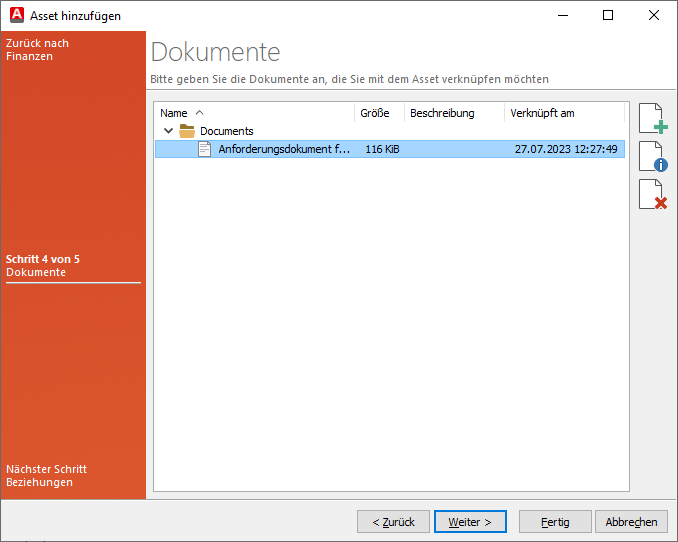
Document linking
On the last page of the wizard, you can create a relationship between the new Asset and existing Assets or Clients. You can choose from several options for the type of asset relationship:
| Relation kind | Meaning |
| Is installed in | An Asset is installed in another Asset (e.g. a disc installed in a PC) |
| Has installed | An Asset has another Asset installed (e.g. a PC with a disc installed) |
| Belongs to | An Asset belongs to another Asset (e.g. a bag belonging to a projector) |
If you select either the Is Installed In or Has Installed In relationship type, you must specify the shared properties of the Assets. In this case, all the shared properties will be listed for all the Assets you have linked. Note that the Assets must all have the same value (for example, you have a printer in your company that can be used by all employees in that location and department. The shared properties must therefore be the Location and the Department).
| Link type | Description |
| Link Assets | Select the relationship type here before selecting the asset(s) on the following pages. If you have selected Is installed in or Has installed, you will need to specify the common properties of the now linked Assets on the final wizard page. The values for the master data (e.g. User, Location, Department, etc.) entered in the existing and new Asset are already displayed. If you have selected and saved different information in both Assets, you will need to decide which data to transfer. |
| Link Clients | If you want to connect a Client, a Wizard will open. All available queries from Query Management are displayed. Select a Query that returns the required Clients as a result. All Clients returned by the Query are displayed on the following pages. Select the required Clients and click Finish to confirm your selection. |

Relations of Assets
Finish the process of creating a new Asset by clicking Finish.
Editing, Deleting and Duplicating Assets
All Asset related actions can be started from the ribbon bar. To do this, click on the appropriate action button and follow the on-screen instructions.
To edit an Asset, first select the Category in which the changes will be made from the drop down list. The Categories allow you to specify the grouping of Assets to be displayed. This list includes the following categories: Asset Types, Locations, Departments, Cost Centres and Asset Collections.
Select the required Asset and click the Edit button (![]() ) on the ribbon bar. Alternatively, you can select the item and double-click to open it. A new window will open allowing you to view and edit the information already stored for the Asset. This information is divided into tabs:
) on the ribbon bar. Alternatively, you can select the item and double-click to open it. A new window will open allowing you to view and edit the information already stored for the Asset. This information is divided into tabs:
| Ride | Description |
| General Information | Change the Asset type by selecting a different type. You can also customize the name and description. |
| Detailed Information | The detailed info shows the master data and the additional dates. Here you can change or assign new information that has already been stored. |
| Finance | In the Finance tab, you can store all purchase, warranty and service dates and customize them if necessary. |
Custom Fields (1:1) and Custom Fields (1:n) | All custom fields (1:1) and (1:n) help you to store additional information that can be configured in the settings. You can edit all the fields you have defined under these two tabs. |
| Documents | Manage the documents you have linked. To do this, you can remove documents that have already been uploaded or change their descriptions and link new documents to the Asset. |
| Relations | You can also use relations to link the current Asset with other Assets or Clients. Existing relations can be removed here. |
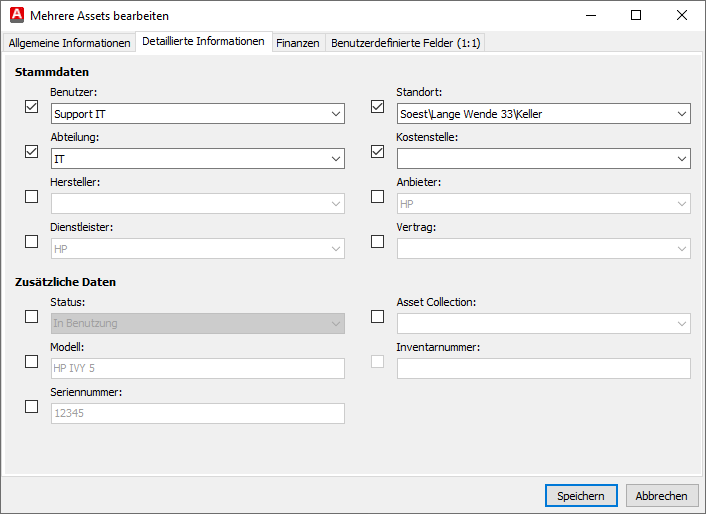
Simultaneous editing of multiple Assets
Click Save when you have made all relevant changes to an existing Asset.
If you wish to delete an Asset, select it and click Delete (![]() ). Confirm the security question and the Asset will be deleted.
). Confirm the security question and the Asset will be deleted.
If you wish to duplicate an Asset, you can clone it either from the context menu or from the ribbon bar (![]() ). BWhen duplicating an Asset, a new window will open allowing you to change the data of the previously selected Asset. If you copy the information 1:1, the asset number will still change when you save the duplicate. You can select and define this unique identifier in the Settings (System > Einstellungen > Asset Management > Import).
). BWhen duplicating an Asset, a new window will open allowing you to change the data of the previously selected Asset. If you copy the information 1:1, the asset number will still change when you save the duplicate. You can select and define this unique identifier in the Settings (System > Einstellungen > Asset Management > Import).
Importing Assets
In addition to the usual ways of working with and managing an Asset, you can also import Assets. In order to import an Asset, you must have a CSV file. To do this, click Import from the ribbon bar. A dialogue box will open for you to select the CSV file. You can also specify the symbol delimiters, whether the file contains column names and whether character encoding should be enforced. For the last two options, tick the appropriate boxes. Then click Next >.
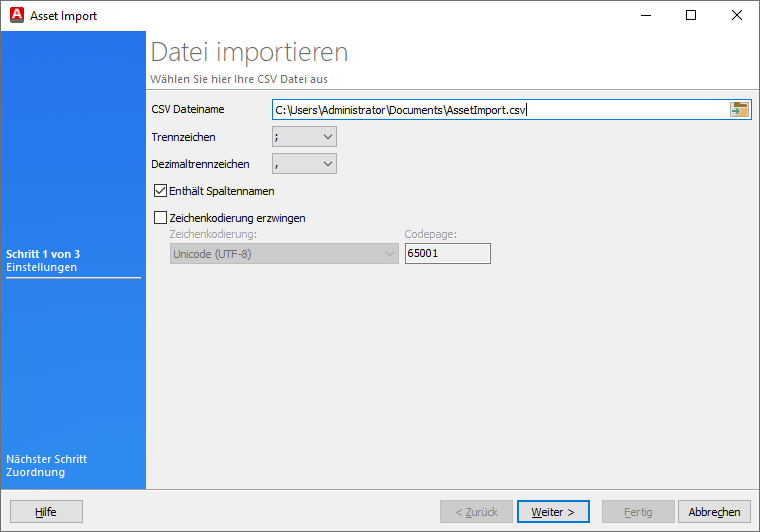
Import file
The previously imported CSV file is displayed on the second page of the wizard. The top row shows the column headings. There is a combo box under each column name. By expanding this combo box, you can select an ACMP database field to associate with the column. Note that only available Asset Management type fields are listed.
If you have previously created and saved mappings, you can use them here. This option provides quick access to previously created mappings that you want to use as templates. Use the Load Mapping ( ), Save (
![]() ) or Reset (
) or Reset ( ) functions. The mappings use the .lmp format.
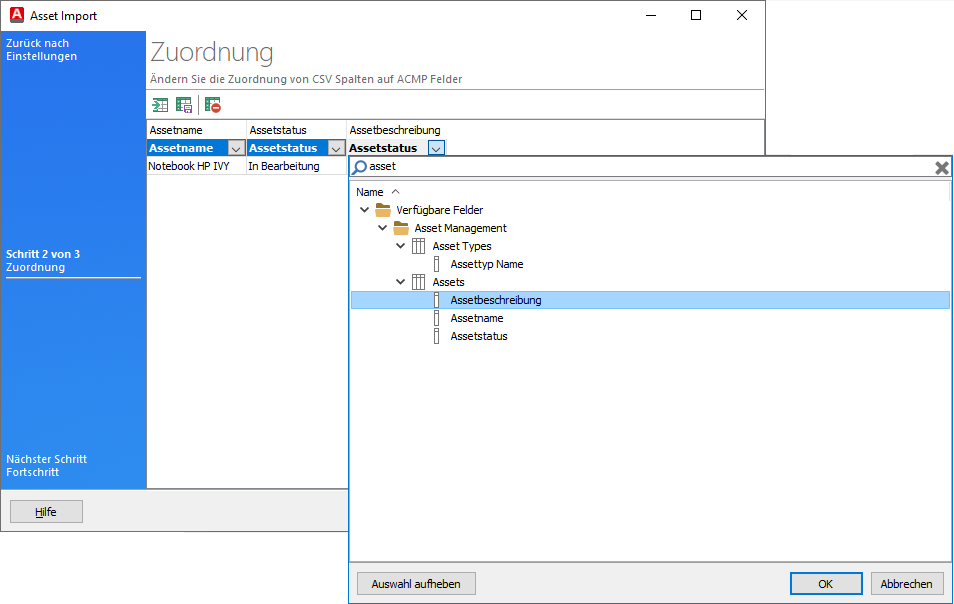
Assignment file for the import of an asset
When you are finished, click Next > to complete the import.
Print Assets
In some organisations, it may be desirable to have the asset information available in printed form. If you wish to print Asset data, you can do so directly from Asset Management. To do this, first select the Assets you wish to include in the printout. To do this, select the relevant Assets by ticking the boxes. Click on either Preview or Print in the ribbon bar under the Assets tab.
| Action | Description |
| Preview | The print preview allows you to view the report before printing, adjust the size to fit the screen width and save the asset report. A number of different formats are available. |
| You can print the report directly using the Print button. This will open a standard print wizard where you can select the print format and printer. |