



Mobile File Repository
 Warning:
 The Mobile File Repository is primarily used to save the data required for a software installation to a storage medium via a Client Command. This storage medium can then be sent to a (field) employee if, for example, they have only limited bandwidth to the corporate network or if the connection was established via an expensive Wireless WAN or dial-up connection. This can save a significant amount of time - and possibly money - especially for larger Client Commands.
If no storage medium is available and the client is a mobile device, the installation data is loaded via BITS from a specified server share. However, if the client does not have a disk, the data is loaded from a file repository.
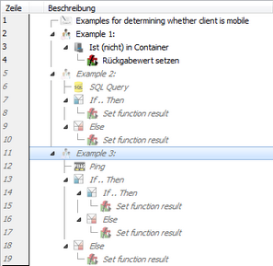
To identify a client as a mobile device, specify a function that returns TRUE or FALSE. This function could, for example, use a condition to perform a query to check whether the current client is in the “Mobile” container.
|
|
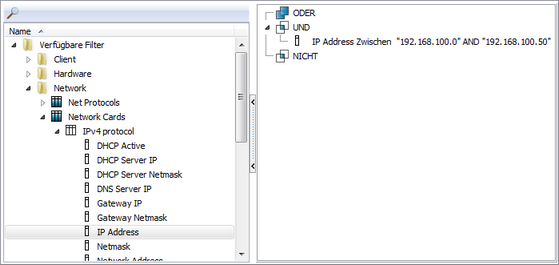
To do this, you would also create the “Mobile” container, which dynamically captures, for example, all clients whose IP addresses fall within a specific range (e.g., VPN connections) .
Another option is to query a client’s network status directly from the database. The required SQL Query is: SELECT NetworkStatus FROM CLT_CLIENTS WHERE ClientID = ‘%ACMPCLIENTID%’
If the returned value is 1, the client is a mobile client, and the function can return TRUE.
It is also possible to determine the Client’s current connection quality to the Server using a ping and to decide, based on the response time, whether the Client should be treated as a mobile Client.
The package wizard
When using a Mobile File Repository, the package wizard works similarly to creating a Windows package. In addition to creating a Mobile File Repository (see the following section), you specify a UNC path to a network share that contains the installation data. You can also specify the authentication credentials.
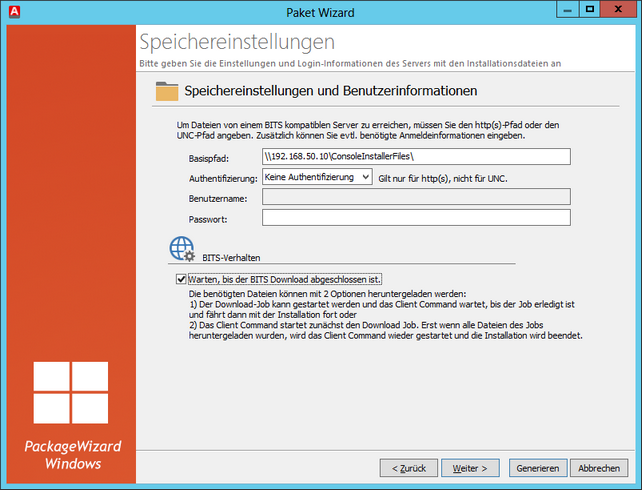
Specify storage location
If you enable the “Wait until the BITS download is finished” option, the download will start, and the Client Command will wait until all files have been downloaded before starting the installation. Until then, all other Client Commands are blocked. If this option is not enabled, the download will start, and the Client Command will exit. Once the download is complete, the Client Command automatically resumes and the installation continues. Other Client Commands are not blocked during the download.
Immediately after specifying the UNC network share, you will be prompted to select a function. This function is used to determine whether the corresponding client is considered a mobile device.
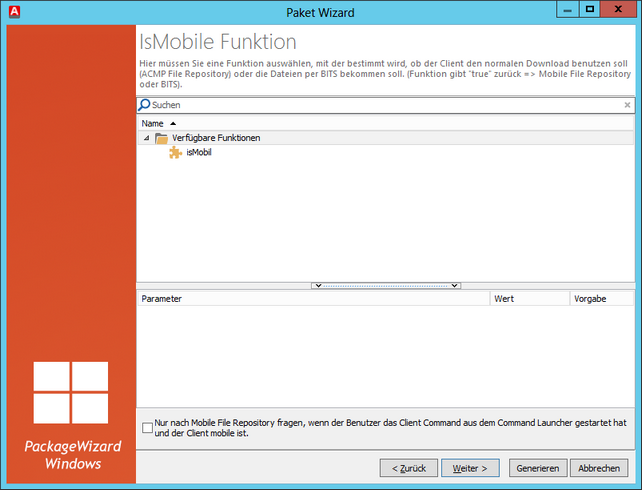
Available functions
The option at the bottom of the dialog ensures that a Mobile-File Repository is used only when a user of a mobile device launches the Client Command created from this project via CommandLauncher. If the Client Command is launched, for example, by an administrator, the installation files are automatically downloaded via BITS, which may result in high costs (e.g., with UMTS).
Creating a Mobile-File Repository Data Carrier
There is no automated process for creating a Mobile-File Repository data carrier. Therefore, it must currently be created manually. However, you do not have to combine all Mobile-File Repositories onto a single disk; instead, you can distribute them across disks as desired. The following provides a description of how to create such a disk:
For each Client Command created via the package wizard using the Mobile-File Repository option, you can make the installation data available on a data carrier. To do this, create an unencrypted ZIP archive for each Client Command. In the ZIP archive, save the data that is also contained in the File Repository of the corresponding Client Command. The name of the ZIP archive is the Client Command ID. You can access the data in the File Repository via the Client Command Editor by opening a Client Command with the Client Command Editor and then opening the File Repository there. Alternatively, you’ll find the subfolder `File Repository\projects` within the acmp installation directory. There, the File Repository data for each Client Command is located in a folder named after the Client Command ID. The data for a specific Client Command version is stored in the corresponding subfolders. While the Server contains the data for all versions, the File Repositories store only the current data.
To ensure that the data on the disc is later accepted by the installing Client Command, an index file must also be created. To do this, create the file MobileFileRepo.ini. In this file, the following data must be entered for each ZIP archive:
- [Client Command ID]
- Version=No.
- Description=Description
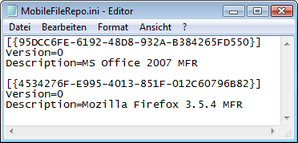
You can find this data in the properties of the corresponding Client Command.
You should preferably write this data to a CD/DVD named ACMP_FileRepo. This allows the Client Command to find its installation files more quickly. You can now distribute the finished disc to employees so that Client Commands can retrieve the installation data from the disc instead of having to download it over the network. Note, however, that increasing the version number of a Client Command via the acmp Console means the data on a CD can no longer be used, since the MobileFileRepo.ini file contains the incorrect version number. As a workaround, you can copy the data from the CD to a local drive and customize the version number in the MobileFileRepo.ini file.
Executing the Client Command
Once the package wizard is complete, the finished Client Command is ready. If you enable “Allow interactive use” in the properties for this Client Command, an employee can start the installation—and, if necessary, the repair or uninstallation—themselves. Otherwise, execution can only be initiated by the administrator.
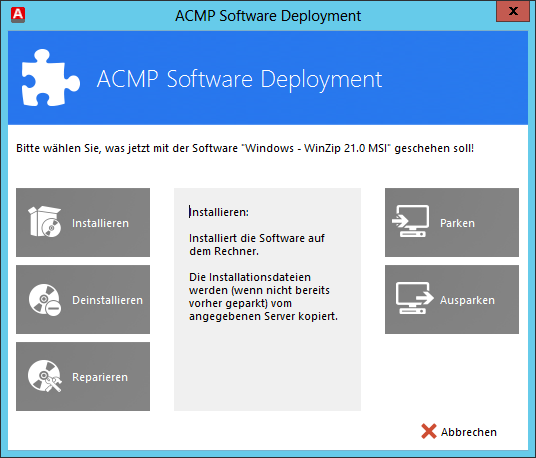
Software distribution selection dialog
After the Client Command is launched, a small dialog box opens. In this dialog, you can specify whether the software should be installed, repaired, or uninstalled. If you specified a setup file in the package wizard, you will only be given the option to repair or uninstall the software if you also provided the information for the repair or uninstall file.
You can then select the data source. Use the Browse button to select the MobileFileRepo.ini file on a disk. The Download button retrieves the data from the server-side file repository or the specified UNC network share, although this again depends on whether the client is classified as a mobile device or not.
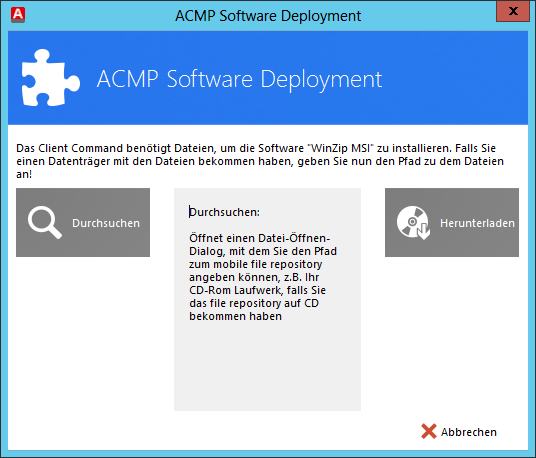
Select data
After selecting the data source, the standard installation routine is executed with the corresponding commands that were specified when creating the Client Command using the package wizard.