

Web Interfaces
The Web Interface is an application that allows you to control the most important helpdesk actions via a browser. A distinction is made between the Helpdesk Web Interface and the Self Service Web Interface. The difference between the two versions is that the Helpdesk Web Interface can only be used by helpdesk staff, while the Self Service Web Interface is available to all other employees.
The following distinguishing criteria are central to this:
| Helpdesk Web Interface | After login, this allows you to open all queries that are accessible via the ticket management administration (see the chapter on Administration. In addition, you can view and edit tickets, create new ones, and add comments and close them. The knowledge base can also be used. |
| Self Service Web Interface | After login, the user is displayed all the tickets they have created themselves in the Self Service Web Interface by default. This list can be changed using a standard query (see Standard query). New tickets can be created and existing ones can be viewed. It is also possible to access the Knowledge Base. |
Installation, Configuration and updating of Web Interfaces
If you haven't yet started the installation of one of the Web Interfaces, you can read here about how a correct installation and update look like and which settings you need to configure.
Authentication and Right Management
Authentication
Users can log in to the Web Interface in two ways: They can either log in with their ACMP account (see user management) or authenticate themselves to an Active Directory so that they are granted access. For the latter option, you must have specified an AD account. You can configure the authentication in the Settings (System > Settings > Web Interface > Login > Authentication settings).
Select one of the two options. Save your changes by clicking Save in the ribbon bar. The updated conditions will take effect the next time you log in.

Authentication settings
Right Management for the Helpdesk
In principle, rights for the Helpdesk and use of the Web Interface are assigned via User Management (System > User Management). For maximum flexibility, there are three different points of contact where you can explicitly assign rights to Helpdesk users or employees.
Self Service permissions
Under Self Service permissions (System > Settings > Web Interface > Self Service permissions), you will find several rights relating to the self-service web interface and its end users. Tick all the permissions you want to allow. Subordinate rights (e.g. ‘"Change ticket category") can only be selected if the level above has been enabled. This allows you to customize the main rights to suit your circumstances and further restrict or extend the rights. Save your settings via the ribbon bar.
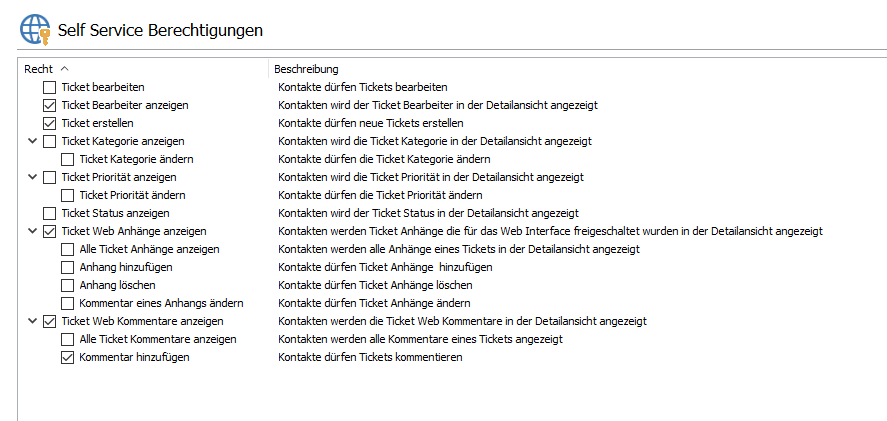
Self Service permissions
Rights of an ACMP or helpdesk employee
As soon as you create a new user via user management or edit one at a later date, you will inevitably reach the point in the wizard in step three where you can define the rights. This allows you to set restrictions that then apply directly to the current selected ACMP User. This generally applies to all rights in ACMP, but special rights can also be assigned for the helpdesk and the web interface.
To do this, open the item Helpdesk > Web Interface in the list on the left. Here you can modify the visibility of data in the Helpdesk web interface so that the created user is not allowed to view comments on a ticket in the web interface or view any ticket attachments, for example. You can set restrictions by assigning these rights. In addition, you can also allow a user to change possible solution suggestions, if desired.
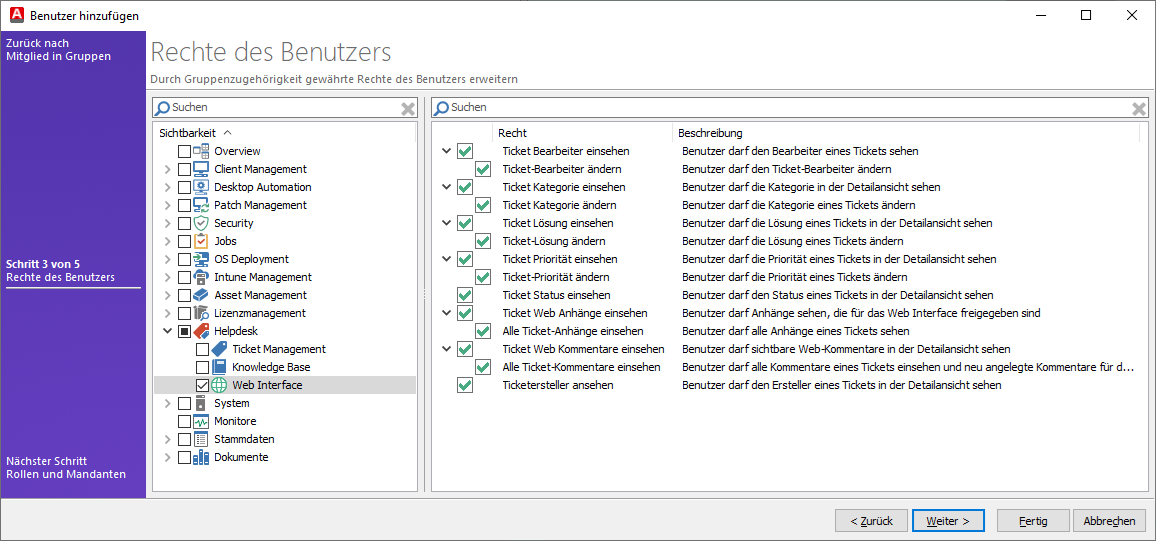
Select rights of User (Web Interface)
To grant a user a right, you must tick the corresponding checkbox and continue with the wizard (Next >). On the next page ("Roles and Clients"), you must now assign the "Helpdesk" role to the ACMP User. Tick the corresponding checkbox so that the previously specified rights can be applied.
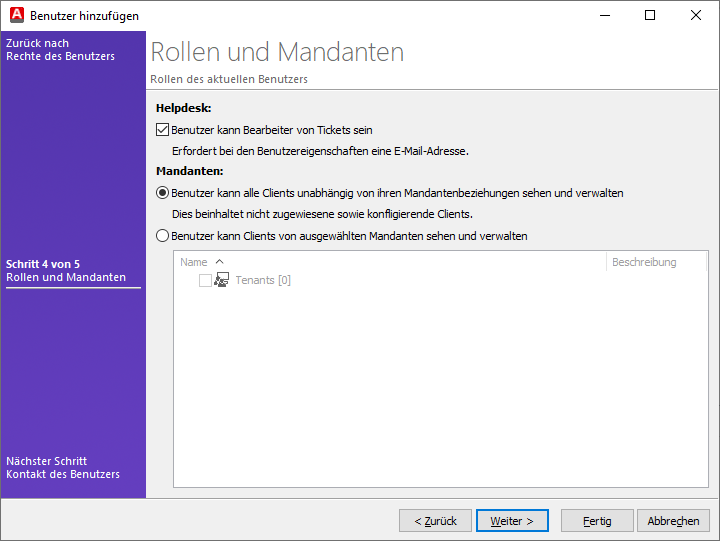
Select roles and tenants for the current user
Complete your work in the wizard and exit it by clicking Finish.
Special feature of the "Visible in Self Service" option
When writing comments in tickets and/or knowledge base articles, as well as when creating knowledge base articles, you will find the "Visible in Self Service" option in the top right-hand corner. This is a checkbox that you must tick manually each time to enable the option and make the comment or article globally visible in the web interface. Please note that the comment or article is only visible to ACMP users and self-service users who have the appropriate right (right: "View ticket web comments").
Customizing of graphics and text elements
If you would like to customize the Web Interfaces to match your corporate identity, both graphically and textually, you can do so in just a few simple steps. To do this, proceed as follows:
Replacing graphics
1. Open the Windows Explorer and navigate to the installation directory of the Web Interfaces. By default, this is %Programfiles%\Aagon\ACMP Web Interfaces\Helpdesk Webinterface\
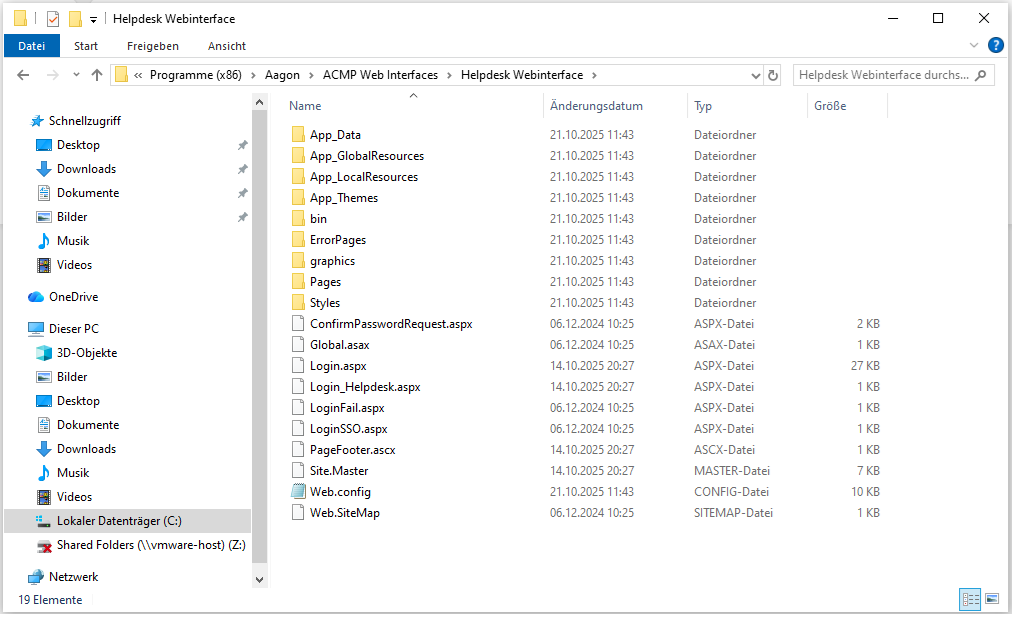
Folder with access to the graphics
The directory App_Themes\ACMP\graphics contains graphics that can be used in the web interfaces.
3. Replace the graphics as required (replace the logo via file, located at: App_Themes\ACMP\graphics\logo.svg).
When replacing graphics, ensure that you use the same names as the original graphics so that they can be read correctly.
CSS customizations
In order to customize CSS, you must have the file ‘Custom.css’ in the “Styles” folder (C:\Program Files (x86)\Aagon\ACMP Web Interfaces\Helpdesk Webinterface\Styles). To do this, create the file in a text editor of your choice and make sure that the extension is ".css".
The file is initially empty and must now be filled. You can insert new content, edit existing content and customize it. Then save the changes by clicking Save. The file is always loaded last for the web interface, which means that the entries in this file have the highest priority for individual adjustments.
As a general rule, the Custom.css file is a file that advances the code and does not replace it!
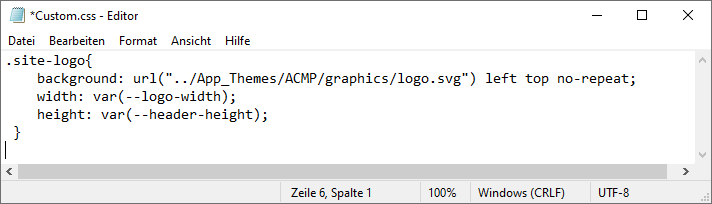
For example, if you want to revise the logo, you must overwrite ".site-logo":
background: url("../App_Themes/ACMP/graphics/logo.svg") left top no-repeat;
width: var(--logo-width);
height: var(--header-height);
}
Changes on the Custom.css
Take a look at the different .css files in the "Styles" folder for the various classes.
Example "Colour changes": If you want to make changes to the colours, you should copy the corresponding variables from Theme.css and insert and customize them in Custom.css within a :root { } using tags.
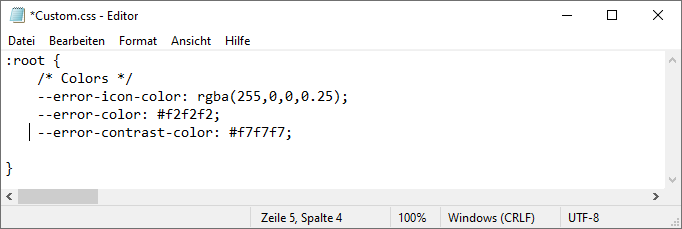
Colour change of error colours within Custom.css
Example: "Image size of Web Interface graphics ("logos")": If you want to change the dimensions of a replaced graphic (a logo), you can also do this via Custom.css.
--logo-width: 174px;
.site-logo {
[..]
width: var(--logo-width);
height: var(--header-height);
[..]
}
The same settings are also used after the login. It is advisable to stick to the dimensions (174x48) and, if necessary, scale the size so that the images are not cropped in the Web Interface.
Customizing text colours
To customize text colours, follow these steps:
1. Open the installation path (default: %Program Files%\Aagon\ACMP Web Interfaces\Helpdesk Web Interface\App_Themes\ACMP).
2. Now open the file Custom.css stored in this directory.
Any changes must be made separately.
3. The file contains individual and “class”-based definitions for text display. Customize the colour for the respective area here by replacing the hexadecimal value.
color: #ff0000;
}
Customizing texts
To change a text in the web interface, you must customize the corresponding .resx file. These can be found in the following paths and subfolders. Each file is available in three language versions (German, English and Czech).
- C:\Program Files (x86)\Aagon\ACMP Web Interfaces\Helpdesk Webinterface\App_GlobalResources
- C:\Program Files (x86)\Aagon\ACMP Web Interfaces\Helpdesk Webinterface\App_LocalResources
- C:\Program Files (x86)\Aagon\ACMP Web Interfaces\Helpdesk Webinterface\ErrorPages\App_LocalResources
- C:\Program Files (x86)\Aagon\ACMP Web Interfaces\Helpdesk Webinterface\Pages\App_LocalResources
- C:\Program Files (x86)\Aagon\ACMP Web Interfaces\Helpdesk Webinterface\Pages\Dialogs\App_LocalResources
- C:\Program Files (x86)\Aagon\ACMP Web Interfaces\Helpdesk Webinterface\Pages\imageuploader\App_LocalResources
- C:\Program Files (x86)\Aagon\ACMP Web Interfaces\Helpdesk Webinterface\Pages\UserControls\App_LocalResources
Open the resource file with a text editor (e.g. Notepad++) and customize the text as desired. Then save the file.
Creating custom fields for the Self Service Web Interface
As a help desk employee or administrator, you can create additional custom fields for the Self Service Web Interface that can or should be filled in by the ticket creator when creating a new ticket. This makes it possible to retrieve individual fields and information that can make your work easier.
If you would like to use the custom fields, navigate to System > Settings > Custom Fields > Tickets in the open ACMP Console. Follow the necessary steps to add a field. Then save the newly created fields and switch to Web Interface > Self Service Fields in the system settings.
Open the folder hierarchy where you previously added the new field. Then either drag it to the right side with a mouse click or use the arrow for this purpose. For the fields on the right, you can also specify whether it is a mandatory field that the user must explicitly fill in in Self Service in order to create a ticket. Optionally, tick the box and save the changes in the ribbon bar. The next time you call up the Web Interface Self Service, your newly added fields will be taken into account when creating a new ticket.