


Register a company application in Microsoft Entra ID
Enterprise applications are often used as an interface between Microsoft Entra and internally used applications, for example to give employees access to Microsoft 365. To do this, you need to register one or more applications centrally. This chapter provides an introduction to how you can register enterprise applications and assign permissions to them. It applies to the following areas of application:
Preparing for the Microsoft Entra ID
In order to work in one of the above application areas, you must first open the Microsoft Entra Admin Centre and register a company application. You will then need to grant the necessary permissions within that application. These steps are necessary to enable ACMP to access and import the required data.
Register an Enterprise Application
First, log in to your Microsoft Entra ID. Click the Identity > Manage tab > Enterprise Applications and create a new application registration.
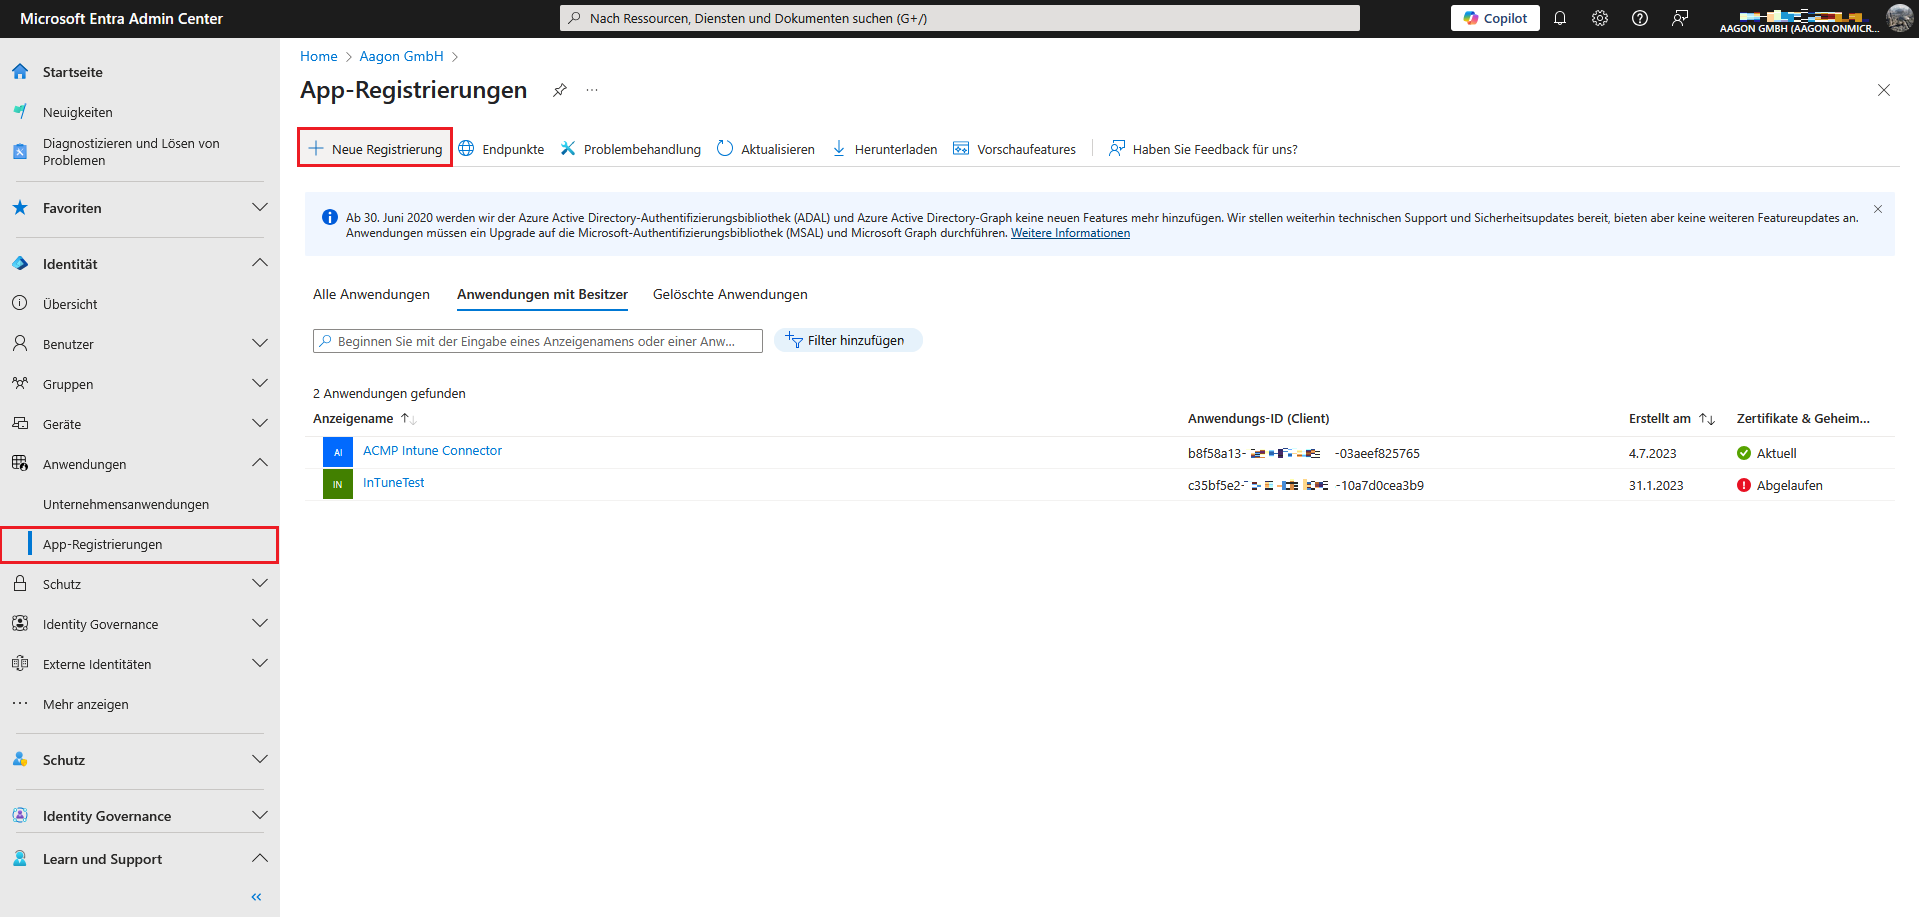
App registrations in Microsoft Entra ID
Enter all the necessary information there: Assign an app name and select the accounts to be supported.
Note for setting up OAuth2 on the ACMP Server:
If only one account from the organisation directory is allowed to access it, you must select the first option. Under the redirect URI, you must enter the following: https://login.microsoftonline.com/common/oauth2/nativeclient
Register the application as Public client/native (mobile & desktop).
Complete the process by clicking Register.
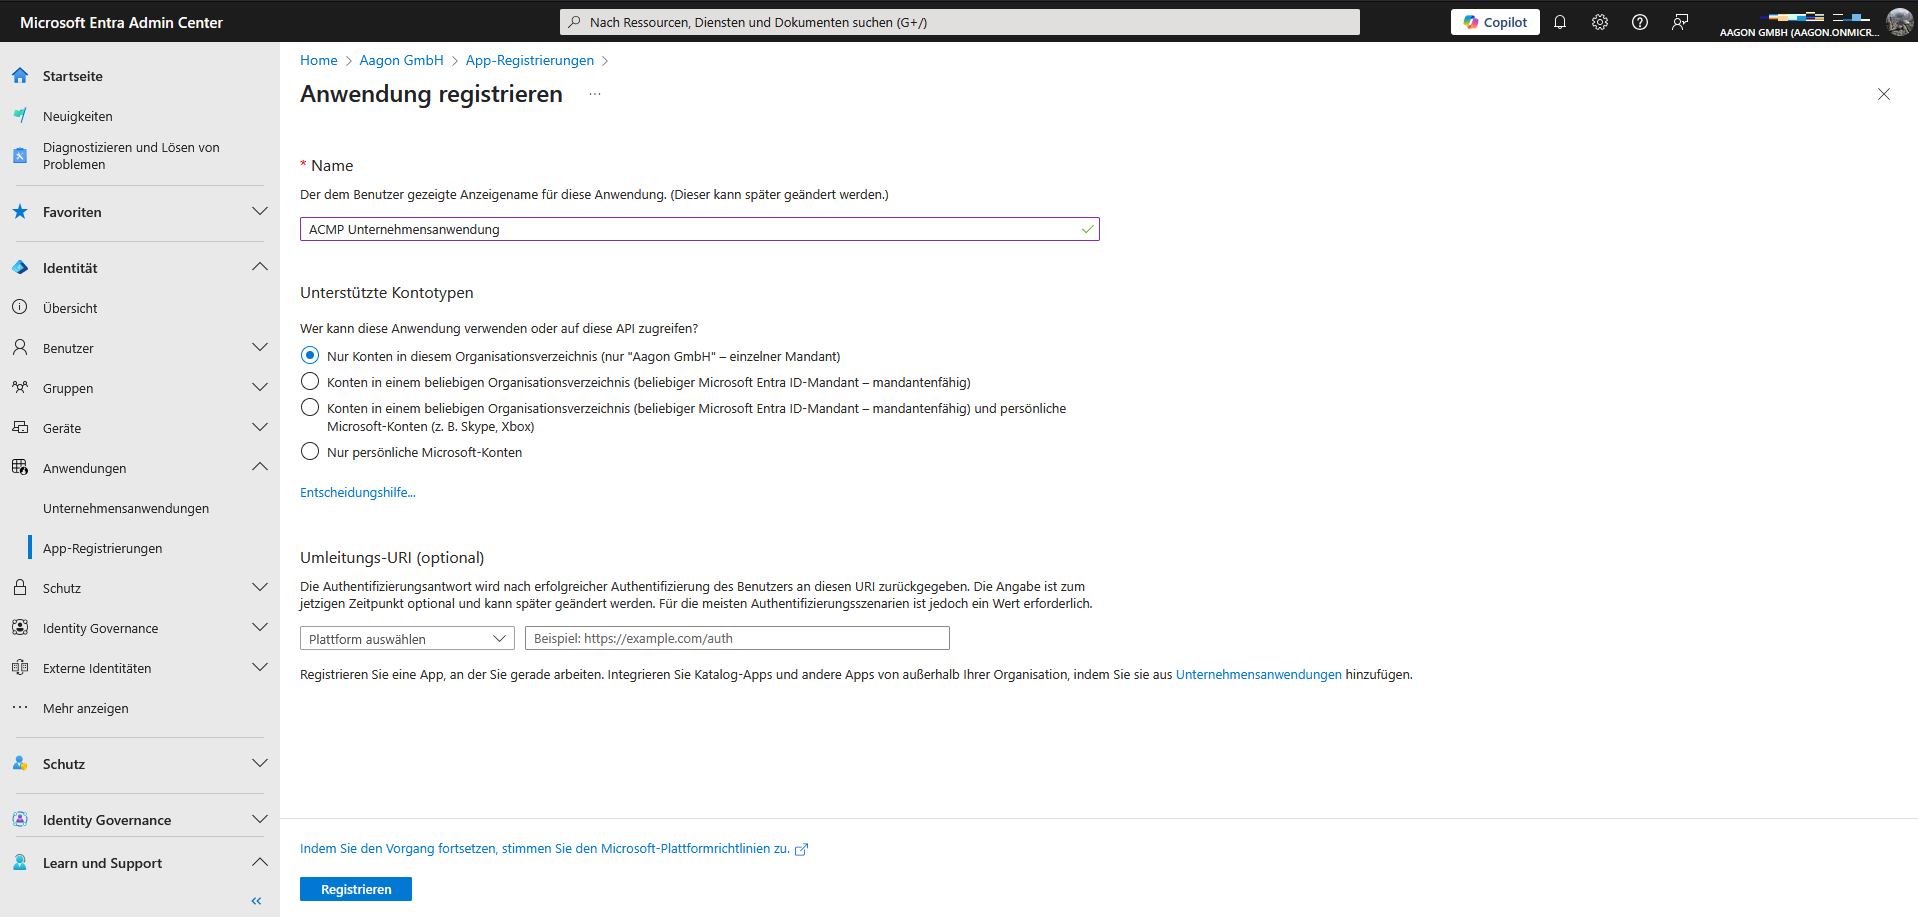
Register an application
When you open the application you have created, you will see a summary of the information you have added. This includes the display name, details of the supported account types and the various IDs (application, object and directory ID). You will need the latter details (the IDs) if, for example, you want to create a new portal for Microsoft 365.
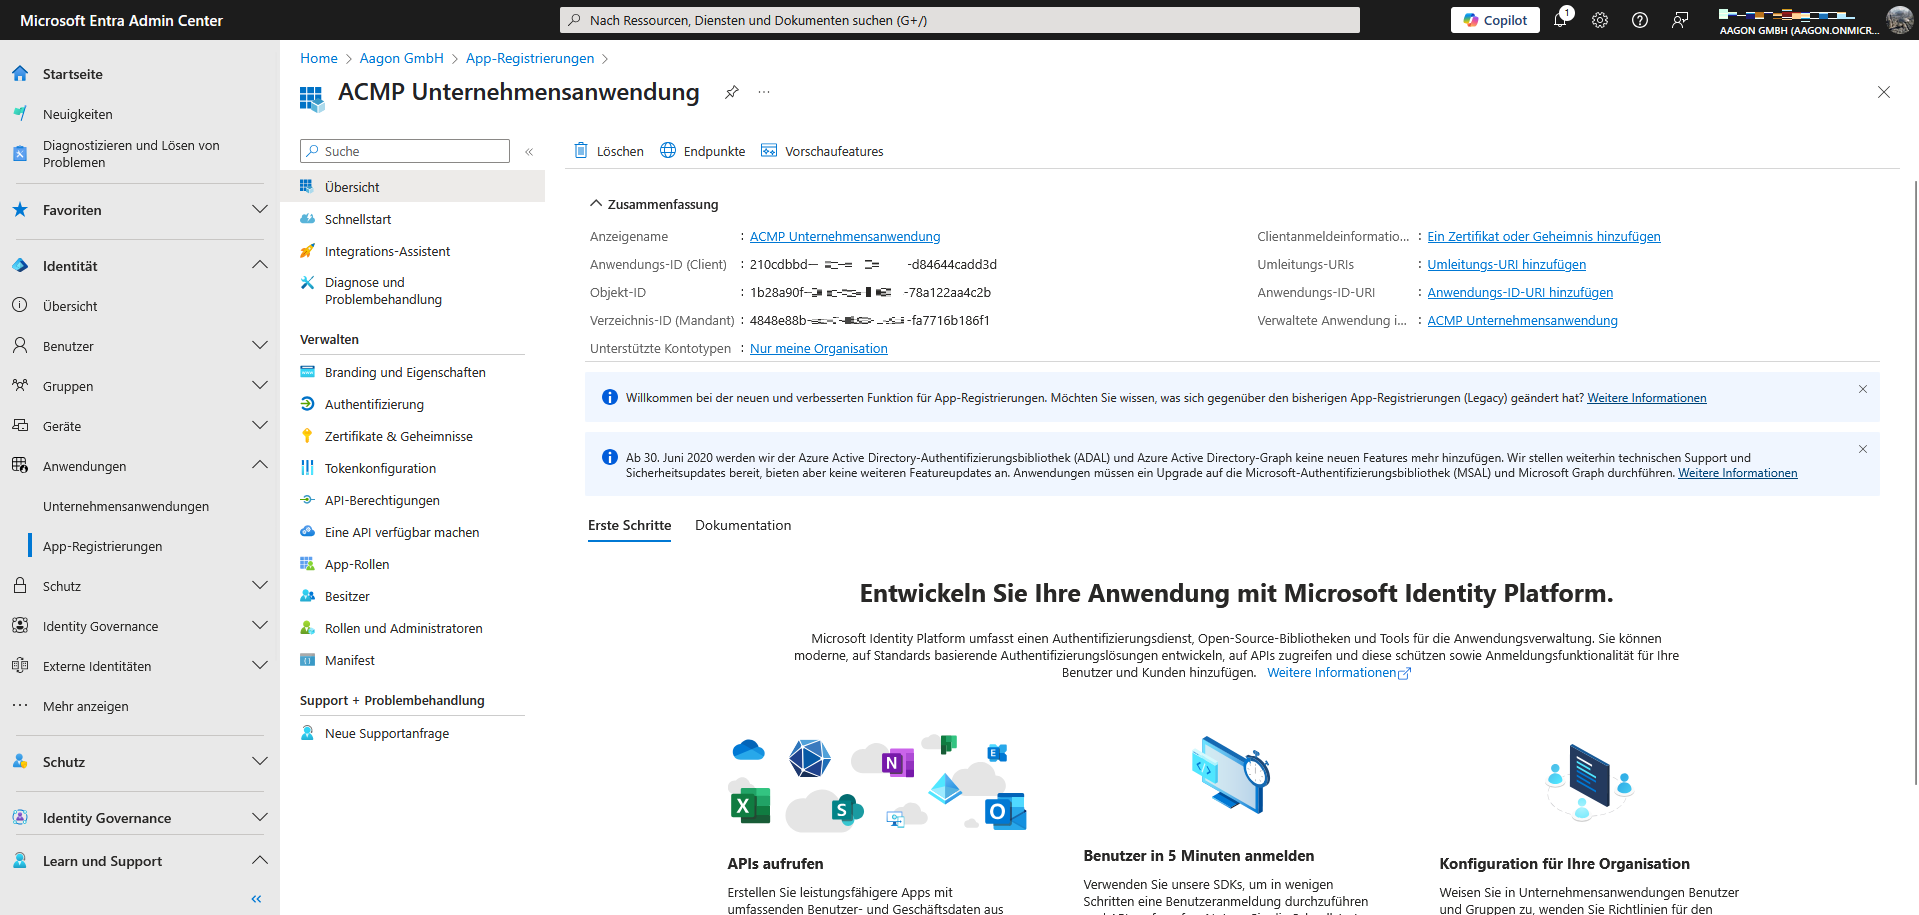
Summary of application information
Distribute permissions
Next, grant the company application the necessary permissions so that it can access the interface. To do this, switch to the Permissions area within the registered app (Manage > API permissions).
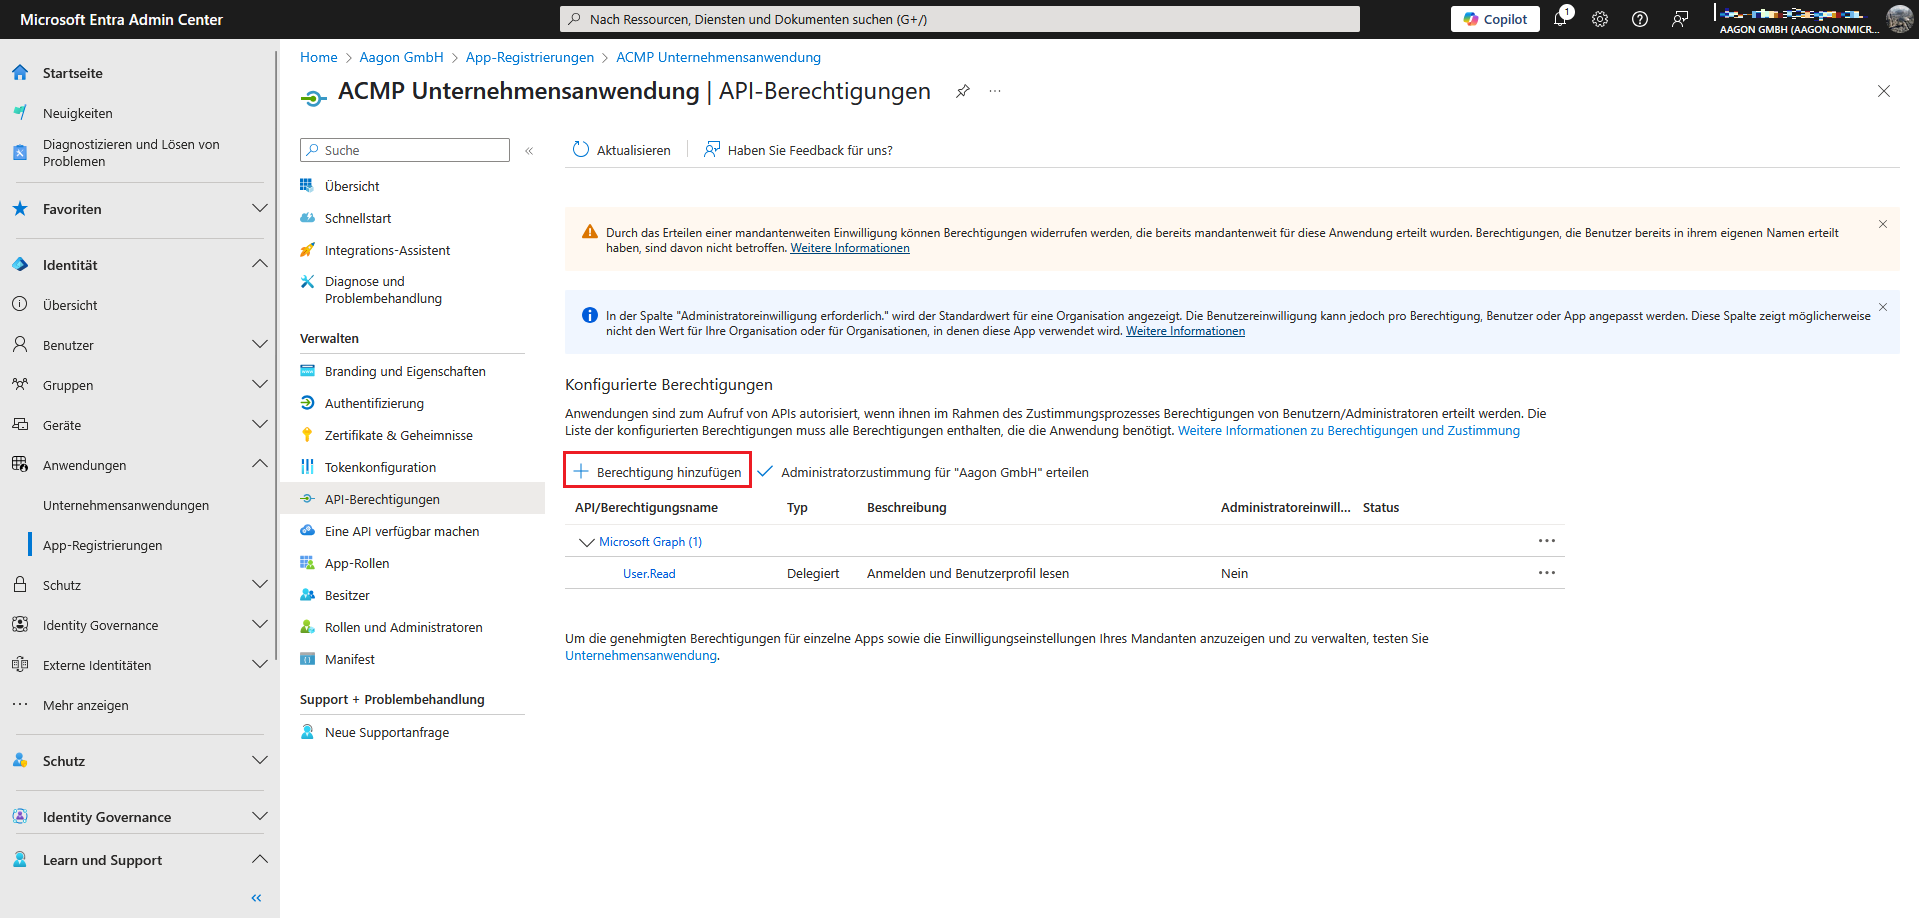
Add permission
Add permissions Click on Add permission. A page will open where you can request API permissions. In this step, you must select Microsoft Graph/Intune.
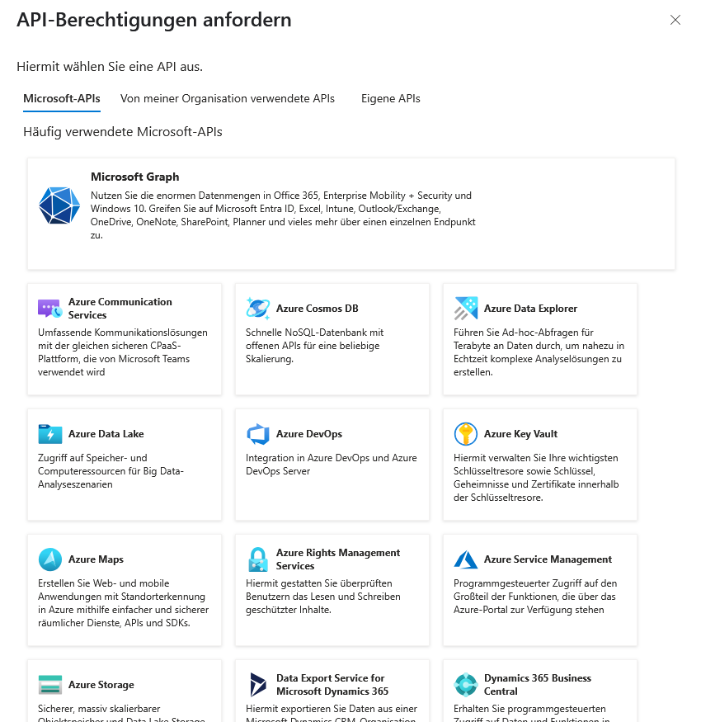
API permissions: Request Microsoft Graph
Depending on the area for which you want to grant authorisations, a distinction is made between ‘Delegated authorisations’ and ‘Application authorisations’. The tables below show the authorisations that you must insert here for the respective area.
Intune Management
The following permissions are required to use Intune Management:
Intune
| Type: Application |
| get_data_warehouse |
| get_device_compliance |
Microsoft Graph
| Typ: Application |
| DeviceManagementApps.ReadWrite.All |
| DeviceManagementConfiguration.Read.All |
| DeviceManagementManagedDevices.PrivilegedOperations.All |
| DeviceManagementManagedDevices.ReadWrite.All |
| DeviceManagementServiceConfig.Read.All |
| Group.ReadWrite.All |
| GroupMember.ReadWrite.All |
| User.ReadWrite.All |
| Directory.ReadWrite.All |
Microsoft 365
Only the application permissions are required to use Microsoft 365. Insert the following values individually and repeat the procedure until both list entries have been added:
| Type: Application |
| User.Read.All |
| Organization.Read.All |
Setting up OAuth 2 on the ACMP Server
| Type: Delegated |
| IMAP.AccessAsUser.All |
| POP.AccessAsUser.All |
| SMTP.Send |
| offline_access |
ACMP Intune Connector
| Type: Delegated | Type: Applicatione |
| DeviceManagementManagedDevices.Read.All | DeviceManagementApps.Read.All |
| DeviceManagementManagedDevices.ReadWrite.All | DeviceManagementConfiguration.Read.All |
| User.Read | DeviceManagementManagedDevices.PrivilegedOperations.All |
| DeviceManagementManagedDevices.Read.All | |
| DeviceManagementManagedDevices.ReadWrite.All | |
| DeviceManagementServiceConfig.Read.All |
Once you have selected all permissions, click Add permissions. You can then see the items in the overview (the following example describes the application permissions added for Microsoft 365).
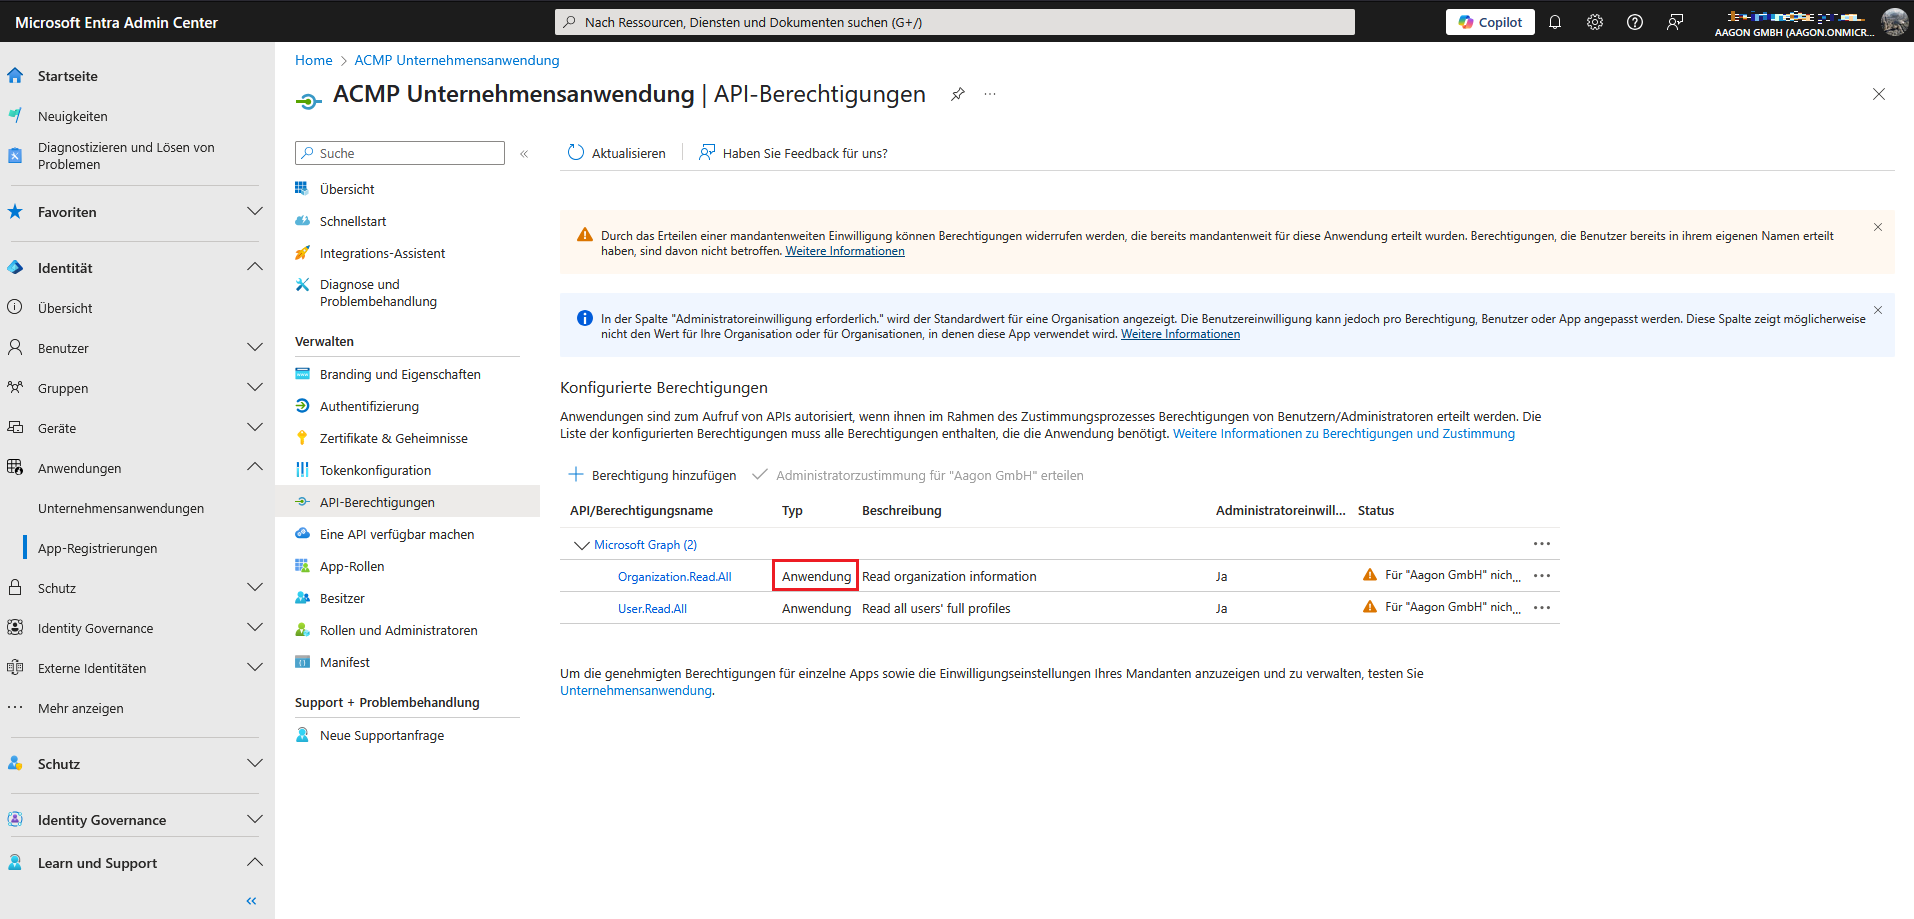
Grant application permissions (without consent)
You may need to grant your consent to the permissions if you have not already done so. To do this, click on the field Grant administrator consent for ‘%Your company%’. This changes the status and the user consent is deployed.
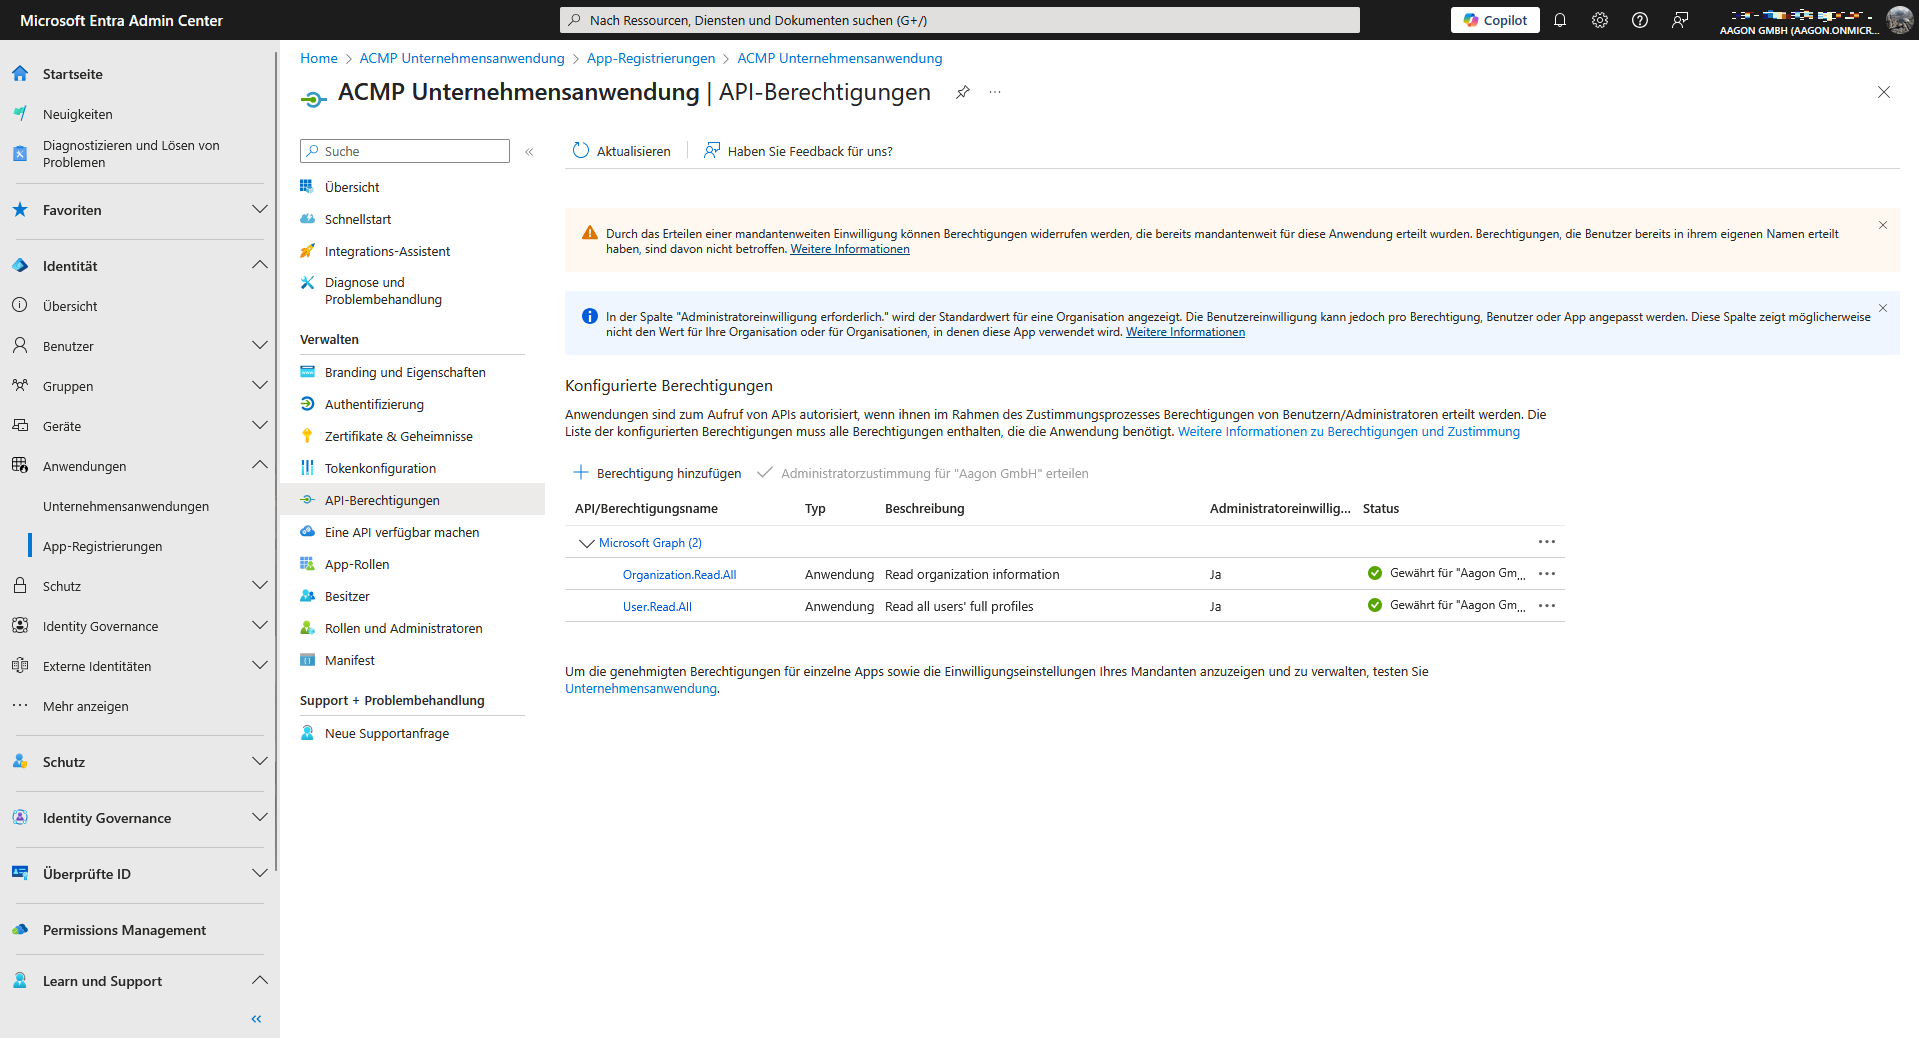
Approved application authorisations
Specify authentication types: Secret client key or upload certificates
Regardless of the application, you must specify authentication types for all areas. You can choose between two methods supported by the Microsoft Client Credentials Provider: Certificate or Secret Client Key.
Upload certificate
Certificates can be used as an authentication method to log in to Microsoft Entra ID. A certificate always consists of a public and a private part, with the public key being loaded directly into Microsoft Entra ID. Both parts are required at a later stage when you add the certificate to the connection information for creating a new portal. This certificate pair must be generated in advance. Read here how to create a certificate via Microsoft or Open SSL. Due to the higher security level, Microsoft recommends using a certificate as login information
Navigate to the Certificates & Secrets item within the previously registered application. Click on the Certificates tab in the details and upload the certificate you created earlier.
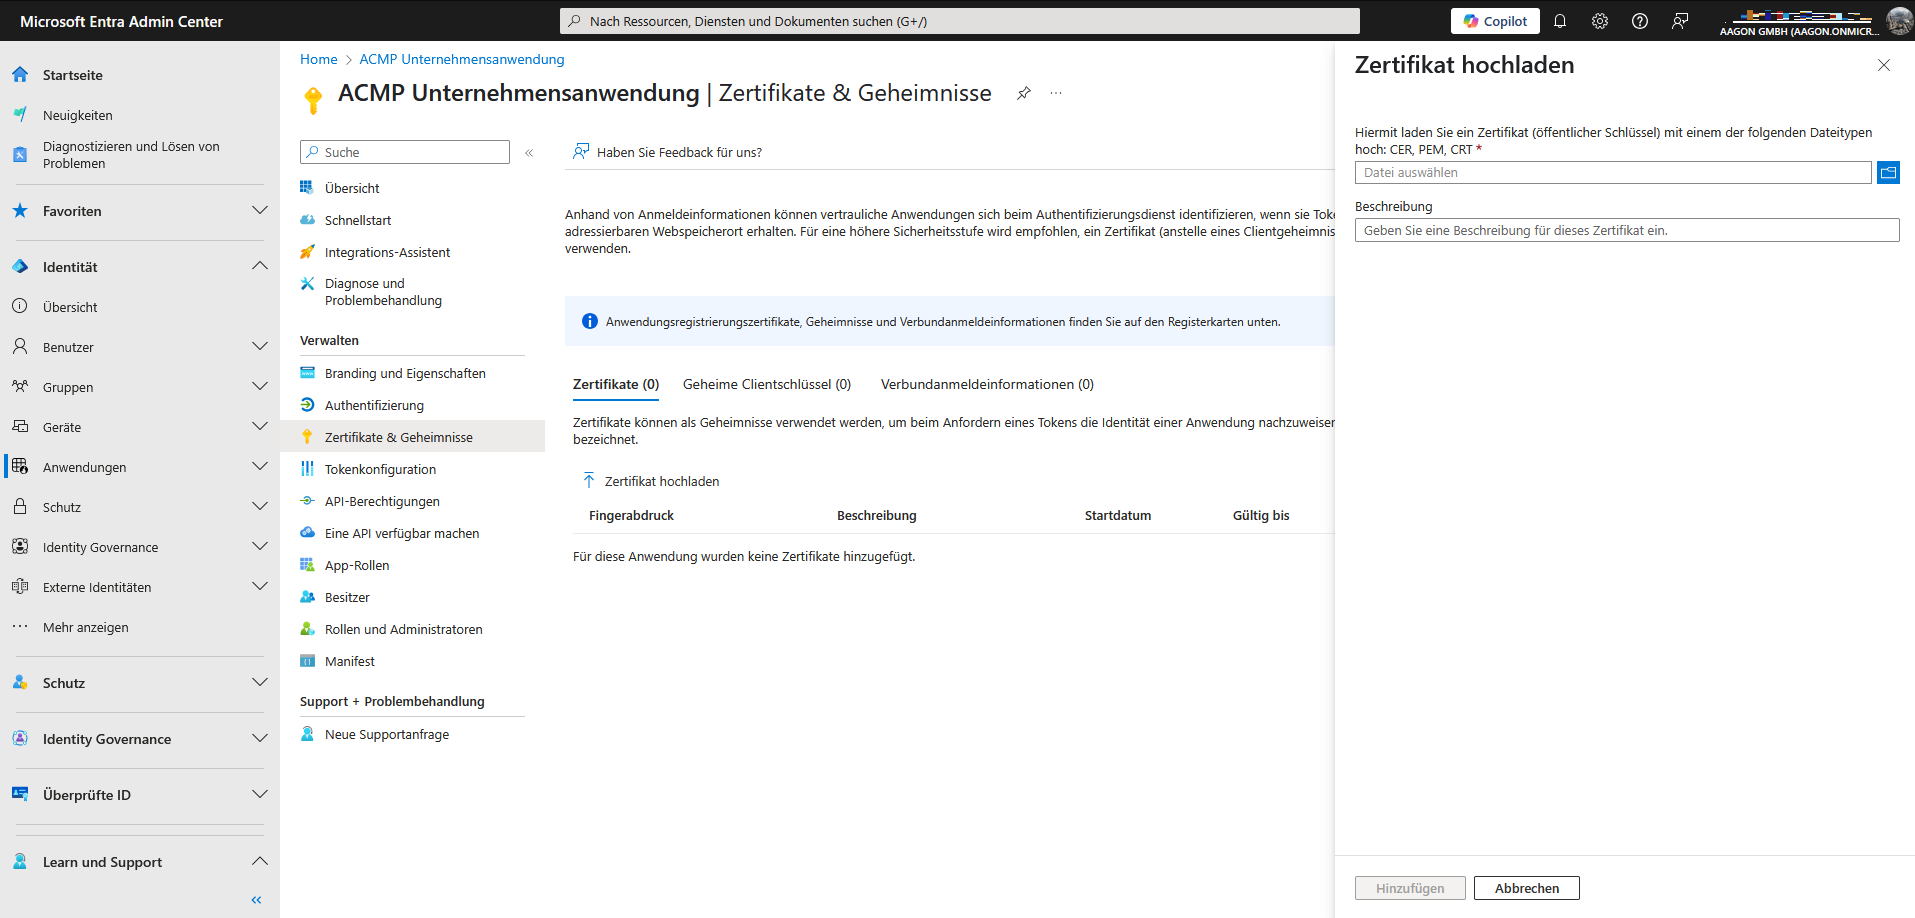
Upload a certificate
A field will open on the right-hand side where you can upload the certificate. Browse to the appropriate folder, upload the file and enter an optional description for the certificate. Then click Add and the certificate will be stored for the application.
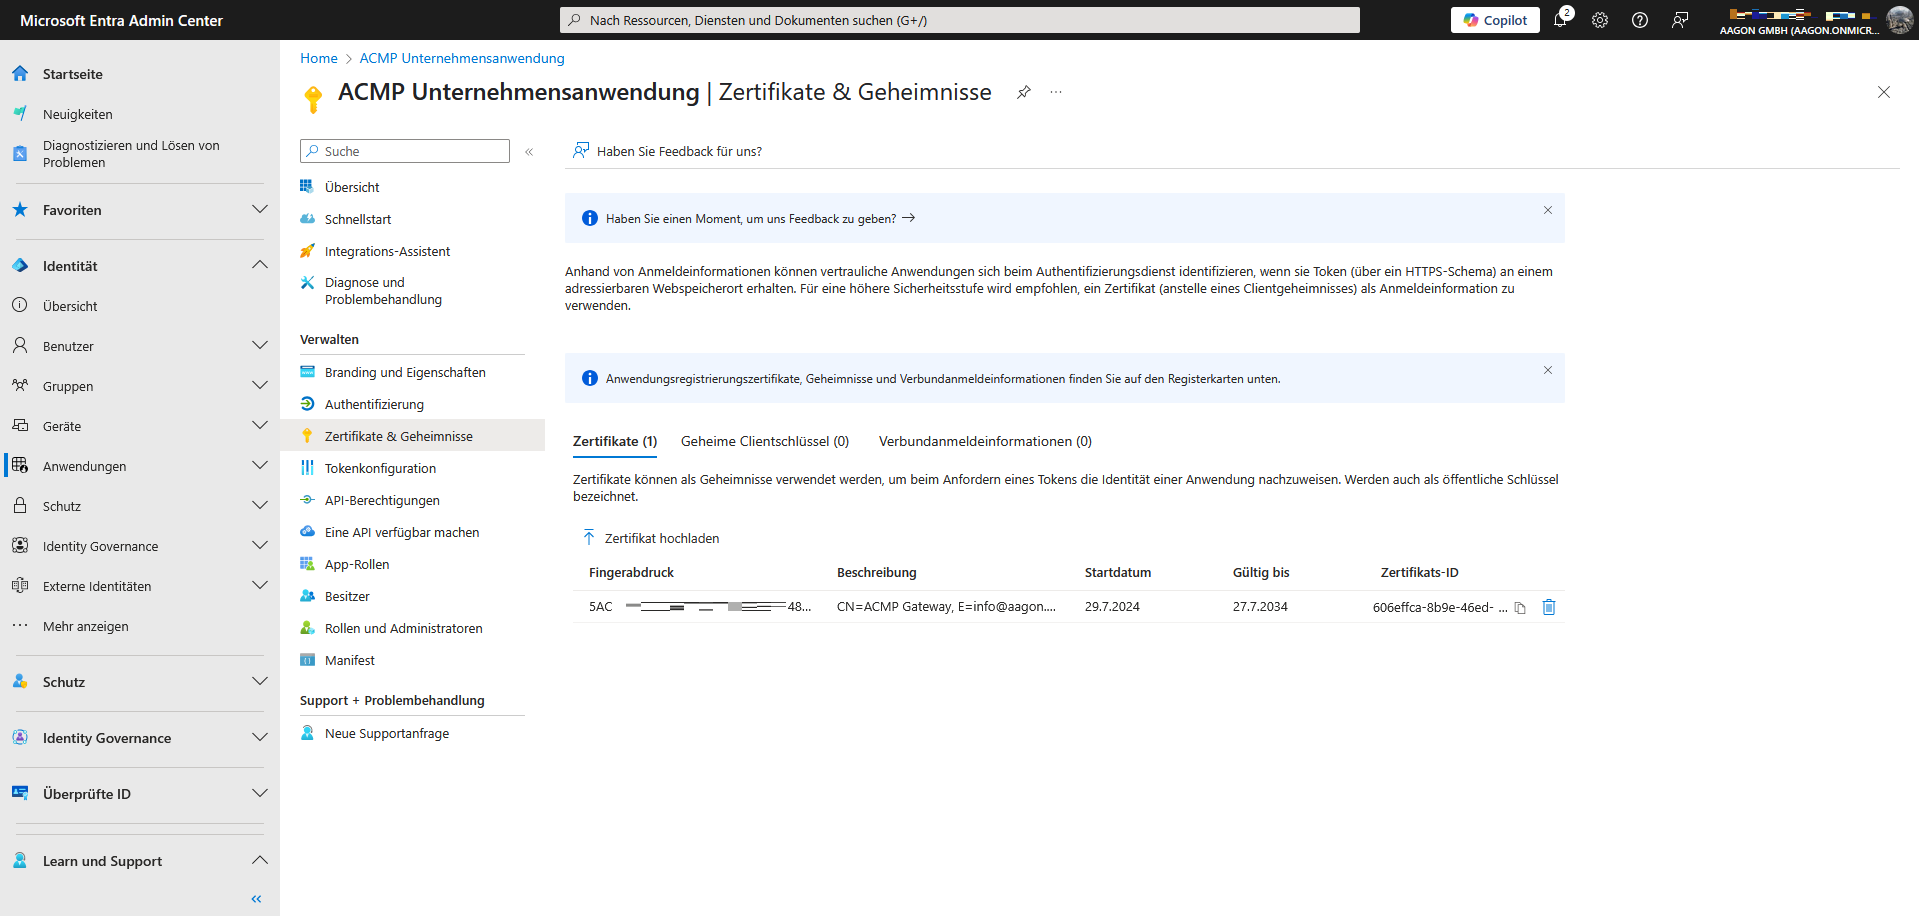
Certificate uploaded to Microsoft Entra
Add secret client key
The secret client key is a character string that is used in the company application as an authentication key or proof of identity when requesting the token. To do this, switch to the Certificates & Secrets area within the registered application. Click on the Secret Client Keys tab in the details and create a new key.
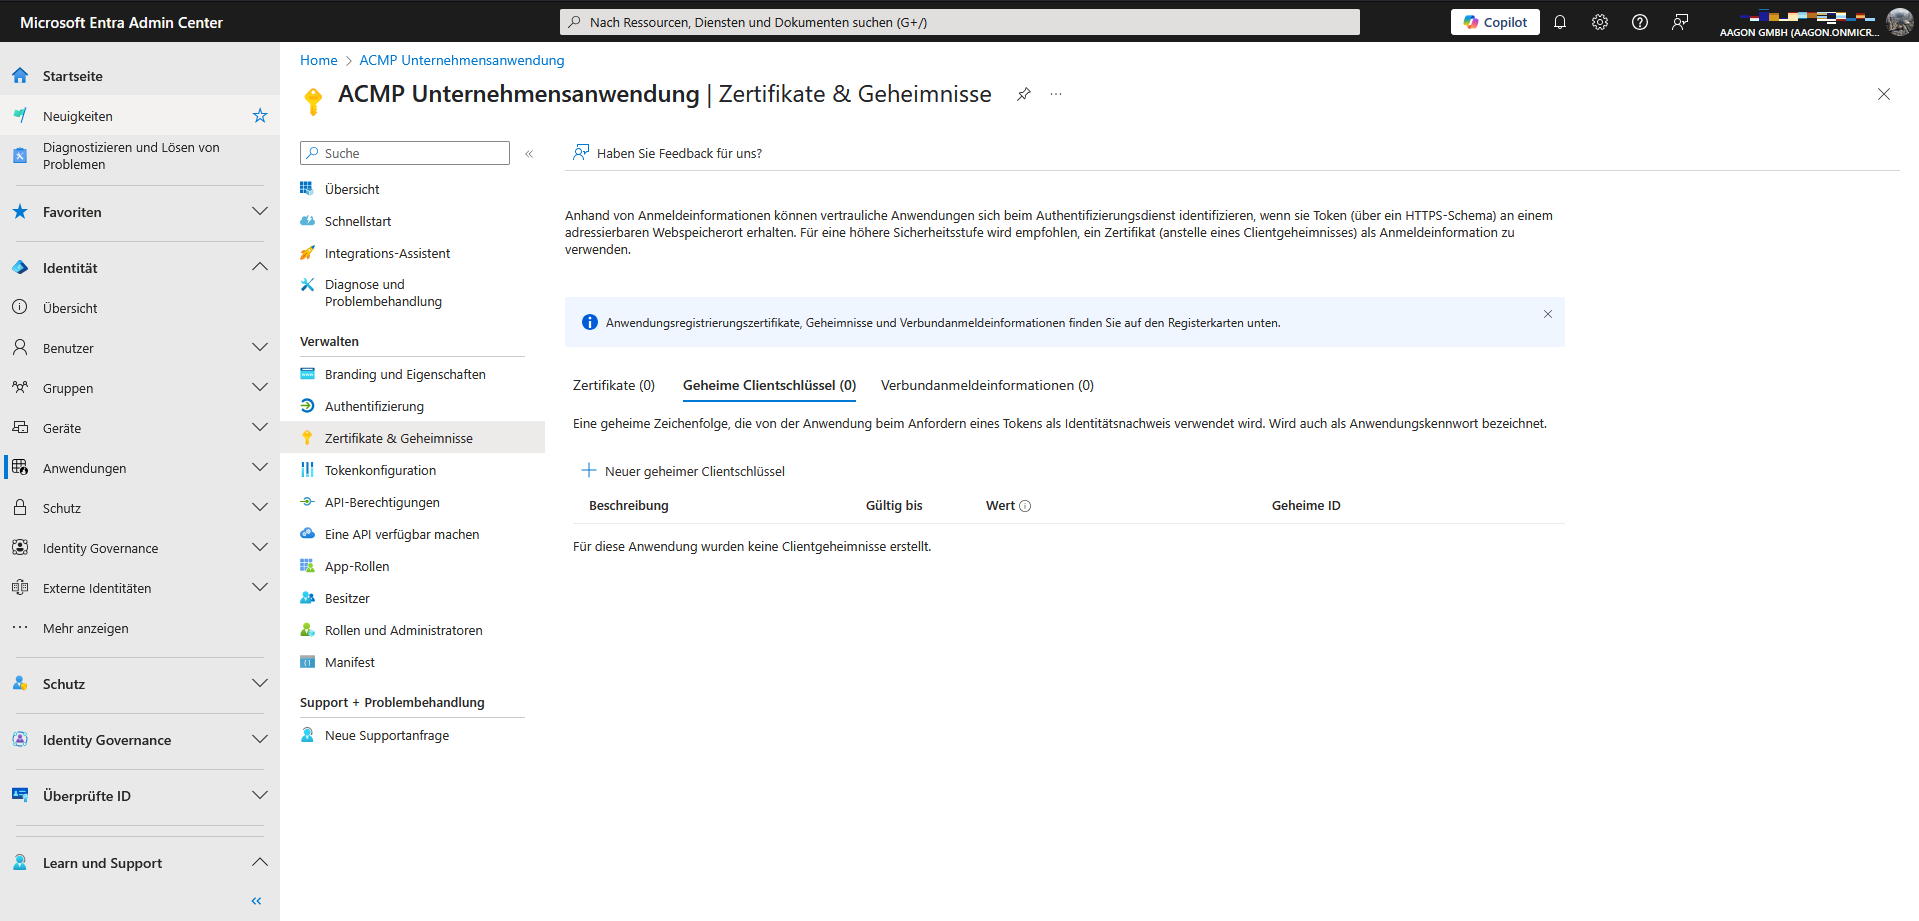
Secret client key
When creating a new secret client key, you have the option of configuring its validity period. Please note that once the validity period has expired, a new key must be created and stored.
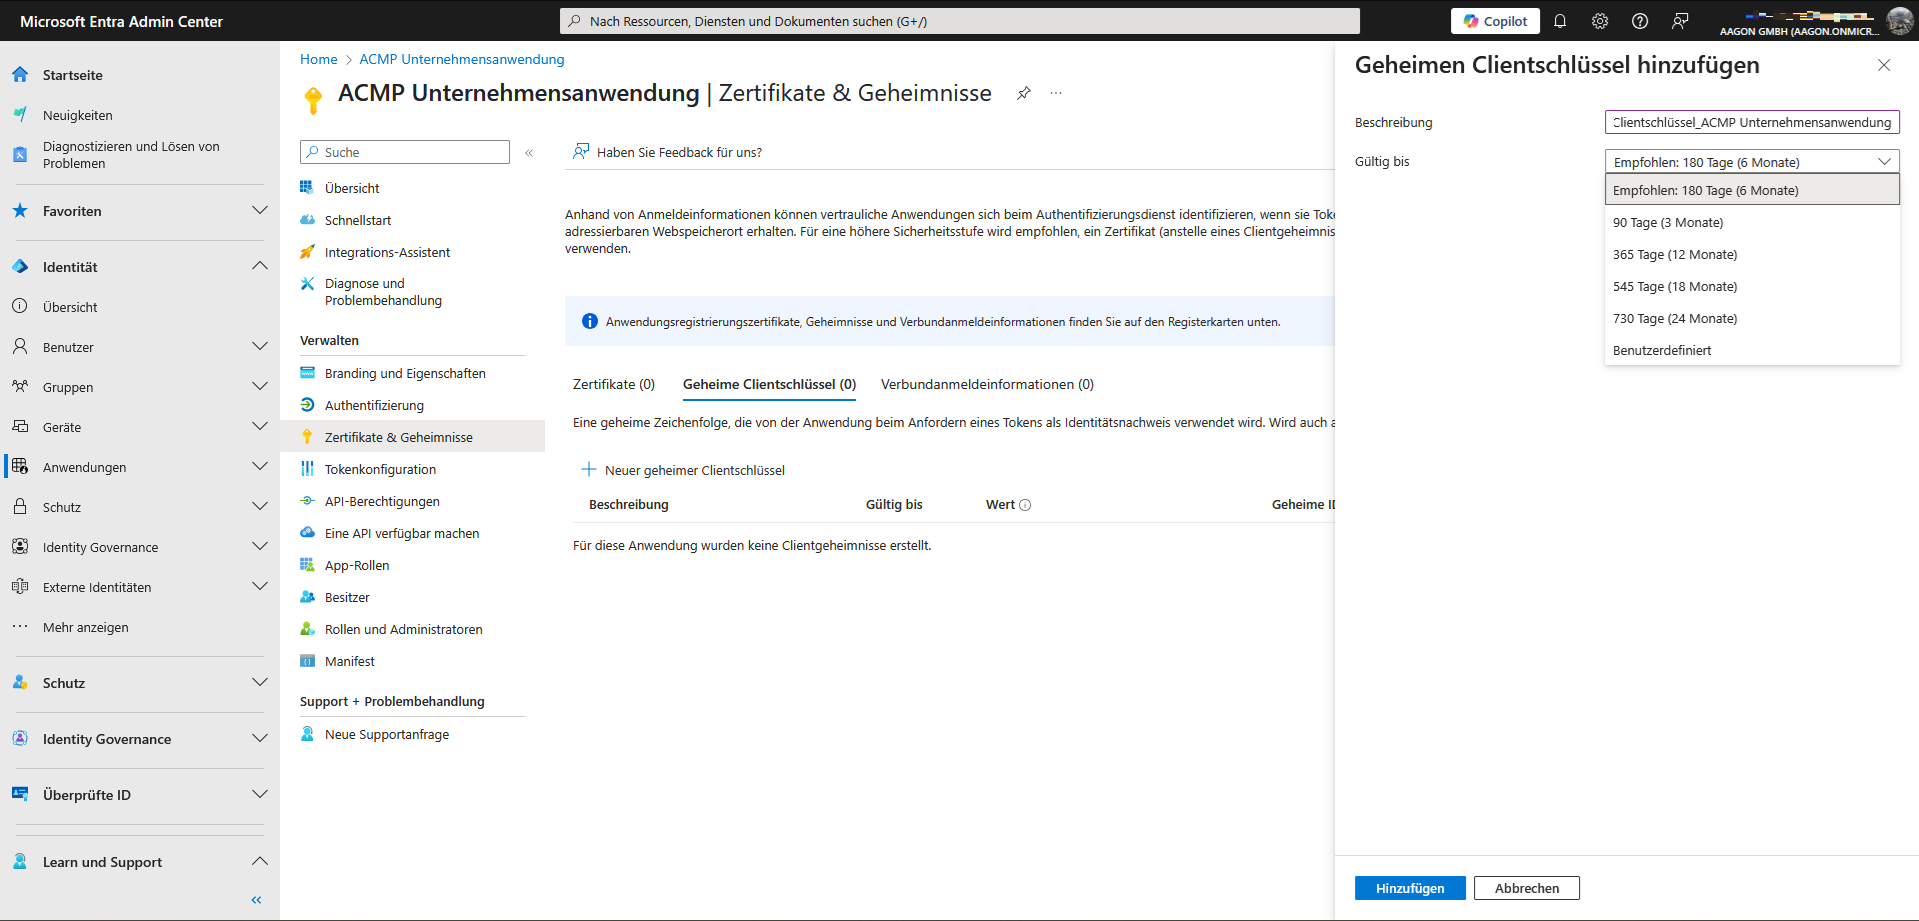
Add secret client key
Next steps
Now that you have registered the company application and granted the necessary permissions, you can switch to the respective application area and continue with your work: