


Windows Update Collection
A Windows Update Collection is a compilation of various updates consisting of selected products and classifications. The updates are stored dynamically and can be distributed via the containers, used to prepare new clients (via rollout) and used during job execution (collection is pushed). This allows you to perform regularly scheduled installations of Windows updates in a targeted manner. The log entry for the respective Windows Update Collection can be used to check the result.
You can create as many Windows Update Collections as you like, allowing you to control the distribution of updates individually. Different reboot options can be assigned to each collection, and it is also possible to manually link individual updates to an update collection.
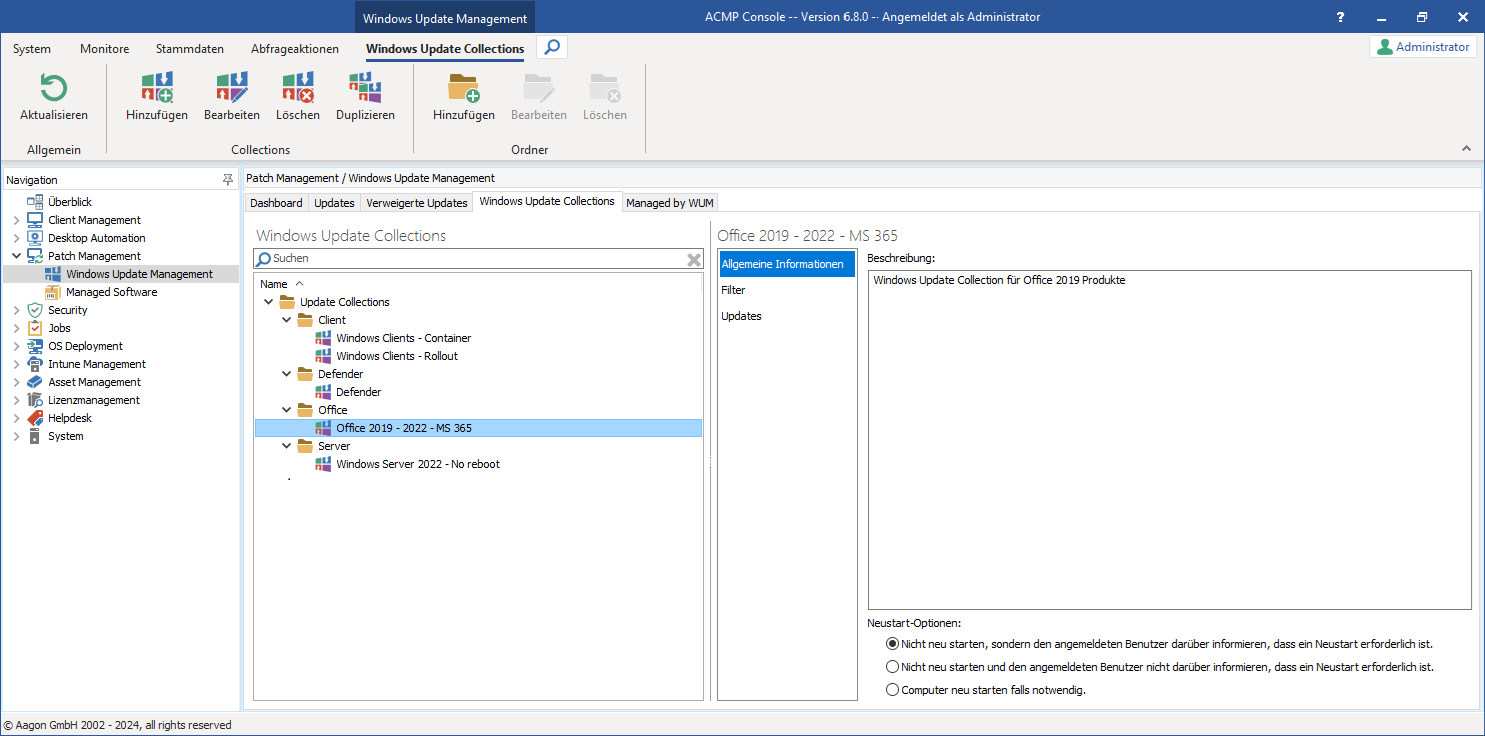
Windows Update Collection overview
Managing Windows Update Collections
The ribbon bar allows you to add ( ), edit (
 ) or delete (
 ) Windows Update Collections. You can also duplicate existing collections (
 ) to store already compiled update collections in another folder or to customize them if necessary.
You can also easily move existing Windows Update Collections to other folders using the drag-and-drop function. If you use multiple collections, we recommend storing the collections you have created in folders and naming them according to the relevant areas (e.g. Update Collection – Windows 11 Upgrades). Folder management is identical here to all other areas of the ACMP Console; a clear structure in the organisation and naming of folders will support you in your daily work with Windows Update Collections.
The Windows Update Collections workspace is divided into two parts: on the left-hand side, you will find a list of already created collections as well as a search bar where you can search for specific items. The collections are sorted alphabetically in the folder structure. On the right-hand side is the detailed view of the respective open entry. Here you can choose between the areas General fnformation, Filters, and Updates to read the information you need.
Add Windows Update Collection
To create a new Windows Update Collection, click Add  in the ribbon bar. EA multi-page wizard will open to guide you through the individual steps. On the first page (General), enter a name for the collection and an optional description. Check that the output directory is correct or customize it (
 ) and select the correct one. Set the reboot options in the lower section. Here you can choose between the following options:
- Do not restart, but inform the logged-in user that a restart is required.
- Do not restart and do not notify the logged-in user that a restart is required.
- Restart the computer if necessary.
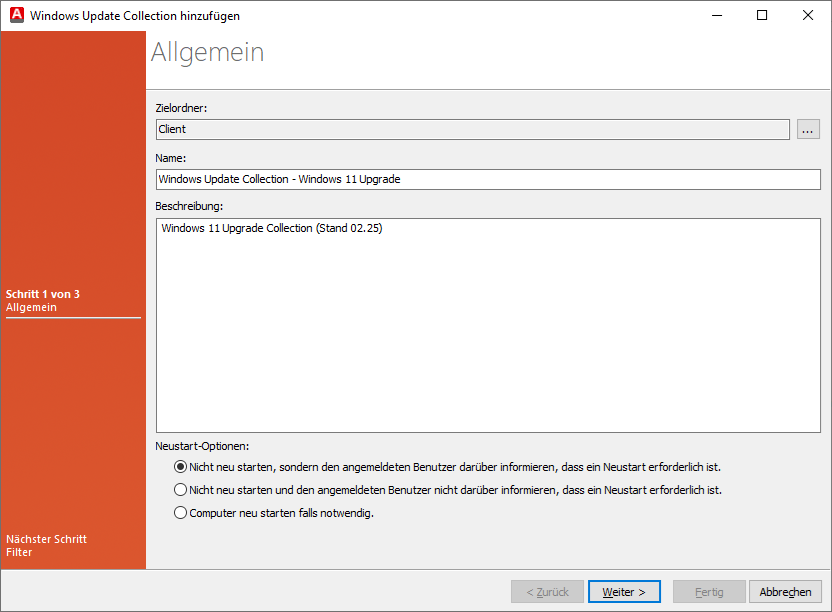
Add a new Windows Update Collection (General)
On the next page, define a filter that includes the products and classifications that should apply to this update collection. Only the products and classifications that you previously selected using the First Steps Wizard or subsequently in the settings are displayed here. In other words, you can only assign products and classifications to a collection that you have obtained as metadata. In this example, a collection is to be created for a Windows 11 upgrade, so only the product Windows 11 is selected in the upper part and only Upgrades under the classifications.
Tip: For a better overview, you can tick the Display selected entries only checkbox under the products.
Continue and click Next >.
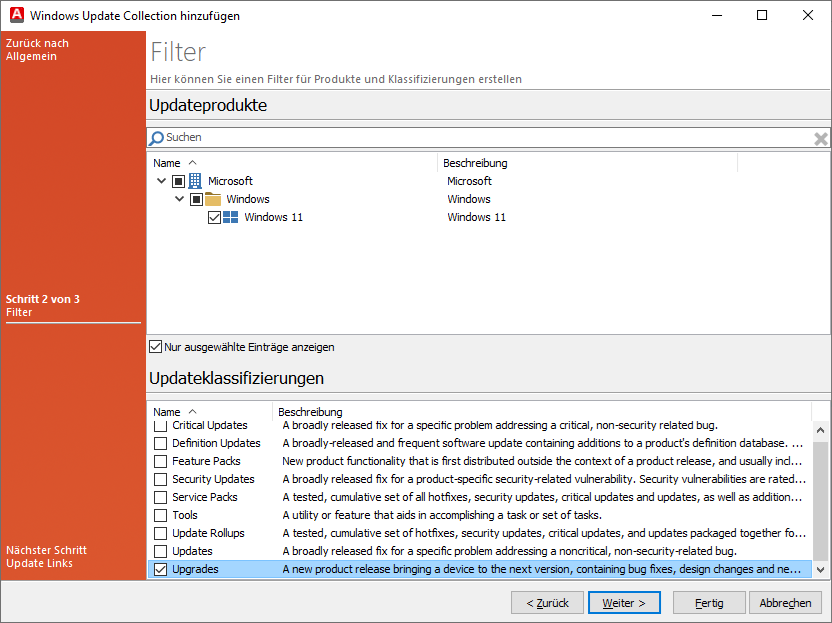
Add Windows Update Collection (filter)
Under Update Links, you can statically link selected updates to this collection. To do this, click on  Add and the Windows Updates element selection will open. In this view, the available updates are displayed in the same way as in the Updates tab (including detailed view). To store an update statically, select the desired number and mark the entries. To remove all entries, you can select the deselect all button below the detailed view. Otherwise, click OK once you have checked all the required updates.
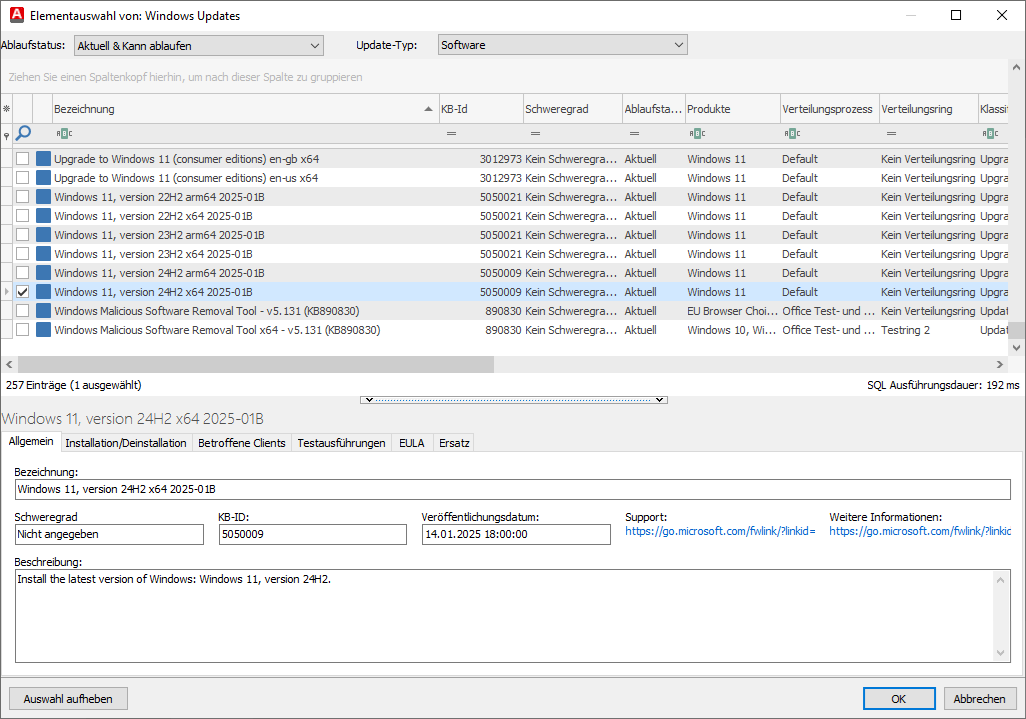
Selecting Windows Updates items for static linking
You will now be brought back to the wizard page where the selected update was stored.
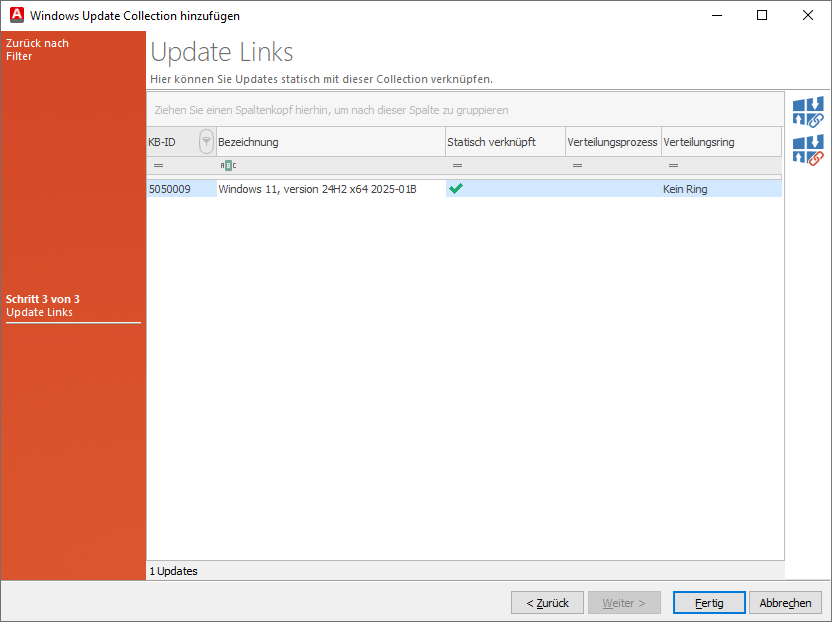
Link updates statically to a collection
If you wish to remove a static link, select the relevant update and click on  Remove. To exit the wizard, click on Finish. The newly created Windows Update Collection will now be displayed in the overview.
Edit, delete or duplicate Windows Update Collections
In addition to creating a new Windows Update Collection, you can also work with existing collections. All actions can be started either via the context menu or from the ribbon bar. To do this, click on the corresponding button for the action and follow the continuing instructions.
To edit a Windows Update Collection, open it with a double-click or select the entry in the list and navigate to the Edit button ( ). Change or add the desired information or customize the product selector or classification retrospectively, for example, by adding or deselecting items. You can also use this option to select a different restart option if the conditions for the selected update collection have changed. Confirm your changes with the Save button.
If you want to delete a collection, select the corresponding entry, click Delete ( ) and confirm the process.
To duplicate an existing collection, select the desired entry from the list and click on Duplicate ( ) via the ribbon bar or the context menu. Change all relevant information and assign a new name to the copied Windows Update Collection. Confirm your changes here as well with the Save button.