

Updates and declined Updates
The Updates section displays all available updates that match your previously set settings (selected products, classifications and languages). This requires that the metadata download has been completed successfully (see Download Types in Windows Update Management). The updates are listed according to the sorting of the grid. If individual updates are to be excluded from the distribution process (e.g. because they are no longer relevant to you), they can be explicitly rejected (Declined Updates).
Working with updates
The available updates are listed in a grid. As a rule, only updates that are current or may expire are displayed here (see expiry status).
Tip: Read the chapter Structure of a grid in ACMP to find out what individueal editing options (filtering, sorting or grouping results) are available to you. The chapter Grid optimisations in Windows Update Management contains further tips on how to group columns.
The ribbon bar can be used to assign  sync profiles and
  accept EULAs if this is a prerequistite for update distribution. If an update is already in a distribution ring (
 ), this can be changed and adjusted manually. In addition, you can navigate directly from the updates to the
  settings and make changes (e.g. deselect or select products or classifications). The
  MS Catalog takes you to the official Microsoft Update catalogue, where you can search for individual updates and select them for import.
Tip: The Microsoft Update Catalog is particularly useful for updates that are only available through the catalog.
To give you a better understanding of the updates in Windows Update Management, the individual areas are broken down below and explained in more detail. These are as follows:
- 1. Process status and update type
- 2. Properties of the updates
- 3. Detailed view of a selected update
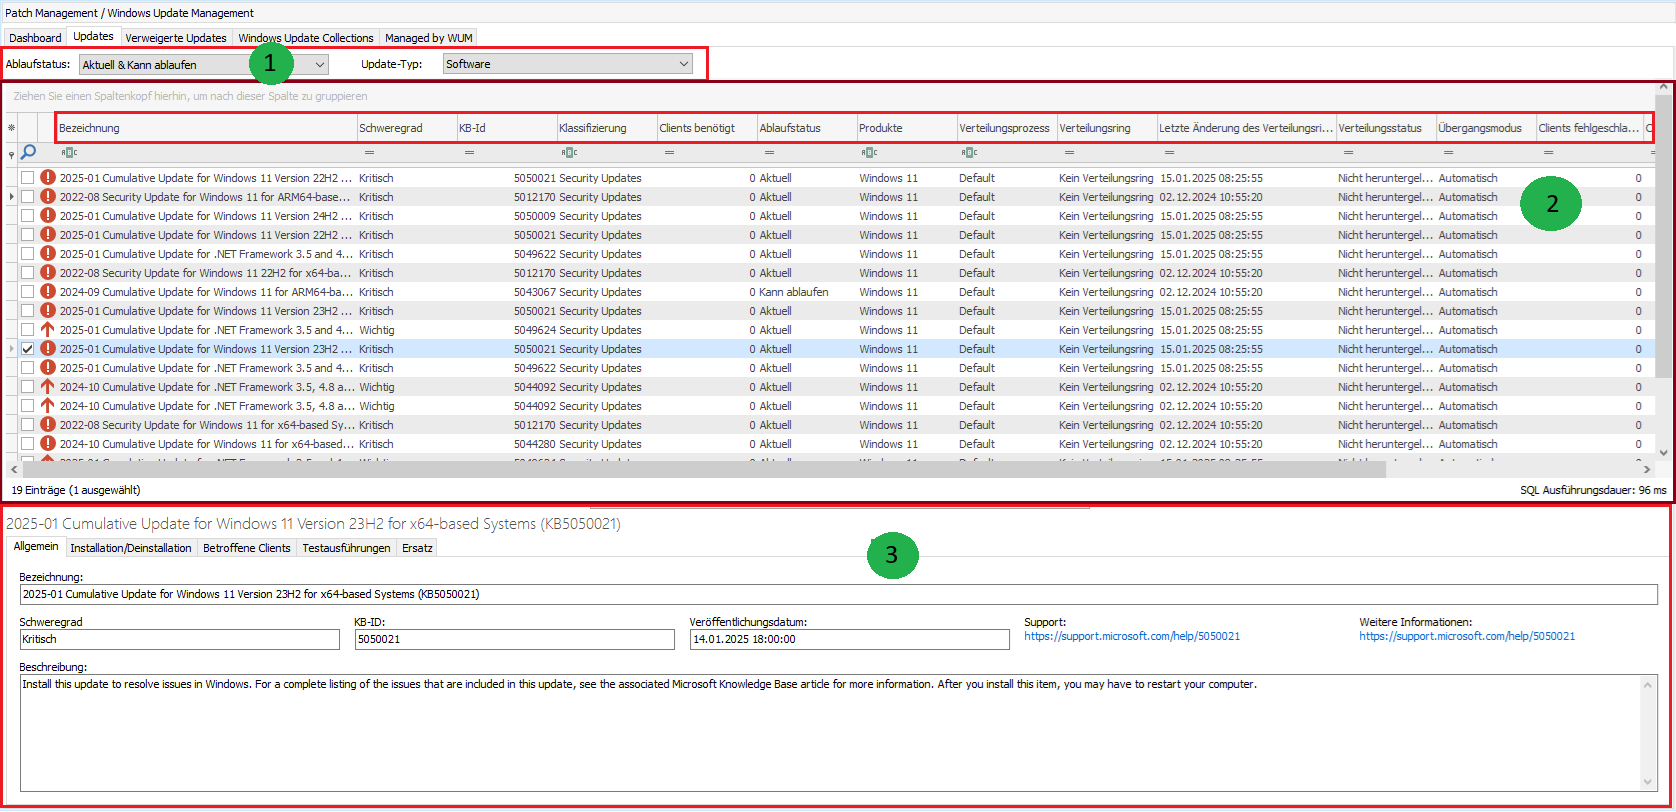
Structuring the areas of the updates
1. Expiry status and update type
As soon as metadata is updated, new updates may be added, existing ones replaced, or updates already published by Microsoft withdrawn and thus disappear from the list. These dynamic updates are collected using the expiry status and listed under Updates. The release cycle also affects the status (e.g. an update may still have the status "May expire" at the beginning of the release process and have expired at the end of the process).

Expiry status and update type
The expiry status indicates what type of updates are displayed to you, regardless of the classification selected. This only refers to the relationship between the updates themselves or whether they have been withdrawn from distribution by Microsoft.
For a better overview, only Current and May expire are selected by default when ACMP is installed.
| Expiry status | Description |
| Up-to-date | Lists all current updates that have been released by Microsoft for the product and classification. There is currently no update that replaces this. |
| Can expire | Updates that may expire are listed in this status. There is at least one update that is newer. However, this update is not further along in the Release process than the one currently selected. In the Replacement tab, there should be at least one update on the right-hand side under Replaced by the following updates. |
| Is expired | Expired updates are updates for which a newer version is available. A newer version has already been released for the update AND the newer update is in the same or higher Release Ring as the selected one. |
| Revoked | Updates may be withdrawn if they cause increased problems. In this case, Microsoft will withdraw the updates until a solution has been found and a replacement update is available. Withdrawn updates will then no longer be distributed or installed in this way. It is also not recommended that withdrawn updates be downloaded manually from the MS catalog and added to the network. |
In addition to the status, you can also filter by update type. To do this, tick the checkboxes if you want to display updates for software and/or drivers. Drivers are only automatically selected if you have ticked them in the First Steps Wizard or subsequently in the settings under the classifications
If you want to add or deselect another status or type, tick the checkbox and then refresh the view. Your changes will be taken into account in the system and displayed accordingly.
2. Properties of the updates
The grid contains a wealth of relevant information that you need to know about an update. The table shows whether an update is critical, its Knowledge ID, which product it belongs to, and when it was released.
Tip: Read more here about how you can optimise the grid for your work in Windows Update Management.
| Property | Description |
Expiration State
| The process status indicates which type of updates are displayed in the grid. If, for example, you have only selected the current updates in the process status, this filter will also be applied here. If you would like to see additional "withdrawn" updates, you must select the status above and click Update in the ribbon bar to refresh the grid. |
| Title | The designation reflects the official name of the update. |
| Clients Required | If a client reports an update as required, this is displayed in this column: Any value greater than zero (0) means that at least one client has reported the update to the ACMP Console as required. Tip: How does a client report an update to ACMP as required? When a client reports an update as required in ACMP, this is done in the background either via the Windows Update Scanner, an Update Collection, or Windows sends a status report on its own initiative stating that the update is required. In one of these situations, the client updates the status of the update. The condition for this is that the agent is managed by WUM. The client scans the status of its updates. Two lists of updates are then created: updates that are already installed and updates that still need to be installed. Both lists are stored in the database, which then determines the number of updates reported as required by the client. If, for example, several clients have the security update ‘2025-01 Cumulative Update for Windows 11 version 22H2 for arm64-based systems (KB5050021)’ in their table, the grid column Clients required would show exactly the number of clients that have reported it as required. Tip: Once the Windows Update Scanner has successfully completed its scan, you can set the filter in the Clients Needed column to (> 0) so that only the updates that are needed are displayed. This allows you to significantly reduce the quantity of results. |
| Clients Failed | If the installation or uninstallation of an update fails on a client, this is displayed in the column of the same name. The value zero (0) means that it did not fail on any client, while the value 1 indicates that it could not be installed/uninstalled correctly on at least one client. The column shows whether the last action failed. |
| Clients Installed | The column shows the total number of updates that have installed this update. |
| EULA status | The EULA status indicates whether the licence agreements for the update have already been accepted or not. Possible values that may appear in the row:
|
| KB-ID | The KB ID consists of the knowledge base and the article number. |
| Classification | The classification indicates the update type (e.g. critical updates, update rollups or upgrades). |
| Last Change of Distribution Ring | Displays the date and time of the last change to the distribution ring. This also includes transitions between individual distribution rings, provided that an update was made, e.g. from Test Ring 2 to Released. |
| Products | Products are the selected operating systems, software, or drivers for which you wish to obtain and distribute updates. |
| Severity | The severity level indicates how Microsoft categorises its updates. A distinction is made between |
| Transition mode | The transition mode indicates whether an update switches automatically or manually from one distribution ring to another. |
| Origin | The origin indicates the source from which the update originates. Updates originating from the metadata download are indicated with Windows Update. Updates obtained from the MS catalogue are marked with Manual import. |
| Release Date | The publish date indicates the date on which it was published by Microsoft. |
| Distribution Process | The distribution process reflects the testing and approval process for Windows updates. Any Windows update that has not been explicitly assigned to a user-defined test and release process is always assigned to the default process. Otherwise, the processes you have created are listed here. |
| Distribution Ring | The distribution ring indicates the transition phase the update is currently in and how far the automatic distribution has progressed. There are four rings that an update can typically pass through: No distribution ring, Test Ring 1, Test Ring 2 and Released. Tip: In the chapter Testing and Release you can learn more about how to define the individual processes and customize them for your specific needs. |
| Distribution State | This refers to the status of the downloaded files in the file repositories. A distinction is made between Synchronised, Synchronisation and Not downloaded.
|
 Important,
  Critical,
  Moderate and
  No security level defined.Example: Microsoft's security updates are often classified as Important or Critical. Example: Microsoft's security updates are often classified as Important or Critical.
 ) via the ribbon bar. To reactivate them, use the function Enable automatic transition mode (
 ).
).Properties that you will exclude from finding under the declined updates tab:
| Property | Description |
| Declination Date | Returns the date on which an update was denied. |
| Declination Comment | Displays the reason or comment given when an update was refused. |
3. Detailed view of a selected Update
The detailed view of a selected update provides you with a wealth of info, some of which supplements the existing info from the grid. Depending on the number of items, it is always worth opening the detailed view to avoid the risk of slipping in the row or column and reading out incorrect info, for example. The view opens below the grid as soon as you select an update.
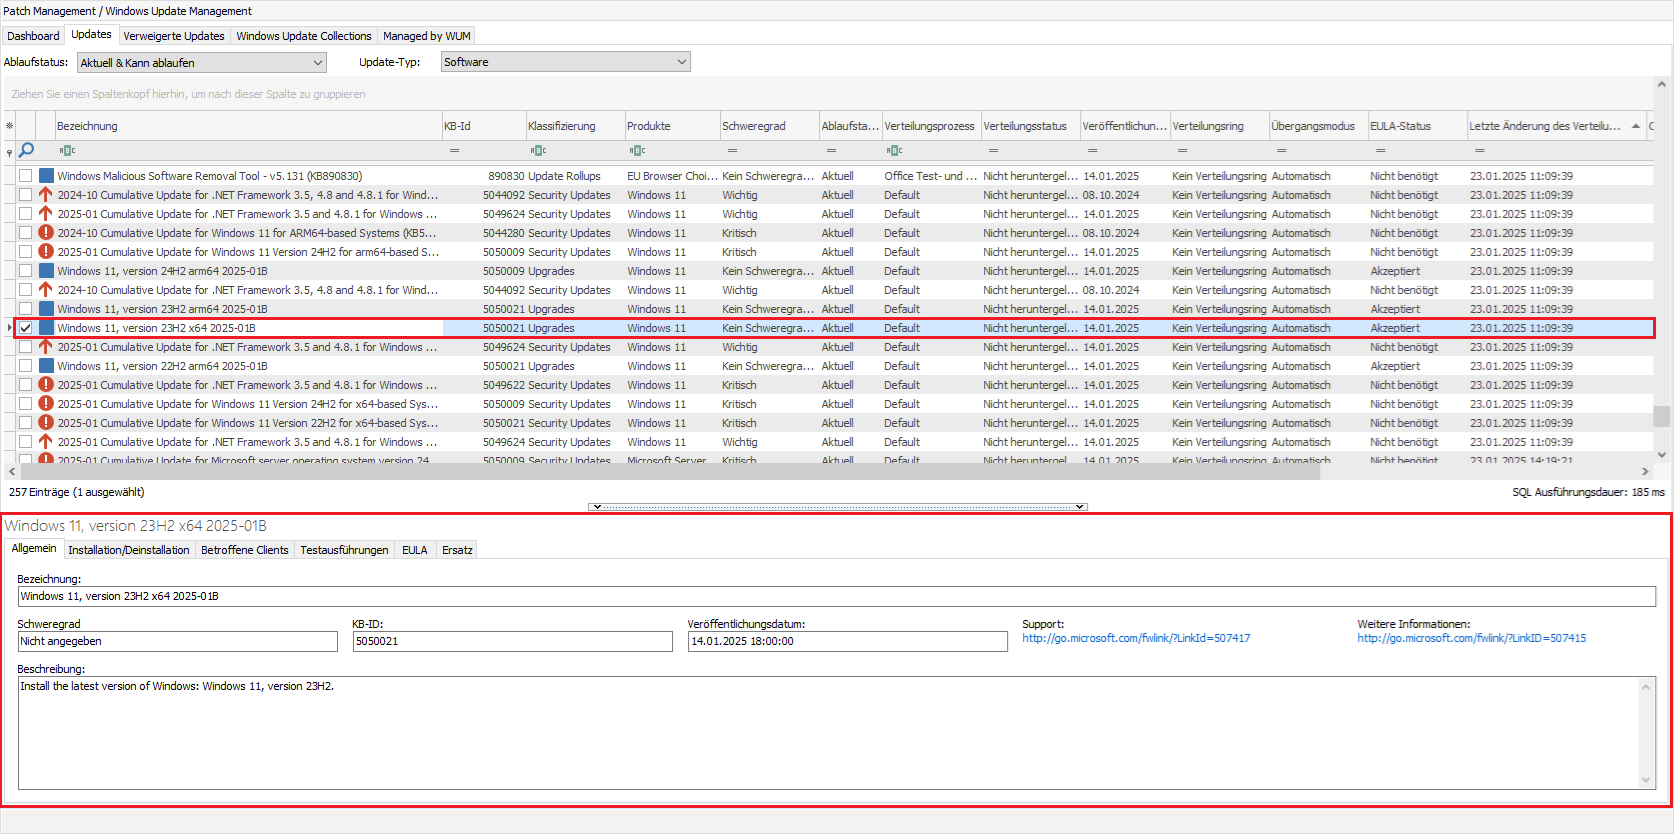
Example of a detailed view of a selected update
The information is divided into six tabs:
| Tab | Description |
| General | This tab provides general details and information about the selected update. In addition to the official name and description from Microsoft and the publish date, you will also find the severity, KB ID and further information about the update. |
| Installation/Uninstallation | If you want to install or uninstall the update, you will find more detailed information on the respective behaviour here:
|
| Affected Clients | This tab lists all agents that are affected by the update in any way:
From this tab, you can perform a pushed installation. To do this, select a client and then click on Install Updates and provide your confirmation in the window that opens. In addition, you can uninstall updates or |
| Test runs | All executions of Update Collections, installations and uninstallations that were executed in Test Ring 1 or Test Ring 2 are listed. |
| EULA | Here you will find info about the EULA status, as well as when and who accepted the EULA. Clicking the Show EULA button opens a new window where you can read the licence terms for the respective update. |
| Replacement | The tab indicates whether the selected update replaces another update or has already been replaced by another update. The updates to be replaced or that have been replaced are listed below, by name. |


Accept EULA
An EULA (End User Licence Agreement) is a legal agreement that grants a user a licence to use software. Only once the licence agreement has been accepted – if the software requires this – can the user utilise the application (e.g. download or install it).
For some updates (often classified as upgrades), you must agree to an EULA (End User Licence Agreement) before distribution and continuing installation. For these updates, you can accept the licence terms by clicking the accept EULA button in the ribbon bar.
This opens a two-part window: in the upper part, you will see the knowledge base ID and the title of the update, and in the lower part, the licence agreements for the update. Read the text carefully, tick the checkbox and then click on Accept to agree to the terms and conditions.
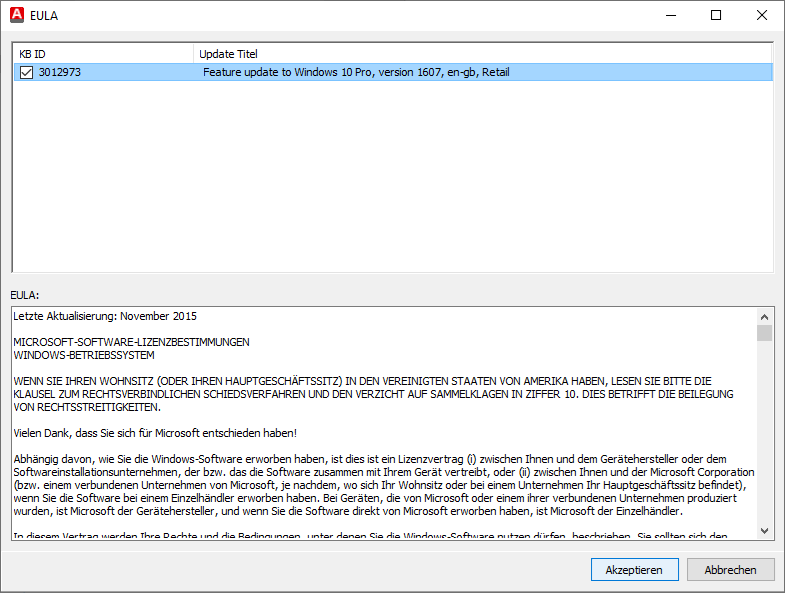
Example of an accepted EULA for an upgrade
Accepting the EULA also changes the EULA status in the grid to accepted for the selected upgrade.
Declined Updates
If you no longer want a displayed update to be distributed on your network (because it is outdated, for example), you can decline this update. A declined update will no longer be distributed or installed on clients and will be removed from all existing update collections (Windows Update Collections).
To decline an update, first select the relevant update in the grid and then click on  Decline in the ribbon bar or choose the action from the context menu (right click). A new window will open where you can specify an optional reason for rejection.

Comment window for refusing an update
The hard drive space occupied by the update will only be freed up during the next cleanup (see Cleanup job). To do this, refresh the view in the dashboard.
Declined updates will then be displayed in the tab of the same name, Declined Updates.
Approve declined updates
All updates that you have previously declined are listed under the tab of the same name in Windows Update Management. Similar to the Updates the results are also displayed here in a grid, with only the columns and filled fields differing slightly (for example, you will find the decline date and the comment entered here).
If you still want to distribute and install one of the displayed updates on your network, select it and click on  Approve in the ribbon bar.

Retrospectively approve declined updates
Confirm the dialogue box with Yes. This will display the selected update again in the Updates tab, where it will be available for you to install on the network.
Change the release process for updates
Updates that are already in a release process and have already been assigned a distribution ring (Test Ring 1 or Test Ring 2) can be manually changed to a different distribution ring using the ribbon bar or the context menu. This may be necessary, for example, if an important update needs to be moved to another ring so that it can be distributed more quickly. To do this, first select the relevant update from the grid and click on Change distribution ring ( ). The distribution ring editor opens, where you can now select the new distribution ring for the update. Also check that the Automatic move items to the next distribution ring checkbox is enabled so that this automatic function takes effect and the update is moved to the next ring at a later point in time. Exit your work by clicking Change. The grid view is automatically updated so that the update is assigned to the appropriate distribution ring.
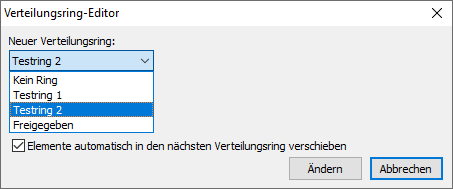
Distribution ring editor in Windows Update Management
 ) / disable (
 ) in the ribbon bar, depending on whether you want a transition mode or not.
In principle, it is also possible to move the updates to a prior distribution ring, and the change does not necessarily have to be closer to release. For example, if you want to keep an update in a test ring for longer and see if there are any changes from Microsoft, you could keep it in the test environment for longer and send it back to a test ring if you do not want to completely change the number of days configured for the process.
Obtain updates from the MS Catalog
The Microsoft Update Catalog is a Microsoft service that provides a wide range of updates that you can distribute via your company network. You can use the catalogue to find any type of Microsoft-specific software updates and, if necessary, download them manually and integrate them into your network.
Click on MS Catalog in the ribbon bar and a new window will open, consisting of two tabs: Update catalog and Selected Updates.
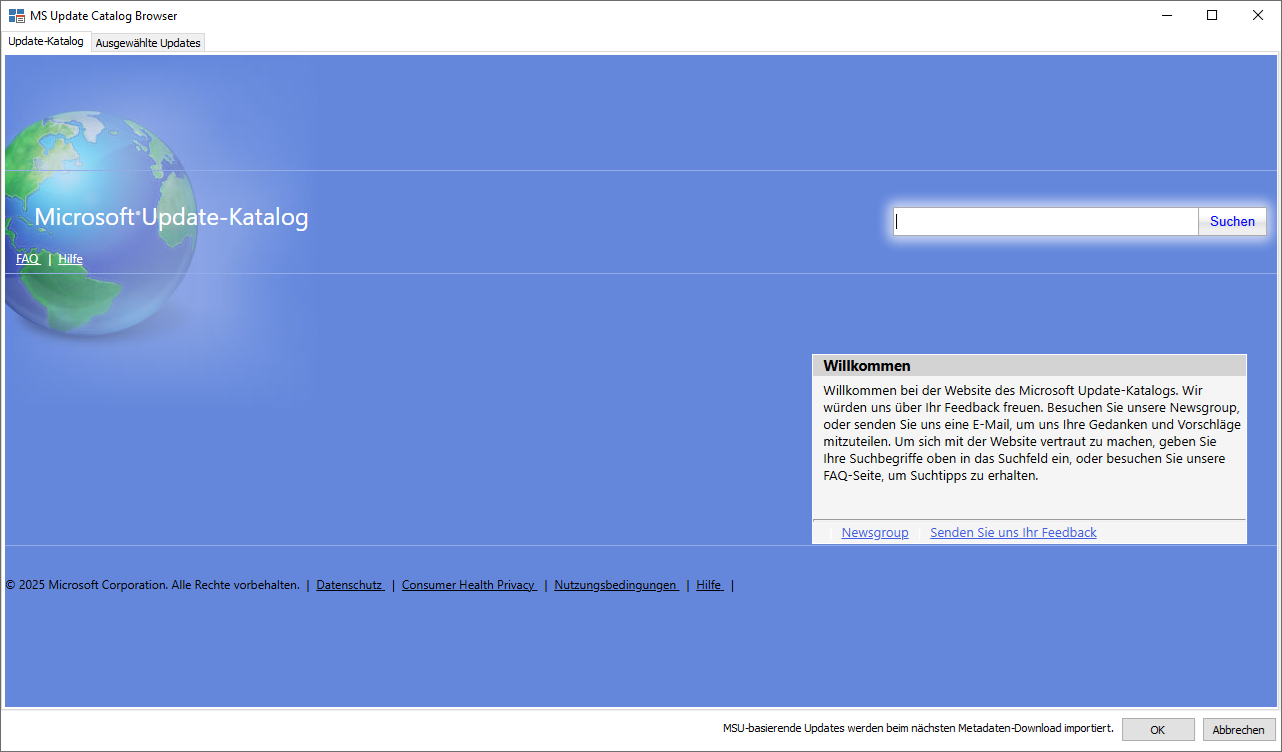
Microsoft Update Catalog
Enter your search term in the search box at the top right. To narrow down the results, Microsoft recommends entering the appropriate Knowledge Base ID (KB ID).
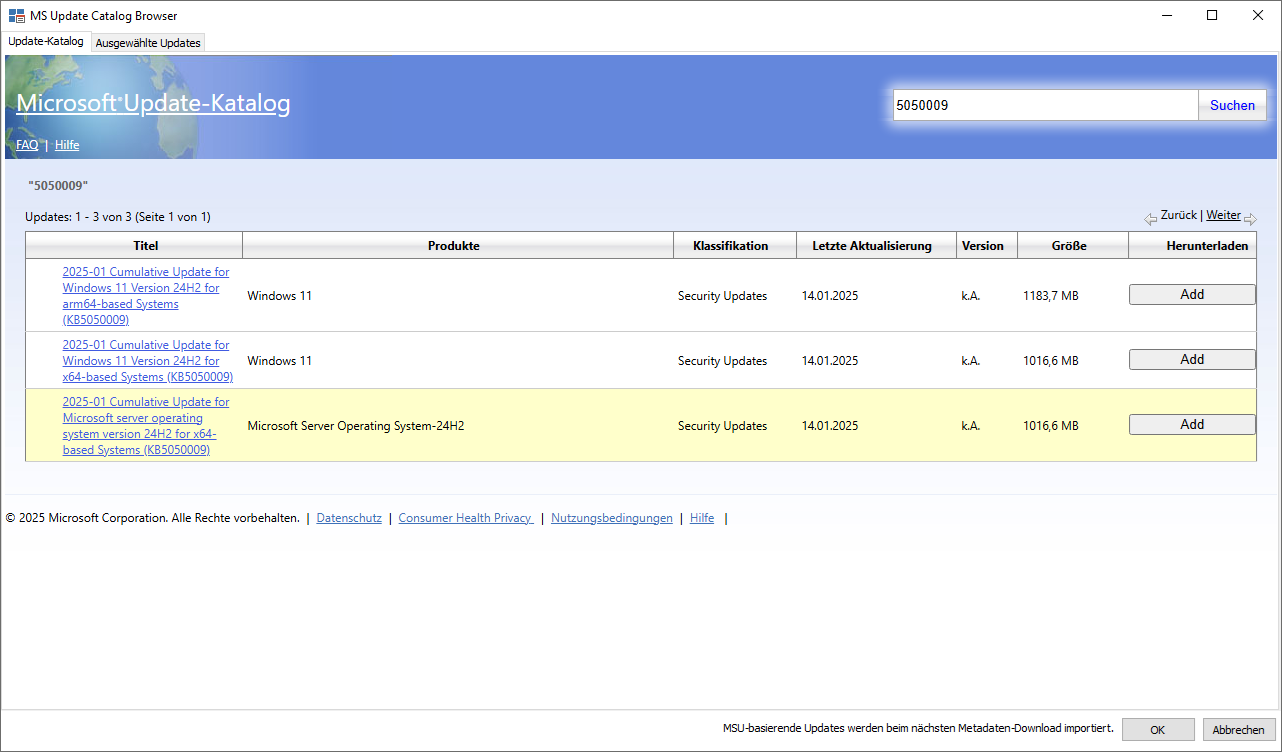
Find updates in the MS Catalog
Once you have found the appropriate update from the entries, click Add in the right-hand pane. The update will now be imported in the background and made available to you in the Selected Updates tab. Click Remove if you do not need the update and want to delete it from the list.
The next time Metadata download is performed, the selected updates will also be downloaded and made available to you in the ACMP Console.
Tip: Updates that you obtain directly from the MS Catalog are displayed within the grid in the Origin column with "Manual import".