


Configuration options in Windows Update Management
Windows Update Management offers numerous configuration options. These begin with the initial setup in the First Steps Wizard, where you can explicitly select or deselect products and classifications, for example, and continue to allow you to make changes for your own corporate identity so that you can customize logos or banners. This section provides an overview of the various areas where you can make changes:
- Configuring the dashboard in Windows Update Management
- Products
- Classifications
- Jobs and tasks
- CI adjustments from the restart dialogue
- Configuring Office 365 apps outside of ACMP
Configuring the dashboard in Windows Update Management
Dashboards consist of various widgets that provide you with the most important information about a plugin. You can choose from a selection of different widgets for Windows Update Management and create a customised dashboard:
| Client status | The widget displays the number of clients with specific statuses. | |
| Hard disk usage | Hard disk usage shows the amount of storage space used. A chart displays how the hard disk is deployed and how much storage space is required at most. This is divided into:
| |
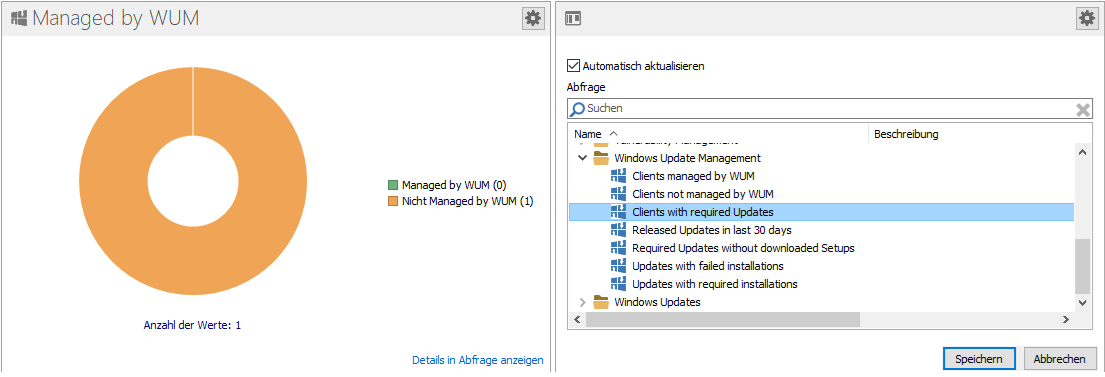
| Managed by WUM | The widget displays the number of clients that are managed by WUM and Not Managed by WUM in diagram form | |
| Status of WUM jobs | The widget displays the status of Windows Update Management jobs. You can also view the current progress of the job, as well as the start and finish dates and the result, from the widget. Learn more about the jobs and download types stored here. | |
| Updates to the distribution ring | Displays the number of updates in the specific distribution rings. The deployed updates are divided among the rings: No distribution ring, Test Ring 1, Test Ring 2, and Released.
| |
| Update status | The widget displays the number of updates with their respective statuses. | |
| Welcome to ACMP Windows Update Management | Displays a welcome page with basic information about the plugin, as well as some websites with further info on the topic. |
When you open Windows Update Management for the first time, the dashboard is already pre-filled and displays two queries and their results (Released Updates in last 30 days and Clients with required Updates). These queries are included and can be opened via Client Management > Query Management > Windows Update Management to change fields or filters, for example.
To insert another widget in its place, click on  Select Widget in the upper right corner of the widget and insert another one. You can insert another query via
  Configure. To insert a query into a clear space afterwards, you must click on Queries > Query in the widget selector. A field will open where you can now insert the desired query.
Example of a configured query in the Windows Update Management widget
Products
Microsoft and the continuing manufacturers listed in the third-party catalogues offer a wide range of different products that you can select for your Windows Update Management tasks. All products that you can configure and use are listed under their respective names. For example, if you want to add a specific Windows operating system as a product, you can enter it directly in the search field or select it from the list of items.
Select all products for which you want to provide updates. All items are provided based on the official names from Microsoft and other providers and are only available with descriptions in only the English language.
When selecting products, you should follow the principle of minimalism: Only select products that are truly relevant to you! If you select all entries, the ACMP Server will be overloaded and enormous performance problems may occur. It does not make sense to include third-party catalogues if you do not use any products from these providers. Read through the selection of products very carefully and check the entries against their exact names.
Tip: The product list and the respective names are provided by the vendors. ACMP obtains the entries and summarises them for you. Especially for Windows entries, it is often useful to check the Microsoft help page to see whether the same cumulative updates are offered for the different versions.
So check the selected products to keep maintenance costs low, for example.
Windows 10 example: Let's say you want to provide clients with updates for the Microsoft operating system Windows 10. However, almost forty items are listed for this search term, as the Business, Anniversary and Creator versions are also included. So which one is the right one to choose?
- Select Windows 10, version 1903 and later, as this covers all newer updates. All updates older than version 1903 would run on Windows 10. You can select the Business, Anniversary and Creator versions, as the names are often very clear.
Windows 11 example: Windows 11 has a much smaller number of possible products to choose from. This is partly because the operating system has not been on the market as long as its predecessor (as of 12/24), but also because there are not that many products available yet. Here, you can use the edition names to check what is and isn't suitable for you (many companies do not use Windows 11 Client S, so these options are already excluded). Also pay attention to the versions that are displayed (22H2, 24H2, etc.). This allows you to exclude incorrect versions as well.
Classifications
Classifications are required to define and synchronise the previously selected products according to the various classifications. This allows software updates to be assigned to and organised according to the respective types of updates. During the synchronisation process, all metadata for the selected software is synchronised for the specified classifications. Microsoft distinguishes between the following classifications:
| Classification | Description |
| Critical Updates | A broadly released fix for a specific problem addressing a critical, non-security related bug. |
| Definition Updates | A broadly-released and frequent software update containing additions to a products definition database. Definition databases are often used to detect objects with specific attributes, such as malicious code, phinishing Web sites, or junk e-mail. |
| Drivers | A software component necessary to control or regulate another device. |
| Feature Packs | New product functionality that is first distributed outside the context oft a product release, and ususally included in the next full product release. |
| Security Updates | A broadly released fix for a product-specific security-related vulnerability. Security vulnerabilities are rated based on their severity which is indicated in the Microsoft security bulletin as critical, important, moderate, or low. |
| Service Packs | A tested, cumulative set of all hotfixes, security updates, ciritical updates and updates, as well as additional fixes for problems found internally since the release oft he product. Service packs may also contain a limited number of customer-requested design changes or features. |
| Tools | A utility or feature that aids in accomplishing a task or set of tasks |
| Update Rollups | A tested, cumulative set of hotfixes, security updates, critical updates, and updates packaged together for easy deployment. A rollup generally targets a specific area, such as security, or a component of a product, such as Internet Information Services „IIS“. |
| Updates | A broadly released fix for a specific problem addressing a noncritical, non-security-related bug. |
| Upgrades | A new product release bringing a device to the next version, containing bug fixes, design changes and new features. |
Tip: If you consciously decide to include the drivers, the Metadata download may take longer, require a lot of storage space, and increase the size of the database accordingly. Base your decision on the hardware you are using and whether the option is really worthwhile. If you only use hardware (computers, notebooks) from other companies (e.g. Lenovo, Dell or HP), you can select and include them via the third-party catalogues.
Jobs und Aufgaben
Damit das Windows Update Management reibungslos funktionieren kann, bedarf es einiger Serverjobs und -aufgaben. Die Jobs richten sich dabei unter anderem an die Auslastung des Servers, die durch konfigurierte Intervalle bestimmt werden. Sie können sowohl den Agentenplaner-Job als auch die Serveraufgaben jeweils eine Startbedingung zuteilen, die Sie Ihrer Umgebung anpassen können. Die Jobs und Aufgaben erfolgen in Intervallen und sequenziell nacheinander. Die Abfolge können Sie in den Monitoren (u.a. Job-, Client- und Servermonitor) überprüfen.
Nachfolgend eine kurze Auflistung der Jobs und welche Aufgaben sie für das Windows Update Management erfüllen:
Agentenplaner (Client Management > Agentenplaner)
| Agentenplaner | Beschreibung | Empfohlene Startbedingung |
| Windows Updates Scanner | Der Windows Updates Scanner scannt die Clients, ob sie ein Update als benötigt/installiert gemeldet haben. Der Scanner wird auch ausgeführt, wenn eine Update Collection angestoßen wird. | Starte täglich |
Geplante Serveraufgaben (System > Einstellungen > ACMP Server > Geplante Serveraufgaben)
| Serveraufgabe | Beschreibung | Empfohlene Startbedingung |
| Windows Update Management Metadaten herunterladen | Lädt die Metainformationen über die Windows Updates herunter. | Starte täglich |
| Windows Update Management Setup herunterladen | Lädt die Setup-Dateien für die ausgewählten Windows Updates herunter. | Starte täglich |
| Neuberechnung Windows Updates für verwaltete Clients | Berechnet die dynamischen Verknüpfungen von den Clients neu, die mit ACMP Windows Update Management verwaltet werden. | Starte stündlich |
| Windows Update Management bereinigen | Gibt den Festplattenspeicher frei, der von den nicht benötigten Windows Updates belegt ist. | Starte täglich |
| Bereinigung der Windows Update Logs | Bereinigt die Logs, die älter als 30 Tage sind. | Starte alle fünf Stunden |
Windows Update Management CI Anpassungen (Neustart-Dialog)
Ähnlich wie an anderen Stellen im ACMP, können Sie als Administrator auch den Neustart-Dialog des Windows Update Managements individuell an Ihre Corporate Identity anpassen. Hierbei lassen sich sowohl das Logo als auch der Banner für den Dialog austauschen.

Neustart-Dialog
Um diese Änderungen vorzunehmen, wechseln Sie zunächst in das Installationsverzeichnis ACMPClient (z.B. C:\Program Files (x86)\ACMPClient). Kopieren Sie nun die Grafiken für das Logo und optional für den Banner in das Verzeichnis. Beachten Sie dazu die folgenden Angaben zu den Grafiken:
| Dateiname | Maße | Originalgrafik | Beschreibung |
| RebootOptionDialogLogo.png | 128x128 |  | Hiermit ändern Sie das Logo und können beispielsweise Ihr eigenes Firmenlogo einbinden. Der Vorteil dieses Logos ist es, dass sofort ersichtlich wird, dass es sich hierbei um das Einspielen neuer Windows Updates handelt. |
| RebootOptionDialogBanner.png | 128x49 | Im Standard-Banner steht ACMP. Sie können hier z.B. den eigenen Unternehmensnamen eintragen. |
Konfiguration der Office 365 Apps Installation außerhalb von ACMP
Als Voraussetzung zur Verteilung von Updates über das Windows Update Management für Office 365 gilt, dass die Apps bereits im Vorfeld installiert wurden. Dies ist Grundvoraussetzung für den Administrator, damit auch eine Konfiguration außerhalb von ACMP möglich ist.
Mithilfe des Microsoft Office-Anpassungstools haben Sie die Möglichkeit, die gewünschte Konfiguration für den Download und die Installation von Office 365 durchzuführen. Hierzu legen Sie im Vorfeld die Bereitstellungseinstellungen fest (z.B. Import oder Export) und definieren, welche Produkte, Versionen und Apps bereitgestellt werden sollen. Sie werden schrittweise durch die Anwendung geführt und können dort individuelle Einstellungen festlegen. Der Download und die Installation erfolgen anschließend über das Tool.
Tipp: Über die offizielle Microsoft Hilfeseite können Sie mehr Informationen zu dem Bereitstellungstool bzw. zu den Konfigurationsoptionen nachlesen.
Wahlweise können Sie das ACMP Client Command "Microsoft Office 365 und 2019" installieren, welches ebenfalls die Office-Bereitstellungstools nutzt.
In der Regel erfolgt im ersten Schritt bei Microsoft auch die Konfiguration sogenannter Updatekanäle. Über den Kanal veröffentlicht Microsoft regelmäßig neue und/oder aktualisierte Features für die Office Apps. Der Administrator kann dabei selbst entscheiden, welche Art von Updatekanal und in welchem Aktualisierungsturnus gewählt werden soll. Das Windows Update Management bezieht die nötigen Updates genau über diesen Kanal.