


Configuration options in Windows Update Management
Windows Update Management offers numerous configuration options. These begin with the initial setup in the First Steps Wizard, where you can explicitly select or deselect products and classifications, for example, and continue to allow you to make changes for your own corporate identity so that you can customize logos or banners. This section provides an overview of the various areas where you can make changes:
- Configuring the dashboard in Windows Update Management
- Products
- Classifications
- Jobs and tasks
- CI adjustments from the restart dialogue
- Configuring Office 365 apps outside of ACMP
Configuring the dashboard in Windows Update Management
Dashboards consist of various widgets that provide you with the most important information about a plugin. You can choose from a selection of different widgets for Windows Update Management and create a customised dashboard:
| Client status | The widget displays the number of clients with specific statuses. | |
| Hard disk usage | Hard disk usage shows the amount of storage space used. A chart displays how the hard disk is deployed and how much storage space is required at most. This is divided into:
| |
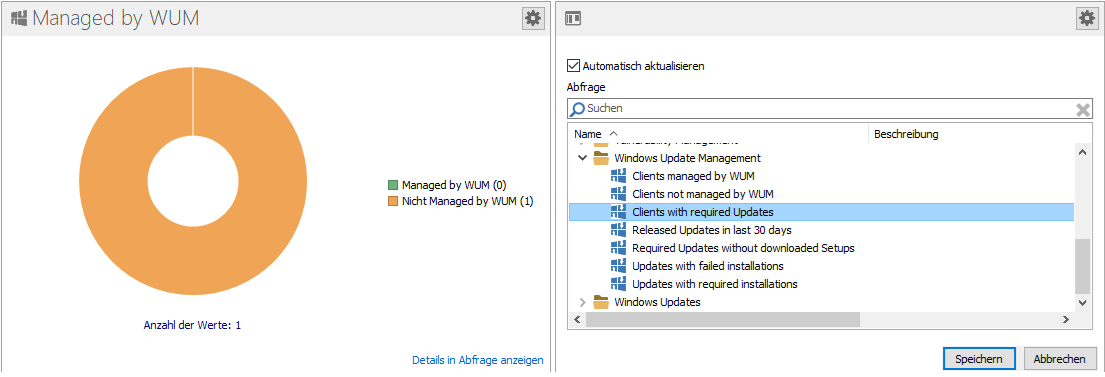
| Managed by WUM | The widget displays the number of clients that are managed by WUM and Not Managed by WUM in diagram form | |
| Status of WUM jobs | The widget displays the status of Windows Update Management jobs. You can also view the current progress of the job, as well as the start and finish dates and the result, from the widget. Learn more about the jobs and download types stored here. | |
| Updates to the distribution ring | Displays the number of updates in the specific distribution rings. The deployed updates are divided among the rings: No distribution ring, Test Ring 1, Test Ring 2, and Released.
| |
| Update status | The widget displays the number of updates with their respective statuses. | |
| Welcome to ACMP Windows Update Management | Displays a welcome page with basic information about the plugin, as well as some websites with further info on the topic. |
When you open Windows Update Management for the first time, the dashboard is already pre-filled and displays two queries and their results (Released Updates in last 30 days and Clients with required Updates). These queries are included and can be opened via Client Management > Query Management > Windows Update Management to change fields or filters, for example.
To insert another widget in its place, click on  Select Widget in the upper right corner of the widget and insert another one. You can insert another query via
  Configure. To insert a query into a clear space afterwards, you must click on Queries > Query in the widget selector. A field will open where you can now insert the desired query.
Example of a configured query in the Windows Update Management widget
Products
Microsoft and the continuing manufacturers listed in the third-party catalogues offer a wide range of different products that you can select for your Windows Update Management tasks. All products that you can configure and use are listed under their respective names. For example, if you want to add a specific Windows operating system as a product, you can enter it directly in the search field or select it from the list of items.
Select all products for which you want to provide updates. All items are provided based on the official names from Microsoft and other providers and are only available with descriptions in only the English language.
When selecting products, you should follow the principle of minimalism: Only select products that are truly relevant to you! If you select all entries, the ACMP Server will be overloaded and enormous performance problems may occur. It does not make sense to include third-party catalogues if you do not use any products from these providers. Read through the selection of products very carefully and check the entries against their exact names.
Tip: The product list and the respective names are provided by the vendors. ACMP obtains the entries and summarises them for you. Especially for Windows entries, it is often useful to check the Microsoft help page to see whether the same cumulative updates are offered for the different versions.
So check the selected products to keep maintenance costs low, for example.
Windows 10 example: Let's say you want to provide clients with updates for the Microsoft operating system Windows 10. However, almost forty items are listed for this search term, as the Business, Anniversary and Creator versions are also included. So which one is the right one to choose?
- Select Windows 10, version 1903 and later, as this covers all newer updates. All updates older than version 1903 would run on Windows 10. You can select the Business, Anniversary and Creator versions, as the names are often very clear.
Windows 11 example: Windows 11 has a much smaller number of possible products to choose from. This is partly because the operating system has not been on the market as long as its predecessor (as of 12/24), but also because there are not that many products available yet. Here, you can use the edition names to check what is and isn't suitable for you (many companies do not use Windows 11 Client S, so these options are already excluded). Also pay attention to the versions that are displayed (22H2, 24H2, etc.). This allows you to exclude incorrect versions as well.
Classifications
Classifications are required to define and synchronise the previously selected products according to the various classifications. This allows software updates to be assigned to and organised according to the respective types of updates. During the synchronisation process, all metadata for the selected software is synchronised for the specified classifications. Microsoft distinguishes between the following classifications:
| Classification | Description |
| Critical Updates | A broadly released fix for a specific problem addressing a critical, non-security related bug. |
| Definition Updates | A broadly-released and frequent software update containing additions to a products definition database. Definition databases are often used to detect objects with specific attributes, such as malicious code, phinishing Web sites, or junk e-mail. |
| Drivers | A software component necessary to control or regulate another device. |
| Feature Packs | New product functionality that is first distributed outside the context oft a product release, and ususally included in the next full product release. |
| Security Updates | A broadly released fix for a product-specific security-related vulnerability. Security vulnerabilities are rated based on their severity which is indicated in the Microsoft security bulletin as critical, important, moderate, or low. |
| Service Packs | A tested, cumulative set of all hotfixes, security updates, ciritical updates and updates, as well as additional fixes for problems found internally since the release oft he product. Service packs may also contain a limited number of customer-requested design changes or features. |
| Tools | A utility or feature that aids in accomplishing a task or set of tasks |
| Update Rollups | A tested, cumulative set of hotfixes, security updates, critical updates, and updates packaged together for easy deployment. A rollup generally targets a specific area, such as security, or a component of a product, such as Internet Information Services „IIS“. |
| Updates | A broadly released fix for a specific problem addressing a noncritical, non-security-related bug. |
| Upgrades | A new product release bringing a device to the next version, containing bug fixes, design changes and new features. |
Tip: If you consciously decide to include the drivers, the Metadata download may take longer, require a lot of storage space, and increase the size of the database accordingly. Base your decision on the hardware you are using and whether the option is really worthwhile. If you only use hardware (computers, notebooks) from other companies (e.g. Lenovo, Dell or HP), you can select and include them via the third-party catalogues.
Jobs and tasks
Several server jobs and tasks are required for Windows Update Management to function smoothly. Among other things, the jobs are based on the server load, which is determined by configured intervals. You can assign both the Agent Tasks job and the server tasks a start condition that you can customize to your environment. The jobs and tasks are performed at intervals and sequentially one after the other. You can check the sequence in the monitors (including the job, client and server monitors)
Below is a brief list of the jobs and the tasks they perform for Windows Update Management:
Agent Tasks (Client Management > Agent Task)
| Agent Task | Description | Condition |
| Windows Updates Scanner | The Windows Updates Scanner scans the clients to see whether they have reported an update as required/installed. The scanner is also executed when an Update Collection is triggered. | Start every day |
Scheduled Server Tasks (System > Settings > ACMP Server > Scheduled Server Tasks)
| Serveraufgabe | Description | Condition |
| Windows Update Management metadata download | Downloads meta information about Windows Updates | Start every day |
| Windows Update Management setup download | Downloads setup files for Windows Updates | Start every day |
| Windows Update Managed Clients recalc | Recalculates dynamic links of Clients which are managed by ACMP Windows Update Management. | Start every hour |
| Windows Update Management cleanup | Frees disk space that is occupied by unneeded Windows Updates. | Start every day |
| Windows Update log cleanup | Cleanup logs, which are older than 30 days. | Start every five hours |
Windows Update Management CI customize (Restart dialog)
Similar to other areas in ACMP, as an administrator, you can also customize the Windows Update Management restart dialogue to match your corporate identity. Both the logo and the banner for the dialogue can be replaced.

Restart dialog
To make these changes, first navigate to the installation directory ACMPClient (e.g. C:\Program Files (x86)\ACMPClient). Now copy the graphics for the logo and, optional, for the banner into the directory. Please note the following information about the graphics:
| File name | Dimensions | Original graphic | Description |
| RebootOptionDialogLogo.png | 128x128 |  | This allows you to change the logo and, for example, integrate your own company logo. The advantage of this logo is that it immediately shows that new Windows Updates are being installed. |
| RebootOptionDialogBanner.png | 128x49 | The standard banner says ACMP. You can enter your own company name here, for example. |
Configuring the Office 365 apps installation outside of ACMP
As a prerequisite for distributing updates via Windows Update Management for Office 365, the apps must already have been installed in advance. This is a basic requirement for the administrator so that configuration outside of ACMP is also possible.
Using the Microsoft Office Customisation Tool, you can configure the desired configuration for download and installation of Office 365. To do this, you first specify the deployment settings (e.g. import or export) and define which products, versions and apps are to be deployed. You are guided through the application step by step and can specify individual settings there. The download and installation are then carried out using the tool.
Tip: You can find more information about the deployment tool and the configuration options on the official Microsoft help page.
Optionally you can install the ACMP Client Command "Microsoft Office 365 und 2019", which also uses the Office deployment tools.
As a rule, in the first step at Microsoft the configuration of so-called update channels is also carried out. Microsoft regularly publishes new and/or updated features for Office apps via the channel. The administrator can decide for themselves which type of update channel and which update cycle to choose. Windows Update Management obtains the necessary updates via this channel.