

Account Menu
In the account menu, you will find various actions for the user who is currently logged in. The name of the field is based on the username you used to log in to the ACMP Console (here: administrator). In the account menu, you can change your password, manage the authentication factors for using MFA and display the QR code for an app login, as well as information about the tenant session.
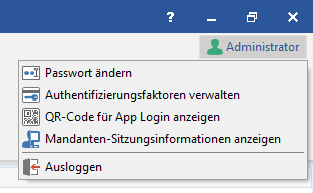
Overview of the options in the account menu
Changing the password
The button allows you to change the password for the current user. To change the current password, you have to click on the entry and a new window will open in which you have to enter the old and the new password. Confirm the new password by entering it twice. Use the password strength field to see how secure the password is (red = weak password, green = strong password).
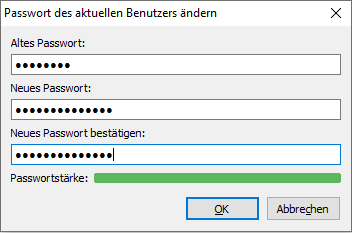
Change password
Manage authentication factors
Manage the authentication factors for using the ACMP Console via this menu item. These are required if you have activated multi-factor authentication and use the additional verification for the ACMP login. Click on Manage authentication factors and a new window will open, which is initially clear. Click on Add authentication factor ( ) in the top bar. A wizard will open and guide you through the process step by step.
Adding an authentication factor
To set up a new factor, you must first enter a name in the field provided.
If you have not yet installed an authentication app on your mobile device, you must do so now. The various apps (e.g. Google or Microsoft Authenticator) can be found in the Google Play Store or Appstore for download. If your company recommends a specific app, please use it. Now start the authenticator app on your mobile device and go through the necessary steps to add a new account in the app. Then scan the QR code from the wizard or enter the secret key manually into the authenticator. Continue by clicking on Next > to review the configuration and make sure that it has been successfully finished.
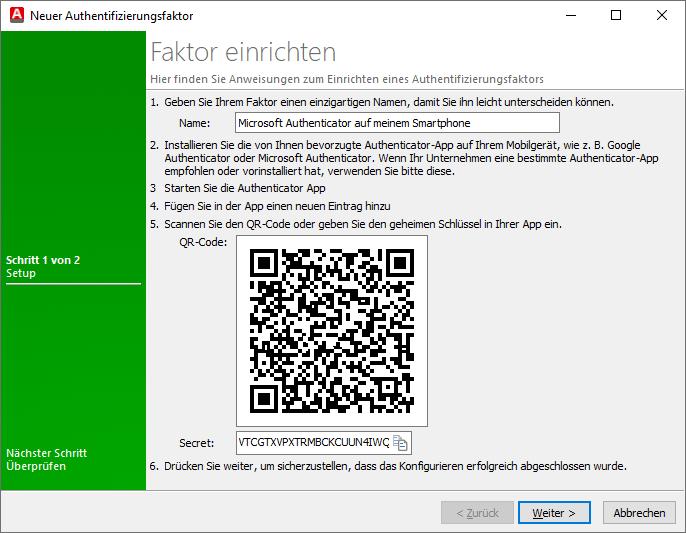
Set up authentication factor
On the second page, you have to verify the factor to enable multi-factor authentification. This is to check that the factor has been set up correctly. Have the authentication app open to enter the code that is displayed there. The six-digit code is renewed every 30 seconds. Enter the code and click the Verify button to verify that the configuration was successful.
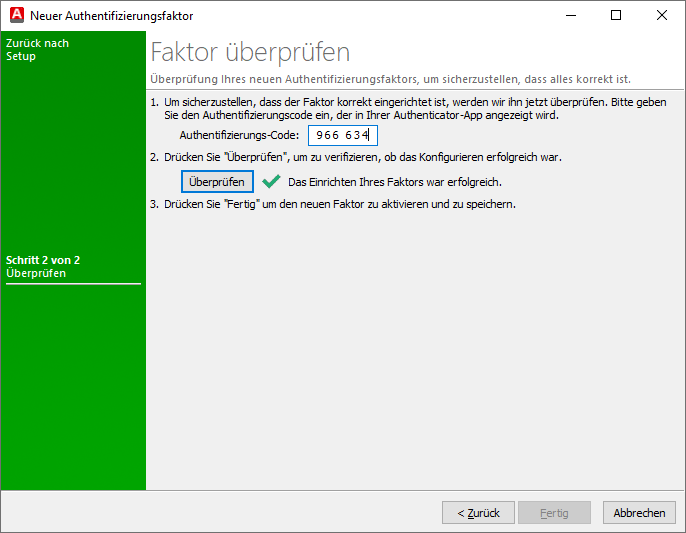
Verify authentication factor
If the verification is successful, you will see a message to that effect. If the setup fails, repeat the verification by entering a new code and clicking Verify again. Click Done to close the window. This activates the new factor and stores it in memory.
The newly added factor now appears on the Manage Authentication Factors pages. If you have created multiple factors, you can use the name to directly identify which factor it is, when you created it (creation date) and when it was last used.
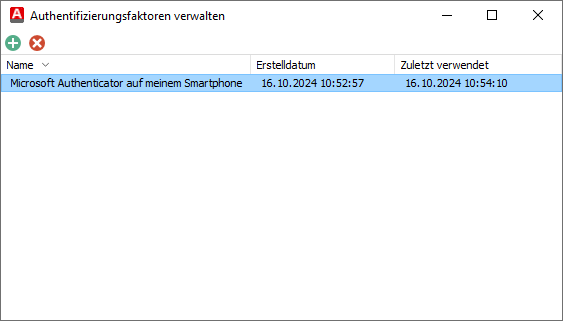
Overview of managed authenticationf actors
Delete authentication factor
To delete a factor, click on Delete authentication factor ( ) in the ribbonbar.
If the administrator forces the setup of multi-factor authentification, the last factor cannot be deleted. In this case, you must first create a new factor before you can delete the factor.
No changes can be made to existing factors. You can only delete them and create a new one if needed.
Display QR code for app login
You can use the menu item to simplify login to the ACMP app by displaying a QR code that you can scan.
Display tenant session information
When multi-tenancy is activated, information about the current tenant session is displayed.
Log out
You will be logged out of the ACMP Console, which will then close and open a new login window. If you want to log in again, enter all the required login information.