How to customize the BitLocker Management CI
Last modified by Sabrina V. on 2024/10/08 11:35
Content
Similar to other parts of the ACMP, as an administrator, you can customize the BitLocker Management dialogs to match your corporate identity.
Specifically, you can change the graphics for the following dialogs:
- Change encrypted drive password dialog (logo)
- Change system system start PIN dialog (logo)
- Reboot dialog box when encrypting the operating system hard disk (logo and banner)
To make these changes, first change to the ACMPClient agent installation directory (e.g. C:\Program Files (x86)\ACMPClient). Then copy the logo and optional banner images into this directory. Note the following information about the graphics:
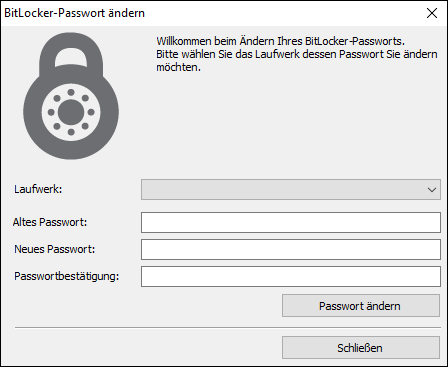
Dialogue for changing the password of encrypted drives (logo)
| Filename | Dimensions | Description |
| BitLocker_PasswordLogo.png | 128x128 | Here you can change the logo to include your own company logo, for example. |

Logo for changing the BitLocker password
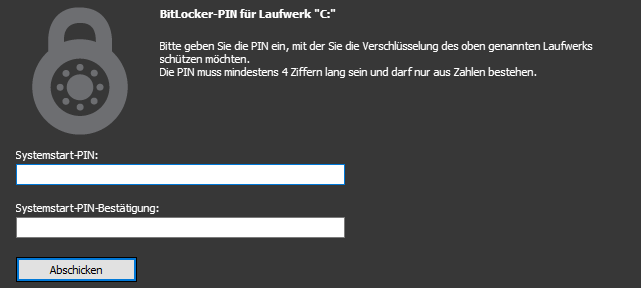
Dialogs for changing the system start PIN (logo)
| Filename | Dimensions | Description |
| BitLocker_Password_Logo.png | 128x128 | Here you can change the logo to include your own comany logo. |

Logo change of the BitLocker system start PIN
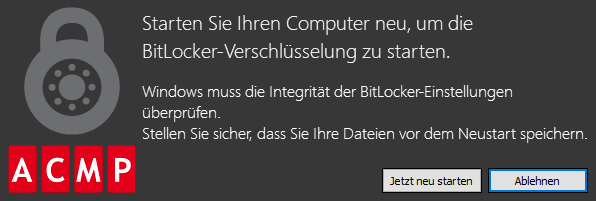
Restart dialoguie when encrypting the operating system hard disk (logo and banner)
| Filename | Dimensions | Description |
| BitLockerRebootOptionDialogLogo.png | 128x128 | Change the logo to include your own company logo. |
| BitLockerRebootOptionDialogBanner.png | 128x52 | The default banner contains ACMP. You can use your own company name here. |

Change the BitLocker encryption restart logo and banner


