


Assigning location Containers with file repositories
Initial situation
As a company grows and expands to include different locations, it can quickly become confusing for an administrator to keep track of which employees are working from where. So how can you ensure that you keep an overview and that every employee at each company location receives updates at the right time?
You can control all of this using the Container by grouping the clients dynamically. After creating a Container, the clients fall into the sorting, which means that you can always send the appropriate Updates, File Repositories or Client Commands to a group. By configuring and prohibiting multiple occurrences of a client, the Container also becomes ‘unique’ and a client may only be sorted into one Container. This allows you to replicate a site structure of your company, which prevents a client from appearing more than once in a Container structure. The client reports back to the ACMP Server at regular intervals. The server assigns the client to a Container according to its IP address, which you have previously created with the IP address filter for the purpose of site assignment. For example, if several locations of a company are in just one city or region, which allows for a changing workspace, you always have an overview of the location from which the Client is communicating with the ACMP Server. The basis for this are the different Containers, which you can replicate as a location structure, as well as the search filter of the primary IP addresses as a filter criterion for the classification. The primary IP address is the IP that the agent uses to connect to the server.
Each location Container can then be assigned a different File Repository, which the client then accesses and from which file repositories the clients should receive their updates, etc.
In the following example, the location structure of the company Aagon is simulated. You can build your own structure by following this example:
Preparation of the parent location Container
- Navigate to the Plug-In Container (Client Management > Container).
- Create a new Container by clicking on Add in the ribbon bar..
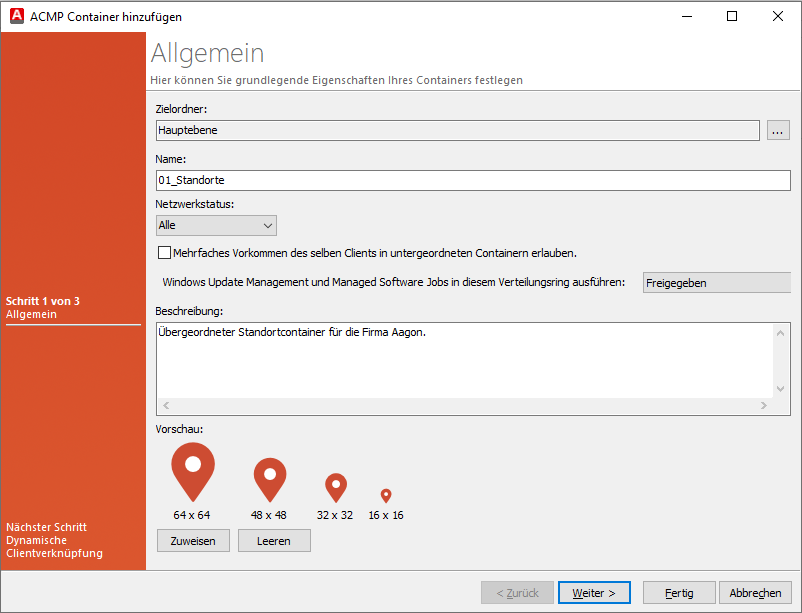
- Select the root level as the output directory.
- Enter a name for the Container (e.g. „01_Locations“).
5. Remove the checkmark from the checkbox Allow multiple occurrences of the same Clients in subcontainers. This makes the Container unique.
6. Optional: Select a suitable icon for the Container by clicking Assign.
7. Optional: Enter a description that you want to store for this Container.
8. Click on Done to close the wizard.
You have created a location Container to which you now have to add continuing Containers to reflect the location structure of your company.
Creating a parent location Container
Preparation of company locations as Containers
- Select the previously created ‘01_Locations’ Container by clicking on it.
- Now click on Add in the ribbon bar again. Based on the previous selection, you can now create a sub-container that represents a company location. The Add to ACMP Container wizard opens.
- Check that ‘01_Locations’ is selected as the output directory. If this is not the case, correct the information by clicking on the icon (
 ) and selecting the correct directory.
 - Enter a name. For example, you can enter the city in which your headquarters are located. The following example refers to the company Aagon, where the headquarters are located in the city of Soest. Accordingly, the container name is Soest.
5. Optional: Assign a suitable icon to the Container.
6. Click Next > and skip the page for the client relationship of this Container. Click Next > again.
7. On the Dynamic Client Linking page, you must select filters that dynamically link the clients to the Container.
To reflect the location structure, it makes sense to work with the ‘Primary IP’ entry.
8. Find the Primary IP entry.
9. Double-click the entry or drag the field to the right-hand side of the dynamic Client link.
10. Make sure that the top operator is set to AND.
11. Change the filter to ‘similar’. This will add all Clients with an IP address similar to this location.
12. Enter an IP address in the clear field that applies to this location. In this example, it is ‘192.168.110.%’. Check the IP address of your respective entry.
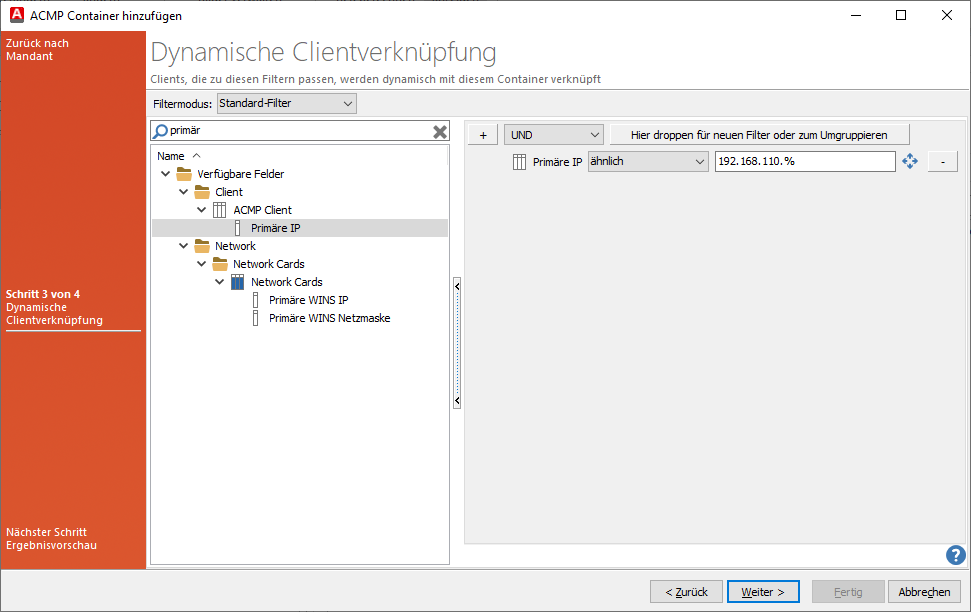
Dynamic Client link of a location Container
13. Click Next > to go to the next page of the wizard. The result preview opens, in which the Clients were found based on the filter results.
14. Close the window by clicking on Done.
The company locations must all be subordinate to the ‘01_Locations’ Container. Refresh your console from time to time and click on Recalculate in the ribbon bar after each new creation so that the Clients and the database are synchronised and reloaded.
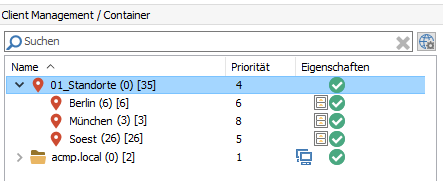
After finishing your work, there are now several Containers under ‘01_Locations’. In this example, Containers were also created for the locations Berlin and Munich, so that three fixed locations are integrated.
Container
Adjusting Container priorities
In the next step, you should change the priorities of the Containers so that they have the highest priority (the smaller the number, the higher the priority). The tasks are always processed one after the other, according to the priority of the Container. The priorities of the Containers can help you, for example, to ensure that updates are carried out in the correct order.
- In the open Container plugin, open the Modify structure and priorities action field in the ribbon bar. A new window will open, listing all your Containers.
- Switch to the Priorities tab.
- Click on the ‘01_Locations’ container and click on the Move to first position arrow (
 ) to move the higher-level location Container up.
The Container now has priority 1. - Now select the company headquarters (in this case, Soest) and then click on Move up on the right-hand side (
 ).
).
The Soest Container now has priority 2. - Repeat the procedure for the other locations so that all the containers for location management are listed in order of priority from highest to lowest.

Changed Container priorities
6. When you have finished working with the priorities, click Save.
The automatic display of the main view shows the changed order.
Assignment of file repositories
To ensure that the Clients in the location Containers receive the correct file repositories, you must assign these within the Containers. This allows you to determine where the Clients should obtain their data for Client Commands and Updates and, based on the locations, decide whether there should be any restrictions.
- Select the previously created location ‘Berlin’ within the Container structure. This location has its own file repository from which the Clients download their data.
- Click on the File Rep./Updates tab in the detail view.
- Now click on Cancel in the ribbon bar. A window will open in which you have to confirm the security question to cancel the inheritance of the Container. The second option ‘Do not apply. The list of file repositories will be cleared’ must be selected.
- Now assign the file repository from Berlin to the site Container by clicking ‘Add’.
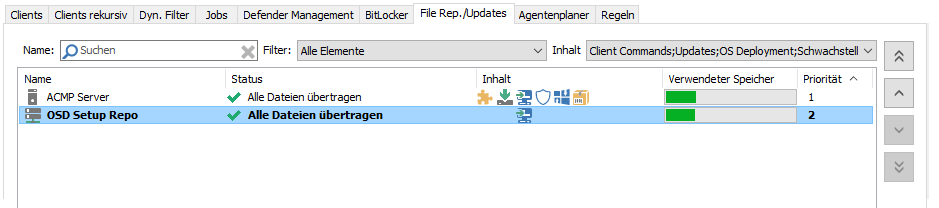
Changed priority in the file repository
5. Exit your work by clicking on Save memory.
The File Repository is displayed in the overview next to the respective location Container ( ).
).
6. Repeat the steps in this section to also assign the corresponding file repositories to the other locations.
Refresh the view. All locations of your company must now be listed.
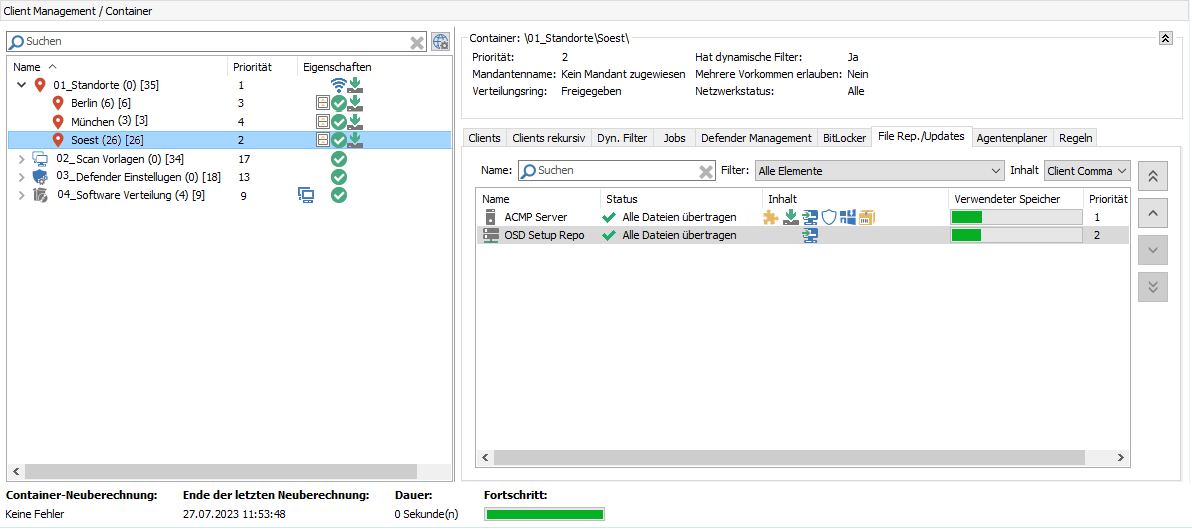
Overview of the location Containers
You can now distribute Updates via your software distribution Container. The Clients download the data in the location and not over the Internet from the ACMP Server by assigning the File Repository. As soon as the ACMP Agent communicates with the Server (for example, when a user logs on to the Client), the primary IP is updated and the Client falls into the correct Container.