


Container Export
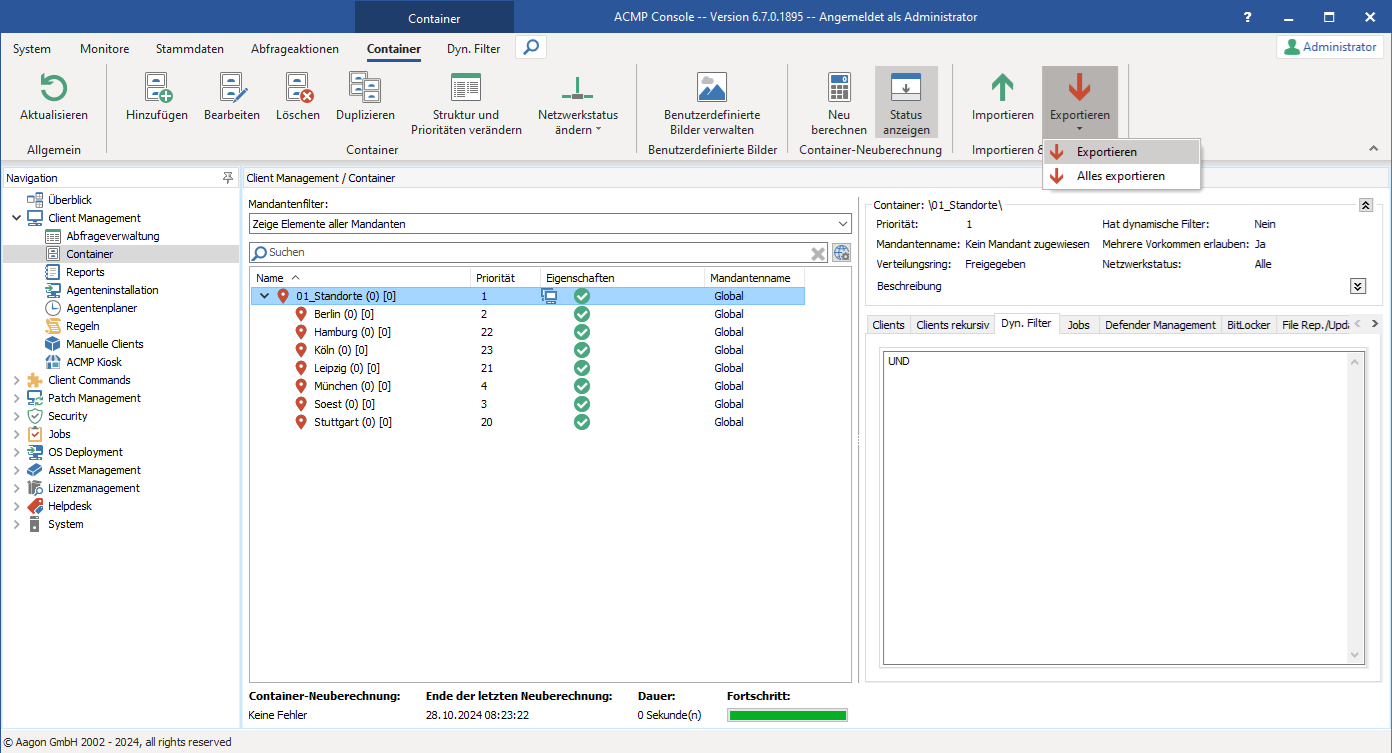
The export of Containers can either be selective to refer to an entire Container structure. A distinction is made between the two options Export (![]() ) and Export all (
) and Export all (![]() ). Select the appropriate option for you and call up the function either via the ribbon bar or via the context menu.
). Select the appropriate option for you and call up the function either via the ribbon bar or via the context menu.
Export
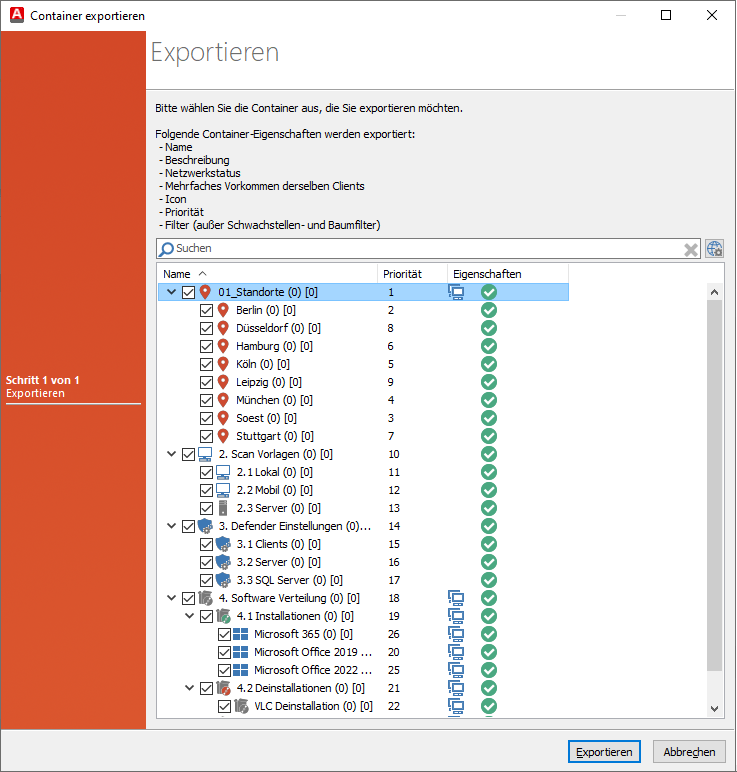
If you want to export a container (and its sub-containers), select it and click on Export (in the following figure 01_Locations).
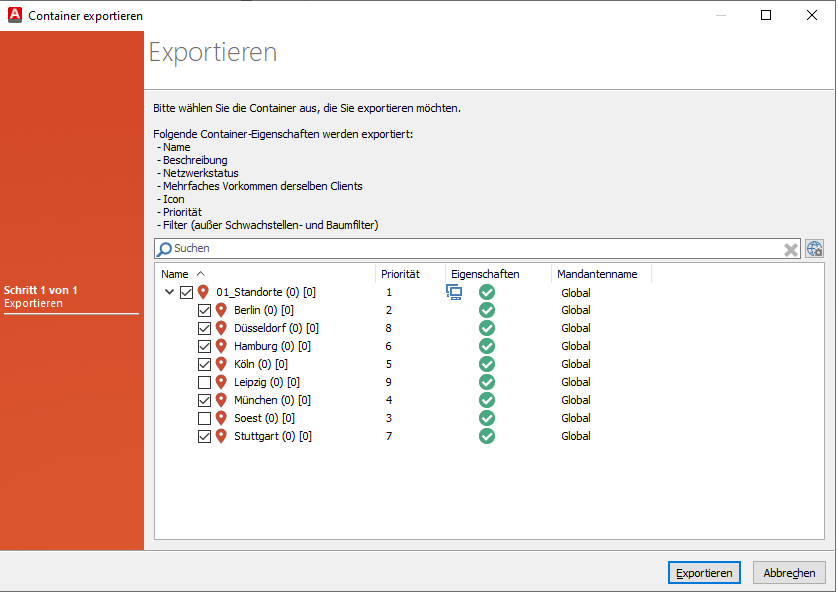
Select container structure for export
It is also possible to export Containers that are not root Containers. To do this, select the Berlin Container from the existing Container structure, for example, and export it. In the export wizard, only one export will be displayed. A one-page wizard opens, which now displays the Container and its sub-Containers for an export. You can deselect entries in the overview by removing the checkmark from the respective checkbox if you want to exclude them from the export.
If you select a sub-Container for export, its parent Container (and thus also its parent Container up to the highest Container displayed) is automatically selected.
Part of the Container properties are also transferred with the export: Name, Description, Network status, Multiple occurrences of the same Clients, Icon, Priorities and Filters (except vulnerabilities and tree filters). Please note that the following properties are not exported, for example: Tenant and client assignments as well as BitLocker and Defender Management configuration profiles.
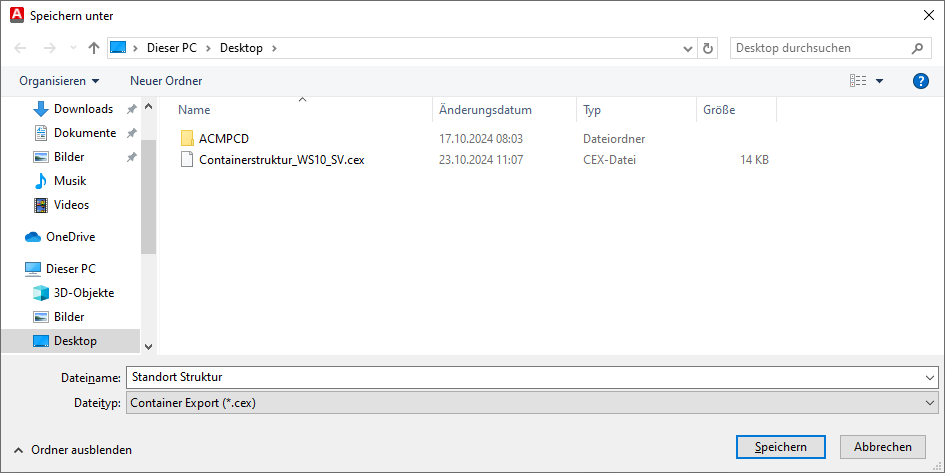
Export Container
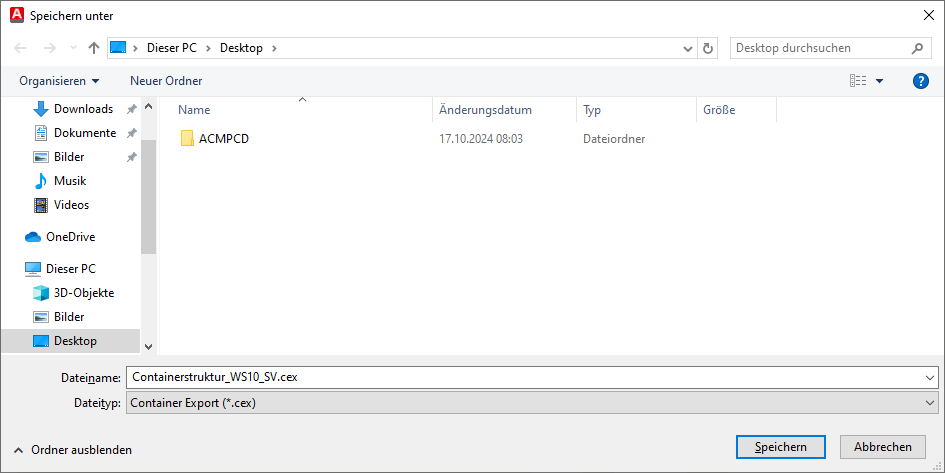
Check your selection and then click on Export. A window opens in which you can select the storage location and a file name. In this example, the export is saved as "Location structure". The file type is a .cex format. Click on Save and the file will be created in the location you have selected (e.g. desktop).
Save export file
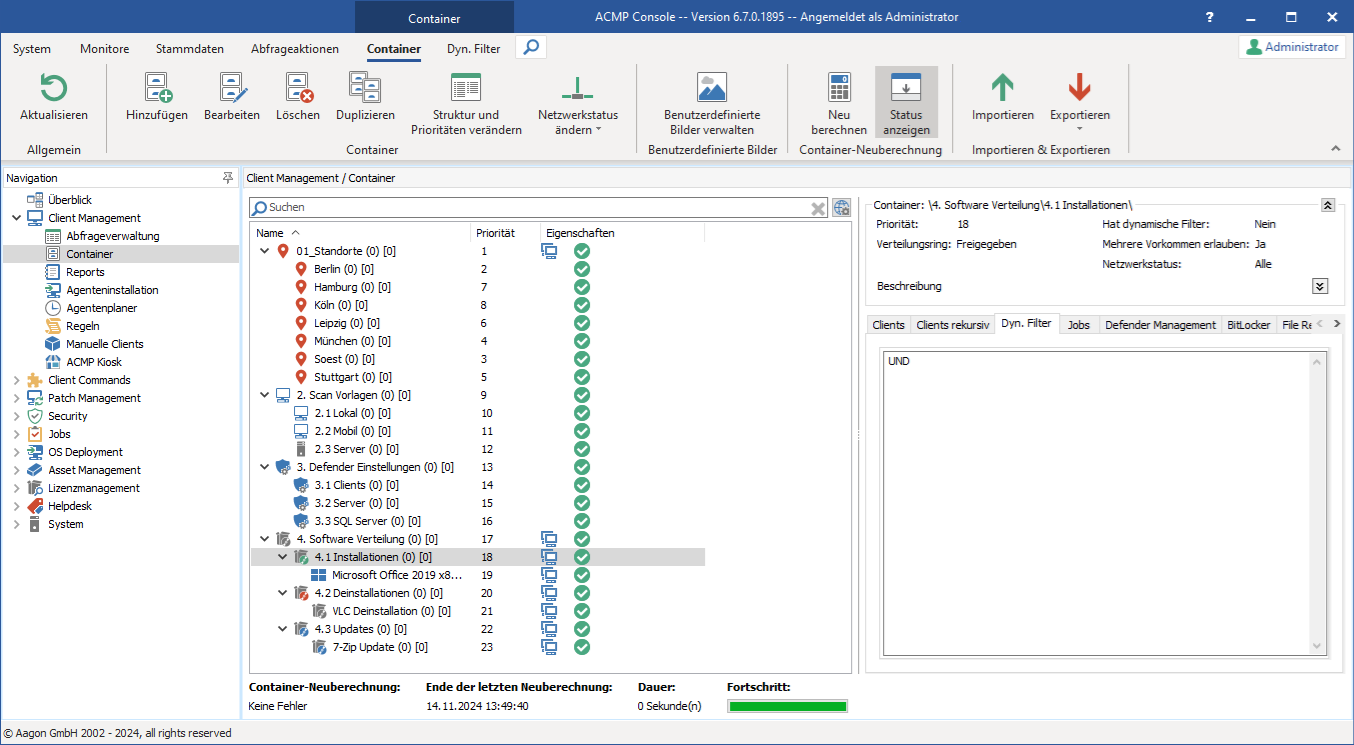
The export for selected Containers and sub-Containers has now exited.
Export all
If you like to export a complete Container structure, click on Export > Export all (![]() ) in the ribbon bar or call up the actions via the context menu. The current Container structure, as it is in your plugin, is taken into account 1:1 for the export. With the export option, it is not relevant which Container level you are in, as all entries are included. A one-page wizard opens, which maps the entries.
) in the ribbon bar or call up the actions via the context menu. The current Container structure, as it is in your plugin, is taken into account 1:1 for the export. With the export option, it is not relevant which Container level you are in, as all entries are included. A one-page wizard opens, which maps the entries.
Preparing the entire Container structure for export
By default, all entries are selected for export and are taken into account. If you want to deselect individual entries, uncheck the respective checkboxes and click on Export.
Part of the Container properties are also transferred with the export: Name, description, network status, multiple occurrences of the same Clients, icon, priorities and filters (except vulnerabilities and tree filters).
Export option
Check your selection and then click on Export all. A window opens in which you must select the storage location and enter a file name. In this example, the export is saved as "Containerstruktur_WS10_SV". The file type is a .cex format. Click on Save and the file will be created at the location where you saved it (here: Desktop).
Save export file
An export file has been created for the entire Container structure.