ACMP Update
General
ACMP Update is used to distribute, manage and install ACMP Updates. You can use the plugin to view all available updates, download them directly and distribute them.
The Update process consists of three steps:

Update process of ACMP Update
1. Download Updates
Updates are first downloaded from the Aagon web server using the ACMP console and stored on the ACMP server. The ACMP console needs internet access for this.
2. Manage Updates
The previously downloaded updates need to be shared. This allows the ACMP Agents to receive the pending updates and cache them locally before installing them on the ACMP Server. During this distribution, the ACMP Agents obtain the ACMP Updates independently from the distributed file repositories (see distributed File Repositories), if you have made them available.
3. Installing Updates
The ACMP Updates can only be installed after the previous phases have been completed. You can conveniently initiate the installation of the Update via the ACMP Console, which initiates it on the ACMP Server. As soon as an ACMP Agent tries to log on to the ACMP Server after the Update, it will detect that it needs to update itself. It will use the locally cached or parked Update. If this is not available or is out of date, the update is downloaded from the ACMP Server (see Agent Tasks).
The update process goes through several stages (Downloaded, In Distribution and Installed). The following status will be displayed:
| Status | Meaning |
| Downloaded | The Update has been downloaded from the Aagon update server and saved on the ACMP Server. |
| In Distribution | The Update is released for distribution and can be deployed to the ACMP Clients. |
| Installed | The Update has been installed on the ACMP Server. The installation on the ACMP Clients is started as soon as the Client has all update files and logs on to the ACMP Server. |
Configure ACMP Updates
To perform an ACMP Update, navigate to System > ACMP Update. When you open the menu for the first time, you will be guided through a wizard that will help you with the configuration. You can call up the wizard at a later time via the System > Help > Display ACMP Updates First Steps ribbon bar.
The following diagram illustrates the steps you need to take before an Update can be deployed to your Agent or one of your Clients. Click on Configure ACMP Updates to open the First Steps Wizard.
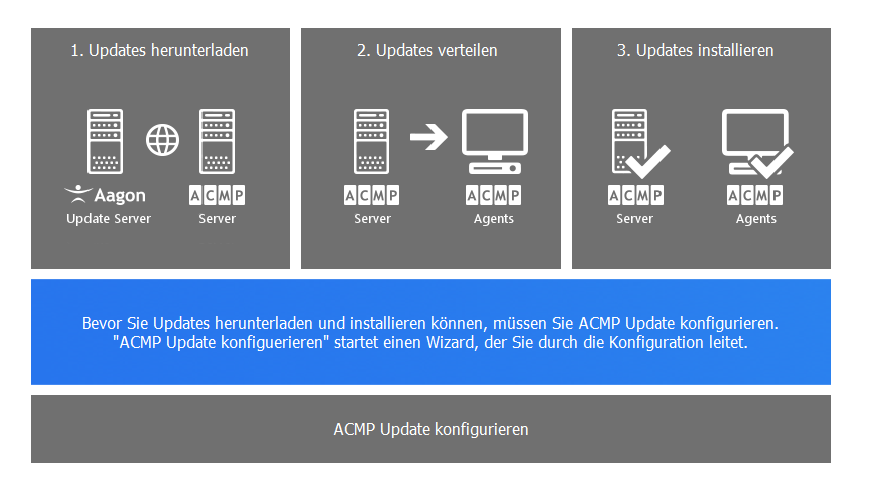
ACMP Update Configuration
On the first page, specify which proxy settings are to be used when downloading Updates. To do this, enable the Use proxy checkbox, otherwise the first option Use system proxy settings will be automatically applied. The settings refer to the information you entered under System > Settings > ACMP Server > Server proxy configuration. Enter a proxy address and the HTTP port. If the proxy uses authentication, also enable this checkbox and enter a username and password. Then test the connection and check that your entries are correct.
Click on Next > to continue with the Update settings.
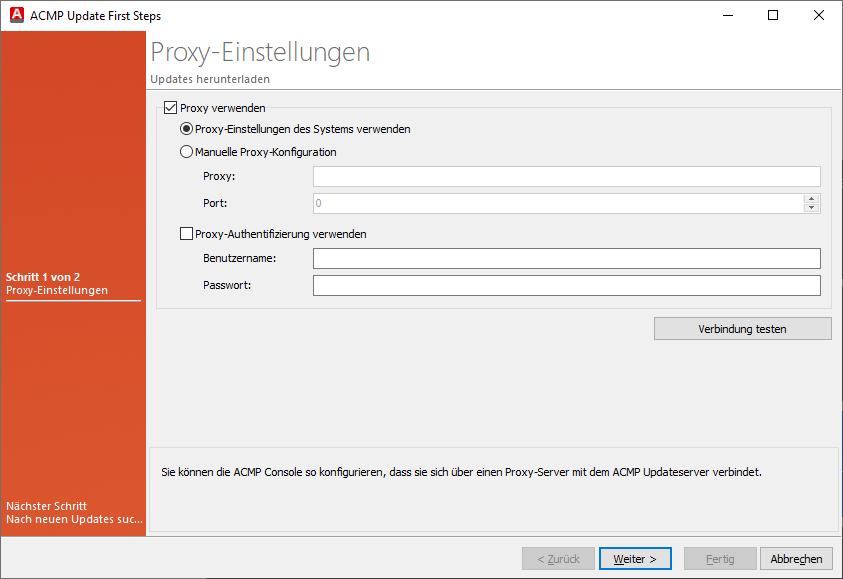
Proxy settings of the ACMP Update First Steps Wizard
Specify the intervals at which the ACMP Console should automatically find new Updates. Enter your interval in days; the default value here is to find new Updates every five days. Tick the box Show info dialog in case of new Updates if you also want to be informed. A dialogue will inform you about new Updates when you start the ACMP Console. Otherwise, if Updates are available, a warning triangle is always displayed in the navigation next to ACMP Updates. Click on Finish to close the wizard.
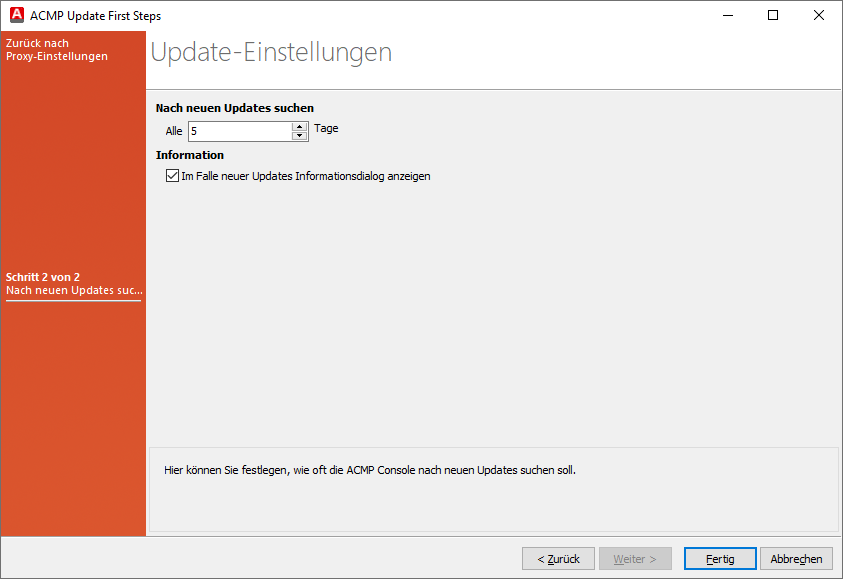
Update settings in the ACMP Updates First Steps Wizard
You have finished the initial configuration for the ACMP Updates.
After successful setup, the ACMP Updates is divided into three tabs: Download Updates, Manage Updates und Configuration.
Download Updates
The Download Updates tab lists all available Updates, their version and size, and the release notes for that version on the right. To download a new update, click the Download button in the ribbon bar. A new window will open showing the progress of the download. Once the Update has been downloaded, it will disappear from the list of available updates and will be listed under Manage Updates.

Download Updates
Manage Updates
The Manage Updates tab provides various information about the updates: In addition to the version number, the status (Downloaded, Installed and In Distribution) is displayed, as well as the Distribution Level and Distribution Information. The Distribution degree shows the progress of the Distribution using a progress bar and a percentage. The Distribution Information shows how many Clients have already cached or parked the Update (this information can also be accessed via the „Parked ACMP Updates“ display field). The Distribution start and Installation dates give you a time component of when which Update was put into circulation. These historical dates allow you to track certain workflows at a much later date. If you have a large number of updates installed, you can use the search field and filter by specific version numbers. The ribbon bar can be used to distribute and install Updates, or to view information about selected versions (Release Notes). You can use the button provided to integrate Updates offline.
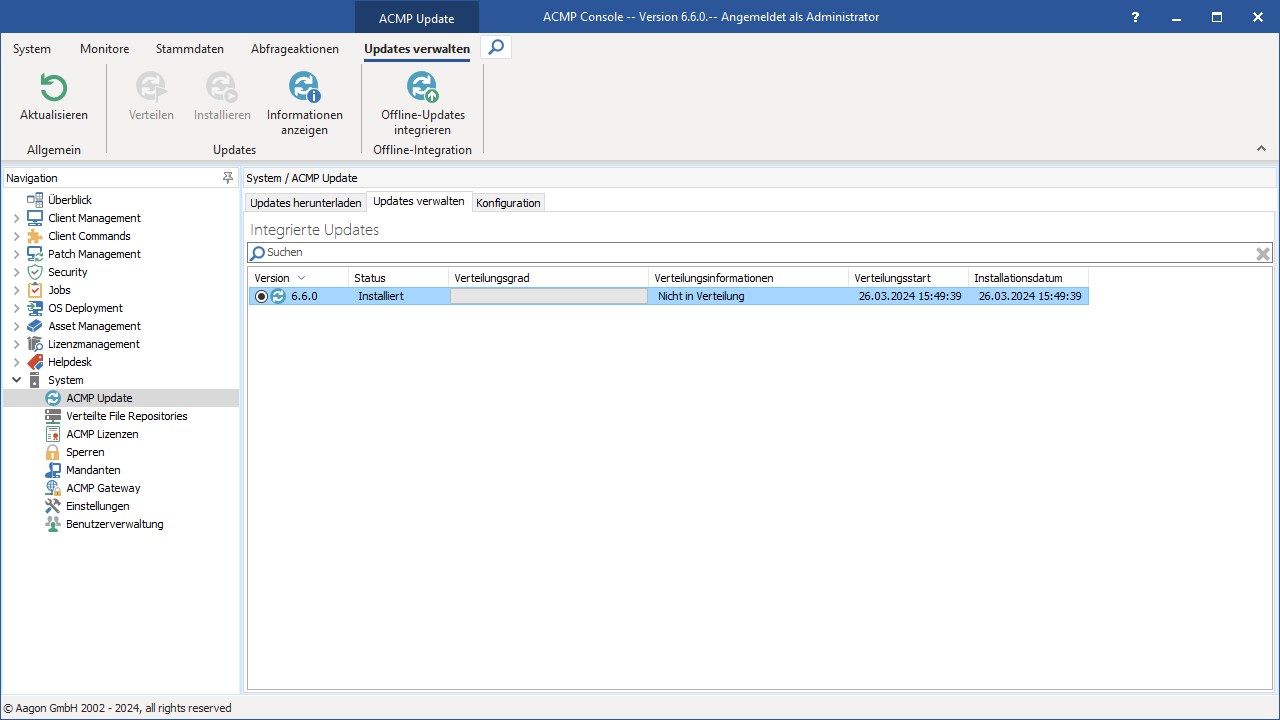
Overview of managed Updates
Integrate Offline Updates
Click on Integrate Offline Updates in the ribbon bar. A wizard will open where you can insert the ZIP files so that ACMP can read them as offline Updates. To do this, click on the plus icon (![]() ) and select all the ZIP files in your Updates directory that you want to insert into the system.
) and select all the ZIP files in your Updates directory that you want to insert into the system.
Click on Open to close the window and return to the wizard where the selected files are located. To remove any of the files, select an entry and click (![]() ) or press Delete.
) or press Delete.
Continue by clicking on Integrate.
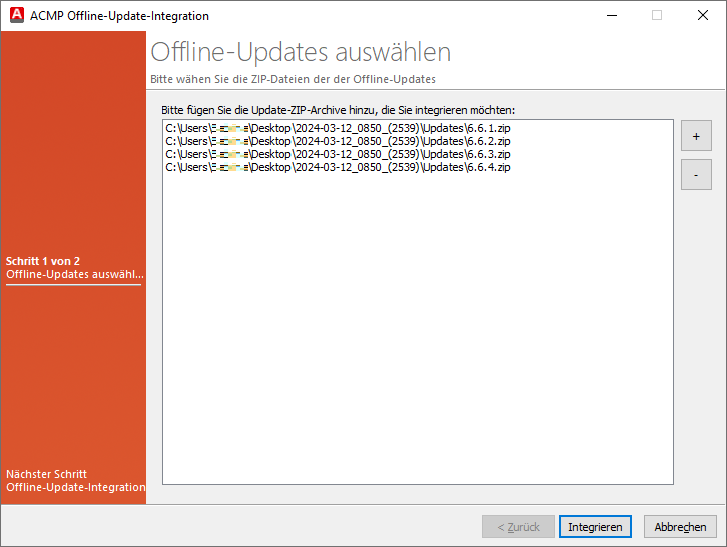
Select Offline Updates
ACMP Updates starts to integrate the Updates, going through the same steps for each ZIP file uploaded: The update signature is checked, then the ACMP Update file is transferred to the server and then the ACMP Updates are integrated on the ACMP Server. This is to ensure that only functional Updates are integrated. The integration of the Updates is only completed when all files have been successfully integrated. Exit the wizard and click Finish.
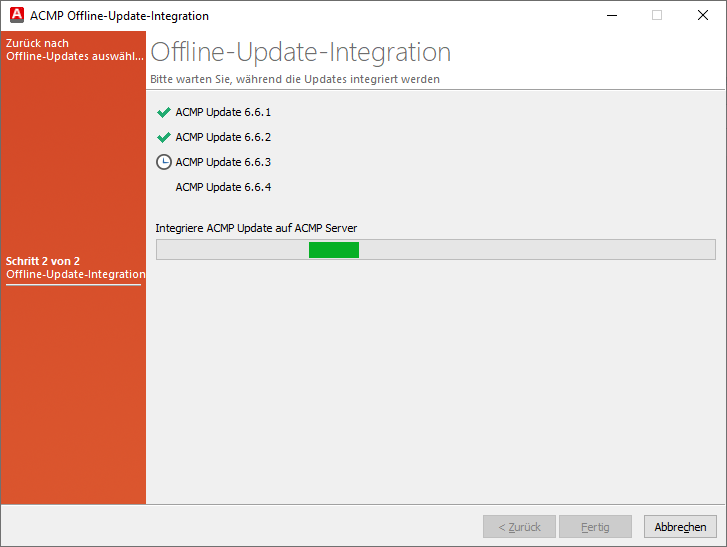
Offline Update Integration of the files on the ACMP Server
The main view of the plugin will now list the newly added Updates, which you can now share and install.
Distributing Updates
Before you can distribute an Update, you must first download the appropriate version. Start by selecting the required version from the downloaded entries and click on it. Click on Distribute in the ribbon bar. A dialogue box opens, which you must confirm in order to start deploying an update. The Distribution will start and the status will change (Downloaded > In Distribution) and you can see from the Distribution Information how many Clients the Update has already been parked on.
Use the Show information button in the ribbon bar to display the Release Notes for the relevant version.
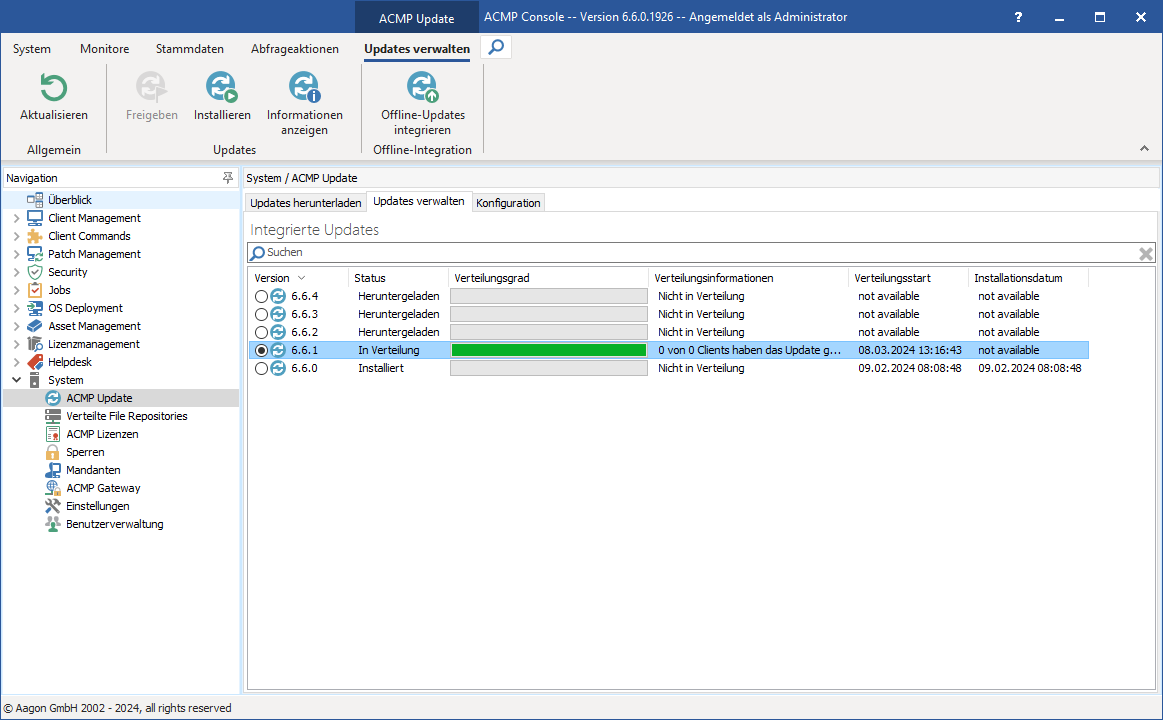
Distribution Update version
Installing Updates
Select the version of the Update that you have previously released for distribution and click Install. A wizard will open to guide you through the installation. Read the installation instructions on the first page and tick the "I have read the installation instructions" box to click Next >.
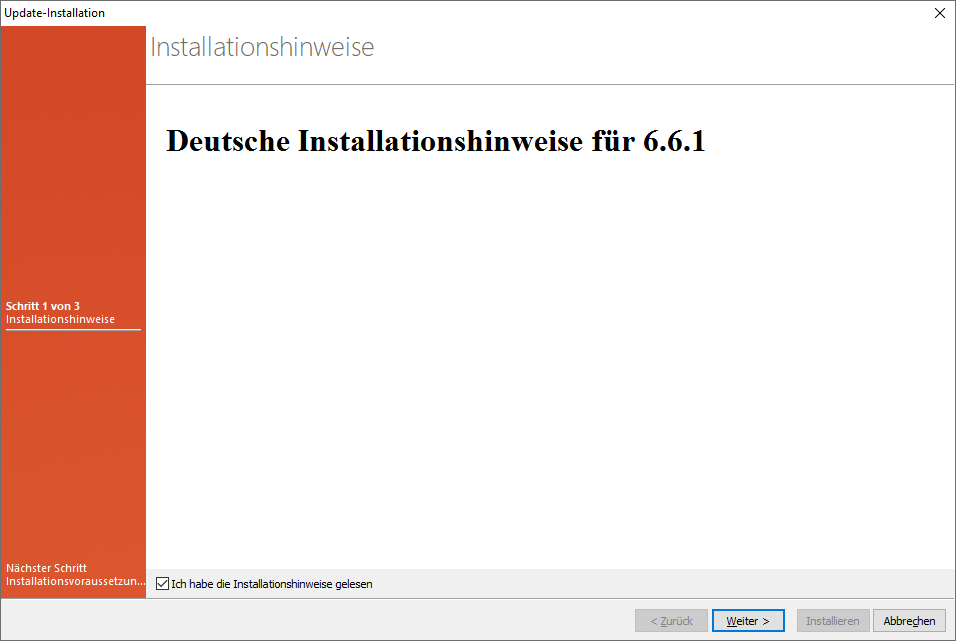
Installation instructions for the Update version
ACMP checks the necessary requirements for a successful installation in the background. The wizard can only continue if all criteria are met. The installation requirements include the presence of all update files, ACMP support for SQL Server, ACMP compatibility with SQL Server and ACMP access to the database.
Click Next > again.
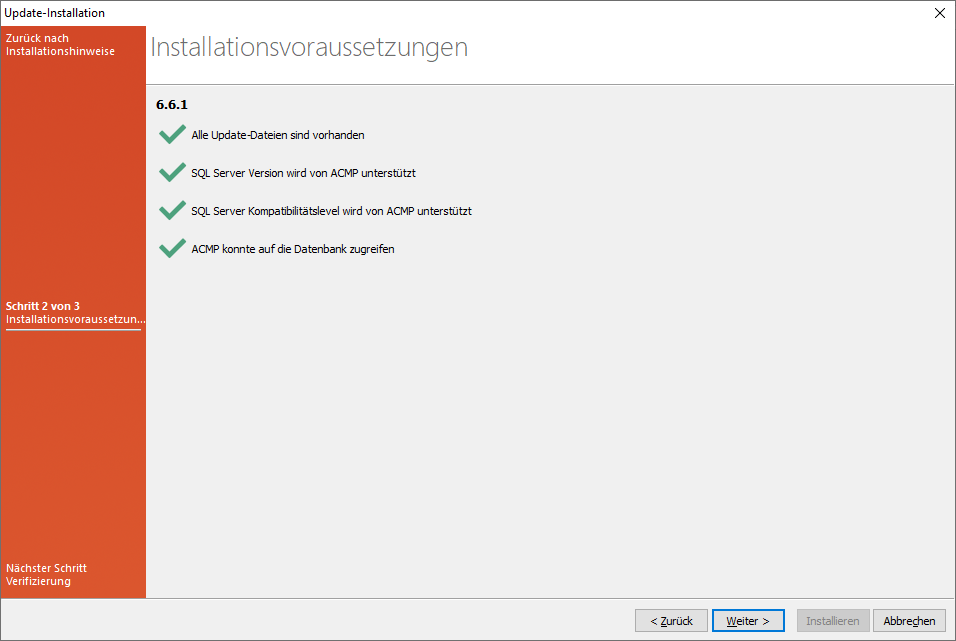
Installation requirements for the Update
You must check the checkboxes for verification before you can start the installation. The three checkboxes assume that you have done all the necessary preparations for installing an ACMP Update. This includes that you have saved a new and functional backup of the ACMP database and the ACMP Server directory and that you are satisfied with the agent distribution level.
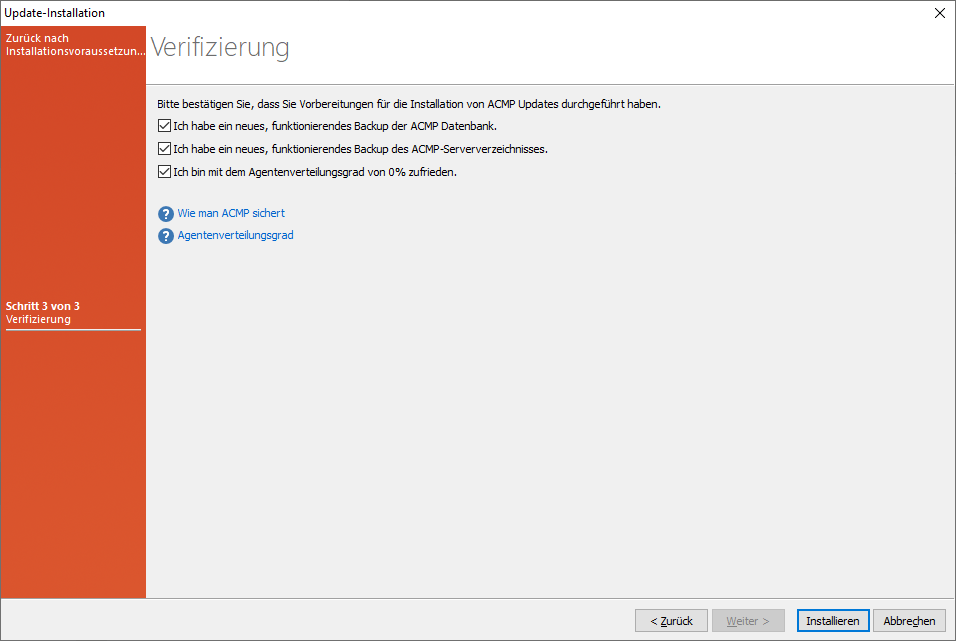
Verification of the installation preparations
Finally, click on Install.
The Updates will now be installed on the ACMP Server. As soon as the Update is finished, close the information window and the ACMP Console will restart automatically.
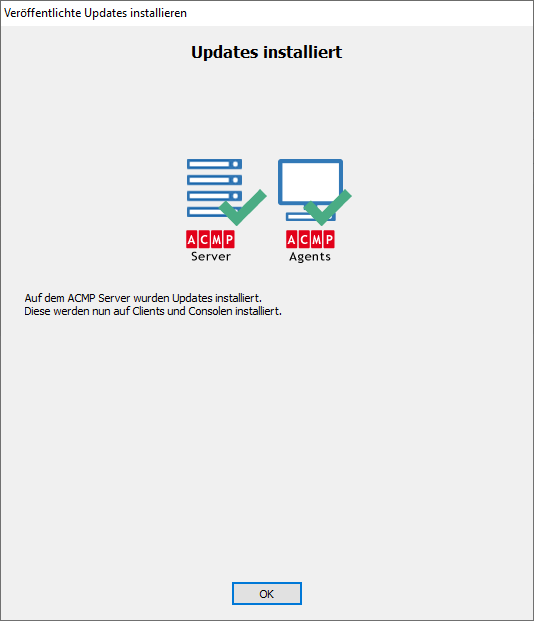
Information window after a successfully installed Update
Log in to the ACMP Console again to download the Updates and install the new version on your Client.
Configuration
The configurations allow you to store proxy and update settings that will be taken into account during the update process. You will have already configured all of the following settings when you run the wizard for the first time. This tab is used to make subsequent changes, such as the time interval for finding new updates or different ports and proxy settings.
| Section | Description |
| Proxy settings | You can use the connection properties to configure a proxy Server through which the ACMP Console connects to the Aagon Update Server. To do this, check the Use proxy box and select one of the available options (Use system proxy settings or Manual proxy configuration). In the case of manual proxy configuration, enter the proxy address and proxy HTTP port. If the proxy uses authentication, also select this check box and enter a user name and password. Then test the connection and check that your entries are correct. |
| Update settings | Configure an interval after which the ACMP Console should automatically find new Updates (specified in days). Check the box Show info dialog in case of new Updates if you also want to be informed. |
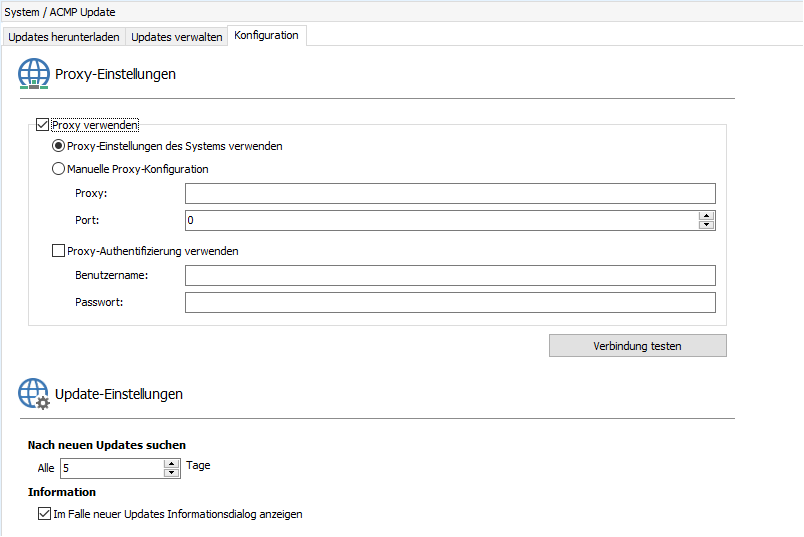
Update configuration
Special features of the ACMP Updates
Below you will find some special features that need to be considered in connection with the ACMP Updates:
| Speciality | Erklärung |
| Setting up deployed file repositories | Optimise the distribution of Updates in your ACMP environment by setting up distributed file repositories (see Distributed file repositories). This procedure is particularly recommended for companies that have several locations. |
| Degree of distribution of Updates | The distribution level of Updates is calculated based on managed Clients. Manual Clients and Clients that have been inventoried via the OneScanClient are not taken into account. |
| Updates of other components in connection with ACMP (e.g. Web Interfaces of the Helpdesk or AESB) | After installing an Update of a component that is used in connection with ACMP (e.g. the Web Interface of the Helpdesk, AESB, ACMP Gateway or Notifier etc.), it may be necessary to reinstall the respective component. In such a case, you will be informed via an information dialogue. You can read more info on the installations and Updates of the additional components here. |
| Version sequence of patches | The Manage Updates tab displays the Updates in the order in which they were released by Aagon. You must also adhere to this order during network share and installation so that they can be installed correctly. When an Update is deployed, all older Updates that have not yet been deployed are also released. The procedure for installing Updates is the same. |
Notes on the Update
In preparation for an Update, you should first disable any additional ACMP components that may be present. This includes the following examples:
- ACMP AD Agent
- ACMP AD Connector
- ACMP Data Gateway
- ACMP Data Proxy
- ACMP Notifier
- ACMP WMI Scanner
- ACMP XML Importer
- Contact Adapter
- Container Adapter
- Network Boot Service
Next, create a backup of the ACMP database. Detailed instructions on how to create a backup can be found here. Also backup the ACMP Server directory (%PROGRAMFILES%\ACMP), the ACMP settings from the registry (HKEY_LOCAL_MACHINE\SOFTWARE\AAGON or HKEY_LOCAL_MACHINE\Wow6432Node\AAGON) and any remote file repositories.
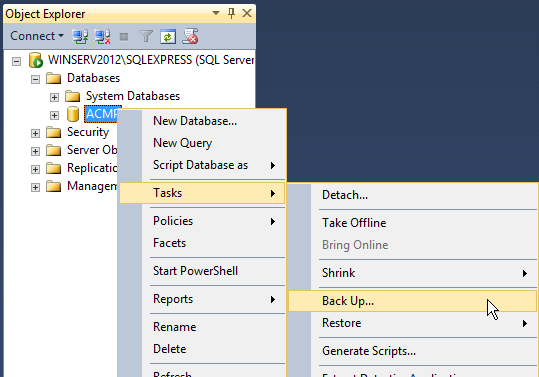
Backing up the database using SQL Server Management Studio
Also check the following:
- Is there enough disk space available for the Update?
- Are all users logged out of the ACMP console, or have they closed the Console?
- Is the virus scanner temporarily disabled for the Update to ensure a smooth process?
Also make sure that you do not run the update at times of high load when the ACMP Server is running other tasks in addition to the ACMP service.
Manual Agent installation using the Launcher.exe
You can run the Launcher.exe file in the C:\Program Files (x86)\Aagon\ACMP Server\Clients\Client directory or its network share to start an installation.
No further information is required as all settings are automatically taken from Settings.ini (C:\Program Files (x86)\Aagon\ACMP Server\Clients\).
Note for missing administrator rights:
If you do not have administrator rights to run the agent installation, the Launcher.exe will contact the Server and initiate a server-side push process if configured.
Note for installation outside the internal corporate network on agents that are to report via the ACMP Gateway:
The share directory can be copied to a USB stick. Launcher.exe can be executed in the usual way. If there are ZIP files in the Launcher.exe directory with the machine name and the Gateway certificates as content, the certificate for the machine will be installed. For example, a client with the machine name can first be inventoried using the Offline Scanner and then a certificate can be created for it using the Gateway plugin (ACMP Gateway > Manual Deployment) and stored on the USB stick.
ACMP Console Update Service in the Windows system service
With ACMP version 6.6.0 there is a new service that you can use to manage the ACMP Console Updates service. Open the command prompt on the PC by pressing the [Windows] and [R] keys simultaneously. The „Run“ command opens. Type services.msc and confirm with OK. Locate the above service in the list. In general, the service ensures that consoles can be updated even without the appropriate rights. The update service runs in the background while the update is being downloaded. If you have administrator rights, you can exit, stop or restart the service from the left hand pages, otherwise the service will only be visible to all other users.
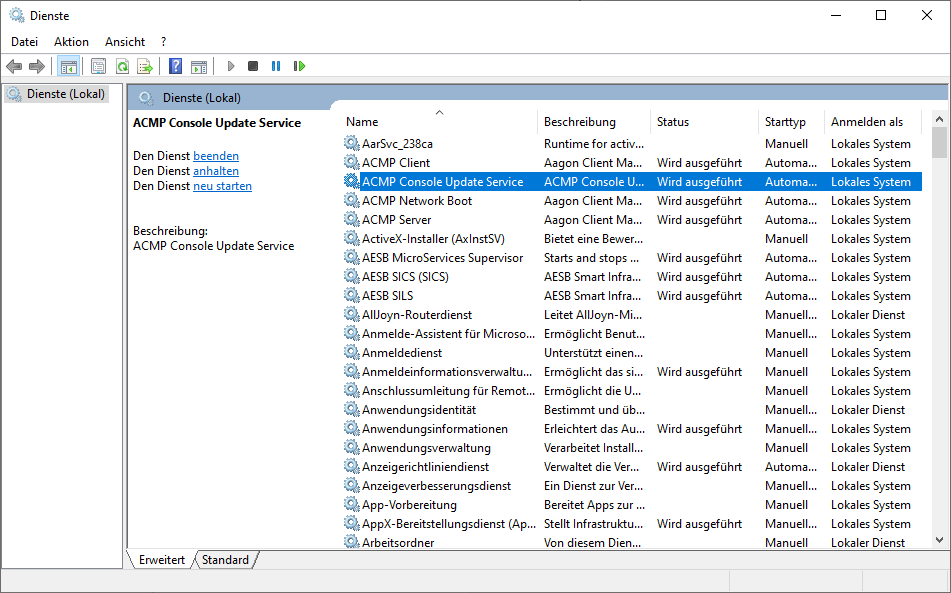
Windows services for the ACMP Console Update Service


