Asset Management
The figure caption must be located inside a figure macro. Click on this message for details.
The Preferences allow you to make individual configurations for your Asset Management. For example, you can specify the sorting of entries or columns, which reports are available as a 'quick view' for an Asset Print, and whether or not to allow duplicate Assets. The Asset Management settings are divided into four sections: General, Print, Import and Inventory number.
General
The General Asset Management settings allow you to define the query and status configurations.

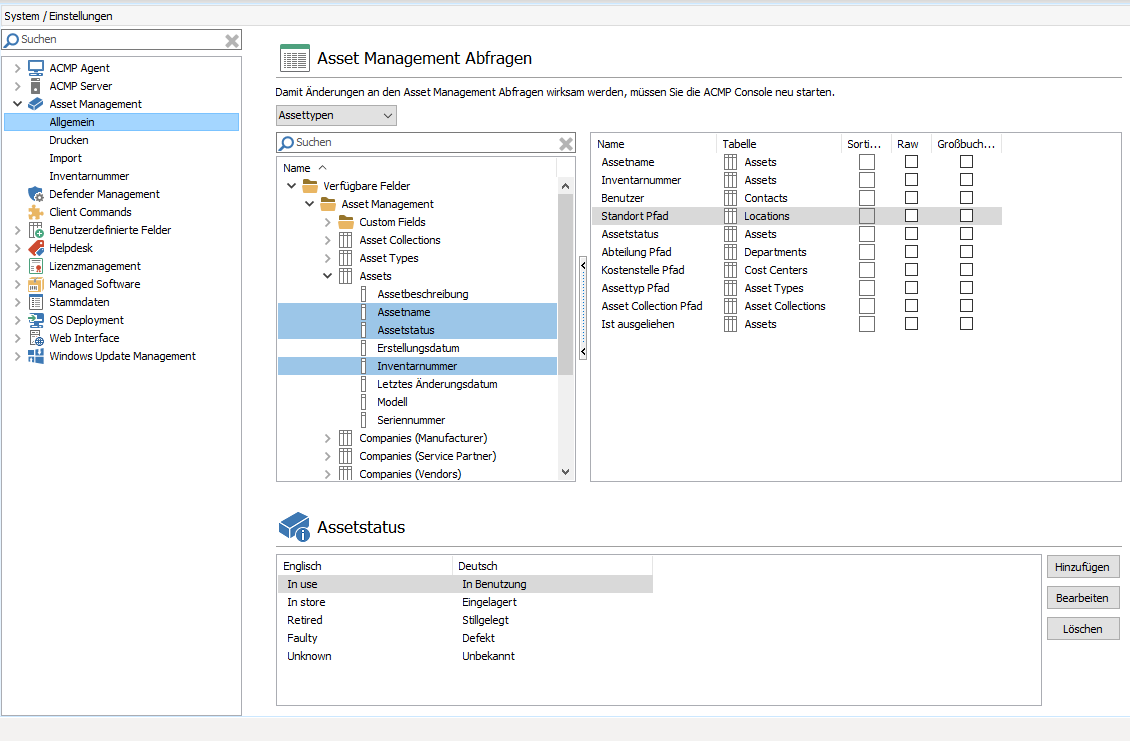
Configuring Asset Management queries and status
For Asset Management queries, you can again first select a specific category to which the changes should relate. You can choose from Asset Types, Locations, Departments, Cost Centres and Asset Collections. Select the appropriate category. On the left hand side is a list of all the fields available for Asset Management, which you can assign to the default queries with Basic Asset Management. On the right are all the database fields that will be displayed in the Asset Management module in the relevant category. To change the order of the entries, you can select a field with a mouse click and drag it to any other position. Entries can also be removed by double-clicking on them. Note that the changes will not take effect for the relevant Asset Management categories until you click Save.
You can define different statuses under Asset Status. The console is delivered with the following statuses: In use, In store, Retired, Faulty and Unknown. You can edit or delete any of these default statuses, or add completely new ones. If you add a new state, you will need to enter both an English and a German title. The caption is displayed according to the selected language of the ACMP console.
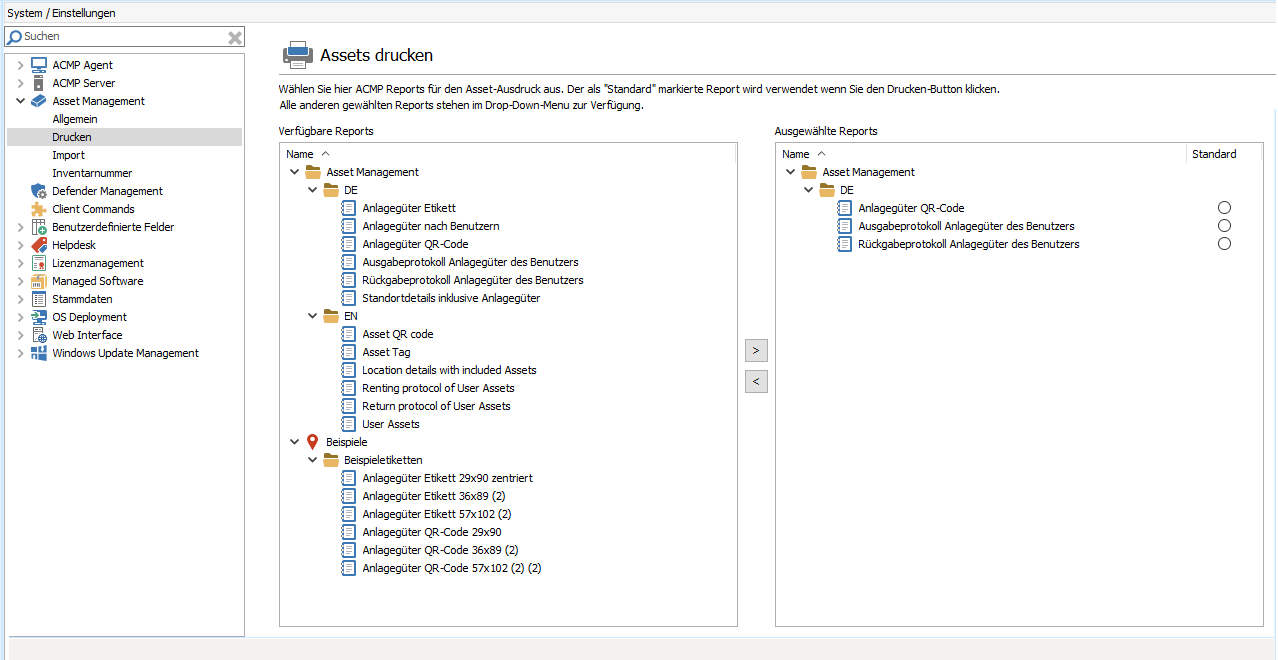
Specify which reports are available for printing when using the Preview and Print action fields on the ribbon bar. Only reports based on Asset Management will be displayed. To select such a report, use the arrow keys or drag and drop the required report. To set a report as the default, select the appropriate entry. The report selected as the default will be used when you click the Print button. All other selected reports can be found in the drop down menu below the Print button.

Print Assets
Import
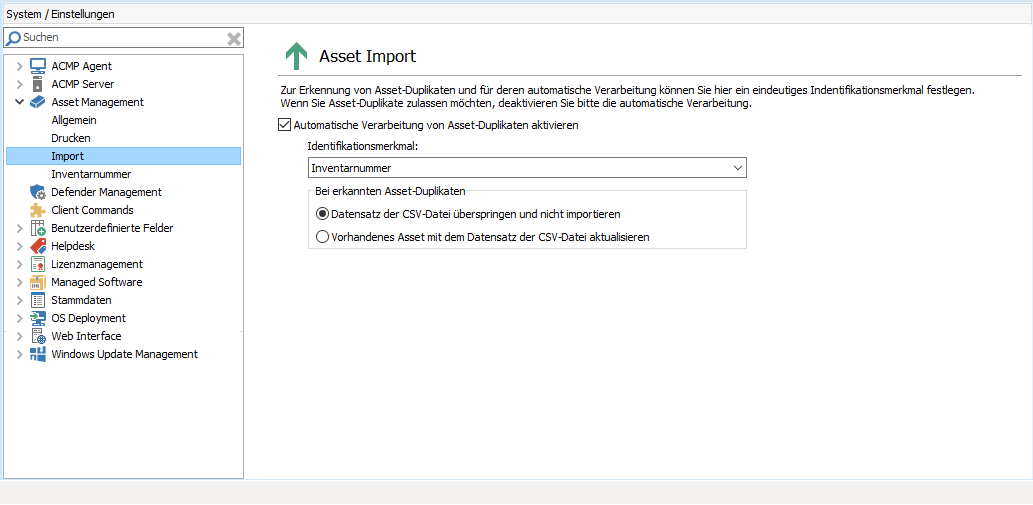
You can enable or disable the automatic processing of asset duplicates when importing assets. You can enable this setting under Import by ticking the checkbox. This option is disabled by default.

Asset Import
If you allow duplicates to be processed, you will need to specify both a unique identifier and the processing method. The default is the inventory number, but you can also choose your own (based on the fields available in the Asset Management query base).
If duplicate assets are detected, there are two options for how to proceed: either skip the CSV file record and not import it, or update the existing asset with the CSV file record. Select the appropriate option.
Inventory number
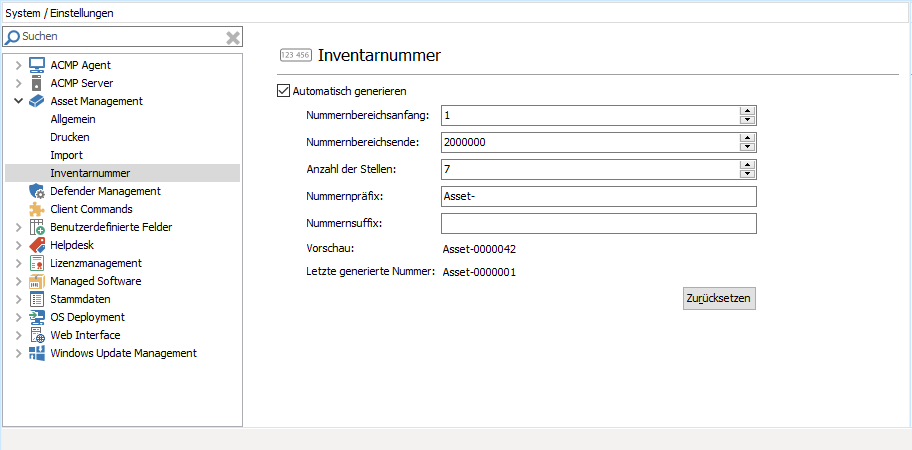
The inventory number is the default inventory number for asset types without an inventory number profile and is used when you add a new asset to Asset Management. The number profile is a scheme from which the asset number is generated. Any changes you make to the default asset number apply to future actions and are not retroactive. For example, if you customise a number prefix, the changes will only apply to new entries. Individual inventory numbers can be generated for each asset type and controlled via the number profiles.

Configuring Asset Numbers in Asset Management
If you want the asset number to be generated automatically, tick the box. In the settings you can define both the start and end of the number range. You can also specify how many digits the auto-generated asset number should have. Customise the number prefix and/or suffix. You can preview the current information and the last number generated. You can use the Reset button to reset the last inventory number generated.


