


ACMP Intune Connector
Microsoft Intune is a cloud-based solution that helps you manage your mobile devices. It allows you to remotely manage devices, secure access or even lock them down. With the ACMP Intune Connector, you can inventory the devices from Intune in ACMP and send the most important actions to the devices from ACMP.
Requirements for using the ACMP Intune Connector
To use the ACMP Intune Connector, the following requirements must be met:
- You need a user account with the appropriate permissions for Microsoft Azure Active Directory
- There must be a connection between AESB and ACMP. AESB must be available for this and the necessary details of the SICS connection must be stored in ACMP
- AESB must be at least version 1.8
- You need a working internet connection, as Intune is a cloud solution and requires a network connection to work.
- A running instance of Intune
Preparations in Azure Active Directory
To enable the ACMP Intune Connector to access the Intune API, you must first register an enterprise application in Azure Active Directory and grant the required permissions within those applications.
Register the Enterprise Application
First, sign in to the Azure AD (Active Directory) and navigate to Azure Active Directory in the Overview. Click the Manage > Application Registrations tab and create a new application registration.
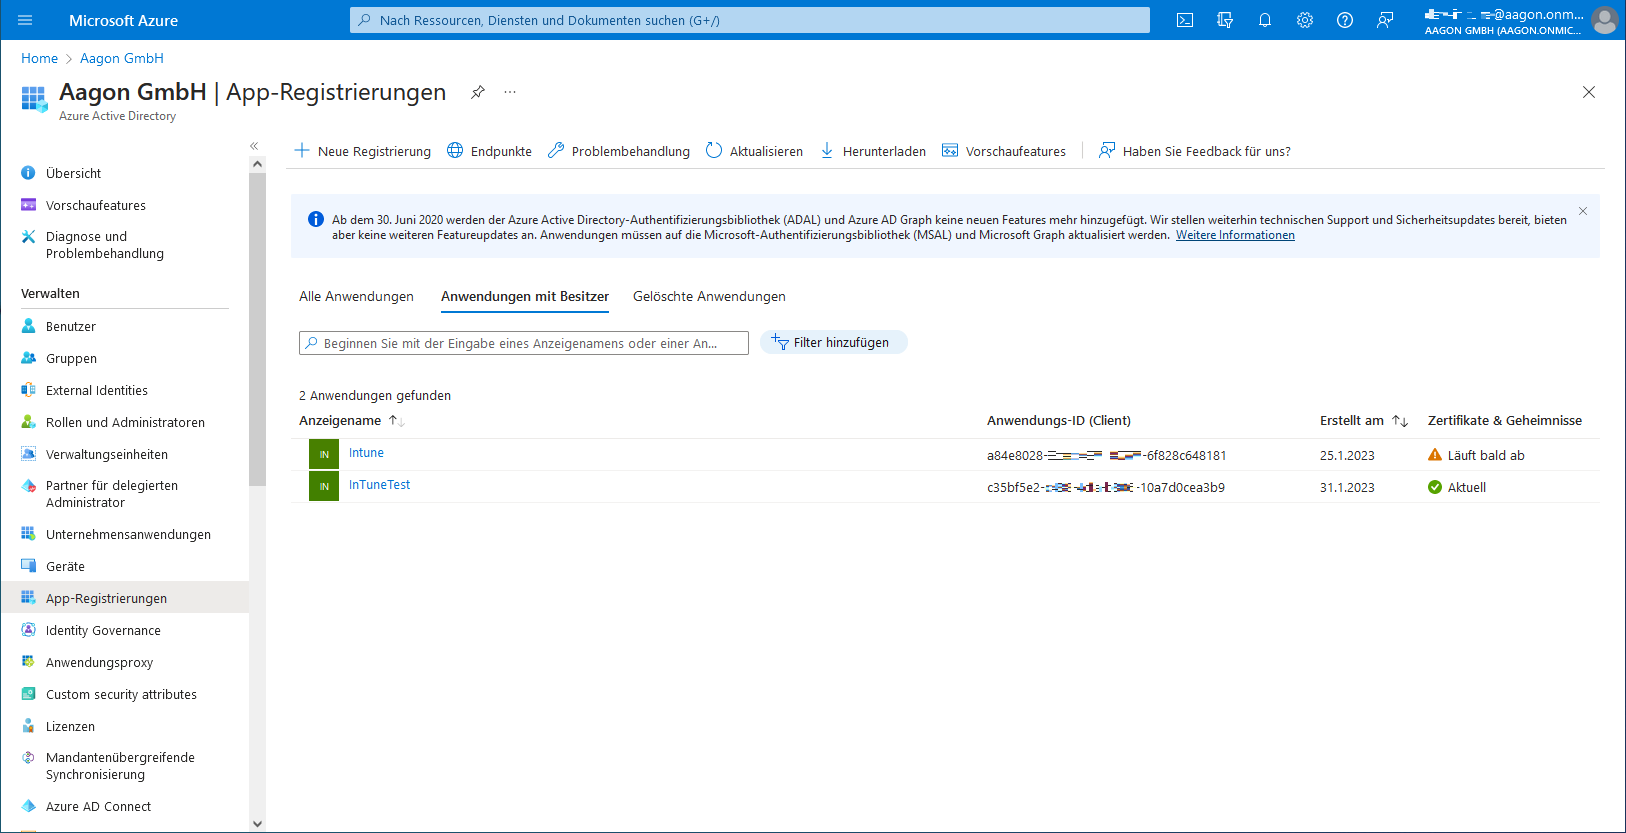
App registrations in the Azure AD
Enter all the necessary information: Enter a name for the application and select the accounts to support. Finish the process by clicking Register.
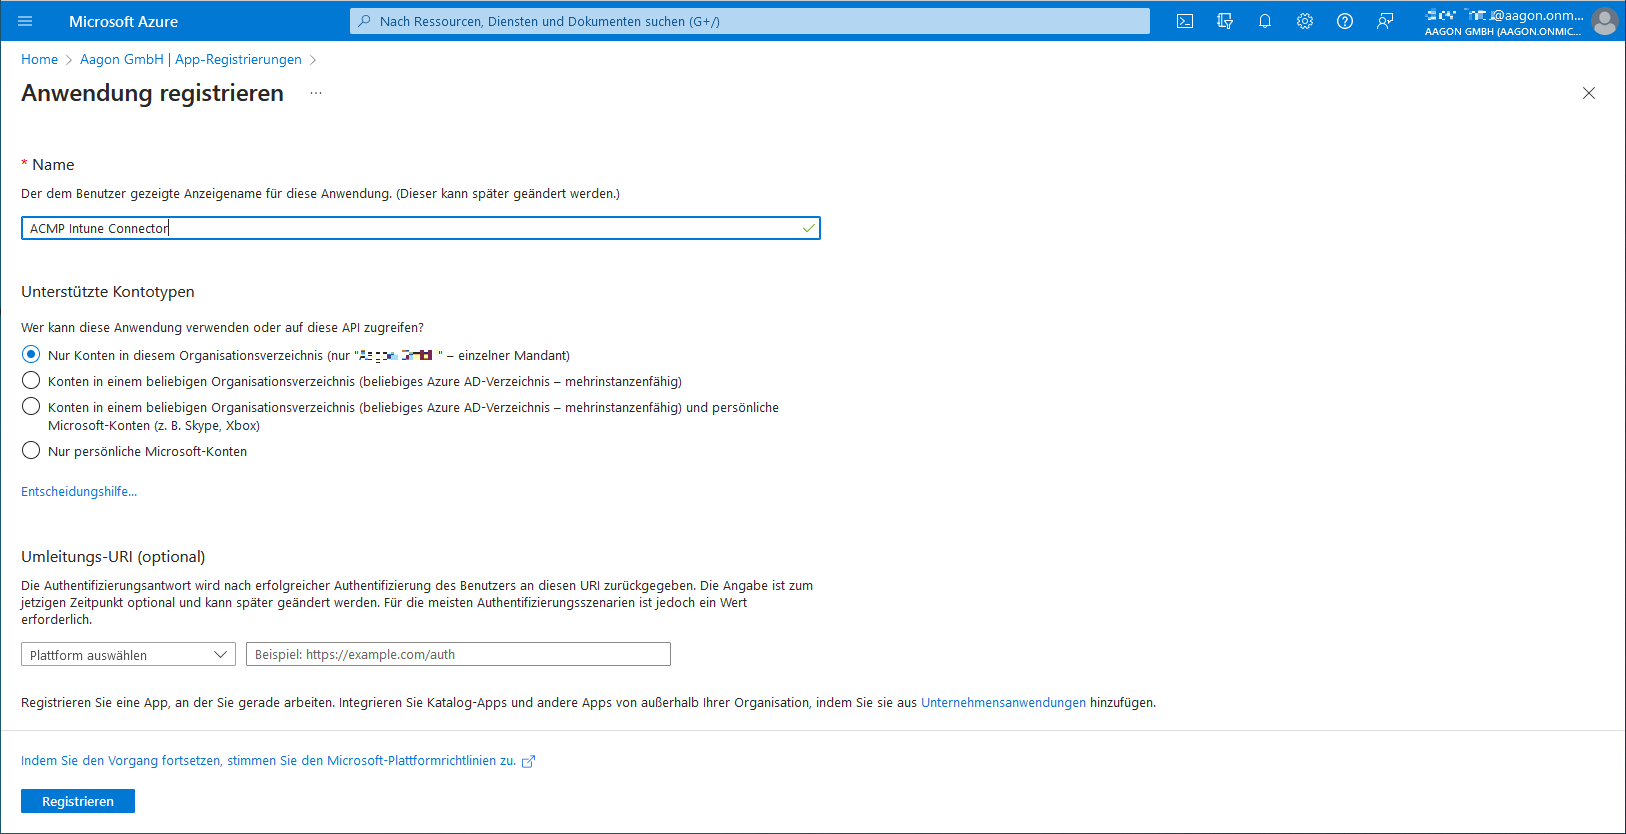
Register application
If you now open the created application, you will see a summary of the information added. This includes the display name, the various IDs (application, object and directory ID) and details of the account types supported.
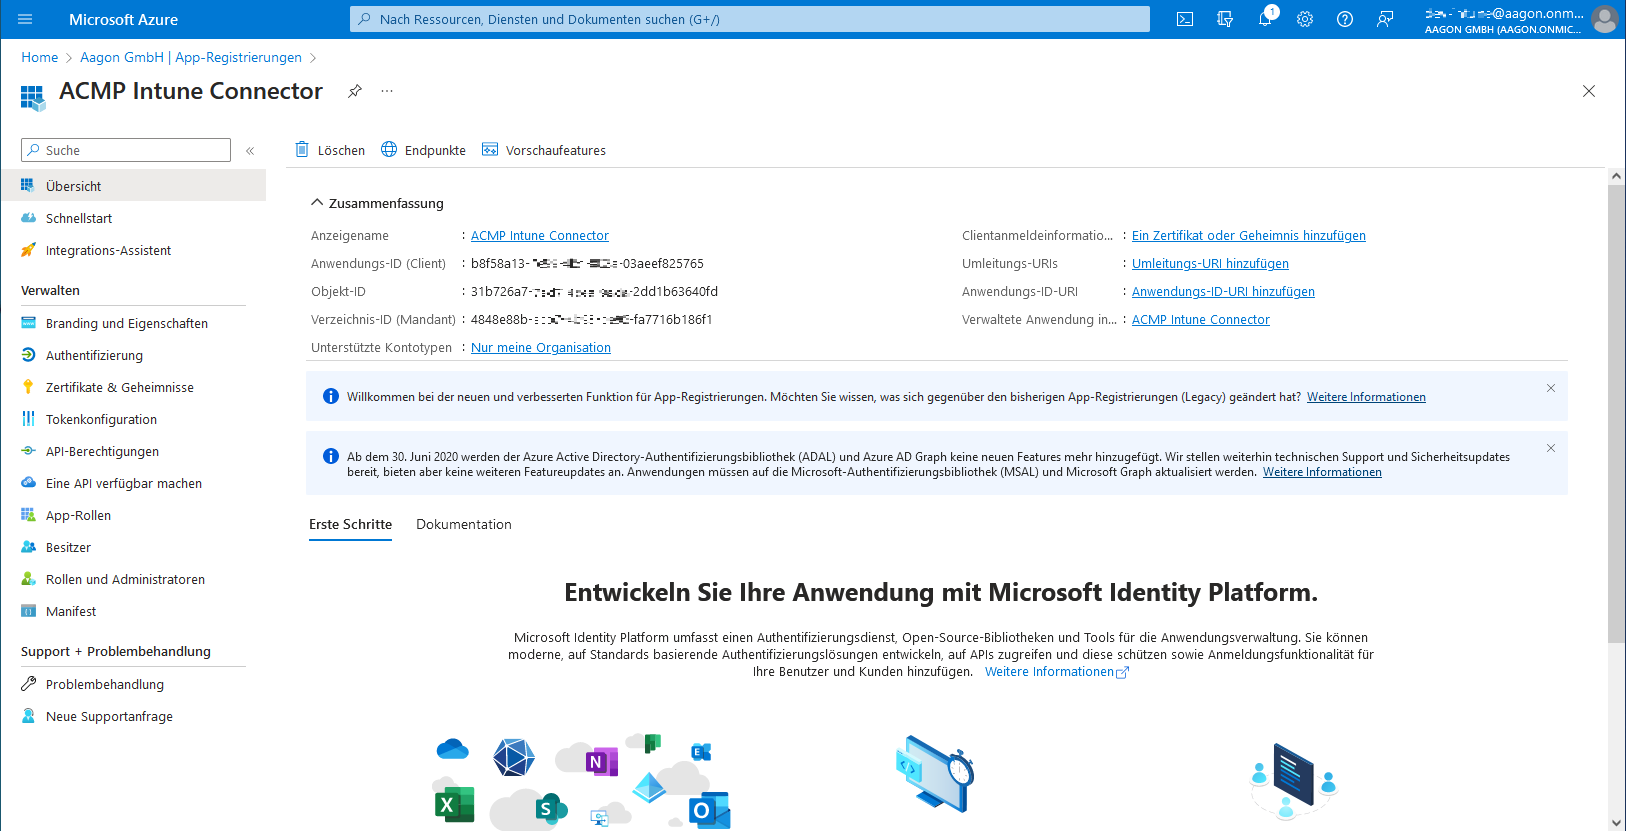
Summary of the application information
Distribute permissions
The next step is to assign the necessary permissions to the business application to access the Graph API. To do this, go to the Permissions section within the registered application (Manage > API Permissions).
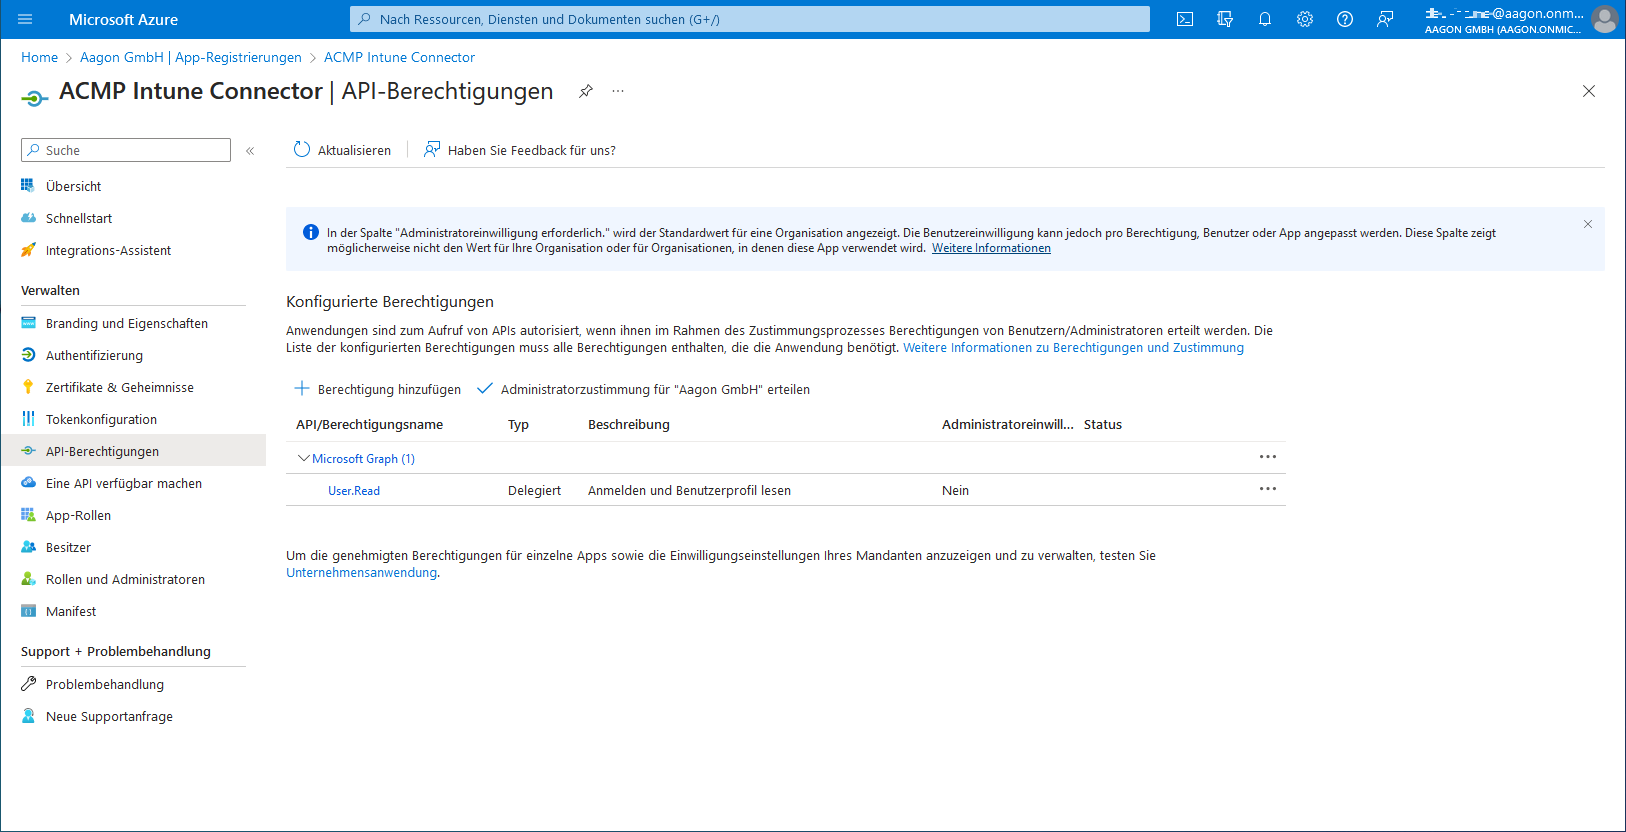
API permissions
There, click Add Permission. This will bring up a page where you can request the API permissions. In this step you need to select the Microsoft Graph.
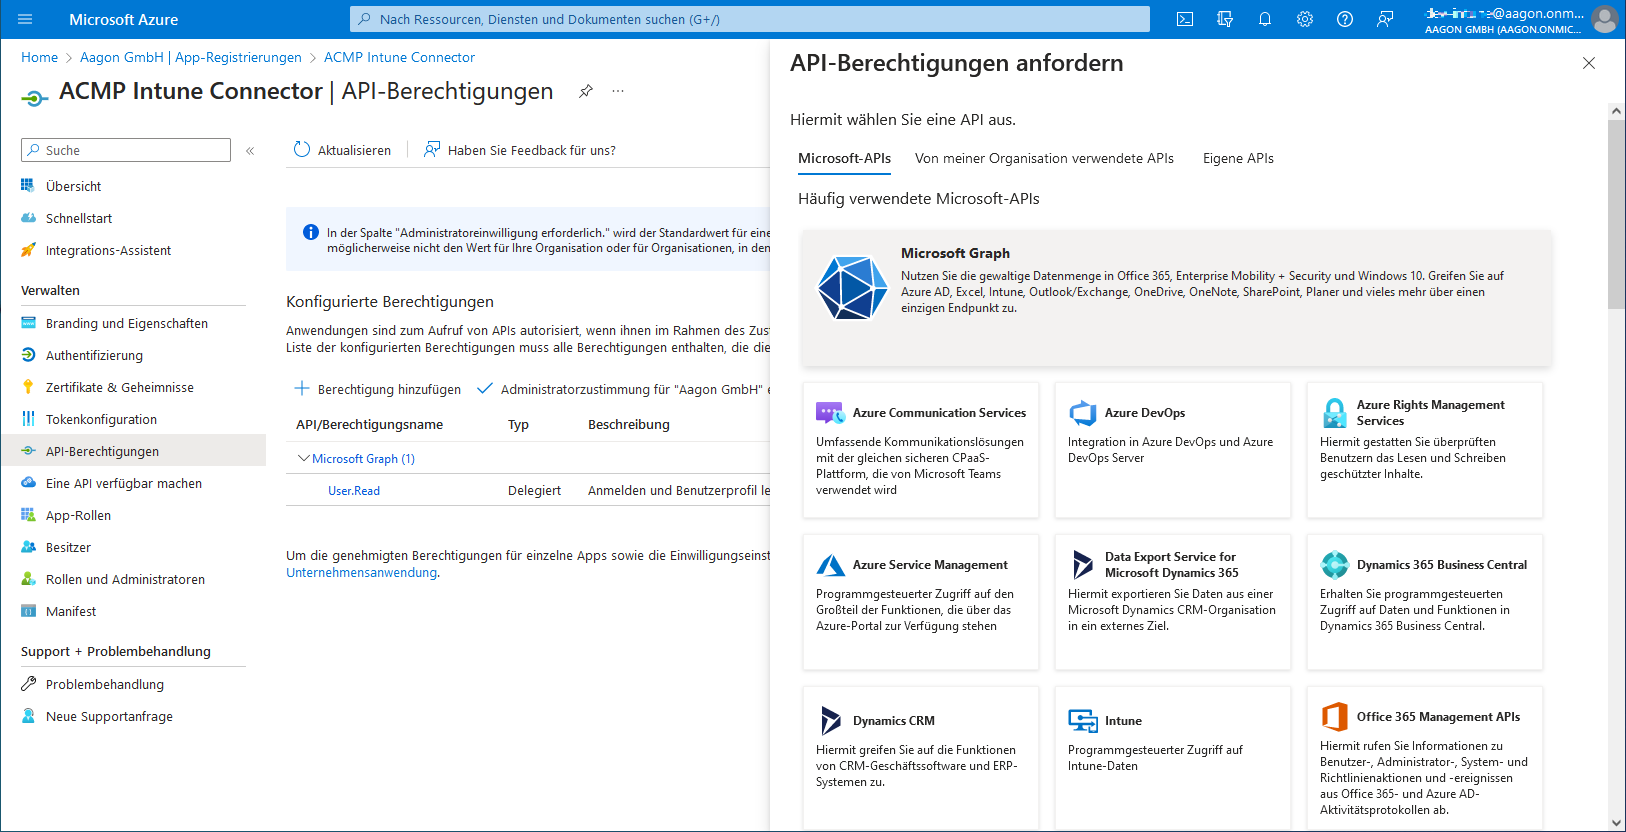
API permissions: Request Microsoft Graph
A distinction is made between "Delegated Permissions" and "Application Permissions". Enter the following values individually under 'Delegated permissions' and repeat the process by entering each of the following list entries:
- DeviceManagementManagedDevices.Read.All
- DeviceManagementManagedDevices.ReadWrite.All
- User.Read
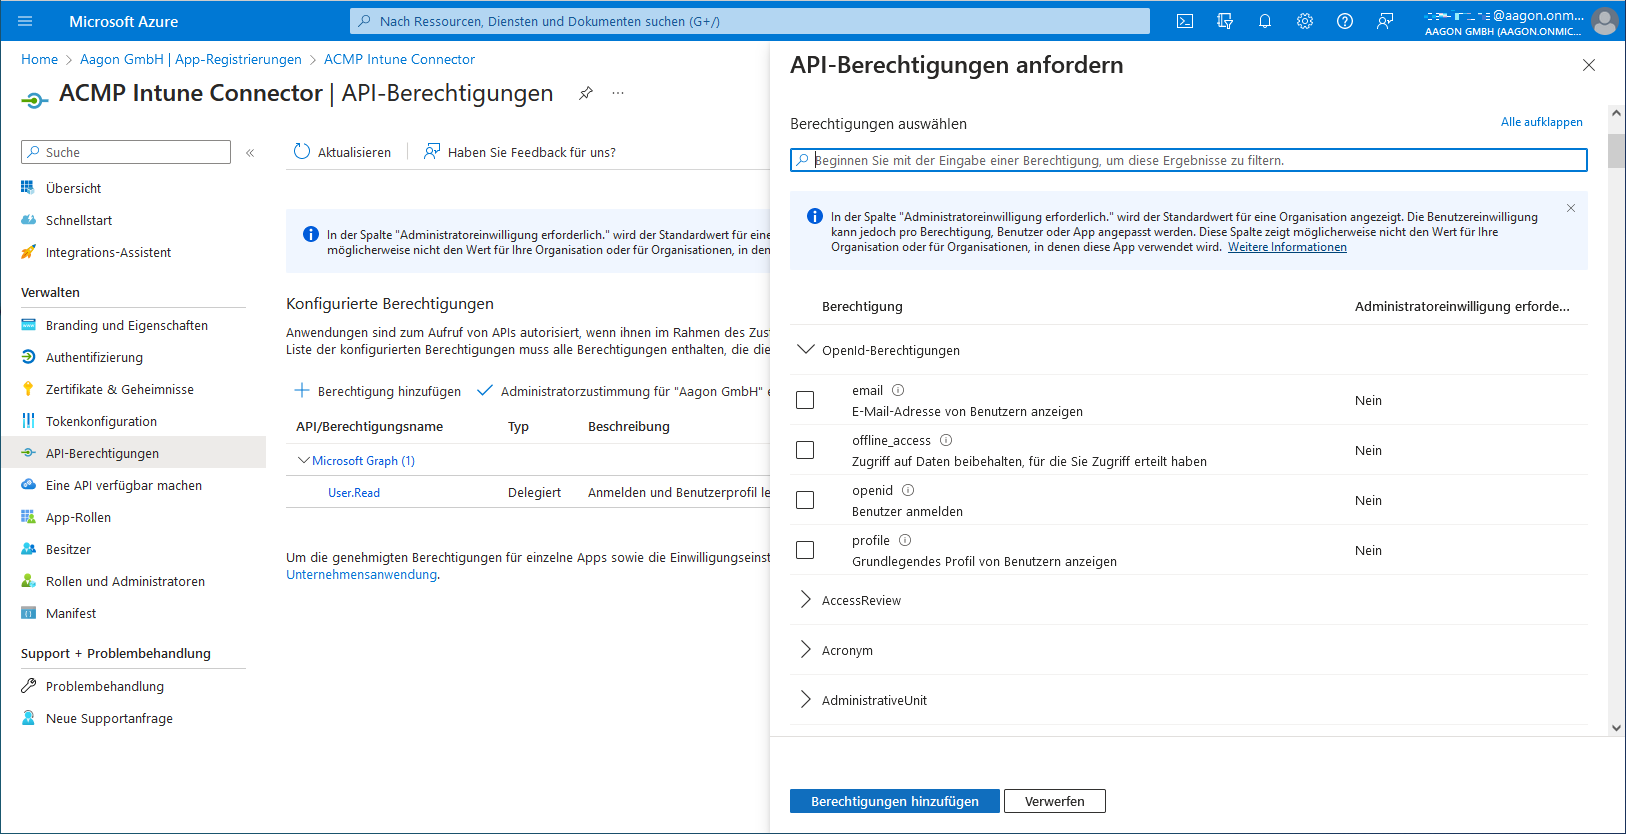
Distribute delegated permissions
Tick the appropriate items, scroll back to the top, click the Application Permissions field and add the following permissions:
- DeviceManagementApps.Read.All
- DeviceManagementConfiguration.Read.All
- DeviceManagementManagedDevices.PrivilegedOperations.All
- DeviceManagementManagedDevices.Read.All
- DeviceManagementManagedDevices.ReadWrite.All
- DeviceManagementServiceConfig.Read.All
- User.Read.All
When you have selected all the permissions, click Add Permissions. You will see the entries in the overview.
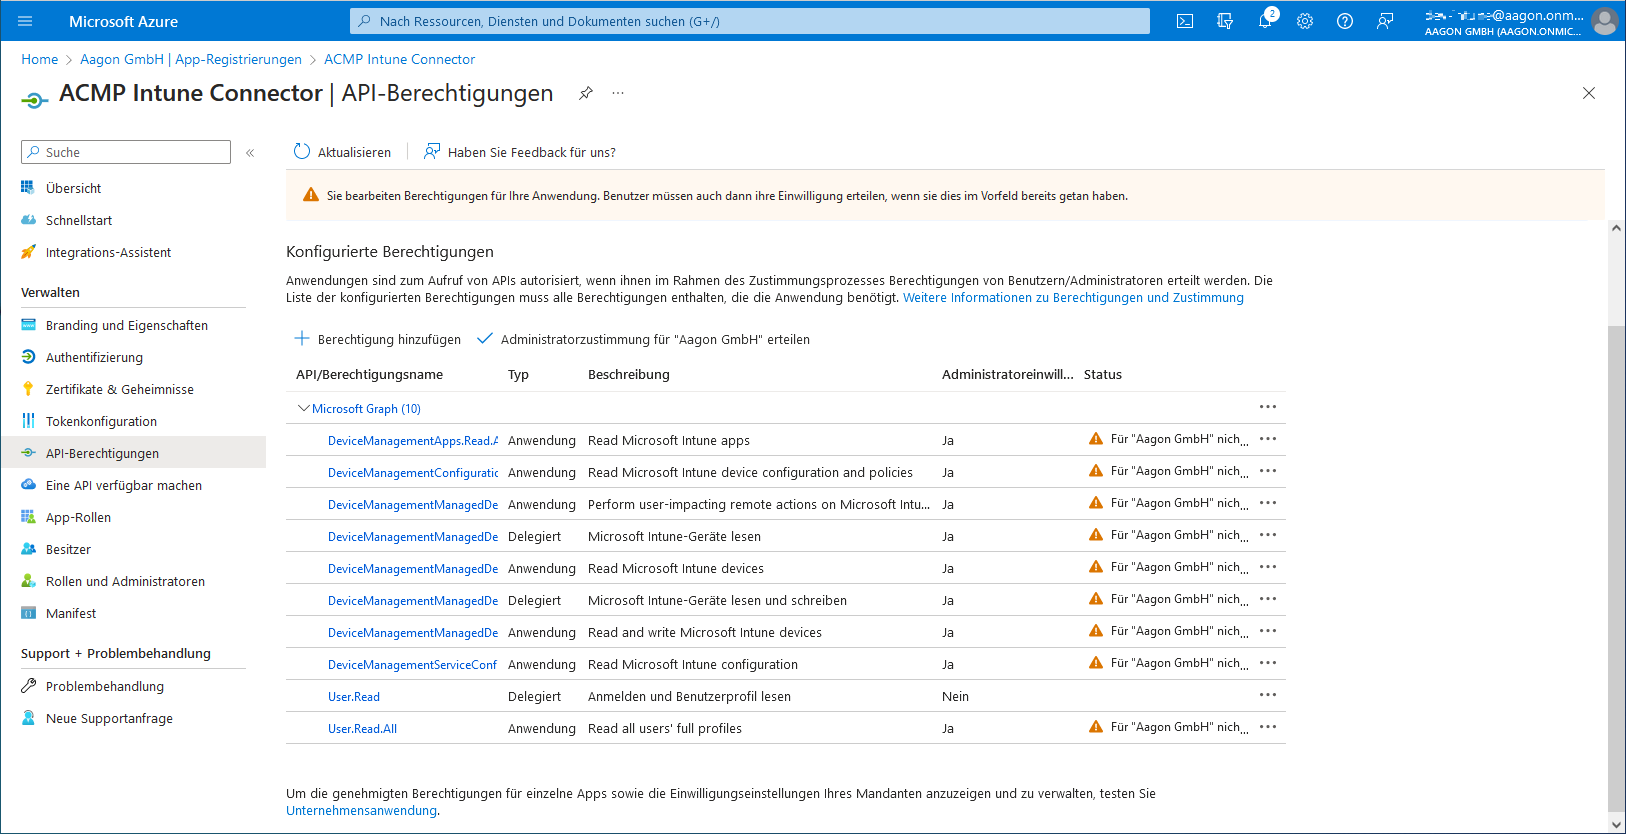
Deployed permissions (without consent)
If you have not already done so, you may need to give your consent to the permissions. To do this, click on the Grant administrator consent for "%Your Company%" field. This will change the status and the user permission will be granted.
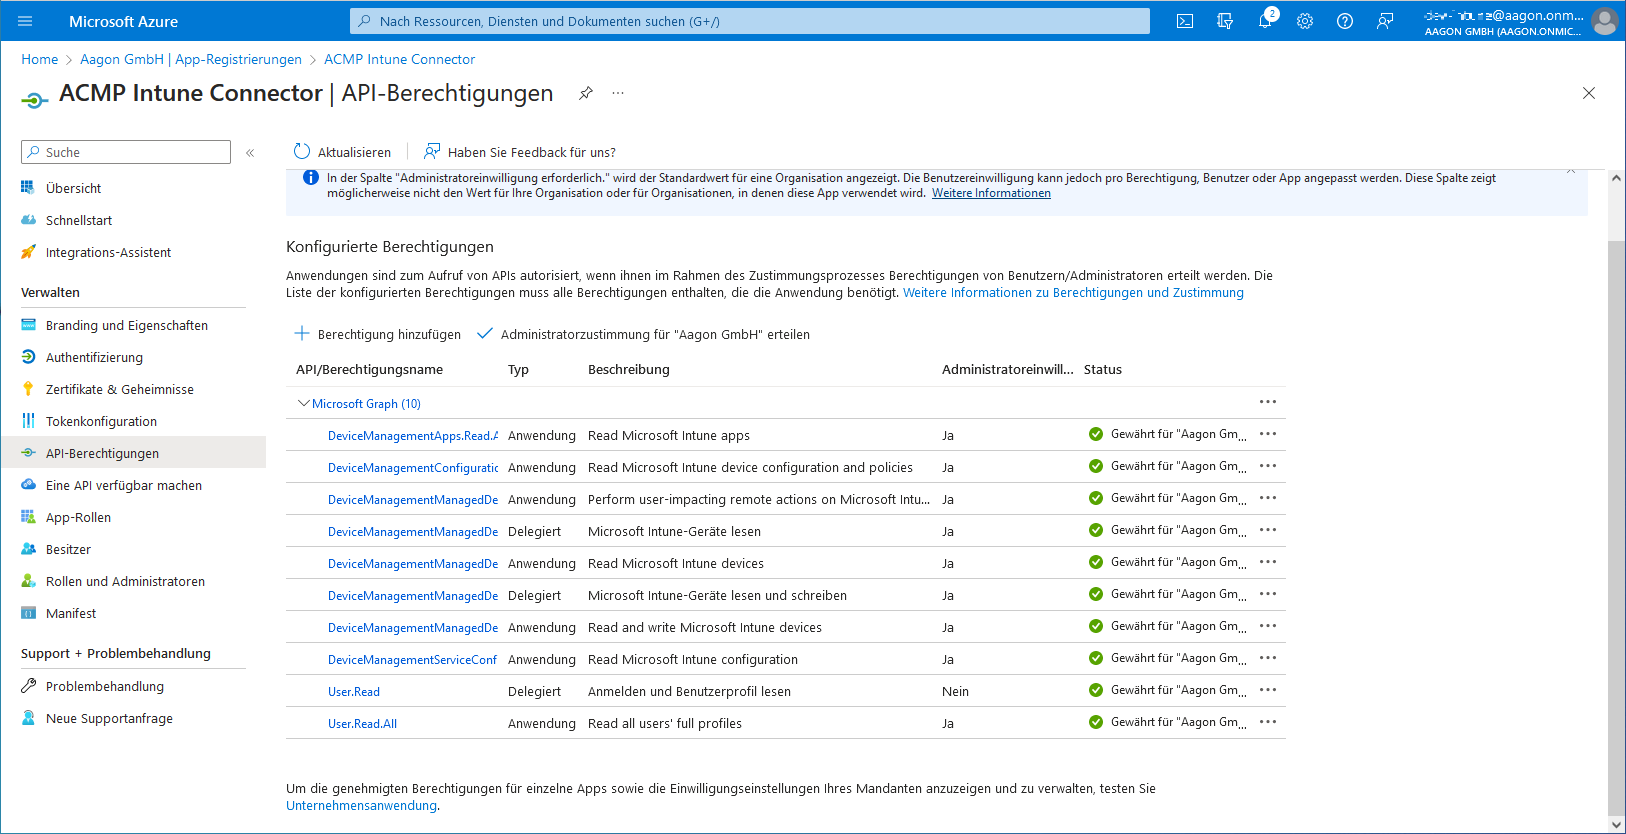
Authorised permissions
Upload client secret key or certificates
Later, during the initial setup of the ACMP Intune Connector, you have to specify an authentication type in the AESB console. You can choose from two methods supported by the Microsoft Client Credentials Provider: Certificate or Client Secret Key.
Upload certificate
Certificates can be used as an authentication method to log in to Azure Active Directory in the AESB console. A certificate always consists of a public and private part, where the public key is loaded directly into Azure AD. The private part is used in the AESB console. This certificate pair needs to be generated beforehand. Read how to generate a certificate via Microsoft or Open SSL.
Navigate to Certificates & Secrets in the previously registered application. In the details, click on the Certificates tab and upload the previously created certificate.
Upload certificate
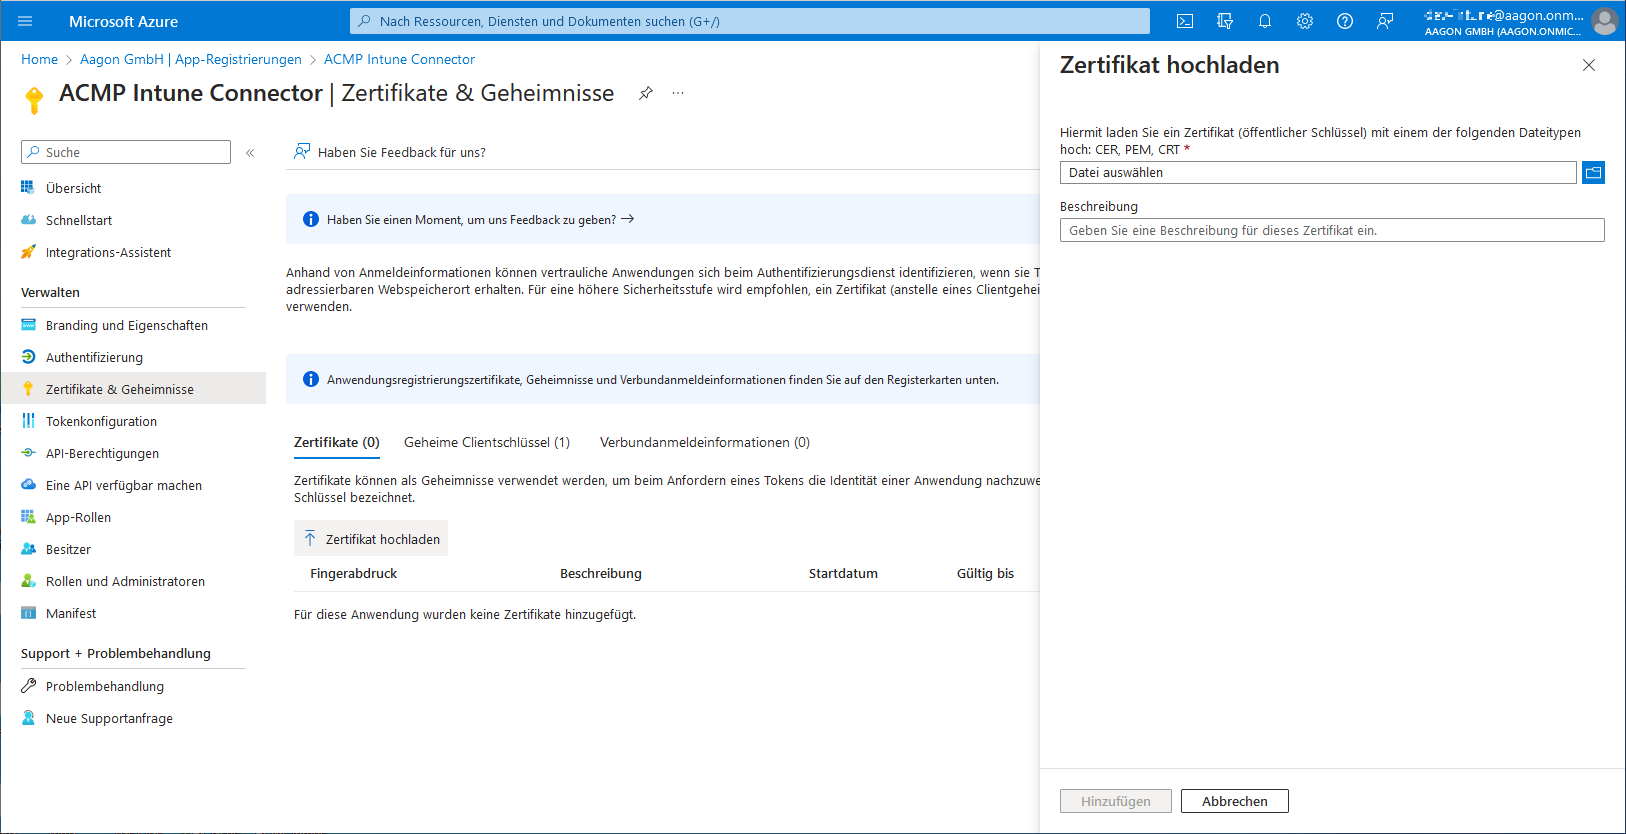
A field will open on the right hand side where you can upload the certificate. Browse to the appropriate directory, upload the file and enter an optional description for the certificate. Then click Add and the certificate will be saved for the application.
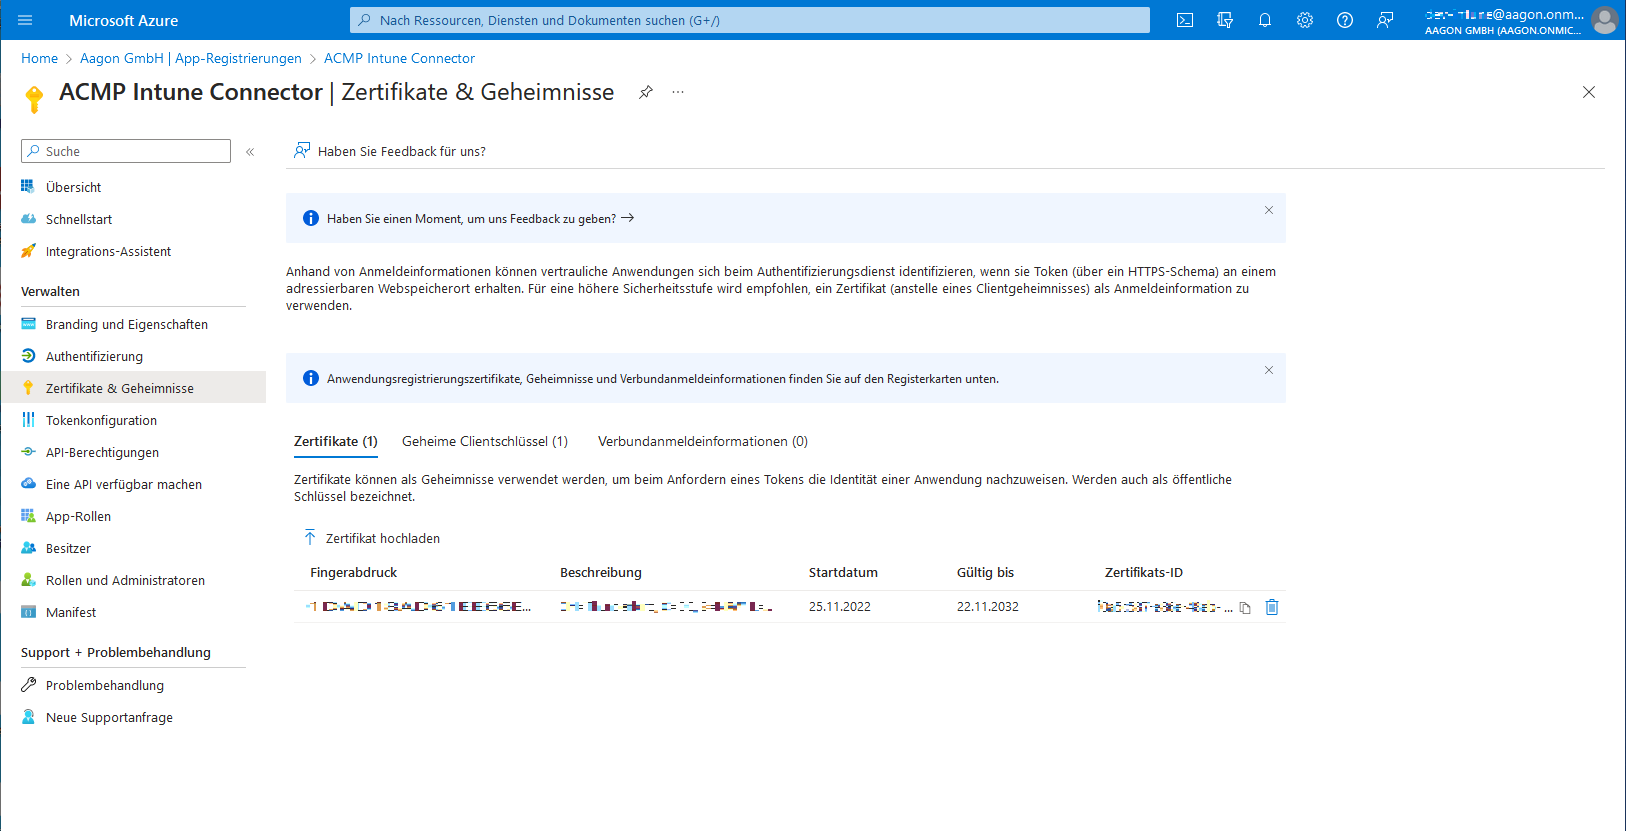
Uploaded certificate in the Azure Active Directory
Adding a secret client key
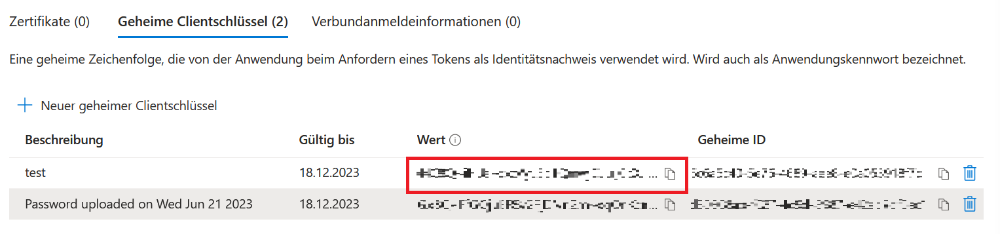
The secret client key is a string of characters used by the enterprise application as an authentication key or proof of identity when requesting the token. To do this, go to the Permissions area within the registered application (Security > Permissions) and click the Application Registration link. Navigate to Certificates & Secrets. In the details, click the Secret Client Keys tab and create a new key.
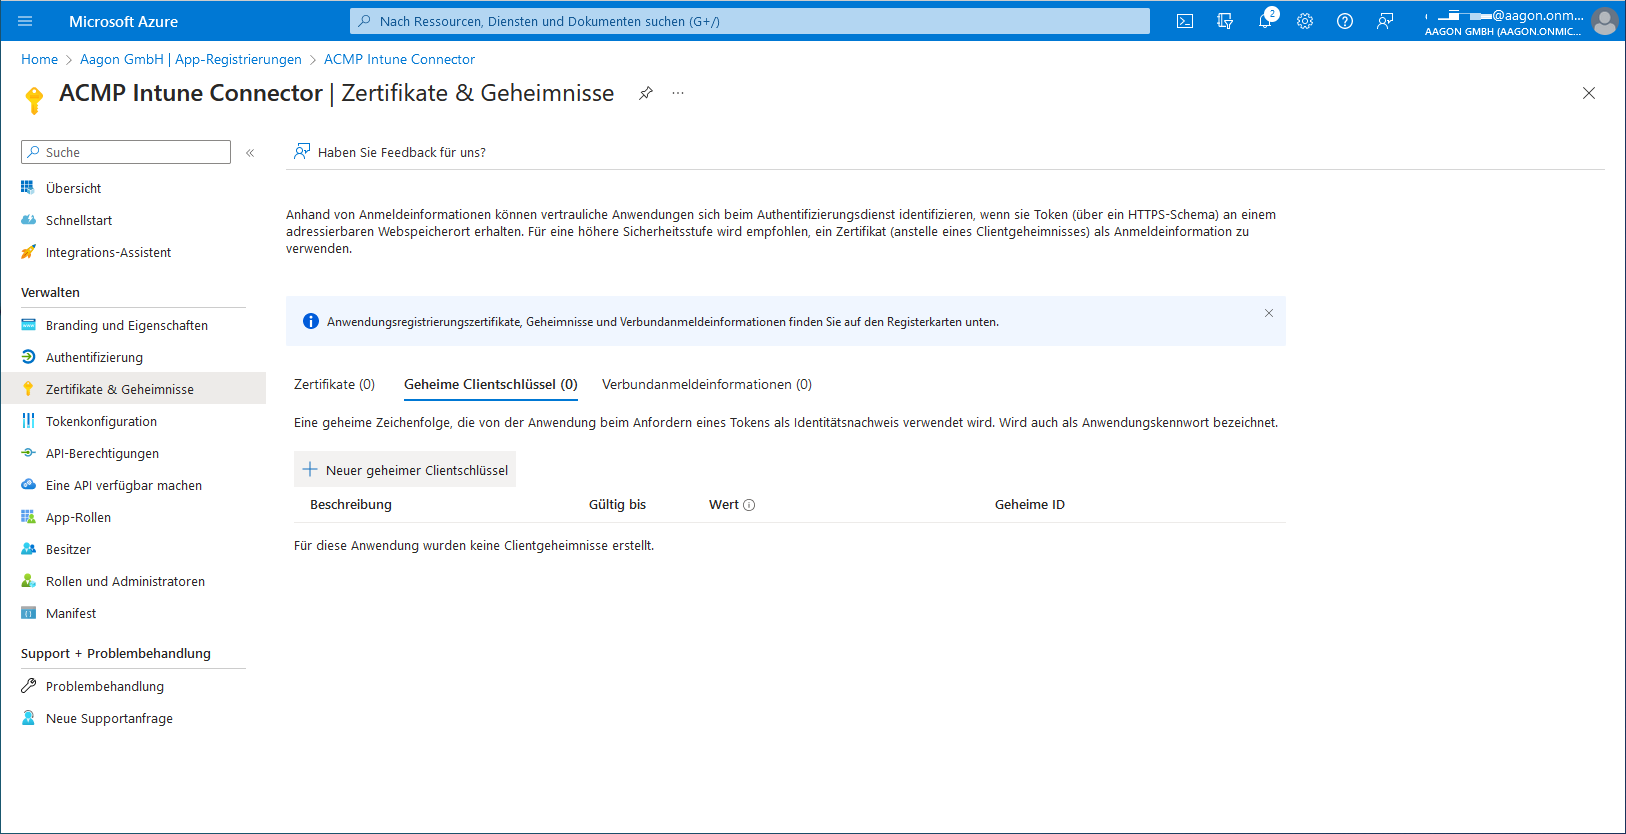
Store new client key
When creating a new secret client key, you can configure the validity period. Note that once the validity period has expired, a new key must be created and stored in the AESB.
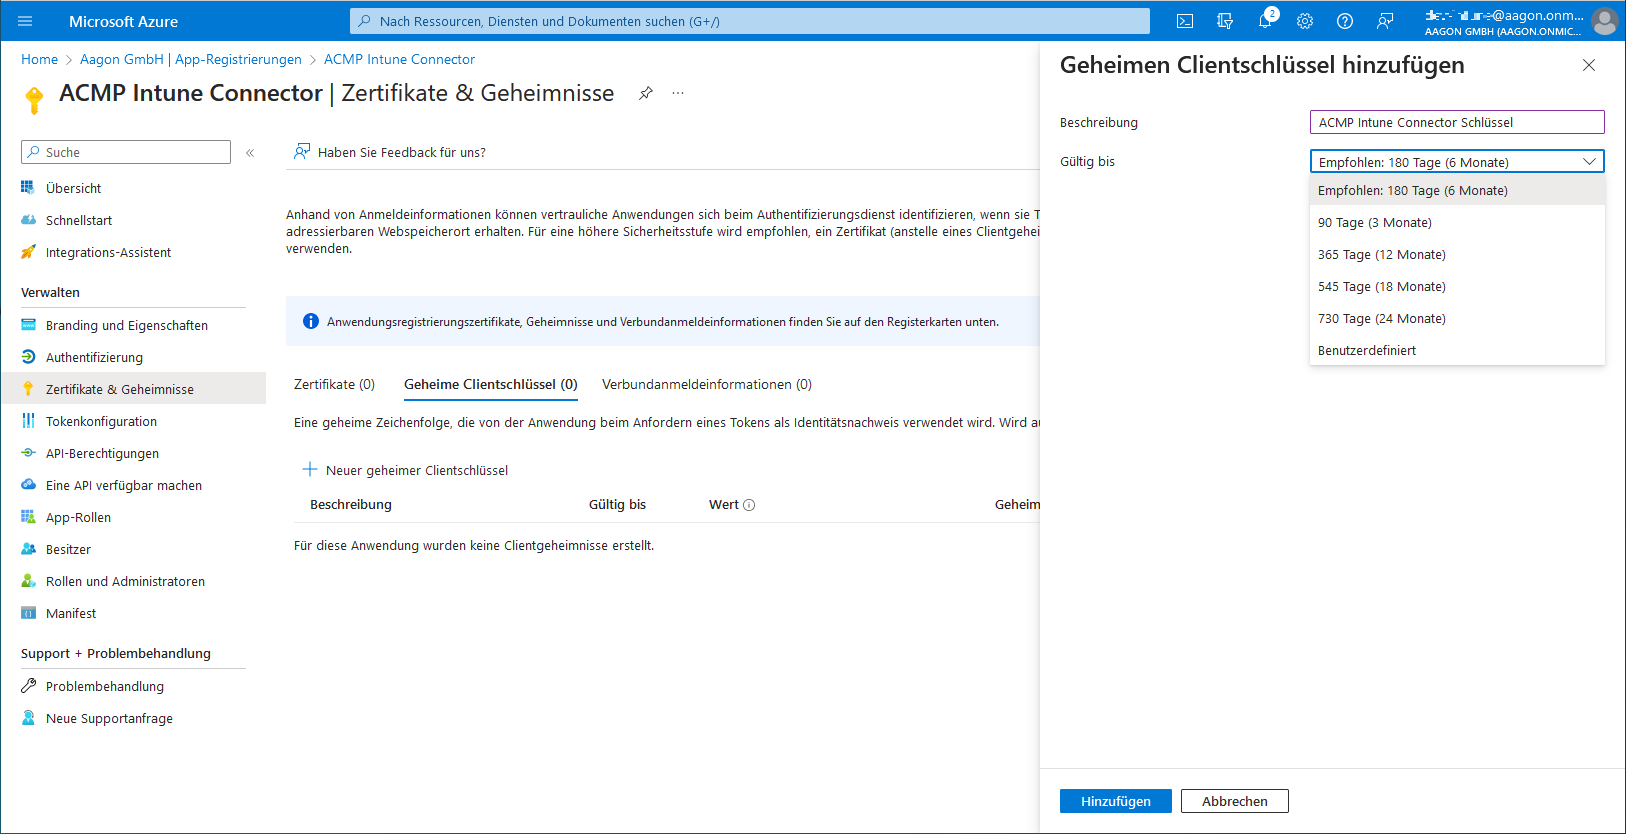
Adding a secret client key
Configuration in AESB and ACMP
Before you can use Intune in ACMP, you need to do some preliminary work in the ACMP and AESB consoles.
1. ACMP console: Check SICS connection in ACMP
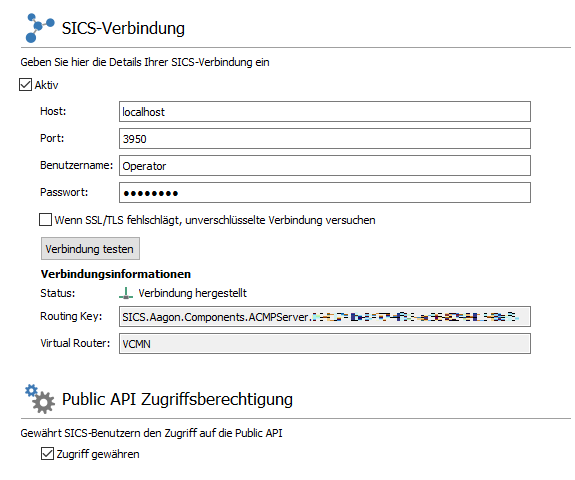
It is necessary that you have a working SICS connection in ACMP. To do this, go to System > Settings > ACMP Server > SICS Connection. First tick the box to enable the connection. Then enter the host and port, as well as the user name and password for the operator. You specified the corresponding operator during the installation of the AESB, which you must also specify here. Specify whether to attempt an unencrypted connection if SSL/TLS fails. Then test the connection.
Also tick the Public API access rights box to grant access. You can now save your settings. ACMP and SICS are now connected to each other.
Set up SICS connection in ACMP
2. AESB console: Install and configure the Intune Connector
Now go to the AESB console. From the Dashboard, navigate to the Products menu item. In the overview you will find a list of all packages available for installation or updates. Select ACMP Intune Adapter and click Install either in the quick selection bar or directly in the fields. A new window will open and the installation will begin.
Overview of the ACMP Intune Adapter in the AESB Console
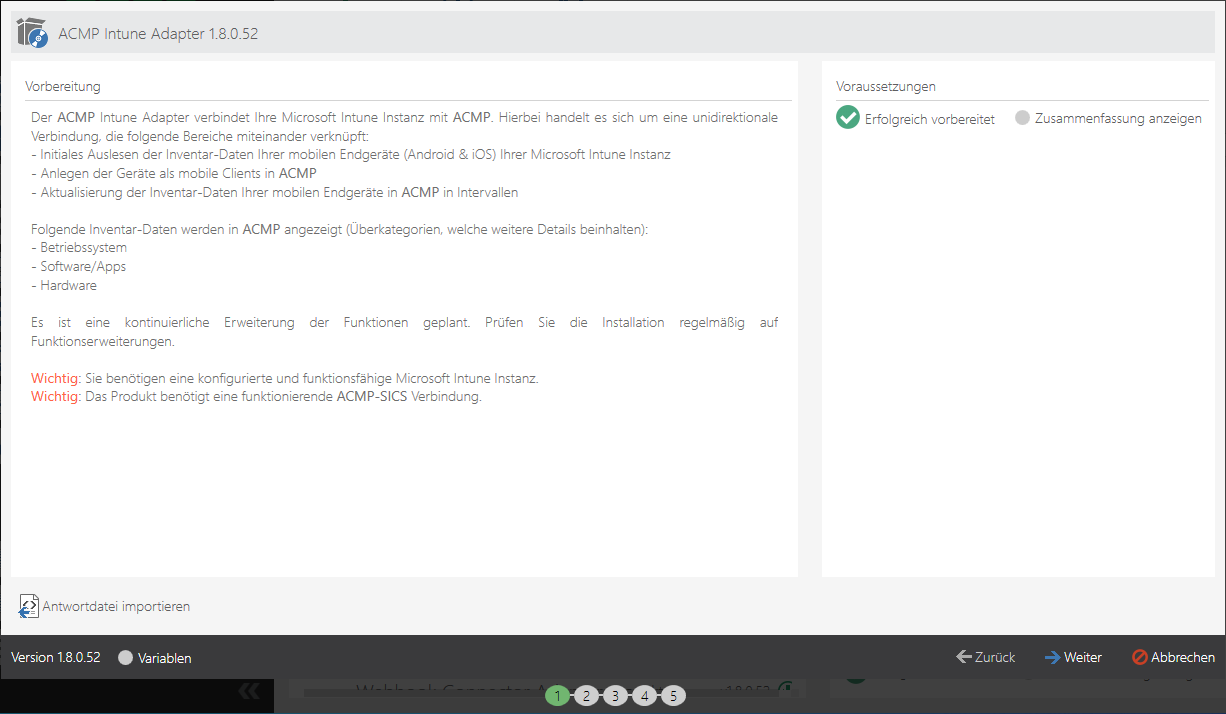
The first step tells you what you need to have already done to successfully install the Intune Adapter: You need a configured and working Microsoft Intune instance and a working ACMP SICS connection. In the second step of the installation wizard, you have the option to assign a template name at the top of the pages.
Under Intune Connector Configuration, you can set basic settings for the Intune Connector. Under ACMP Server ID, you need to specify the server to which the changes will be sent. If you enter an asterisk, the changes will be sent to all ACMP servers that have a SICS connection and whose connection information is identical to the information you entered in step 1. ACMP console: Check SICS connection in ACMP. You can also specify the name of the workflow instance under which the settings are to be sent. You can do this under Ondemand definition name.
In the Intune Configuration menu item, you can now use one of the two login methods: the secret client key or a certificate.
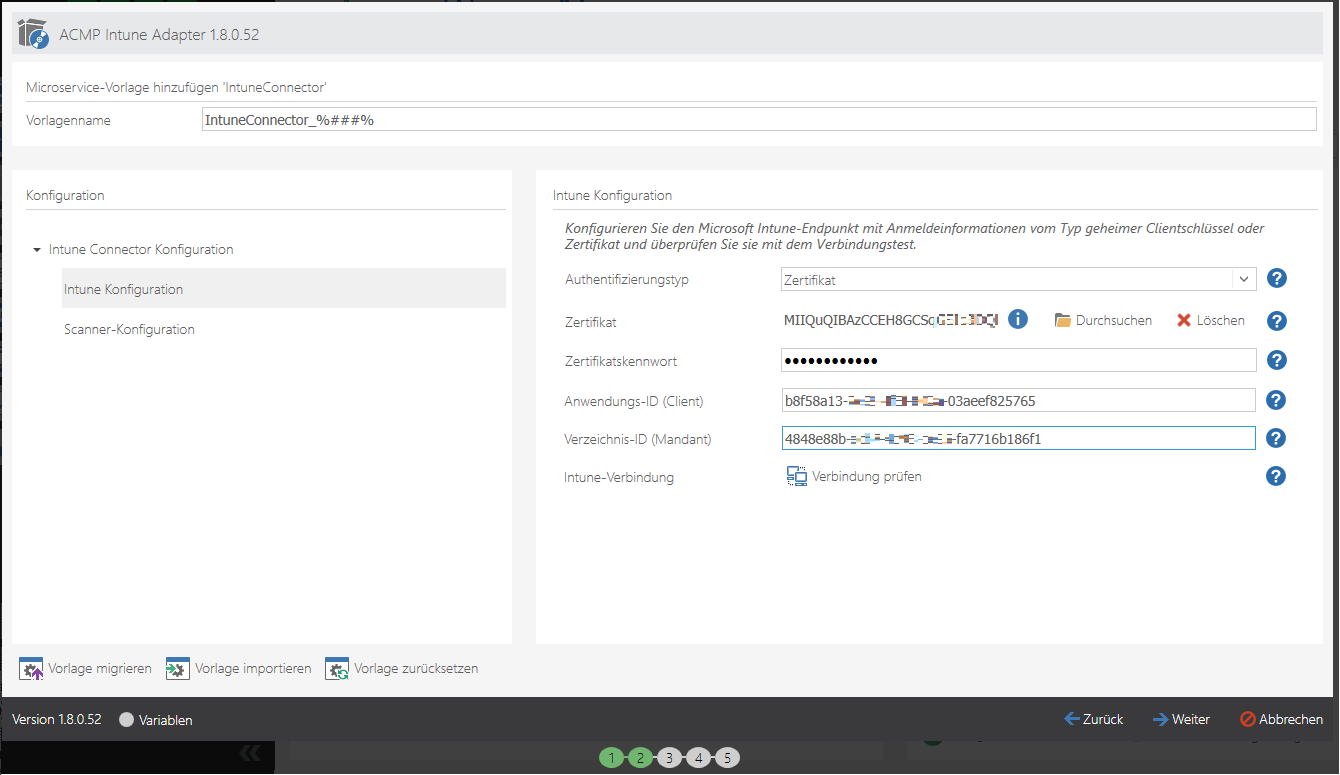
Option 1: Certificate authentication method:
Configuring Intune with a certificate is very similar to the secret client key authentication method. You only need to upload the certificate and enter its password.
Select Certificate as the authentication type. Enter the certificate to be used in the Certificate field. Only .pfx files can be uploaded. Then enter the certificate password, if available. Also enter the Application ID (Client) (the ID is used to identify the user to Intune) and the Directory ID (Tenant) (it runs under the tenant) in the fields provided. Both strings can be found in the general information of the previously registered business application on the Azure AD pages.

Enter the application and directory ID
Uploading the certificate
Option 2: Secret client key authentication method:
Select secret client key as the authentication type. Under secret client key, enter the value that you generated as the secret key on the Azure Active Directory pages.
Enter the secret client key
Also enter the Application ID (Client) (the ID is used to identify the user to Intune) and the Directory ID (Tenant) (under which the Tenant runs) in the fields provided. Both strings can be found in the general information of the previously registered Enterprise Application (Azure AD).
Enter the application and directory ID
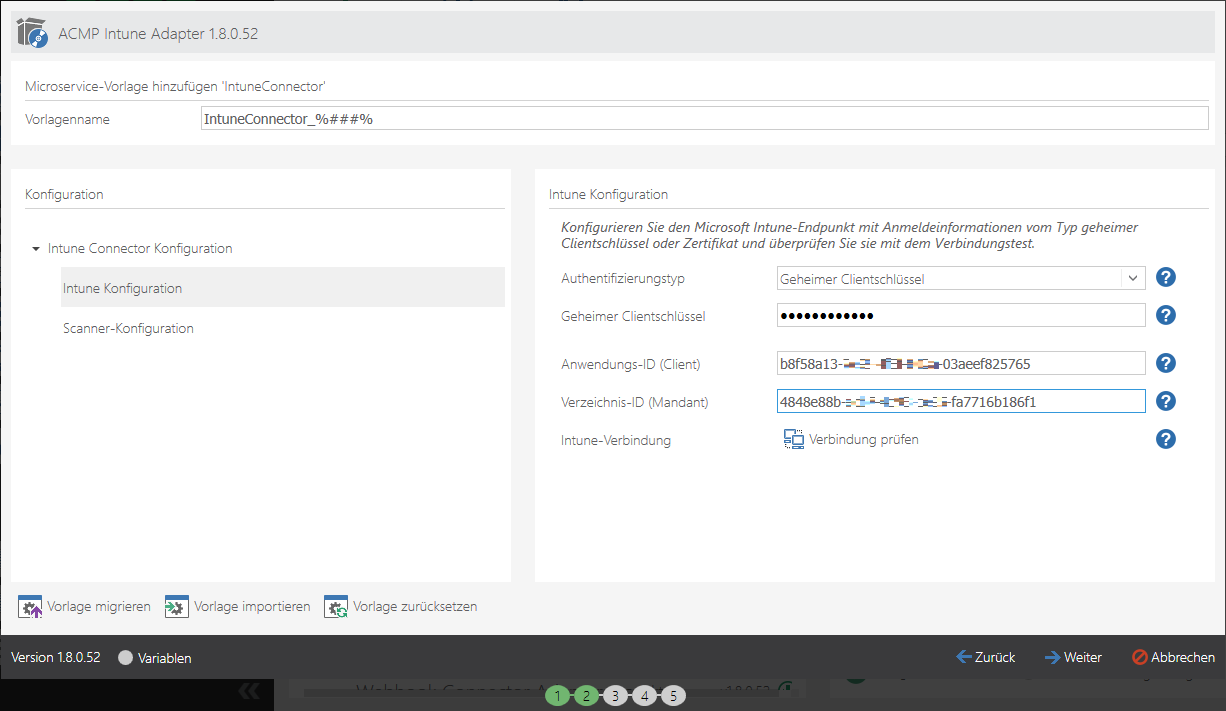
Enter the info for the secret client key
Click Verify Connection. If the connection is successful, you will be taken to the scanner configuration, where you can optionally set time intervals for the scanner. If you do not want to make any changes, click Next.
The Intune adapter installation will begin in the background. When the installation is complete and all items have been successfully installed, you can click Finish. You will be returned to the AESB Console Overview page. There are several places in the AESB Console where you can check that the installation was successful and that all the required applications are available:
| Navigation point | Description |
| Microservices | Below the Supervisors & microservice instances, you will see the entries IntuneConnector_1 and IntuneWorkflowEngine_1. |
| Workflows | Within the Workflow engines & instances section, the entries IntuneWorkflowEngine_1 and IntuneMobileDevices_1 must be listed. |
How to use Intune in ACMP
Once you have set up the ACMP Intune Connector, devices are imported from Intune into ACMP. You can use this data in queries and reports, for example. You can also send some actions to the devices through ACMP.
Query Actions
Navigate to Client Management > Query Management. Open a query that contains the required Clients.
In the query result set you will see the inventoried Client types (e.g. Clients of type Android, iOS or Windows). Select the Clients on which you want to perform an Intune action.
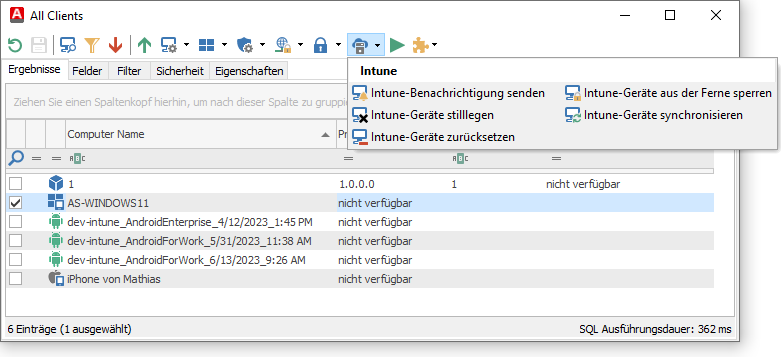
Intune-relevant Query Actions
You can choose between the following actions:
| Query Actions | Description |
| Send Intune notification | You can use this action to send Intune notifications to the Company Portal app on the selected devices. The messages may also appear on lock screens or in the Android apps. Make sure you only share information that is not too sensitive if you want to send notifications about it. Enter both a title and body text, then click Execution. |
| Retire Intune devices | This action deletes the Intune-specific settings on the selected devices. It also removes the Company Portal app and deletes the selected devices from Intune Management. |
| Wipe Intune devices | If you want to reset an Intune device to its factory settings, choose this action. This will also delete the device from Intune Management. You must select the checkbox for this step and confirm the confirmation prompt before you can perform the action. |
| Remotely lock Intune devices | If you want to lock Intune devices remotely, you can do so from the Action. This requires the user to correctly enter their chosen security mechanism (PIN, password, facial recognition, etc.) on the endpoint to unlock the device. |
| Synchronize Intune devices | This action causes selected Intune devices to send their inventory data to Intune. This allows you to keep devices up to date with the latest information. |
Client Details
If you want to view information about an Intune device, you can get all the relevant data from the Client Details. To do this, navigate to the required client in a query and double-click to open the details.
Under the Mobile Device Management > Mobile Device menu, you can find all the information about the stored mobile device. If you want to perform an Intune related action on the selected Client, you can use the options in the quick selection bar.
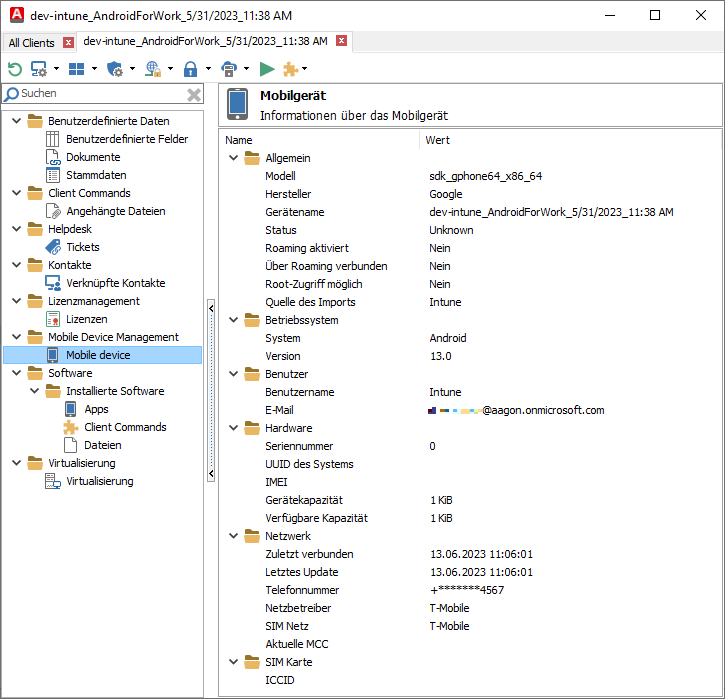
View of the Intune Client details