Windows Defender mit Powershell in einem Client Command aktivieren
Ausgangslage
Sie können mithilfe eines Client Commands auf all Ihren Clients Programme installieren und diese so verteilen. Dies kann zum Beispiel dann sinnvoll sein, wenn Sie zeitnah auf Sicherheitsrisiken reagieren und beispielsweise ein Antivirusprogramm verteilen müssen. Durch das Client Command werden Sie nicht durch räumliche Entfernungen Ihrer Mitarbeiter gehindert und können zentral und gezielt ein Programm steuern.
In diesem Anwendungsfall wird beschrieben, wie Sie das Windows Feature Defender Antivirus über ein Client Command installieren und aktivieren können. Um eine Möglichkeit der Ein- bzw. Ausgrenzung verschiedener Betriebssysteme aufzuzeigen, wird in diesem Beispiel das Betriebssystem Windows Server 2016 genutzt.
Gehen Sie dafür wie folgt vor:
Skript auswählen
- Navigieren Sie ins Modul Client Commands > Erstellen.
- Klicken Sie in der Ribbonleiste auf Hinzufügen. Es öffnet sich der Client Command Editor, in dem Sie entscheiden müssen, ob es sich um ein Console- oder Clientskript handelt. In diesem Fall wählen Sie das Clientskript aus.
Command Execute PowerShell script auswählen und bearbeiten
- Wählen Sie den Befehl Processes and Shell > Execute PowerShell script aus.
- Öffnen Sie den Befehl per Doppelklick.
- Wechseln Sie in den Allgemein Tab.
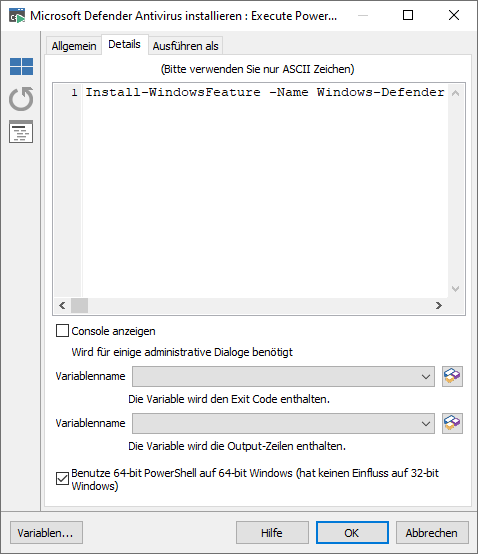
- Fügen Sie unter Beschreibung der Aktion einen Namen ein, wie zum Beispiel „Microsoft Defender Antivirus installieren“.
- Wechseln Sie nun in den Details Tab.
- Tragen Sie dort die Befehle in den Textbereich hinein, die als PowerShell-Skript ausgeführt werden sollen.
In diesem Fall müssen Sie „Install-WindowsFeature -Name Windows-Defender“ in die erste Zeile eingeben.

PowerShell-Skript einfügen
7. Beenden Sie Ihre Arbeiten an dem Befehl, indem Sie auf OK klicken.
Command If operating system is (not) einfügen und anpassen
- Laden Sie den Befehl If operating system is (not) (Conditions) in das Skript, indem Sie es wie den vorherigen Befehl aus der Commandliste per Doppelklick auswählen.
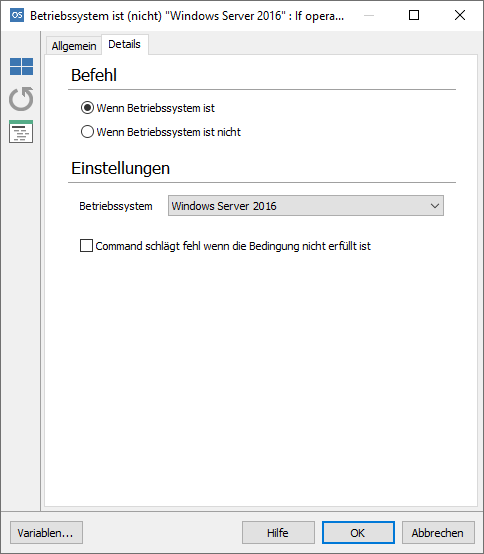
- Vergewissern Sie sich, dass im Details Tab unter Befehl die Option „Wenn Betriebssystem ist“ ausgewählt ist.
- Wählen Sie unter den Einstellungen das Betriebssystem, welches Sie benötigen.
In diesem Beispiel wird der Windows Server 2016 gewählt. - Wechseln Sie in den Allgemein Tab.
- Fügen Sie eine aussagekräftige Beschreibung der Aktion ein, z.B. „Betriebssystem ist "Windows Server 2016"“.
- Klicken Sie auf OK, um den Befehl abzuschließen.

Betriebssystem auswählen
Command Execute PowerShell script einfügen und bearbeiten
- Wählen Sie den Befehl Processes and Shell > Execute PowerShell script aus.
- Öffnen Sie den Befehl per Doppelklick.
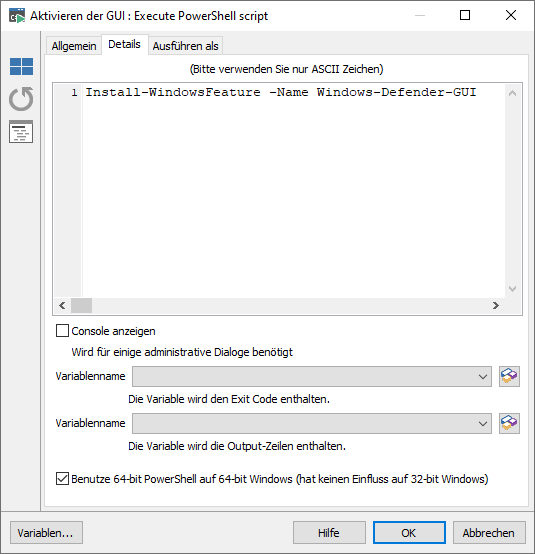
3. Tragen Sie dort die Befehle in den Textbereich hinein, die als PowerShell-Skript ausgeführt werden sollen.
4. In diesem Fall müssen "Install-WindowsFeature-Name Windows-Defender-GUI" in die Zeile eingeben.
5. Wechseln Sie in den Allgemein Tab.
6. Fügen Sie unter Beschreibung der Aktion einen Namen ein, wie zum Beispiel "Aktivierung der GUI".

Defender GUI einfügen
7. Schließen Sie das Command ab, indem Sie auf OK schließen.
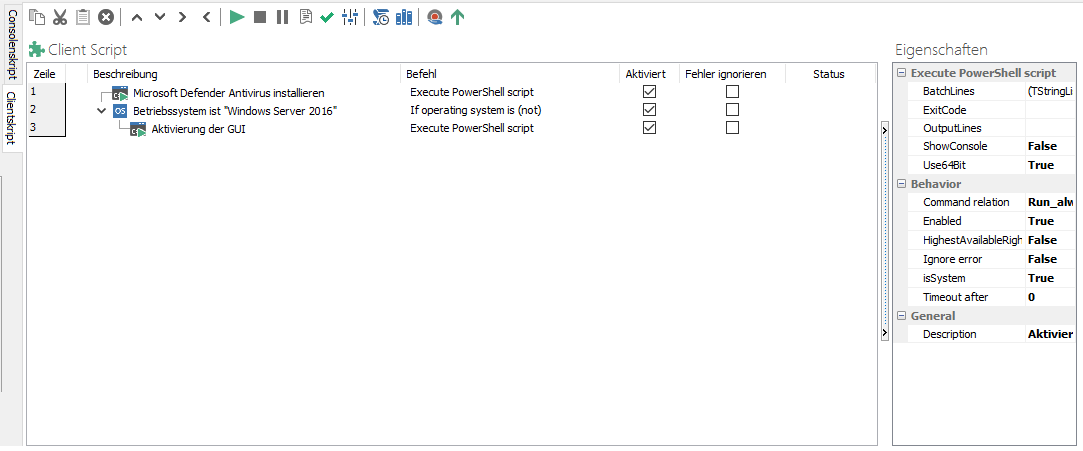
Speichern Sie Ihr Client Command ab und benennen Sie es nach Ihrem Wunsch. Dieses Beispiel wurde in diesem Fall „Aktivierung von Microsoft Defender über PowerShell“ genannt.

Client Command-Editor: Defender über ein Client Command aktivieren
Client Command-Phasen durchlaufen lassen
Ehe das Client Command verwendet werden kann, muss es noch abschließend die Testen, Synchronisieren, Freigeben und Ausführen durchlaufen. Erst danach können Sie Microsoft Defender auf den von Ihnen ausgewählten Clients installieren und aktivieren.


