


Enable Windows Defender with PowerShell in a Client Command
Initial situation
You can use a Client Command to install and deploy programs to all your Clients. This can be useful, for example, if you need to react quickly to security risks, such as deploying an antivirus program. With Client Commands you are not hindered by the physical distance between your employees and can control a programme centrally and in a targeted manner.
This use case describes how you can use a Client Command to install and enable the Windows Defender antivirus feature. The Windows Server 2016 operating system is used in this example to show a way to include or exclude different operating systems.
Follow the steps below:
Select Script
- Navigate to the Client Commands > Create module.
- Click Add on the ribbon bar. The Client Command Editor will open and you will need to decide whether it is a Console or Client Script. In this case select Client Script.
Select and edit the PowerShell Script Command
- Choose Processes and Shell > Execute PowerShell script.
- Double click to open the Command.
- Switch to the General tab.
- In the Action description box, type a name, for example, „Install Microsoft Defender Antivirus“.
- Switch to the Details tab.
- In the text area, type the Commands that you want to run as a PowerShell Script.
In this case, you need to type „Install-WindowsFeature -Name Windows-Defender“ in the first line.
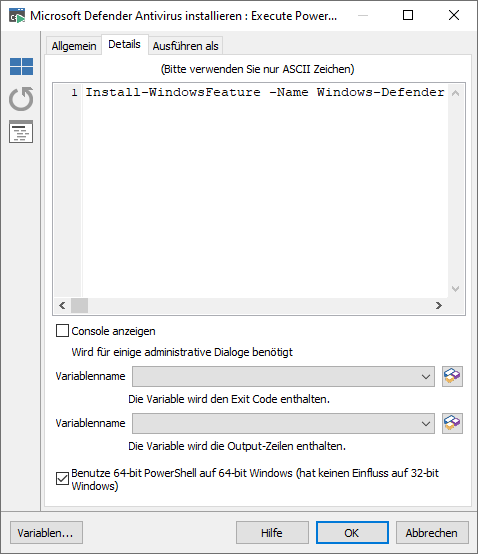
Inserting PowerShell Script
7. Finish your work on the Command by clicking OK.
Inserting and customising the If operating system is (not) Command
- Load the If operating system is (not) (Conditions) Command into the Script by double clicking it in the Command List, just like the previous Command.
- Ensure that the "If operating system ist" option is selected in the Details tab.
- Select the required operation system from the Settings.
In this example, Windows Server 2016 is selected. - Switch to the General tab.
- Enter a meaningful description of the action, e.g. "The operating system is "Windows Server 2016"".
- Click OK to complete the Command.
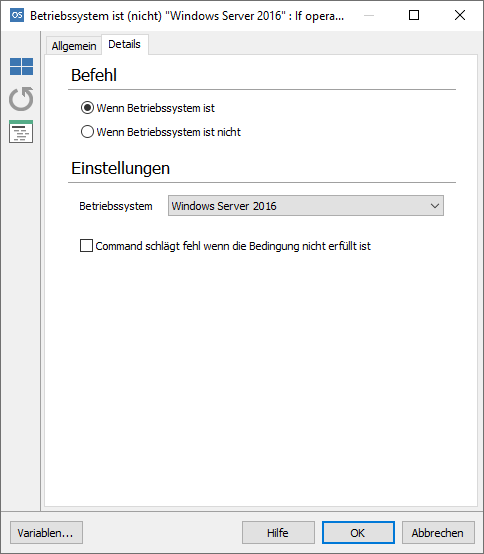
Select operating system
Insert and edit the Execute PowerShell Script Command
- Choose Processes and Shell > Execute PowerShell Script.
- Double click the Command to open it.
3. Type the Commands that you want to run as PowerShell Scripts in the text area.
4. In this case, you need to type "Install-WindowsFeature-Name Windows-Defender-GUI" in in the line.
5. Switch to the General tab.
6. Enter a name under Action description, for example "Enable GUI".
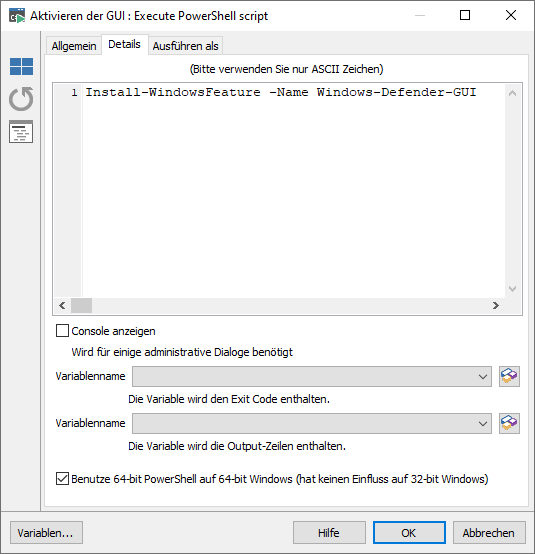
Enter a Defender GUI
7. Close the Command by clicking OK.
Save your Client Command and name it. In this case, we have named this example "Activate Microsoft Defender using PowerShell".
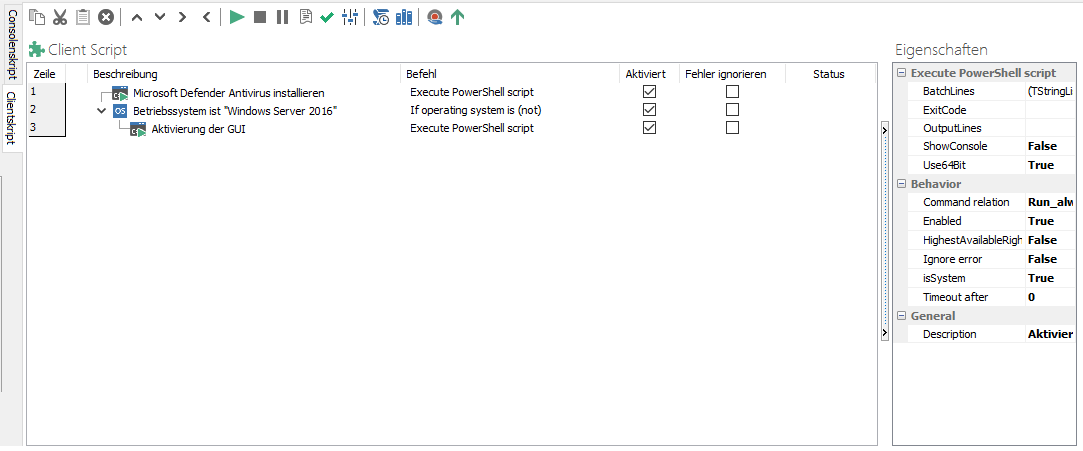
Client Command Editor: Enable Defender via a Client Command
Running through Client Command phases
Before you can use the Client Command, you must go through the Test, Synchronize, Release and Execute phases. Only then can you install and enable Microsoft Defender on the selected Clients.