Form Editor - Sending Client Commands to a Client via the AESB Interface
Initial situation
This Use Case shows you step by step how to send the Form Editor to a Client via the AESB Interface using a Client Command. The available Clients are loaded from the database and displayed in a list. A search field allows the user to filter for specific Client Commands. The hits are retrieved from the database and also displayed in a list. To prevent the Client Commands from being sent inadvertently, the user must tick a checkbox. This is to confirm that the selected Client and Client Command are correct.
For ease of understanding, much of the content of the Form Editor is explained in the Code View.
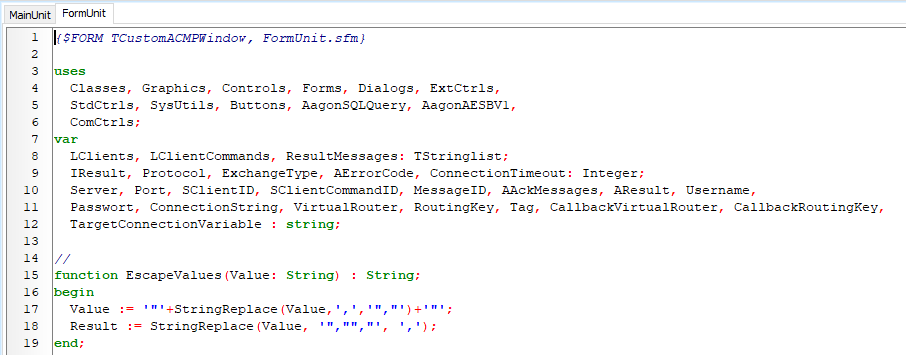
Code view for the following Client Command use case
Select script
- Navigate to the Client Commands > Create module.
- Click Add on the ribbon bar. The Client Command Editor will open and you will need to decide whether it is a Console or Client Script. In this case select the Console Script.
To select and edit the Set project variable Command
- Select the Variables > Set project variable command from the Command list..
- Double click the Command and select the General tab.
- Enter a name under Description of actions. In this example, "Set the AESB user name here" is inserted. All other configuration options in this tab do not need to be customised.
- Switch to the Details tab.
- Under Variable Settings, click on the icon next to the variable name.
- Optional: Create a new variable under Actions. Name it "USERNAME" and click on the plus sign. Then click on the OK button to complete the step and have the entry listed as the variable name.
7. In the Single line text box, enter „Operator“. This is required here as an identifier for the user name.
8. Click OK.
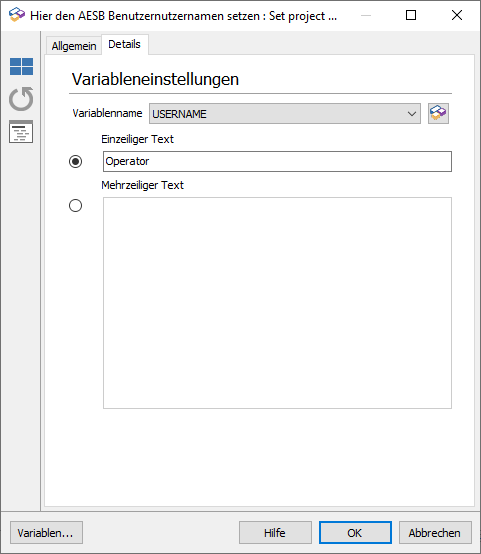
Making variable settings
To select and edit a Command Set project variable
- Select the Command Set project variable again.
- Double click on the Command and open the General tab.
- Under Description, enter the name of the action, e.g. Set the AESB user password here. Do not make any further changes to the other settings, they are not necessary.
- Switch to the Details tab.
- Optional: Create a new variable in the variable settings. To do this, click on the icon next to the list entries and a new window will open. Name the new variable "PASSWORD" and click on the plus sign. Click OK to complete this step.
6. Select the Plain text option if you have not already done so. The clear text password will be added to this line later.
7. Finish your work on this Command and click OK.
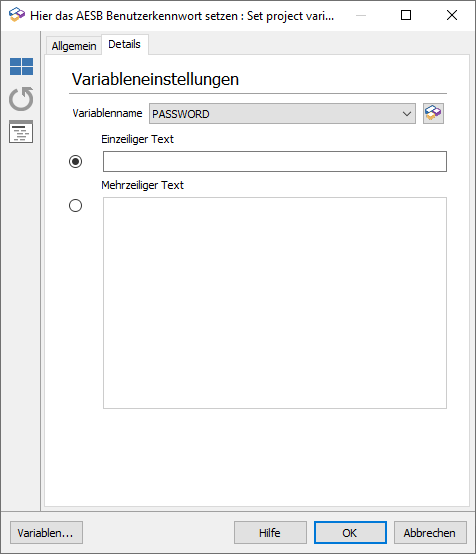
Defining variable settings
Opening and editing the Command Form Editor
You can edit the elements of the Form Editors using either the code view or the design view. To make it easier to understand, the following section deals with the visual design view only in isolated cases, and more with the code. This means that the explanations of the properties and events of the Object Inspector, which you can read here, are no longer necessary.
Use this Client Command to create an interactive form where you can assign a selected Client Command to a Client. To do this, proceed as follows:
- Select the Client Command Form Editor (Dialogs > Form Editor).
- Double click on the Command, open the General tab and optionally customise the description of the actions. In this example the title remains Form Editor.
- Switch to the Edit Form tab.
- Click on the Edit Form button below the preview form. A new window opens for working with the Form Editor in the standard view, with some custom fields.
5. Switch from the design view to the code view by clicking on the tab at the bottom (see illustration). The view will change.
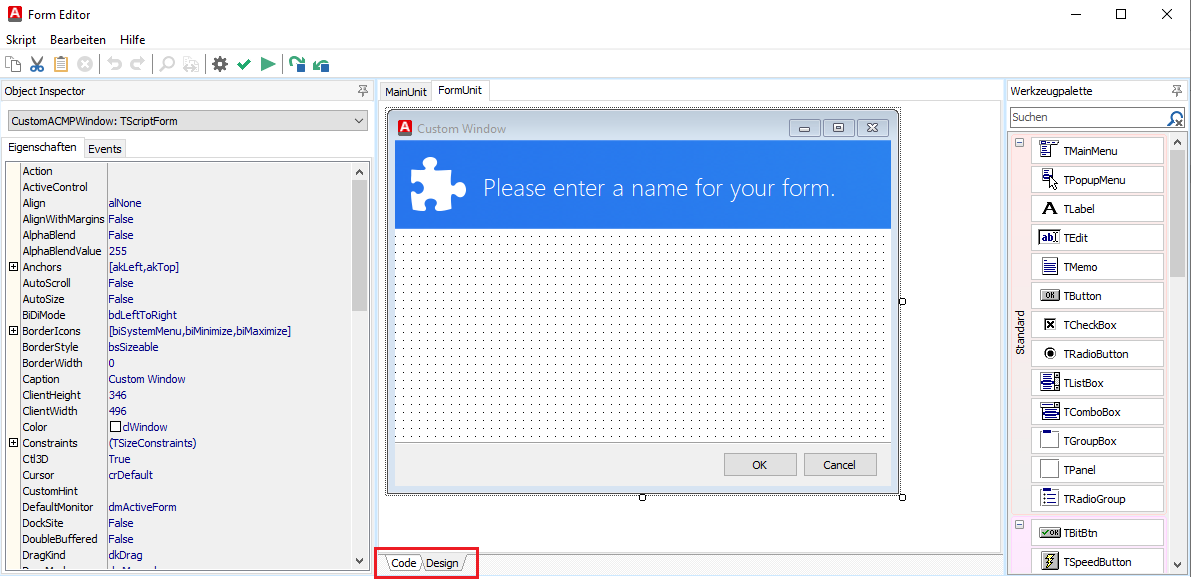
Form Editor view
6. Switch to the FormUnit tab if you are not already there. Here you can see the code from the upper Custom Windows window from the design view. This code now needs to be customised for your purposes.
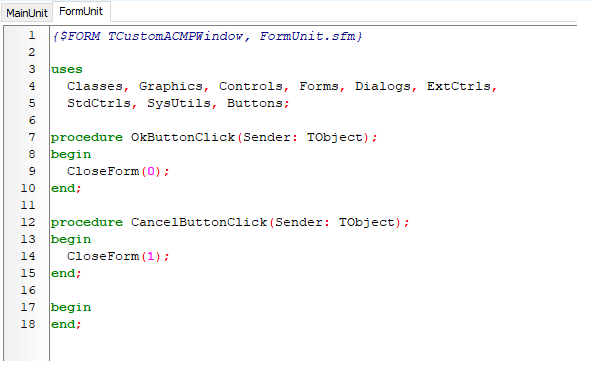
View of the code for the Custom Windows window
Customising the code
The code is divided into useful sections and explained below. Always insert the lines in the order shown here to ensure that the client commands work correctly. The form will be executed as it will be displayed later.
| Row section | Description |
| Row 1 - 13 | |
| {$FORM TCustomACMPWindow, FormUnit.sfm} uses Classes, Graphics, Controls, Forms, Dialogs, ExtCtrls, StdCtrls, SysUtils, Buttons, AagonSQLQuery, AagonAESBV1, ComCtrls; var LClients, LClientCommands, ResultMessages: TStringlist; IResult, Protocol, ExchangeType, AErrorCode, ConnectionTimeout: Integer; Server, Port, SClientID, SClientCommandID, MessageID, AAckMessages, AResult, Username, Passwort, ConnectionString, VirtualRouter, RoutingKey, Tag, CallbackVirtualRouter, CallbackRoutingKey, TargetConnectionVariable : string; | These rows define the display of the Form Editor for the user and describe what the display is filled with and what type of content is generated (data type: string, row 12). In the rows, units are added (uses, rows 3 - 6) and variables (var, rows 7 - 12) are declared, which can be filled at a later time. The respective variable type (e.g. TStringlist, Integer or String) is shown after the variable names.
|
| Row 14 - 21 | |
| // function EscapeValues(Value: String) : String; begin Value := '"'+StringReplace(Value,',','","')+'"'; Result := StringReplace(Value, '","","', ','); end; // | This function is required to use certain special characters in strings. Some special characters in the string have a special meaning for the program: If you want to display these special characters, you must "escape" them. When escaping, the special character to be displayed is preceded by the same character or a specific other character, such as a "\". |
| Row 22 - 45 | |
| function SetAESBConfig; begin Protocol := 1; // HTTP (0) / HTTPS (1) ConnectionTimeout:= 30; // Timeout in Sekunden ExchangeType:= 1; // Direct (0) / Routing (1) ResultMessages.Clear(); AAckMessages:= ''; AResult:= ''; AErrorCode:= 0; IResult:= 0; Server:= '127.0.0.1'; Port:= '3900'; Username:= GetVarContent('USERNAME'); Passwort:= GetVarContent('PASSWORD'); TargetConnectionVariable:= 'CONNECTION'; ConnectionString:= ''; MessageID:= '{43584358-4358-4358-4358-435843584358}'; //hier kann eine beliebige GUID verwendet werden VirtualRouter:= 'VCMN'; RoutingKey:= '?.Aagon.Components.ACMPServer.*'; Tag:= 'ICQL'; CallbackVirtualRouter := ''; CallbackRoutingKey := ''; end; | In this section, the variables for the AESB service function (function SetAESBConfig, row 22) are defined and filled with values. The function is required later (from row 142), but you must already configure it at this point. Fill the rows of the function as follows: Row 24: Enter the type of protocol here. The value 0 stands for an HTTP page, 1 for an HTTPS page. Insert a 1 here, as this is an encrypted request. Row 25: Specify a number of seconds when the request to the AESB runs into a timeout. The default value "30 seconds" was specified here. Row 26: The ExchangeType can either be filled with the type "Direct (0)" or "Routing (1)". The latter option is selected here. Row 27: ResultMessages.Clear() deletes the string list. Rows 28 - 29: The two variables AAckMessages and AResult can be left clear. To do this, enter '' after the equals sign. Rows 30 - 31: The AErrorCode and IResult are each filled with the value 0. Row 32: Enter the name or IP of the AESB Server you want to connect to. In this example it is '127.0.0.1'. Row 33: Enter the port number you need for the connection (here: '3900'). Row 34: The GetVarContent function is used here, which refers to the project variable ('USERNAME'). The project variable must be created and filled outside the Form Editor in the Client Commands themselves. Row 35: The GetVarContent function is used here, which refers to the project variable ('PASSWORD'). This project variable must also be created and filled outside the Form Editor in the Client Command itself. Row 36: The variable TargetConnectionVariable must be filled with the value 'CONNECTION'. The protocol requires this type for this type of connection (type: Connection). Row 37: The value of the ConnectionString remains clear (' ') and will be filled with values later on. Row 38: The MessageID is a GUID that can be exchanged and used as desired. When entering it, however, it is important that it follows the same input scheme: The number of digits must remain the same (8-4-4-4-8 digits each). Row 39: The value 'VCMN' must be entered for the VirtualRouter. This is a virtual section within the AESB in which the ACMP Server is located. As this example communicates with the ACMP, this router must be specified. Row 40: The RoutingKey specifies where the entered values are to be sent. Accordingly, the ACMP Server that is to receive the entries must be entered here. In this example it is called '?.Aagon.Components.ACMPServer.*'. The question mark and the asterisk both represent a wildcard. The asterisk represents the ACMP Server ID. If you have several ACMP Servers connected to the AESB, you can also enter the ID of one Server to route the data only to it. Row 41: The input row Tag describes the type of message. As the ICQL protocol is used here, the value to be entered must be 'ICQL'. Lines 42 - 43: The virtual router (CallbackVirtualRouter, row 42) and routing key (CallbackRoutingKey, row 43) are displayed here. No response is required, so a '' is sufficient as a clear value after the equals sign in both rows. |
| Row 46 - 55 | |
| function GetClientID : String; var Ltemp : TStringList; begin LTemp := TStringList.Create(); LTemp.CommaText := LClients.Strings[LBClients.ItemIndex]; Result := LTemp.Values['CLIENTID']; LTemp.Free(); end | The GetClientID function, with a return value of the String type, is described in rows 46 - 50. The function determines the Client ID of the Client selected in the interface from the LBClients list. Row 46: Start of the GetClientID function with a string as the return value. Rows 47 - 54: The value LClients.Strings contains the index of the Client you have selected. With this index, the corresponding Client is selected from the LClients.Strings list and temporarily stored in a temporary variable. The return value of the function (row 52) is set to the value "Client ID" from the temporary variable and thus corresponds to the Client ID that you have chosen as the selected agent from the list. The working memory is released again via row 53. |
| Row 56 - 65 | |
| function GetClientCommandID : String; var Ltemp : TStringList; begin LTemp := TStringList.Create(); LTemp.CommaText := LClientCommands.Strings[LBClientCommands.ItemIndex]; Result := LTemp.Values['SCRIPTID']; LTemp.Free(); end | Rows 56 - 65 describe the GetClientCommandID function. The function determines the Client Command ID of the Client Commands selected in the interface from the LBClientCommands list. Row 56: Start of the GetClientCommandID function with a string as the return value. Rows 57 - 65: LBClientCommands.ItemIndex contains the index of the Client Command you have selected. This index is used to select the corresponding Client Command from the LClientCommands.Strings list and temporarily store it in a temporary variable. The return value of the function (row 52) is set to the value "Script ID" from the temporary variable and thus corresponds to the Client Command ID that you have chosen as the selected Client Command from the list. The working memory is released via row 63 (LTemp.Free()). |
| Row 66 - 80 | |
| function CreateMessageBody : String; var MessageBody : TStringList; begin MessageBody := TStringList.Create(); MessageBody.Add('<ICQL><ACMP><EnqueueClientCommand version="1">'); MessageBody.Add('<TEnqueueClientCommandRequest_V1 xmlns:xsi="http:~/~/www.w3.org/2001/XMLSchema-instance">'); MessageBody.Add('<ClientId>'+GetClientID+'</ClientId>'); MessageBody.Add('<ClientCommandId>'+GetClientCommandID+'</ClientCommandId>'); MessageBody.Add('</TEnqueueClientCommandRequest_V1></EnqueueClientCommand></ACMP></ICQL>'); Result := MessageBody.Text; MessageBody.Free(); end | The rows 66 - 80 describe the functions for creating the message that is sent to the SICS / AESB. In the section where the MessageBody is defined and filled, the data type must first be defined. Row 72 contains various values that must be adhered to. ICQL stands for the format in which the SICS expects the request, as well as the value ACMP. EnqueueClientCommand specifies that a function is to be called to queue a Client Commands in version 1. Rows 74 and 75 specify that the request must contain the Client ID and the GetClientCommandID as a day so that the recipients (in this case the ACMP Server) know which Client Command to send to which Client. The return value (row 77) then contains the complete message. This is followed by a network share of the working memory via row 78. |
| Row 81 - 109 | |
| procedure GetClients; var LSQL, LTemp : TStringList; I : Integer; begin LSQL := TStringList.Create(); LTemp := TStringList.Create(); // SQLStatement zum Ermitteln der Clients LSQL.Add('SELECT COMPUTERNAME, CLIENTID'); LSQL.Add('FROM CLT_CLIENTS'); LSQL.Add('WHERE ismanaged = 1'); LSQL.Add('ORDER BY COMPUTERNAME'); // Leeren der Listbox der Clients LBClients.Clear(); LClients.Clear; // Ausführen des Statements zum Beziehen der Clients aus der DB SQLQuery(LSQL.Text,'','',LClients,true,30); for i := 0 to (LClients.Count-1) do begin LTemp.Commatext := EscapeValues(LClients.Strings[i]); LBClients.Items.Add(LTemp.Values['COMPUTERNAME']); end LSQL.Free(); LTemp.Free(); end; | Rows 81 - 109 (procedure GetClients) retrieve the agents from the database and save them in the left box, which is filled with the entries directly when the window is started. To do this, two lists are first defined and then created (86 and 87). The SQL Query/SQL statement is then assembled and filled with values, which enables the Clients to be determined. Only the computer name and the Client ID are retrieved from the CLT_Clients table. The condition ismanaged=1 ensures that only managed agents are involved. The list returned by the SQL server is sorted according to the computer name (89 - 94). The list box is emptied once before it is filled to prevent entries from still being present (96 and 97). The SQL Query function applies the SQL statement and writes all clients to the global string list (LClients) (line 99). Lines 101 - 107 fill the interface of the list box that is displayed to you as a user. The list box is filled with the computer names that were previously retrieved from the SQL query. The last two rows (106 and 107) release the previously created lists. |
| Row 110 - 141 | |
| procedure GetClientCommands; var LSQL, LTemp : TStringList; I : Integer; begin LSQL := TStringList.Create(); LTemp := TStringList.Create(); LSQL.Add('DECLARE @Search nvarchar(200) = ' + QuotedStr(EDCCSearch.Text) + ';') LSQL.Add('SELECT DESCRIPTION, SCRIPTID'); LSQL.Add('FROM SYS_SCRIPTS'); LSQL.Add('WHERE HASCLIENTSCRIPT = 1'); LSQL.Add('AND State = 7'); LSQL.Add('AND DESCRIPTION LIKE @Search'); LSQL.Add('ORDER BY DESCRIPTION'); // Leeren der Listbox der ClientCommands LBClientCommands.Clear(); LClientCommands.Clear(); // Ausführen des Statements zum Beziehen der ClientCommands aus der DB SQLQueryEx(LSQL.Text,'','',LClientCommands,true,emOpen,30); for I := 0 to (LClientCommands.Count-1) do begin LTemp.Commatext := EscapeValues(LClientCommands.Strings[i]); LBClientCommands.Items.Add(LTemp.Values['DESCRIPTION']); end LSQL.Free(); LTemp.Free(); end; | These rows (110 - 141) are used to fill the right box with the Client Commands entries by loading them from the SQL database and inserting them there. First, two lists are defined (116 and 117). To determine the Client Commands, an SQL Query is created in rows 119 - 124. Row 118 uses the search field of the interface to retrieve only Client Commands with this name from the database. Entering the wildcard "%" retrieves all Client Commands from the database, entering "Test_%" only retrieves all Client Commands that begin with "Test_" in their name. (LSQL.Add('DECLARE @Search nvarchar(200) = ' + QuotedStr(EDCCSearch.Text) + ';')). The list box and the global list of client commands are emptied via lines 127 and 128. The statement is then executed via the SQL query, whereby the retrieved client commands are written to the global string list (LClientCommands). Lines 132 - 136 fill the surface of the list box with the description (name) of the client command that was previously retrieved from the SQL query. The rows 138 and 139 release the functions again. |
| Row 142 - 151 | |
| procedure FormActivate; begin LClients := TStringList.Create(); LClientCommands := TStringList.Create(); ResultMessages := TStringList.Create(); GetClients; SetAESBConfig; end; | Procdure FormActivate (rows 142 - 151) is called when the window is created. The global lists LClients and LClientCommands are created first (144 and 145). The GetClients method retrieves all Clients from the database and displays them in the interface (see upper function) (148). The SetAESBConfig function is called in row 149 and sets all variables that were previously set by you and that are necessary to communicate with the AESB (see function above). |
| Row 152 - 160 | |
| procedure OkButtonClick(Sender: TObject); begin LClients.Free(); LClientCommands.Free(); ResultMessages.Free(); CloseForm(0); end; | The function in rows 152 - 160 is called when the OK button is pressed. All lists are cleared so that there are no more entries in LClients or LClientCommands. Row 158 CloseForm(0) closes the form with the parameter 0. |
| Row 161 - 169 | |
| procedure CancelButtonClick(Sender: TObject); begin LClients.Free(); LClientCommands.Free(); ResultMessages.Free(); CloseForm(1); end; | Rows 161 - 169 are called when the cancel button is pressed. As in the previous section, all lists are cleared and the Closeform (row 167) is filled with the parameter 1 in order to show a better distinction between the OK and Cancel button, whereby this value does not represent an error. This parameter can be used in the Client Command as the return value of the form to distinguish whether the OK or cancel button was pressed. |
| Row 170 - 176 | |
| procedure CBSureClick(Sender: TObject); begin if ((CBSure.Checked) AND (LBClients.ItemIndex > -1 ) AND (LBClientCommands.ItemIndex > -1 )) then BtnSend.Enabled := True; Else BtnSend.Enabled := False; end; | This line section is called when the CBSure checkbox is clicked ("I am sure"), which the user must enable before sending a Command. The process procedure CBSureClick(Sender:TOBject) (from row 170) ensures that the following conditions are met (171 - 175) and that the Send Command button is enabled as a result. The condition is: If CBSure (true) (checkbox checked), a Client from the left box and a Client Command from the right box have been selected (ItemIndex must be larger than -1; so a selected item must be selected), then the Send Command button is enabled (BtnSend.Enabled :=True). Otherwise, the button is disabled on Else. |
| Row 177 - 194 | |
| procedure BtnSendClick(Sender: TObject); var AESBMessage : String; begin AESBMessage := CreateMessageBody; AddSICSConnectionV1(Protocol,Server,Port,Username, Passwort,ConnectionTimeout,TargetConnectionVariable,false); ConnectionString := GetVarContent('CONNECTION'); IResult := SICSPublishV1(ConnectionString, MessageID, VirtualRouter, RoutingKey, ExchangeType, Tag, AESBMessage, CallbackVirtualRouter, CallbackRoutingKey, ResultMessages, AAckMessages, AResult, AErrorCode); if (IResult = 0) then begin ShowMessage('Command has been send'); CBSure.Checked := false; BtnSend.Enabled := false; end; Else Showmessage('An Error has occured: '+InttoStr(IResult)); end; | The function procedure BtnSendClick(Sender: TObject) is defined in the following rows and then executed as soon as the user clicks on the button. The variable (AESBMessage), whose data type is a string, is declared (row 179). The function CreateMessageBody is then called. In this function, the MessageBody is completely assembled once and returned as a return value. This return value is in turn inserted into the AESBMessage variable (row 181). The SICS connection is then created, which consists of the various parameters and the AddSICSConnectionV1 function. In line 183, the ConnectionString variable is filled with the GetVarContent function. The function retrieves the value from the client command variable with the name (parameter of the function) "Connection". Line 184 continues with the IResult variable, where the result of the function is saved as SICSPublishV1. The various parameters are sent to the AESB. This is followed by an if. then clause follows: The result (IResult) of the function is checked to see if the result is 0 and therefore there were no errors. The ShowMessage function is called, which opens a dialog box with the text "Command has been send" (line 188). In the next two lines, the properties "Checked" for the checkbox and "Enabled" for the button are set to False. This restores the objects to their original state. If an error has occurred, the Else part is executed (line 192) and a dialog "An Error has occured" is displayed, as well as the result of IResult (the error code). |
7. Once you have inserted or customised all the relevant information in the code, you can run the form from the quick selection bar using the Start button  (F9). Note that this is not only a test to check for any syntax, spelling or logic errors, but also to send client commands to an agent. The following image shows the finished form as it may appear in your system.
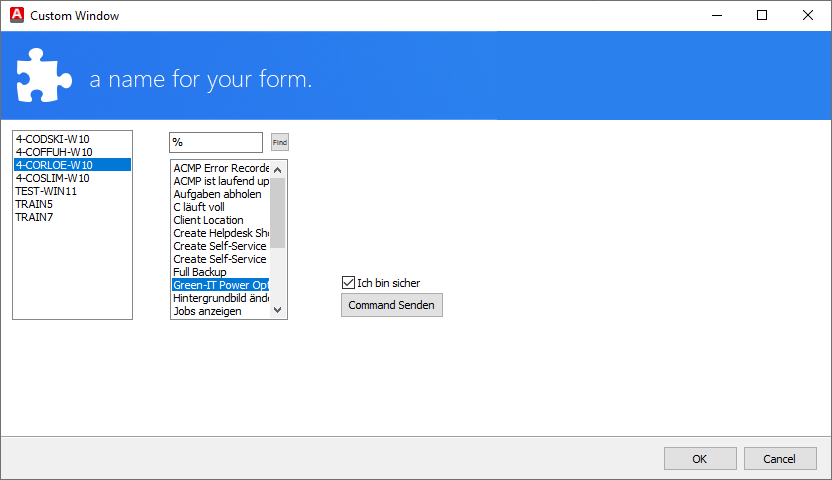
Completed Client Commands in the Custom Window
8. Close the open windows (Custom Window and Form Editor). You will be returned to the Form Editor interface and its preview.
9. Check the value entered under Script Return Value. It should be the integer '-1'.
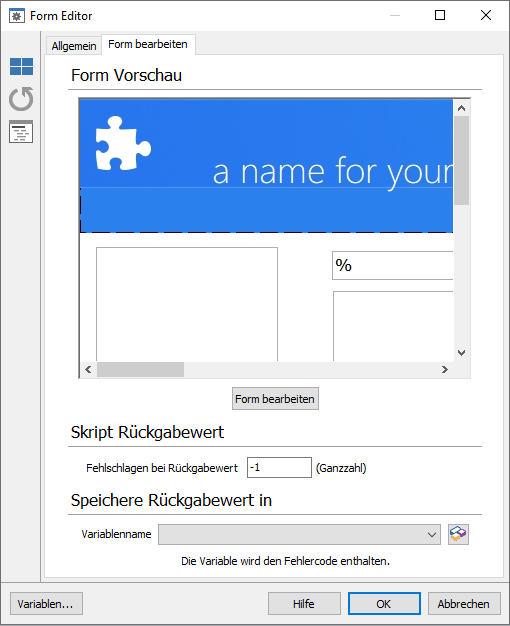
Form Editor preview
10. Click OK.
11. Save the finished Client Command and close the editor.
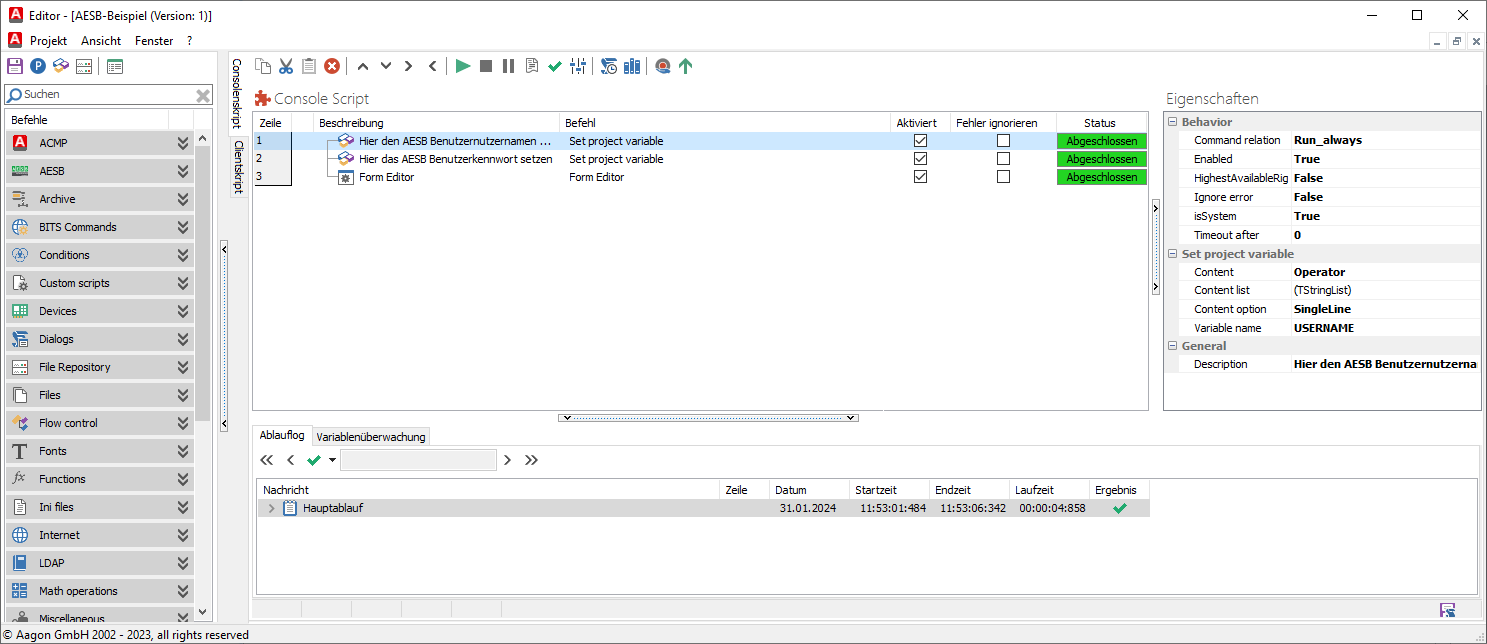
Client Command Editor: Sending a Client Command statically to a Client using the Form Editor via AESB
Running through the Client Command phases
Before the Client Command can be used, it must go through the Test, Synchronise, Release und Execute phases. It is then possible to send the Client Commands statically to a Client via the AESB using the Form Editor.


