


Organise Assets
The figure caption must be located inside a figure macro. Click on this message for details.
Organising Assets into Types
To help you organise your assets, you can divide them into different asset types. These types can be structured hierarchically as required.
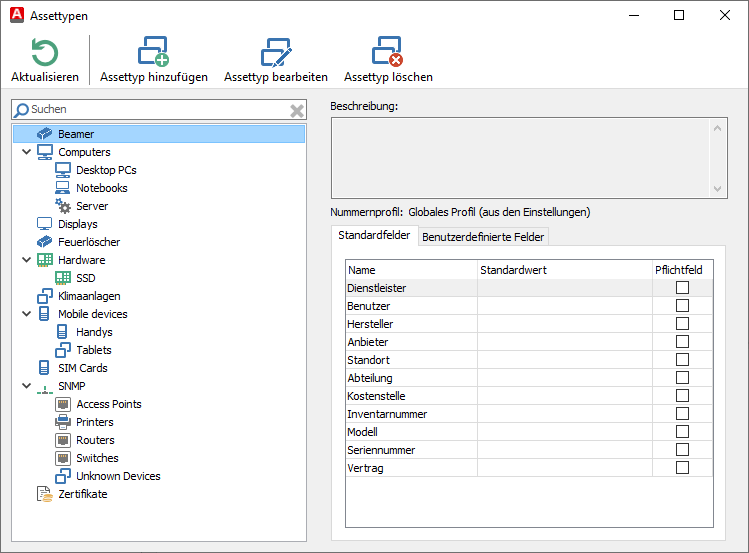
To do this, navigate to Asset Management > Hardware Assets and select Asset Types from the ribbon bar. This will open a separate window that you can dock into the Console. In the top row you will see all the common actions you might need to work with Asset Types: You can create a new Asset Type (), edit a selected Asset Type (
![]() ) or delete it (
) or delete it (). As in many other areas of the ACMP Console, the view can be refreshed using the button
![]() . Below this, on the left, is the list of existing Asset Types, sorted alphabetically. On the right is an optional description and the stored standard and custom fields associated with each Asset Type.
. Below this, on the left, is the list of existing Asset Types, sorted alphabetically. On the right is an optional description and the stored standard and custom fields associated with each Asset Type.
Asset Type
Adding an Asset Type
First click Add Asset Type (![]() ). A wizard will open and guide you through the following steps.
). A wizard will open and guide you through the following steps.
On the first page, under General Information, select where the Asset Type will be stored. Enter an Asset Type as the output directory under which the new type will be created, or select the top level (root). If the new Asset Type is created below an existing type, the settings of the parent type can be used by selecting the checkbox with the same name. Enter a name for the Asset Type, an optional Asset number profile and an optional description. Then click Next > to proceed to the second page of the wizard.
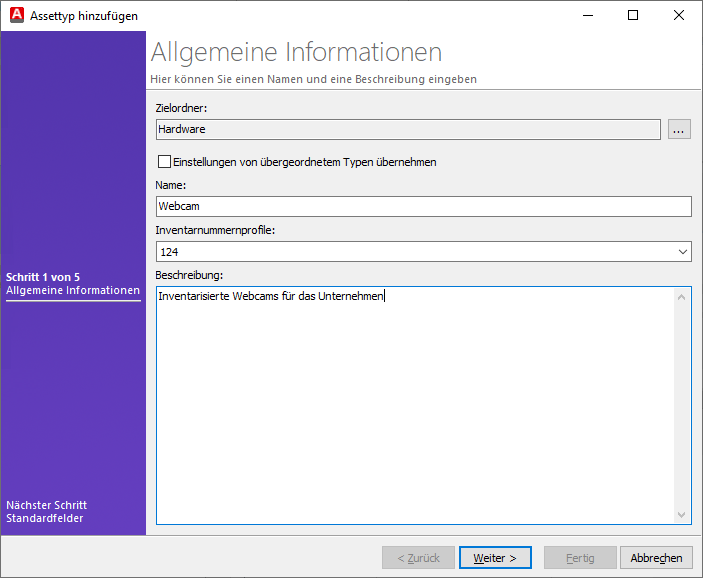
Add Asset types (General information)
Customise the properties within the basic fields. To do this, click on one of the fields and set a default value in advance. This can be useful if, for example, you only buy certain hardware from one manufacturer and you do not want to consider another manufacturer. If this value differs when you create an Asset and needs to be changed, you can adjust it manually when you create the Asset. If you wish to define a required field, tick the appropriate box under Required field. Click Next > if you do not wish to make any further changes.
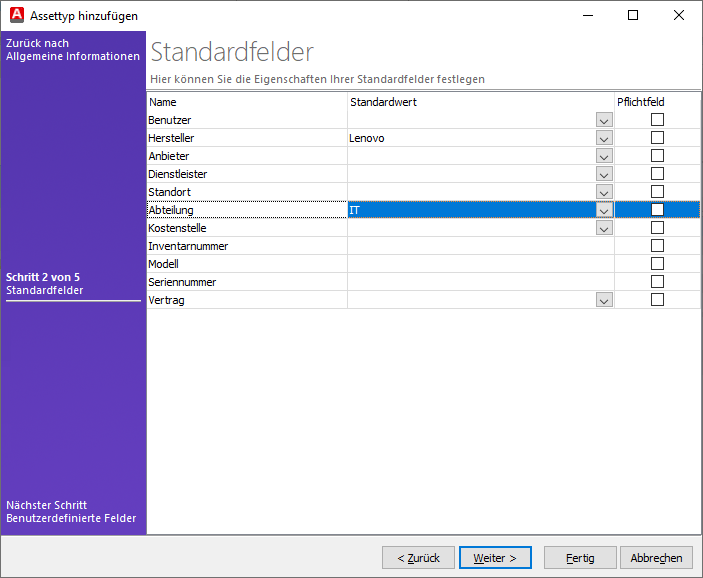
Configure basic fields
This wizard page allows you to define custom fields and their properties. For example, you can store customised information such as the PIN of a SIM card. If you have accidentally entered too many custom fields, you can remove them by double-clicking on the right side of the entries. If the order of the field list does not suit you, you can easily change it: Select the desired field and use the arrow icons to move it to the desired position. Otherwise, click Next > to move to the next pages.
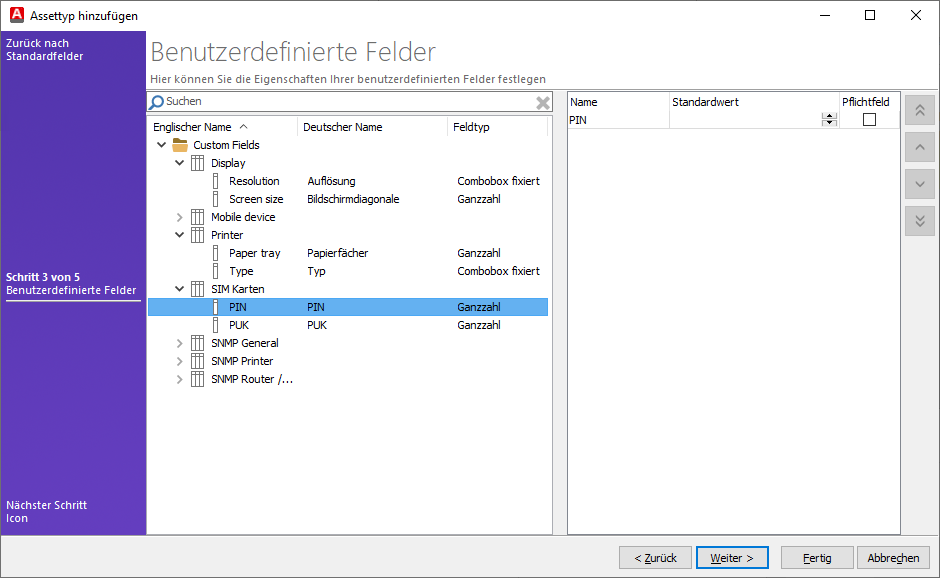
Custom fields
Optionally, you can assign a different icon to the Asset Type on the next page. To do this, either select one of the existing icons from the list, or add your own. Then click Next >.
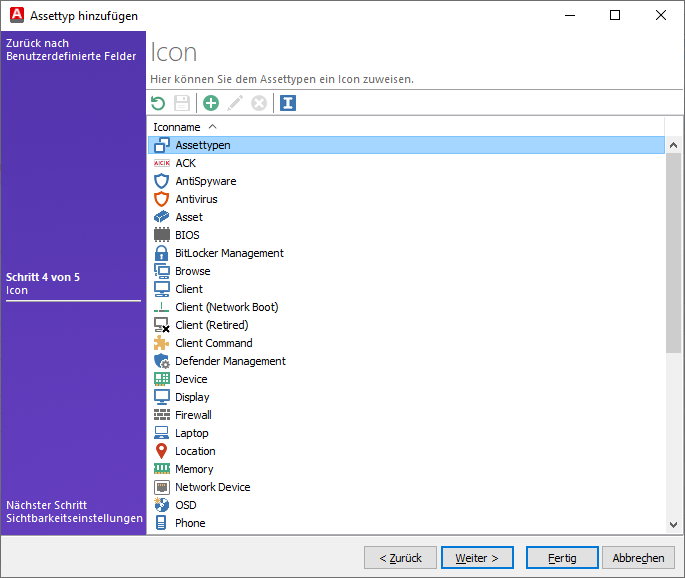
Zuweisung eines Icon
The last page of the wizard allows you to change the visibility settings for the Asset Type. This is where you define who can see assets of this type. A distinction is made here between the access rights for groups and users that you have previously created in the Settings (System > User Management).
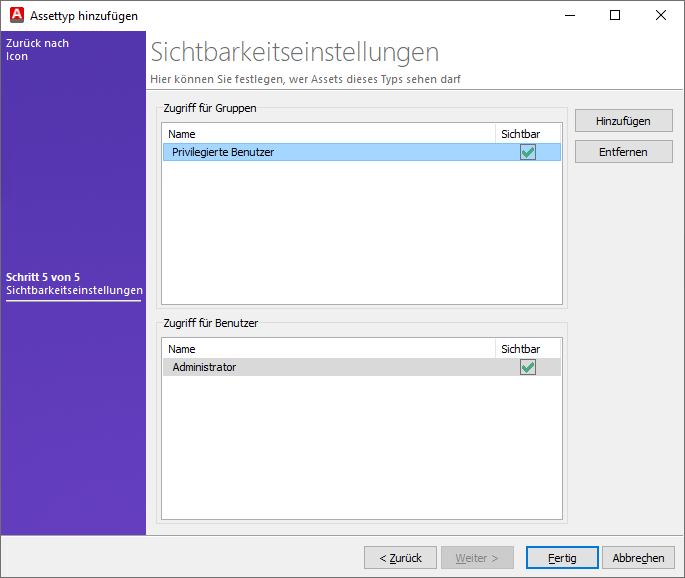
Configure visibility settings for an Asset Type
Exit the wizard by clicking on Finish. The newly added Asset type now appears in the list.
Editing or Deleting Asset Types
To edit an existing Asset Type, select the Asset Type you wish to edit. Then click Edit Asset Type  to open a wizard that will guide you through the steps. You can customise the general information (e.g. output directory, name, asset number profile or description) and configure the default and custom fields. If you later wish to assign a new icon to the asset type or customise the visibility settings, you can also do this in the wizard.
To delete an Asset Type, select the desired entry and click on Delete Asset  .
.
Included Asset Types
ACMP comes with a number of Asset Types that you can use straight away. To do this, open the Asset Types in the Asset Management ribbon bar. A new window will open where you can see the list of Asset Types supplied. This is the SNMP type that belongs to the AESB's SNMP adapter. This can automatically create Assets via the PublicAPI. Below is a brief description of each Asset Type and the custom fields they contain.
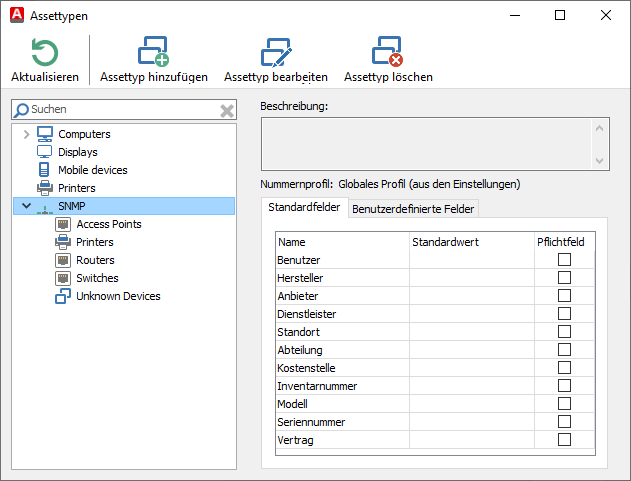
Included Asset Types
| Asset Type | Description | Custom Fields |
| SNMP > Access Point | You can add the devices under the access points. |
|
| SNMP > Printers | Add your SNMP printers here. |
|
| SNMP > Routers | Add your SNMP routers here. |
|
| SNMP > Switches | Store all SNMP switches. |
|
| SNMP > Unknown Devices | Create all SNMP devices that cannot be assigned to any other Asset types here. Alternatively, you can also add your own Asset Types. |
|
Asset Collections
Asset Collections allow you to create logical groupings of individual assets in ACMP. Asset Collections allow you to combine different assets that are often used or rented together (e.g. hardware for on-site visits to a customer or the inventory of a media van).
Asset Collections can be accessed from Asset Management. Click the Asset Collections button on the ribbon bar. This will open a new window that you can dock into the Console. You can use the toolbar to manage the collections (add (![]() ), edit (
), edit (![]() ) or delete (
) or delete (![]() ) collections) or generally customise the structure of the Asset Collections via the folders (add new folders (
) collections) or generally customise the structure of the Asset Collections via the folders (add new folders (![]() ), bedit existing folders (
), bedit existing folders (![]() ) or delete entire folders (
) or delete entire folders (![]() )), in which the items are located.
)), in which the items are located.
If you want to lend(![]() ) or return (
) or return (![]() ) entire Collections, it works in the same way as the Asset Rental system. It is important to note that you can only lend Collections that are linked to at least one Asset
) entire Collections, it works in the same way as the Asset Rental system. It is important to note that you can only lend Collections that are linked to at least one Asset
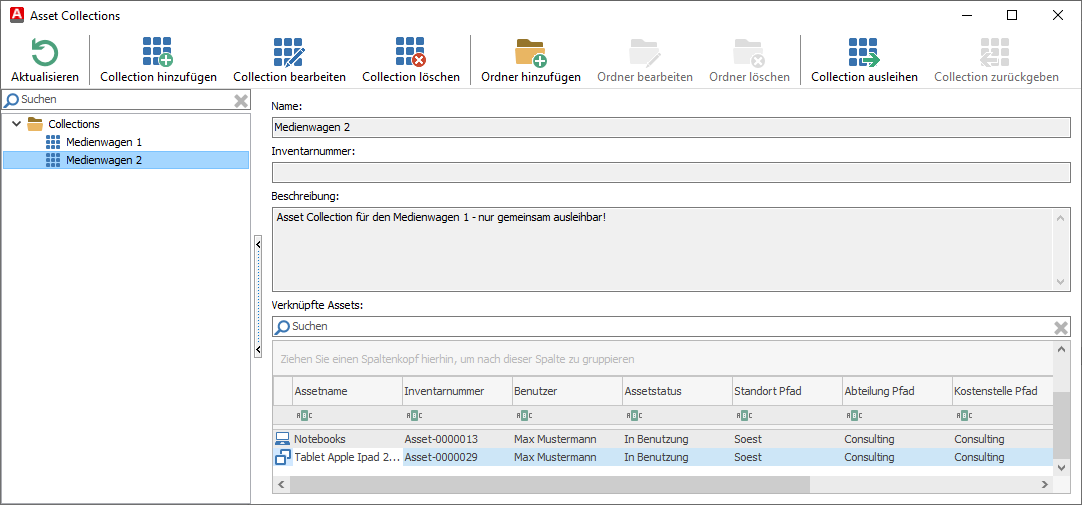
Overview of the Asset Collections
Adding Collections
First click on Add Collection (![]() ) in the toolbar. A multi-page wizard will open, asking you to enter general information. Select an output directory where the collections will be stored. Then enter a name and optionally the inventory number and a description for the collections. Click Next >.
) in the toolbar. A multi-page wizard will open, asking you to enter general information. Select an output directory where the collections will be stored. Then enter a name and optionally the inventory number and a description for the collections. Click Next >.
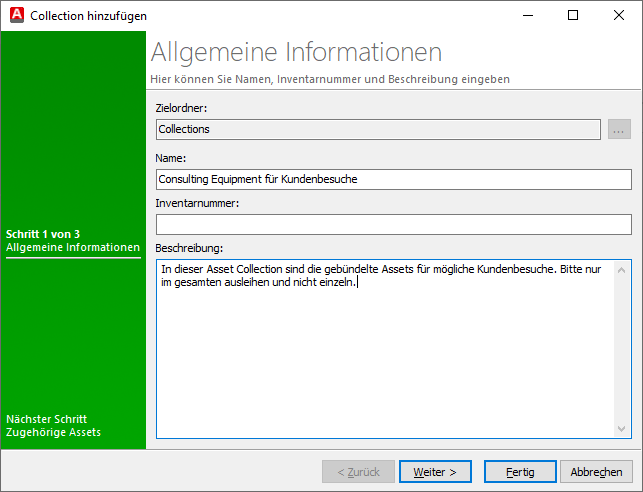
Add new Asset Collections (General Information)
The next step is to define the contents of the Asset Collections. To do this, you need to link the associated Assets to the Collections. Use Link Asset (![]() ) to select the appropriate freely definable entries from the Asset Types, Locations, Departments or Cost Centres categories.
) to select the appropriate freely definable entries from the Asset Types, Locations, Departments or Cost Centres categories.
Confirm each entry with OK.
You can remove an Asset from the Collection by selecting it and clicking Remove Asset Links (![]() ). When you have added all the required Assets to the Collections, click Next >.
). When you have added all the required Assets to the Collections, click Next >.
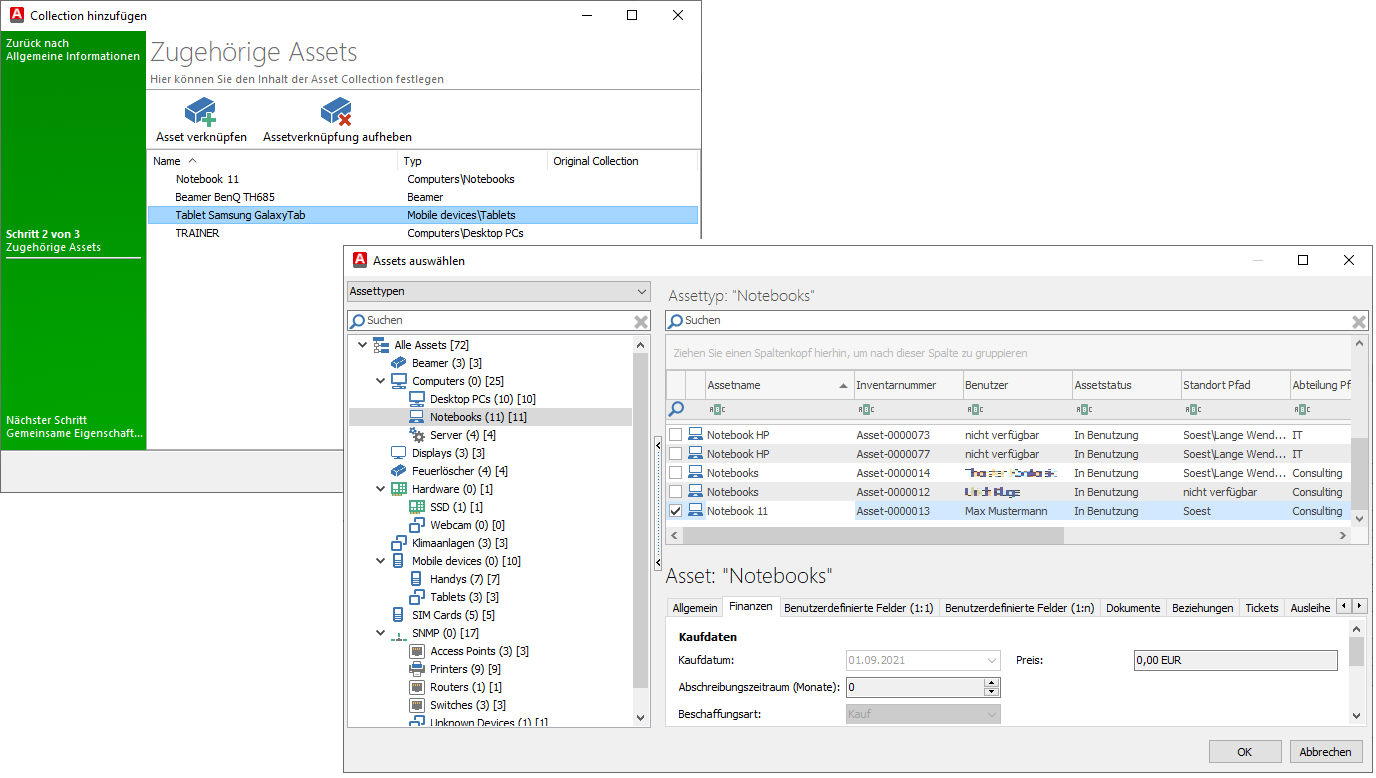
Link Assets of a Collections
In the next pages of the wizard, create any common properties. Here you can optionally store master data for Users, Locations, Departments and Cost Centres. To do this, select the required data from the appropriate drop down list and add the items by clicking OK.
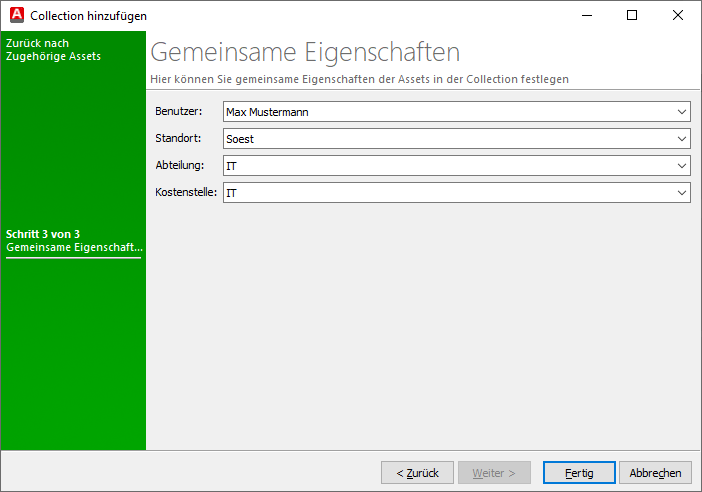
Define common properties for the Asset Collections
Exit the wizard by clicking on Finish. The new Collection is added to the list.
Edit or delete Collections
To edit an existing Collection, open a list entry from the Asset Collections either by double-clicking on it or by clicking on the button in the ribbon bar. Click on Edit Collections (![]() ) and customize all the information you want to change in the wizard that opens. Confirm your customizations with Finish.
) and customize all the information you want to change in the wizard that opens. Confirm your customizations with Finish.
If you want to delete a Collection, select a list entry and click on Delete Collection (![]() ). Confirm your actions with Yes so that the entry will be deleted.
). Confirm your actions with Yes so that the entry will be deleted.
Managing Folders
Folders provide an overview and structure to the Asset Collections. To add a new folder, click on the corresponding button in the toolbar (![]() ). You will first need to select an output folder and give it a name. Continue by clicking Next >. On the next page, define the security settings for the folder and assign the level of access that each group or user should have. Finish your work by clicking Finish.
). You will first need to select an output folder and give it a name. Continue by clicking Next >. On the next page, define the security settings for the folder and assign the level of access that each group or user should have. Finish your work by clicking Finish.
To make changes to existing folders, click Edit folder (![]() ). You will be taken through the same wizard as when adding a new folder. Here you can change the name, output directory or security settings.
). You will be taken through the same wizard as when adding a new folder. Here you can change the name, output directory or security settings.
Delete the folder by clicking the ![]() button. Note that all subordinate folders and Asset Collections will also be deleted.
button. Note that all subordinate folders and Asset Collections will also be deleted.
Number profiles
Number profiles help you to organise your Assets by assigning specific profiles to your Asset types, which are built according to a specific scheme. The inventory numbers are created automatically via the settings (Settings > Asset Management > Inventory number). You can either add this assignment directly when creating an Asset type or when editing an existing type.
Number profiles always consist of a number of digits defined by you, as well as a prefix and/or suffix. The advantage is that you can create an individual number profile for each asset type created, for example to be able to filter for specific inventory numbers in Queries or to be able to directly recognise which Asset types are involved when printing Assets (see the following graphic of a QR code).
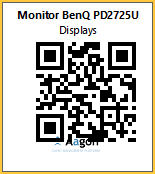
QR Code of a Display Asset
You can only manage the number profiles in Asset Management. To do this, navigate to the Asset Management > Hardware Assets module and select the Number profiles button in the ribbon bar. All available profiles are displayed in a new window, which you can dock in the console. You will find the usual action fields in the toolbar: You can add new number profiles (![]() ), edit existing ones (
), edit existing ones (![]() ) or delete them (
) or delete them (![]() ). Update the content as usual the button
). Update the content as usual the button ![]() to display direct changes.
to display direct changes.
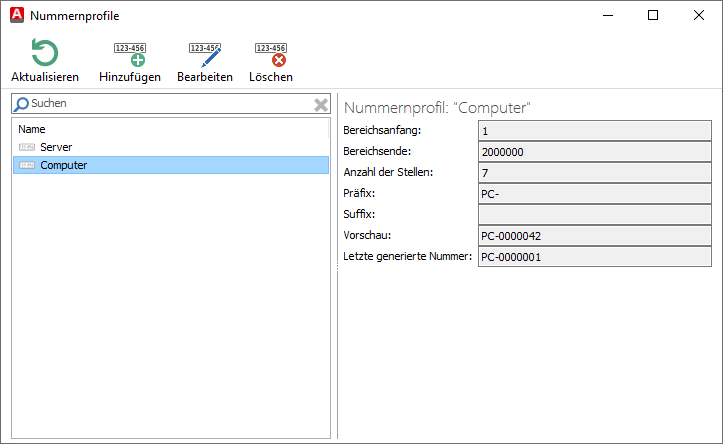
Overview of number profiles
Add number profiles
Click Add (![]() ) in the number profiles toolbar. A wizard opens asking you to enter general information about the number profile. Type a name for the new profile. Then specify the number range start and end. This is the number to which you want to count. You can use the number of digits to specify the minimum number of digits the inventory number should contain. If the number of digits to be assigned to the new asset is less than the number of digits you set, the number will be padded with leading zeros. Enter a number prefix and/or suffix. These two entries help you to identify Asset types, for example (e.g. number prefix "PC-"). You will see a preview of the settings in the lower fields (e.g. "PC-0000042"). Finish your work by clicking Finish..
) in the number profiles toolbar. A wizard opens asking you to enter general information about the number profile. Type a name for the new profile. Then specify the number range start and end. This is the number to which you want to count. You can use the number of digits to specify the minimum number of digits the inventory number should contain. If the number of digits to be assigned to the new asset is less than the number of digits you set, the number will be padded with leading zeros. Enter a number prefix and/or suffix. These two entries help you to identify Asset types, for example (e.g. number prefix "PC-"). You will see a preview of the settings in the lower fields (e.g. "PC-0000042"). Finish your work by clicking Finish..
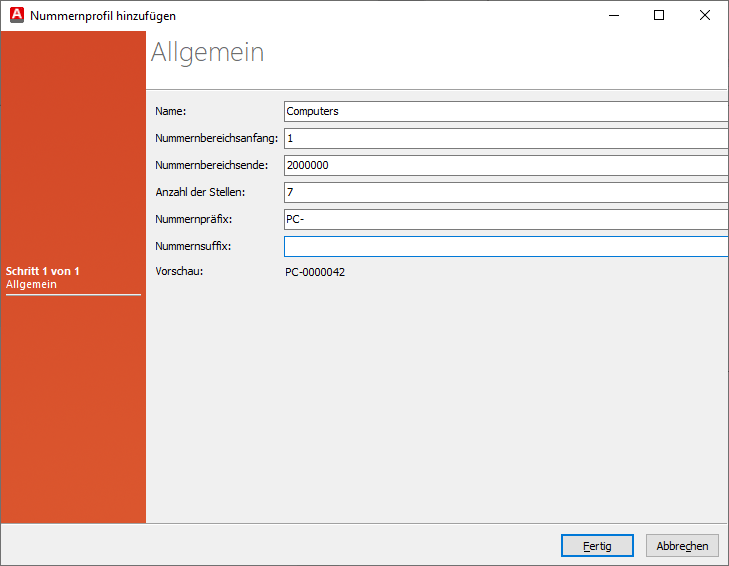
Add a number profile
Editing or deleting number profiles
To edit an existing number profile, select the desired number profile and click Edit (![]() ) in the toolbar. A wizard will open where you can make changes to the numbering profile. Again, you can adjust all the fields you previously set using Add number profile. You can also use the Reset button to reset the last inventory number generated. Confirm the security prompt and click Yes.
) in the toolbar. A wizard will open where you can make changes to the numbering profile. Again, you can adjust all the fields you previously set using Add number profile. You can also use the Reset button to reset the last inventory number generated. Confirm the security prompt and click Yes.
Once you have edited and corrected all the details, click Finish to return to the overview of number profiles.
To delete a number profile, select the entry and click Delete (![]() ) and confirm the security question with Yes.
) and confirm the security question with Yes.
Asset Rental system
The Asset Rental system is divided into two areas: Loan and Return. You can access this function from the Asset Management ribbon bar or by right-clicking on an open Asset. If you want to lend or return Assets or even entire Asset Collections while you are working, navigate back to Asset Management.
| Function | Description |
| Lend Assets | Select the required number from the list of Assets and tick the checkbox(es). Then click on Rent Assets in the ribbon bar. A wizard will open asking you to enter a contact. Select the required contact from the drop down list. Enter the rental date. The current day is always displayed as an option, but you can change the display for both past and future days. You can also optionally enter an estimated return date. Once you have entered all your details, click Finish. The rental status is saved under the tab of the same name for the respective Asset. |
| Return Assets | To return an Asset, select and highlight the Asset, then click Return Assets. This will bring up another wizard for you to enter the return date. Exit the return process by clicking Finish. The return will be recorded and documented in the Rental tab. |