



Self Service Web Interface
General
The Self Service Web Interface is designed for end users (service requesters) to create or edit their tickets or to view tickets again. In addition, it is possible (with existing rights) to view articles from the knowledge base that can contribute to self-help. As an end user, you can also retrieve ticket-related queries.
Page structure and login area
To access the Self Service Web Interface, enter the following address in your browser: http://[ip]/Self-Service/Login.aspx
The beginning of the address [ip] stands for the IP address of the computer on which the Web Interface is installed.
The login page is therefore the first page that you as an end user see from the web interface. Enter your email address and password in the input fields to log in successfully. If you have selected a different authentication setting, you may also need to log in via Active Directory. Optional, you can request your password by clicking on the button of the same name. To do this, enter the stored email address and the password will be sent to you. Otherwise, continue by logging in.
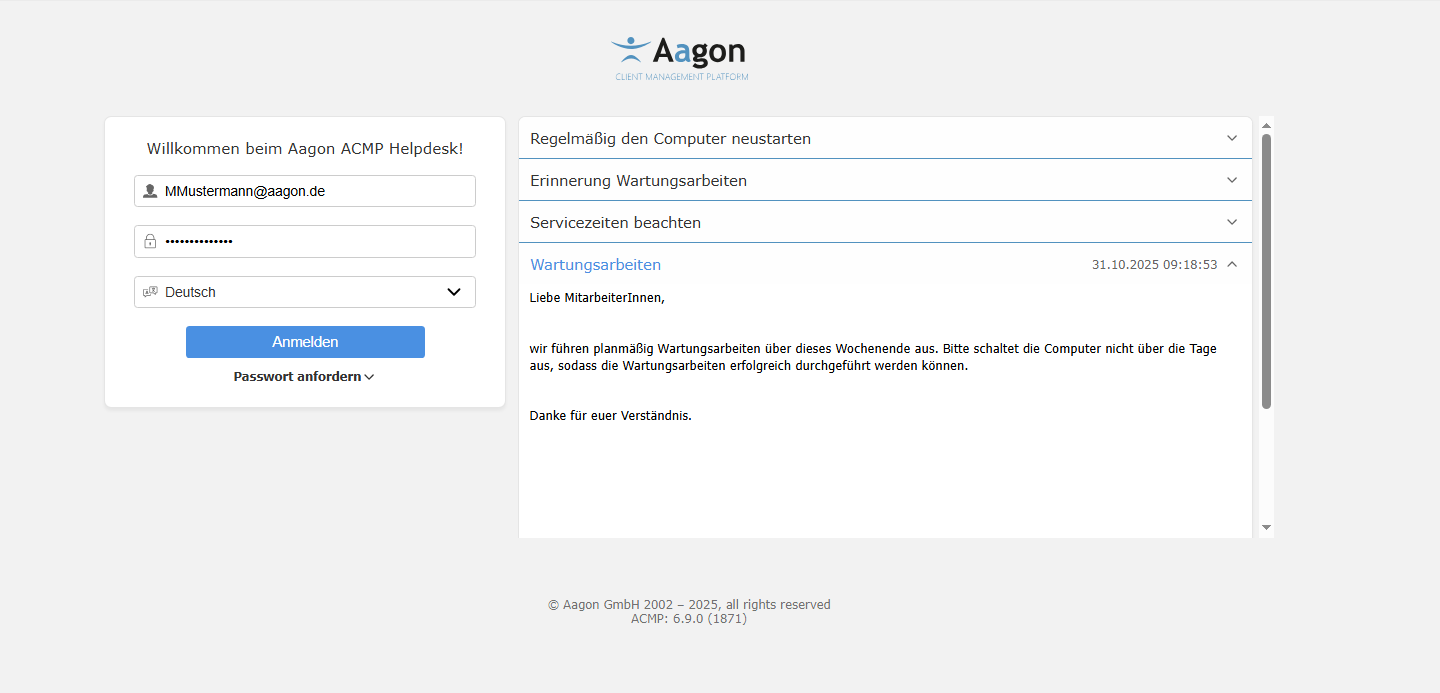
Login window in the ACMP Self Service Web Interface
Structure of the Self Service Web Interface
The Self Service Web Interface is divided into three areas or tabs: Info, Ticket Overview and Knowledge Base. In addition, you will find the Profile with which you are logged in, in the top right-hand corner, where you can also change your password if necessary.
Info
The Info tab serves as a page where you can find out about news and updates. The information page has the same structure as the login page for Self Service.
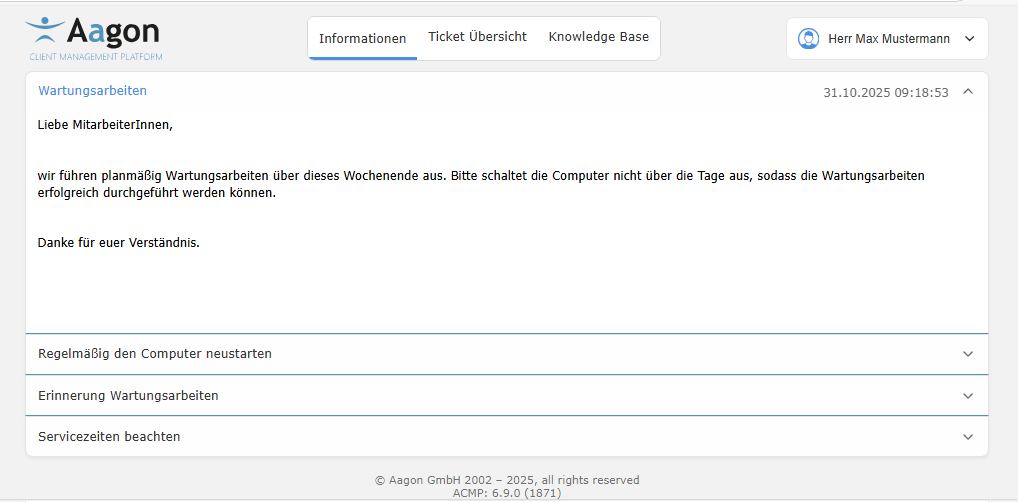
Example of various info in Self Service
If information is time-limited, it can have a start and end date. For example, you could be informed about upcoming maintenance work that may require continuing action (e.g. shutting down your computer).
Ticket Overview
The Ticket Overview is the area where the tickets you have created are listed. You can find this under My tickets.
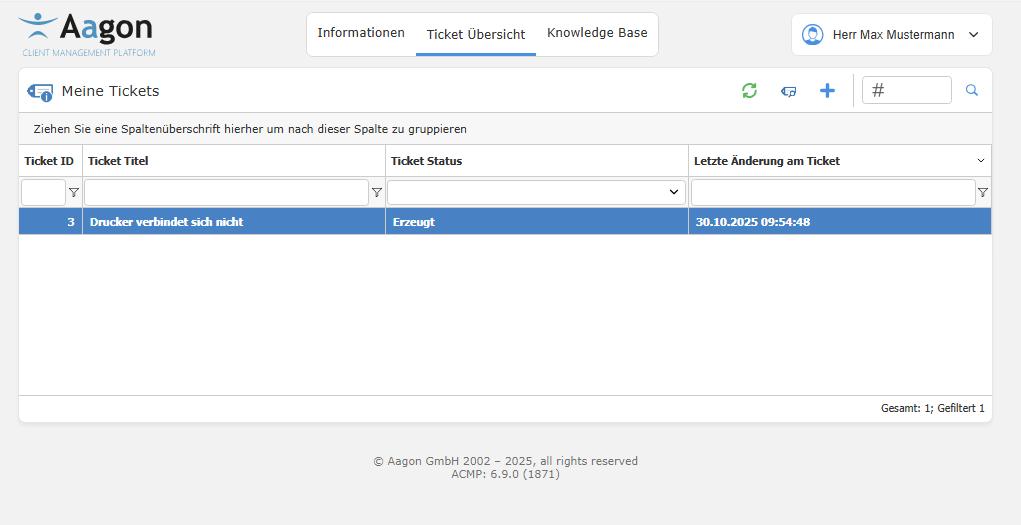
Ticket overview with tickets created by you
he tickets are listed in a table and are subdivided under the individual column headers. Click on  to refresh the ticket display or on
  Show tickets if you want to view a selected ticket in the detail view. Create a new ticket (
 ) or use the search bar to find a specific ticket by entering a keyword. To customize the view according to your preferences and for example display the results grouped accourding to a specific criterion, drag one of the culumns to the top row to enable continuing sorting of the results.
Tip: Please refer to the chapter Structure of a grid in ACMP for additional configuration options.
In addition, you can use the input elements above each column to filter the tickets continuing according to the value entered. For the fields "Ticket ID“, „Ticket Title“ and „Last Change to Ticket“, you can use a free filter  . For the "Ticket Status" column, a preselection is made based on predefined fields
Create tickets in the Self Service Helpdesk
To create a new ticket, navigate to the Ticket Overview tab and then click on  Create Ticket. A new window will open.
Now fill in the fields for the ticket. First, enter a title that briefly provides a summary of the problem. Below the description, you can describe your problem and apply common formatting to the text, as well as insert links or tables. If you want to embed a graphic in the text, click on Select File and upload an image. Optionally, enter some keywords for the ticket. Using the attachments, it is also possible to attach file formats other than graphics to the ticket. To do this, click on  Add attachment and select a file. You can also add a comment if you wish.
 Note:
Note: It is possible to edit the comment on the attachment at a later date ( ). If you wish to remove the attachment completely, click on
  Delete attachment.
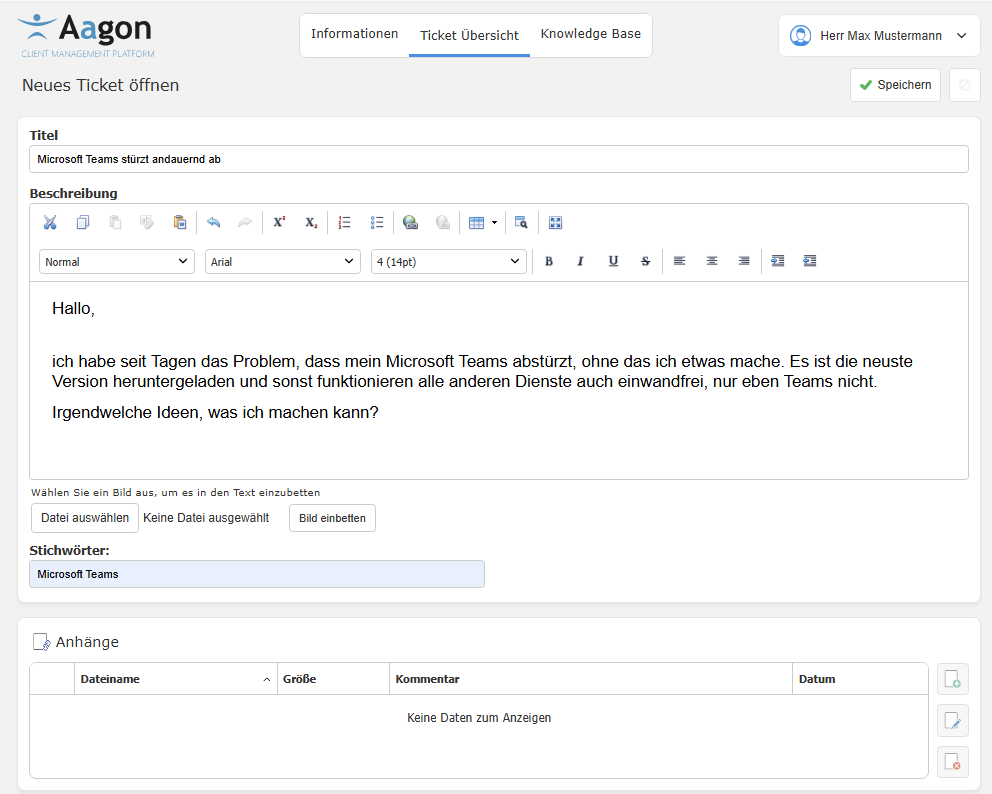
Create a new ticket
To create the ticket, check your details again and click on Save. The newly created ticket will now appear in the ticket overview.
Tip: Depending on the configuration, user-defined fields may also be available in the interface. These are either mandatory (declared as required fields) or optional for the user to fill in.
The administrator can enter custom fields via the ACMP Console.
View and edit ticket details
The ticket details can be viewed in each ticket that has already been created. To do this, double-click on the desired ticket or click on  Display ticket. The interface is almost identical to that used when creating a new ticket.
 Edit.
Edit. Whether the images are automatically displayed in the tickets depends largely on the settings you have specified. If the images are hidden, placeholders are displayed instead and you can only click on the images to load them later. You can find the images under the attachments. If you want to change basic information on the ticket, e.g. because additional data needs to be added to the description that has not yet been entered, you must click on  Edit. This allows you to make changes (corrections, different formatting etc.) to a ticket that has already been created. Save your changes afterwards.
Comment on tickets
The comment function allows end users to provide additional information that may need to be recorded after the ticket has been created (e.g. to document their own attempts, etc.). All comments receive a timestamp and the name of the person who made the comment is displayed. Fill in the comment box as required. To receive additional emails, you must provide a valid address. Then click on Add comment.
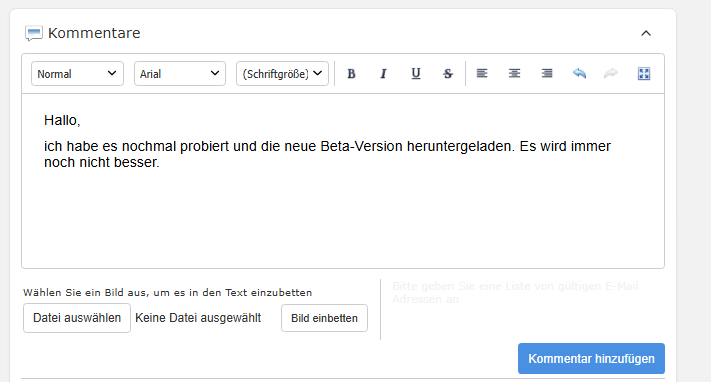
Comment function when editing tickets
Knowledge Base
Über den Reiter Knowledge Base sind die Knowledge Base-Artikel gelistet, die für Sie zuvor erstellt wurden. Jeder Artikel ist mit einer Artikel ID und einer Überschrift versehen. Auf der linken Seite finden Sie die Ordner-Hierarchie, auf der rechten Seite ist der Erstellungs- und Änderungszeitpunkt sichtbar. Eine Suchleiste oberhalb der Artikel hilft Ihnen dabei gezielt ein richtiges Suchergebnis zu finden, geben Sie dafür ein Schlagwort ein und drücken Sie auf  oder starten Sie die Suche mit Enter. Möchten Sie einen Artikel oder die Übersicht drucken, klicken Sie hierfür auf Drucken
  . Für die Detailansicht eines Artikels können Sie einfach den gewünschten Artikel anwählen.
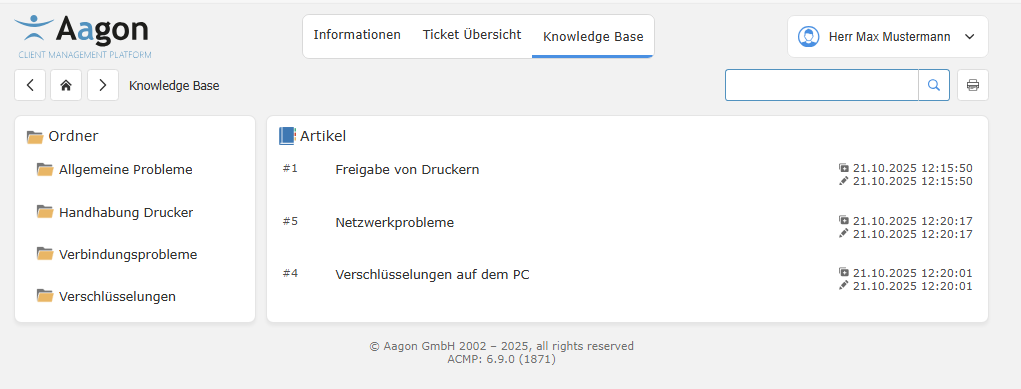
Übersicht der Artikel in der Knowledge Base
Detailansicht eines Knowledge Base-Artikels
Öffnen Sie den Artikel Ihrer Wahl. Die Artikel sind strukturiert aufgebaut: In der ersten Zeile steht der Titel des Artikels („Wie öffne ich den Software Kiosk?“) sowie allgemeine Angaben, welcher Benutzer wann den Artikel erstellt bzw. zuletzt geändert hat. In der ersten Box darunter ist die Fragestellung, welches Thema der Artikel hat. Darunter befindet sich die Antwortbox. Sollten Dateien dem Artikel angehängt worden sein (Bilder, PDFs etc.), werden diese innerhalb der Anhänge (letzte Box auf der Seite) gelistet und können separat nochmals heruntergeladen werden.
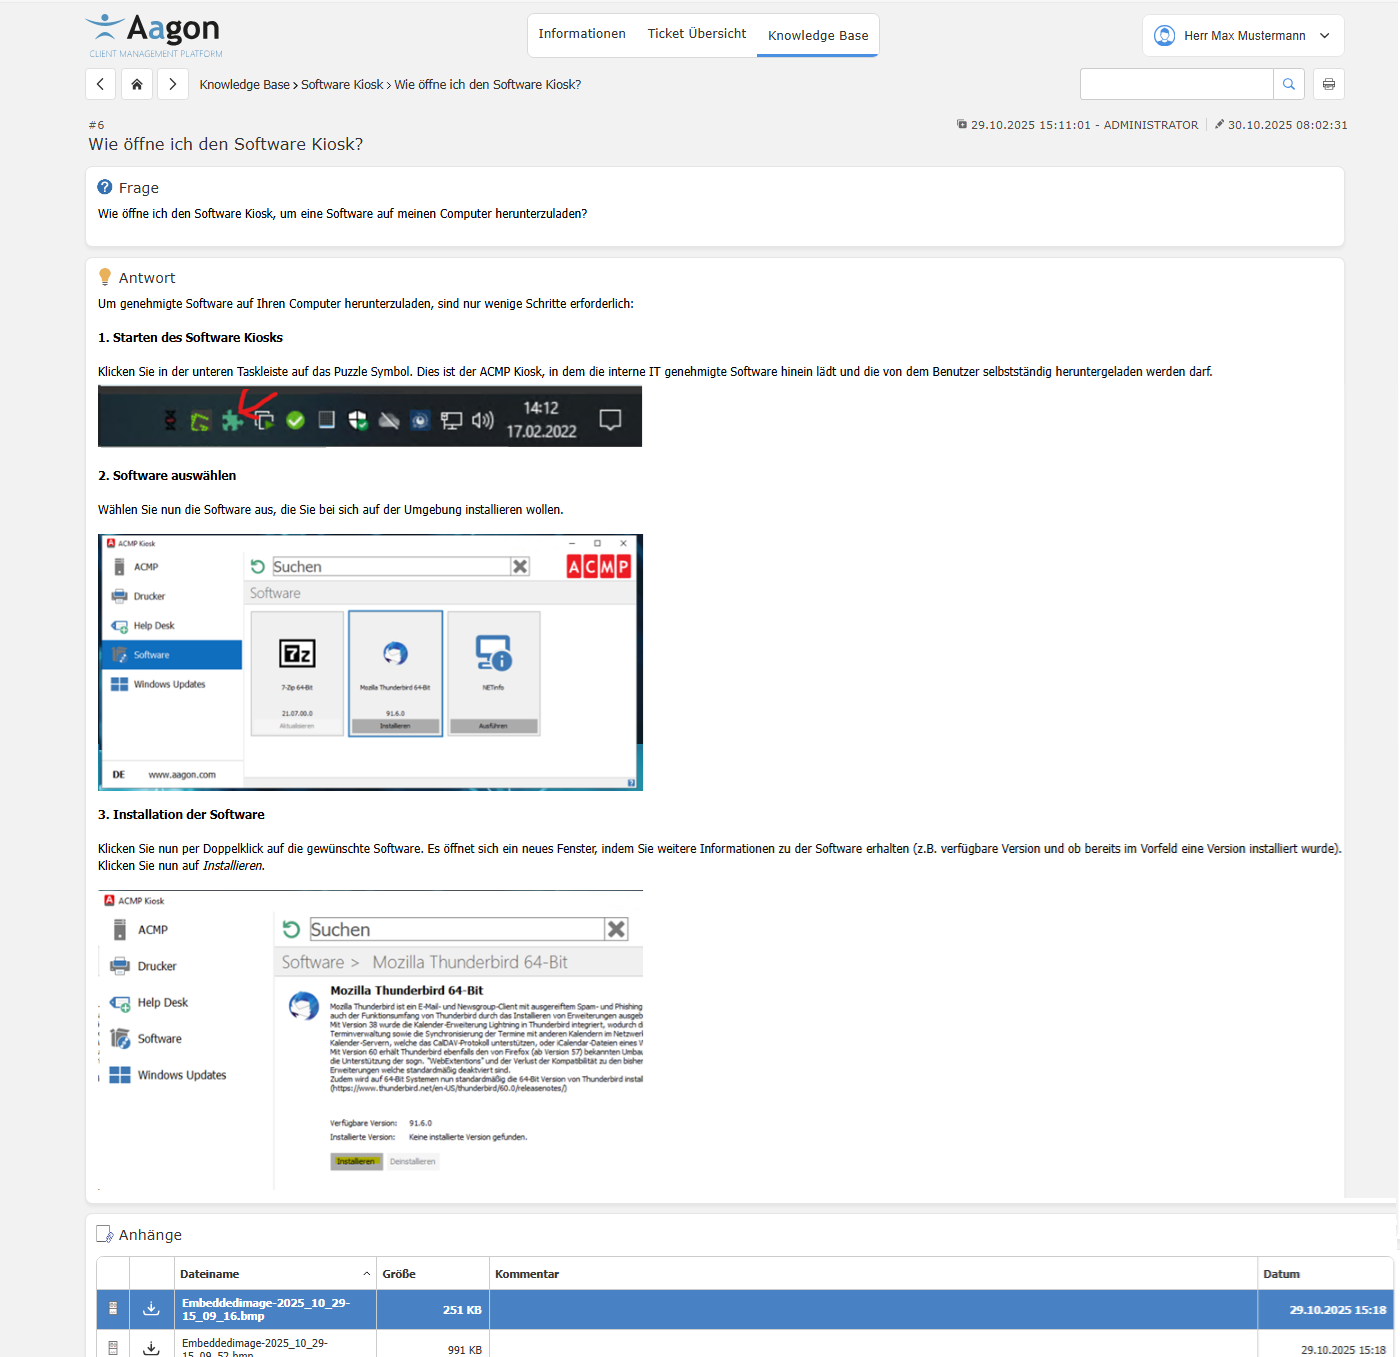
Beispiel eines Artikels in der Knowledge Base
Benutzerprofil bearbeiten
Das Benutzerprofil lässt sich zu jederzeit oben rechts über die gleichnamige Schaltfläche öffnen. Klicken Sie auf die Schaltfläche > Profil und Sie sehen die Angaben zum angemeldeten Benutzer. Sie haben hier die Möglichkeit das Passwort zu ändern. Geben Sie dafür das aktuelle Passwort ein und vergeben Sie in den beiden Zeilen darunter ein neues und klicken Sie abschließend auf Passwort speichern.
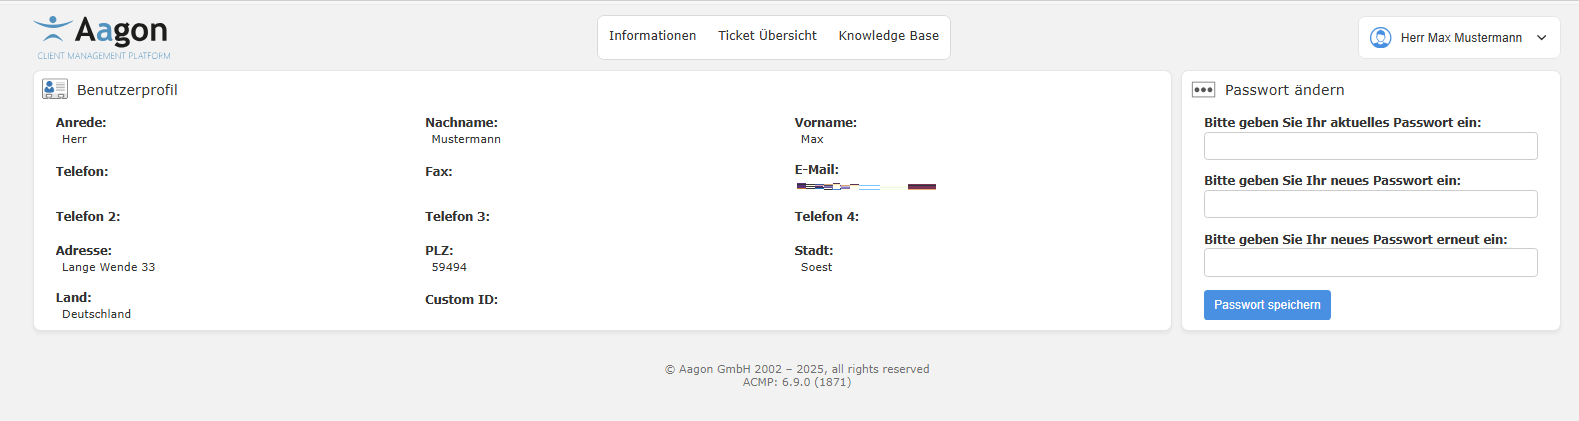
Ansicht des Benutzerprofils im Self Service