



Handling Tickets
General
| Opens the template for creating a new ticket. |
| Creates the ticket in the database. |
| Opens the ticket with the number specified in the input field. |


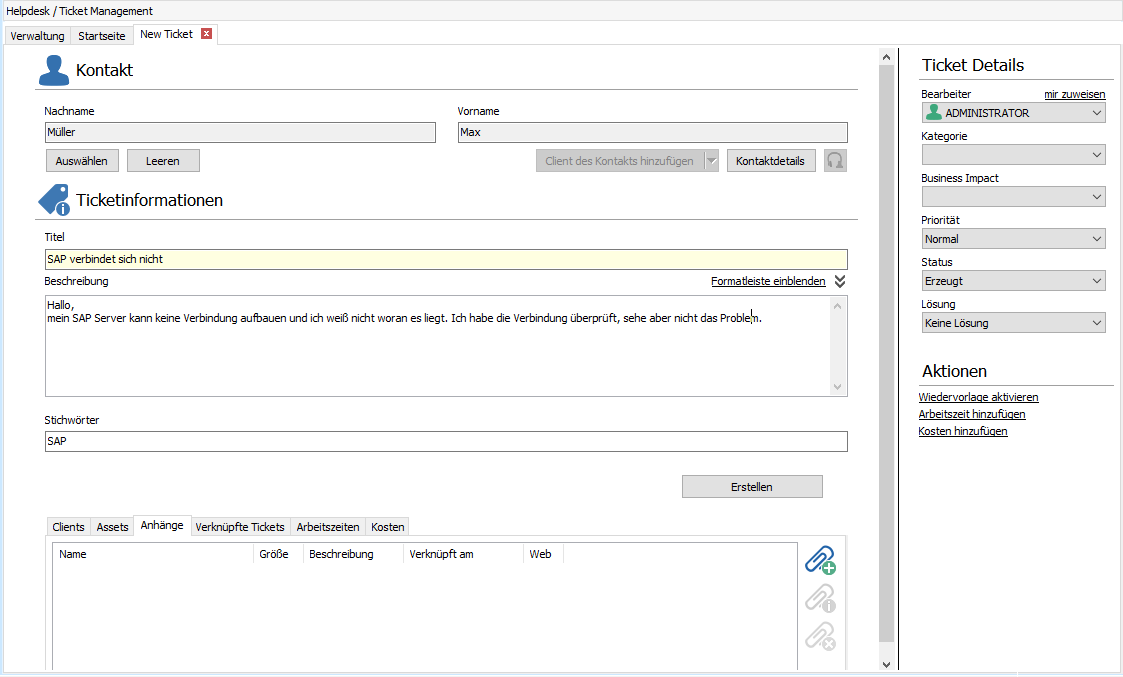
A new ticket provides you with various form fields for creating the ticket. The form fields highlighted in yellow are required fields that you must fill out to create a ticket. You can further customize the “Contact” and “Ticket Information” field groups to suit your needs later on. However, you will be notified when creating the ticket if these fields are still empty. For more info, see the sections ticket fields and Custom Fields.
Create a New Ticket
Ticket Details
Contact
In these fields, enter the name of the person affected by the problem. If this person has already been saved as a contact, an autocomplete feature will suggest people who match your entry. If the person is unknown to the system, you will be asked when saving the ticket whether you would like to save this person as a contact (see Manage contacts). If you have entered an existing contact, you can view the contact’s details by clicking the Contact Details button.
Clients Linked to a Contact
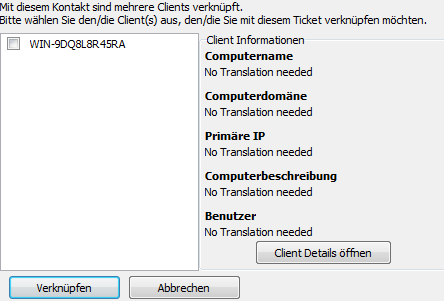
Clicking the Add Clients for This Contact button opens a window listing all clients linked to the contact (see Manage contacts). When you select a client, the client’s key information is displayed immediately. Clicking the Open Client Details button displays all of the client’s data. To link a client to the ticket, select a client and click Link. If only one client is assigned to the contact, that client is automatically linked to the ticket as soon as you click Add Clients to Contact.
 Note:
Note: If at least one phone number is associated with the contact, you can call that contact directly using the phone button. You’ll see a list of the stored phone numbers, from which you can select the desired number. This requires that ACMP Notifier be installed and running, as well as a valid CTI license.
Tickets cannot be saved unless the contact person is entered into the database. This is partly due to licensing requirements and partly to make ACMP easier to use. The contact person can also be a group.
Ticket Information
In this section, enter the title you want to assign to the ticket. You can also enter a description and keywords. You can use keywords to find and find similar tickets in the system or in the knowledge base. Multiple keywords can be entered in any format. Clicking the “Show/Hide Formatting Bar” button provides additional formatting options for the description text. You’ll also find an option to embed images here. Clicking the “Create Ticket” button saves the ticket and stores it in the database.
In the lower part of the input form, you can assign clients, assets, attachments, or similar tickets to the new ticket. You can also document the required working times or specify costs incurred in connection with this ticket.
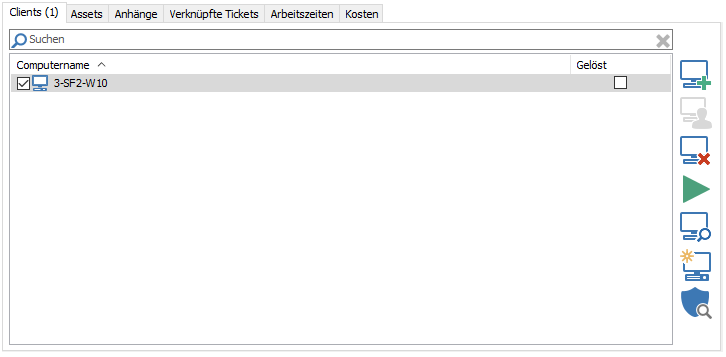
To assign a client to the ticket, enable the corresponding tab and click the Add icon. A dialog box will open, displaying the Queries available from Query Management as well as any Queries currently open there. If you execute a Query in this dialog, it will also open in the browser and in Management. Select one or more clients from a query and click Add. These clients are now added to the list. The Add Clients from Contact icon has the same function here as the corresponding button in the contact area. Alternatively, you can simply add a client from an already open query using drag-and-drop.
Link Clients
Using the Execute Client Command icon, you can execute any client commands on the client. For more information, see Executing Jobs. The Rescan Client function opens an overview of client tasks (see Client Tasks)
, which you can use to execute them.
You can check a box next to a client (Resolved) if the problem described in the ticket has been resolved on that client. You can make this change in edit mode (see The Saved Ticket). This provides a clear overview in case the reported problem occurred on multiple Clients or is still occurring.
Add Attachments
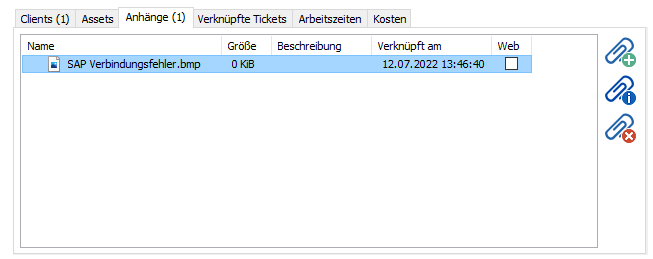
To attach attachments to the ticket, enable the corresponding tab and click the Add icon. A file selection dialog will display, and you can add your attachment to the ticket. Alternatively, you can add attachments using drag-and-drop. After adding the attachment, you can select it and add a comment.
To link additional tickets to this ticket, navigate to the Ticket Links section. Click the Add icon to open a window where you can enter the ticket ID of the ticket you want to add or find a ticket. You can then select a ticket and add it to the new ticket.
Ticket Details
In this section, you can enter some details about the ticket’s creation. Under “Assignee,” enter the name of the person who created the ticket. By default, the current user is automatically entered here. Later, in edit mode (see The Saved Ticket) you can enter a new editor here and thus assign the ticket to them for editing. Under “Status,” enter the current status of the ticket (Created, Viewed, In Progress, Pending, or Closed). Initially, the ticket’s status should be Created, which can and should be changed by other staff members as the support request is processed.
You can also select the category to which the ticket should belong. By default, the categories “Printers,” “Hardware,” and “Software” are selected. However, you can also create, edit, or delete your own categories (for more information, see the section Categories). The priority indicates how important the support request is and how quickly it should be processed. Here, you can choose between Trivial, Normal, Important, and Critical. This allows you to use a custom query to filter, for example, the most important tickets and process them first.
Options
Here, you can set up an automatic reminder for the ticket. For more info, see the Reminder section
Saved Tickets
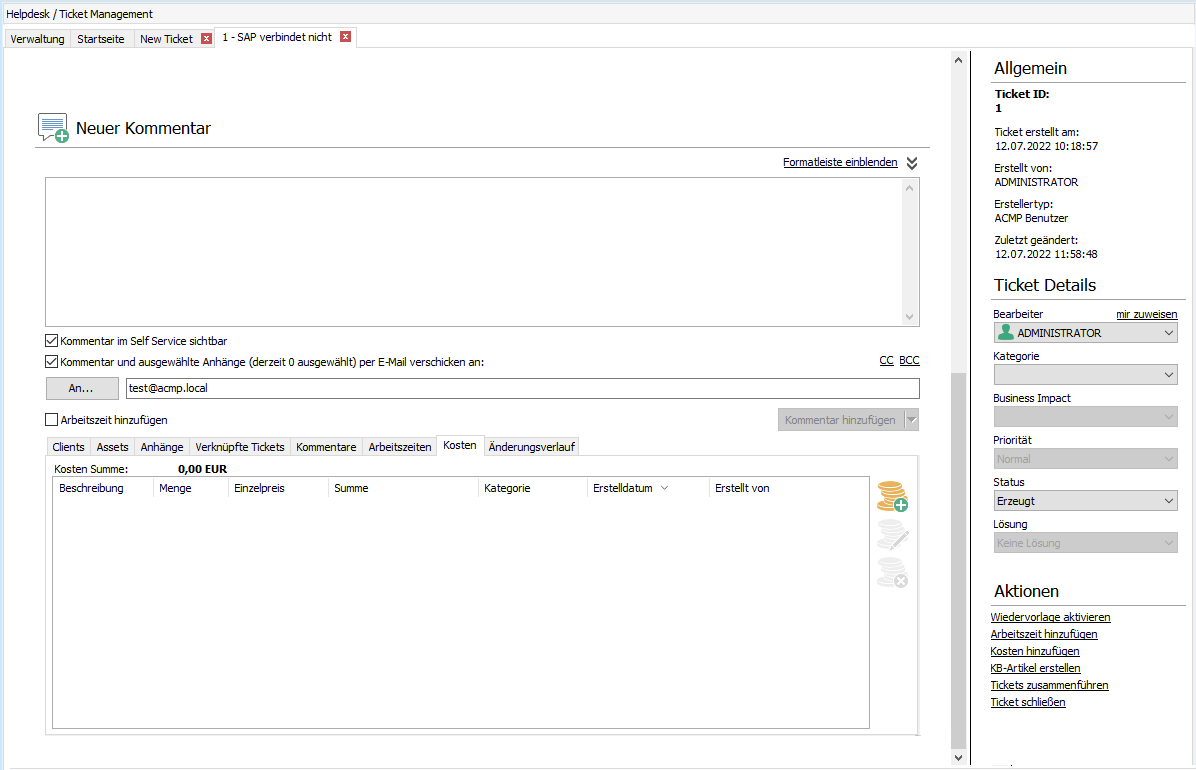
Once you've saved the ticket, it will still be displayed. This time, however, it will be in what's called “non-edit mode.” This means you cannot change the ticket's details unless you click the “Switch to Edit Mode” icon.
If one or more images have been embedded in the description, they will either be displayed directly in the description or hidden. This depends on the settings under “Embedded Images.” If the images are hidden, a note will appear at the top of the ticket providing a button that allows you to reload the images for this ticket. You can also find all images under “Attachments.”
In the lower section, you can write comments on this ticket and select attachments to send via email to one of your employees. To send the comment to multiple employees or external recipients, separate the individual email addresses with a semicolon: info@aagon.de;sales@aagon.de;noreply@aagon.de. You can also specify whether there should be recipients in the CC and/or BCC fields. Using the drop-down menu next to the “Add Comment” button, you can enable the option “…and attach all comments.” This allows you to attach all previous comments to the email. However, a dialog box will first give you the option to edit all comments so that, for example, certain information is not made available to the recipients. This does not permanently change the actual comments; however, the comment history will later display, below the current comment, that comments were changed before sending. You can view these changes by double-clicking.
Of course, the comments you’ve entered can also be edited or deleted and can be found under the “Comments” tab. Here, you can select a comment and click the links provided to edit or delete it. Clicking “Edit” opens a simple text input window. Change your comments here and then click “OK.” Additionally, for comments received via email, you can copy the sender’s and recipients’ email addresses. This minimizes typing errors that can occur during manual entry.
To enable you to respond to comments automatically, the following fields are available for your rules: Last Change to Ticket, Last Comment Author, Last Comment Text, and Last Comment Date.
Under the Change Log tab, you’ll find a list of all activities that have affected this ticket. The old values that were changed are shown alongside the new values.
The Saved Ticket
In non-edit mode, the ticket details section also displays the ticket’s ID, when and by whom it was created, and when it was last edited. You can also use the ticket details section to assign the ticket to another employee, even in non-edit mode.
To learn how to edit a ticket, see the section Editing a ticket. In addition to the reminder (see Reminder), you'll find two other options, wich are explained in the sections Create a KB Article and Merge Tickets.
Merging Tickets
This function is designed to merge tickets that were automatically generated from an email. Of course, this function can also be applied to all other tickets.
An example:
Tim, an employee at an external company, has a problem and sends you an email. A ticket is then automatically generated from this email. Tim receives a reply confirming that his email has been received (see Contact Email Templates).
This reply automatically includes the ticket ID in curly braces. The next day, Tim sends another email to provide some additional info. If he includes the ticket ID in curly braces from the reply he received, the info is automatically attached to the existing ticket. However, if Tim sends an email without this ticket ID, a new ticket is naturally created. This is where the “Merge Tickets” function comes into play.
First, open the ticket. On the right-hand side, you’ll now see several possible actions for this ticket. Click “Merge Tickets.” A dialog box will open where you can select the ticket to merge with.

Find a ticket to merge
Here, you can enter the ID of the other ticket or find it using a keyword. The selected ticket will then be deleted, and its data will be transferred to the first ticket. The subject and description will appear in the comment.
Create a Knowledge Base Article
If the problem described in the support request occurs frequently or is difficult to resolve, you have the option to save your ticket as an article in the Knowledge Base (see Knowledge base). This allows you to find a solution to a problem quickly and easily.
First, save the ticket. Then click on “Create KB Article.” A wizard will open that automatically pulls the ticket’s title and keywords. Choose a Knowledge Base folder where you want the article to be created. Alternatively, you can use the icons on the side to add new folders or edit existing ones. Click “Next.”
Create a Knowledge Base Article
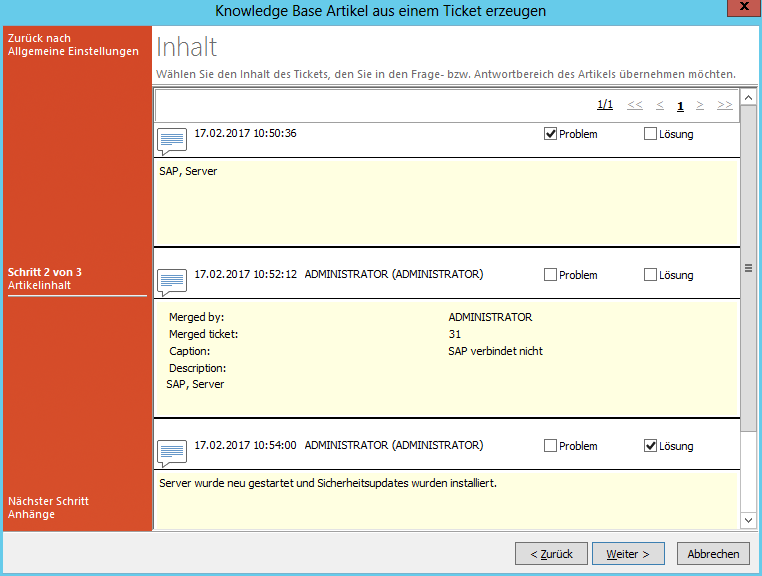
The ticket description, along with all comments, is now displayed. Here, you can mark items as questions or answers. Items marked as questions are summarized in the article as a question, while items marked as answers are summarized as the appropriate answer or solution to the problem. Click Next.
You can now select the attachments associated with the ticket if you want them to be included in the knowledge base. Attachments are integrated into the ACMP and do not need to remain on your current machine afterward. Click Done, and the article will be created.
Resubmission
If you have an open ticket in front of you, you can set a resubmission for it. This will send you a reminder about this ticket at a specific time by displaying an icon next to the ticket. To do this, the ticket must be listed in an open Query (see Home). Click on Resubmission, and another section will open above the current ticket.
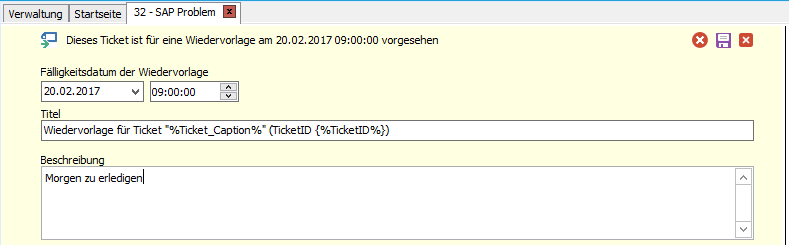
Here you can specify a date - a small calendar in the drop-down menu will help you with this. You should also specify a time when you’d like to receive the reminder. Additionally, you can enter a title and a description, which will be displayed to you. The title already contains two internal variables representing the ticket ID and the ticket title.
Set Up a Resubmission Reminder for a Ticket
To finalize the resubmission reminder, click the small Save icon in the upper-right corner. This icon will now change to an Edit icon, and the entire area will shrink to a short status bar displaying the set date and time.
To delete the resubmission, simply click the corresponding icon in the upper-right corner.
Printing Tickets
To print a ticket and its details, you must first open the relevant ticket by double-clicking it from a Query or by entering the ticket ID directly into the corresponding search bar on the ribbon bar.

Print tickets
Once you have done this, several options for the Query Result will appear. A distinction is made between the print preview and printing the ticket. You can use these two options to specify different criteria and generate more targeted reports that are more helpful to you.
| Function | Description |
| Print Preview | In the print preview, you can view the report to be printed and customize its size. You can set the size using the top navigation bar. Additionally, if the report spans multiple pages, you can navigate to a specific page. You can also save the ticket report. You can choose between Ticket Details or Ticket Details with Comments. You can configure which of the two is used as the default in the settings. |
If you want to print the ticket directly, you will be redirected to a standard print wizard. There, you can select the printer and print format, for example. You can choose between Ticket Details or Ticket Details with Comments. You can configure which of the two is used as the default in the settings. |