


Manage contacts
If you add a new contact to a ticket, you will be asked when saving the ticket whether you also want to save the new contact. This allows the contact to be automatically displayed later when you create a new ticket, and all matching contacts will appear as you enter the name. Furthermore, contacts can be used for user authentication at the Helpdesk. However, this is only possible if an email address is provided in addition to the name.
When you click the Manage Contacts button, a dialog box opens that allows you to create, edit, or delete contacts.
In addition, you can set or change a password for each contact to use the Self-Service Web Interface (see Self Service Web Interface). A contact must have an email address stored in the system to log in to the Self-Service Web Interface. You can recognize contacts by the light blue employee icon. A dark blue icon represents ACMP or Helpdesk staff.

Manage contacts
Merge Contacts
If a person has more than one contact entry or if you want to intentionally delete a contact, you can merge two contacts. When you do this, one contact is deleted, and the tickets associated with the deleted contact are transferred to the remaining contact. The individual details of the deleted contact (e.g., phone number, address, etc.) are also transferred to the remaining contact if that contact does not already have the corresponding info—that is, if the specific field is empty. Right-click and select the “Merge Contacts” option to open the corresponding wizard.
In the first step, specify the contact to be deleted. In the second step, select the remaining contact. The third step allows you to customize the data for the remaining contact if necessary. In the fourth step, you can rearrange the clients assigned to the two contacts. To do this, the upper section displays the clients assigned to the contact to be deleted, while the lower section displays the clients assigned to the remaining contact. The middle section displays the clients that will be reassigned to the remaining contact. To do this, you can select clients from the top or bottom sections and use the corresponding arrow buttons to add or remove them from the middle section.
Create New Contact
Clicking the New Contact button opens an input form with two tabs to help you create a new contact. This form is displayed when you enter a new contact in a ticket and confirm that you want to save the contact.
On the Contact Information tab, you can enter various pieces of information about the contact. The name and a current email address are essential here. The email address is required if users are to be able to log in to the Web Interface using their contact information. If login occurs via authentication against an Active Directory, the Active Directory data must match the contact’s data (see Login). In the lower section, you'll find the custom fields (see Custom Fields), which you can also fill out here.

Contact details
Assign Clients to Contacts
Using the “Linked Clients” tab, you can assign one or more clients to a contact. If the contact then creates a ticket - or if a ticket is created for the contact - the ticket entry form offers the option to use a quick selection to integrate one of the assigned Clients in the ticket. This often saves you from having to think about the name of the machine affected by the ticket when creating it.
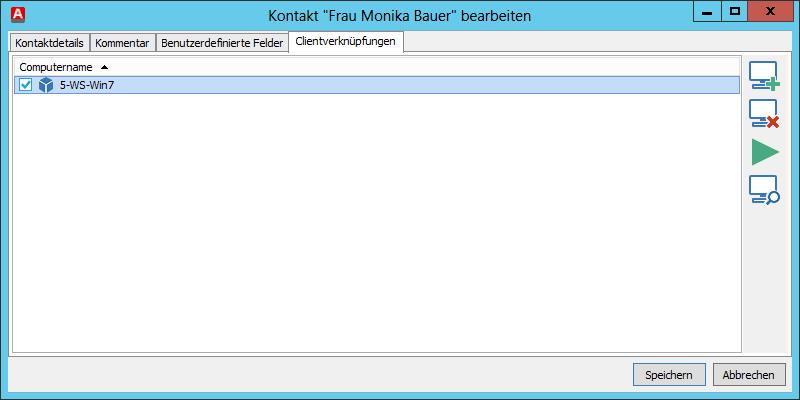
Linked Clients
Clicking the Add button opens a wizard that displays a view similar to the one in Query Management. Execute one of the displayed Queries and select one or more clients using the checkboxes. Clicking the Add button assigns the selected clients to the contact. In the lower section, you may see the Clients on which the contact was the most recently logged-in contact or user (see Master Data). Clicking the Copy button also assigns a selected Client to the contact.
 Note:
Note: