



Client Command Properties
In the properties of a Client Command, you can enter general information and set specific options and conditions for the Client Command.
Client Command-Specific Properties
 Note:
Note: General
Here you can manage the basic settings for Client Command.
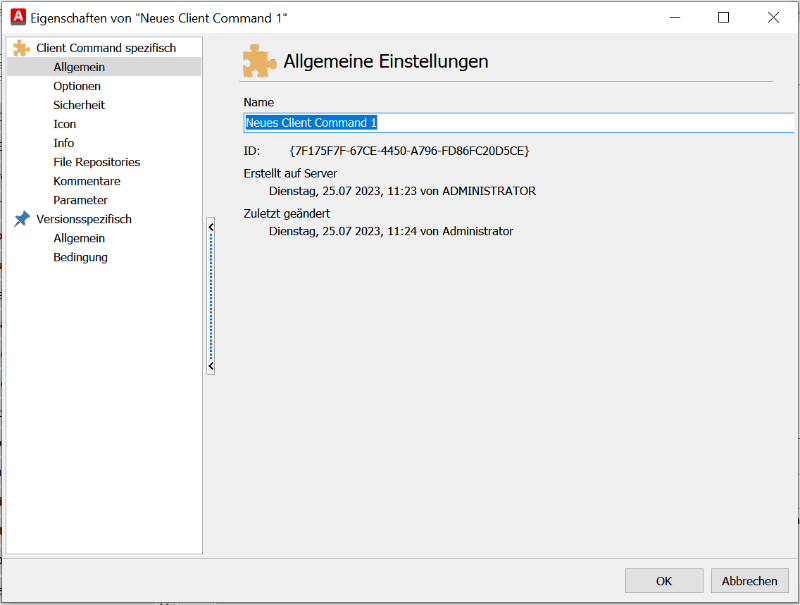
General Settings for the Client Command
You can customize the name of the Client Command and view the ID used to uniquely identify the Client Command.
You will also find information about the creation date, the time, and the acmp User who created the Client Command, as well as the last change made and the device on which it was made.
Options
In this section, you can configure various Client Command settings.
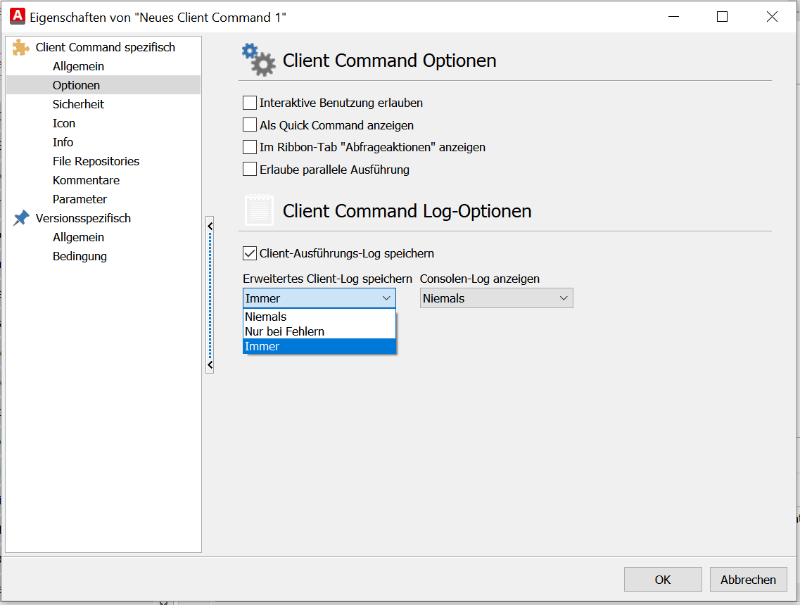
Various option settings for the Client Command
Client Command Options
Check the corresponding checkbox to enable this option.
| Allow interactive use | Allows a client user to execute this Client Command independently using a (W)RunCC shortcut. |
| Display as a Quick Command | Enables a command to be displayed or executed as a Quick Command by right-clicking a client when viewing a query in Query Management. |
| Display in the “Query Actions” ribbon tab | Enables the Client Command so that it appears in the “Query Actions” ribbon tab (in every acmp menu item) or via the puzzle piece icon in a query. |
| Allow parallel execution | Prevents long-running Client Commands from blocking the execution of short Client Commands. |
Client Command Log Options
By checking the Save Client Execution Log checkbox, you confirm that client command logs should generally be saved.
Using the Save Extended Log drop-down list, you can specify whether the data should be logged Never, Only on Errors, or Always.
There is also the Show acmp Console Log drop-down list, which allows you to select when a console log should be displayed (Never, Only on Errors, Always).
Security
Under Security, you can protect the Client Command with a password so that no one else can edit it.
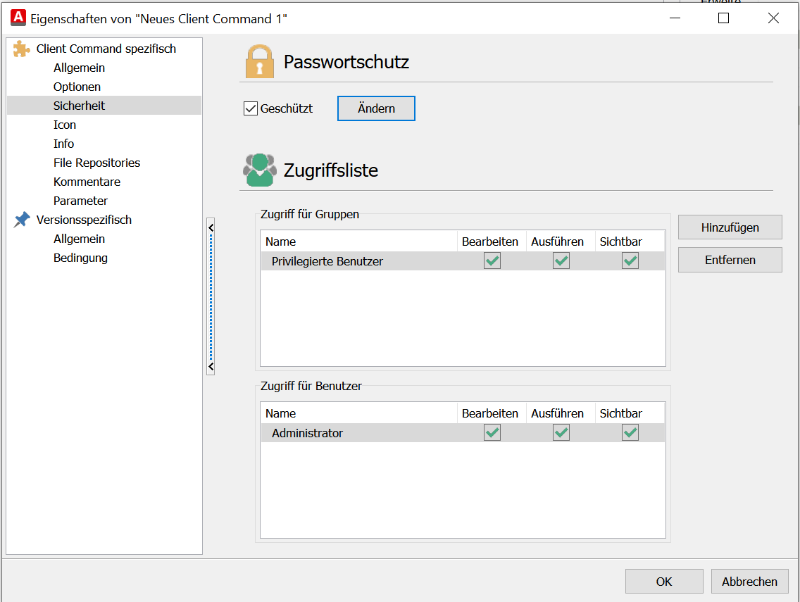
Security Settings for the Client Command
To protect the Client Command with a password, check the Protected checkbox. Then click Change. In the window that appears, either re-enter the old password if you want to change it, or simply enter a new password if you are setting one for the first time.
In either case, re-enter the new password and click OK.
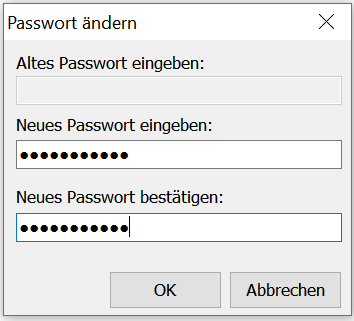
Changing the Password for a password protected Client Command
In this case, the symbol appears in the list of all Client Commands under Properties to indicate a password protected Client Command.
If you no longer want to use a password for the Client Command, you must uncheck the Protected checkbox and re-enter the old password. Only then will the Client Command no longer be protected.
You can also grant or revoke rights for this Client Command to specific users and groups.
To grant a right to a group or user, you must first add them to the selection. The available rights are Edit, Run, and View. Use Add and Remove to grant or revoke permissions for the Client Command for groups and users.
Icon
If you want to select a specific icon instead of the default icon for the Client Command, you can add a new one, edit an existing icon, or delete it here. This is useful if this Client Command is particularly important.
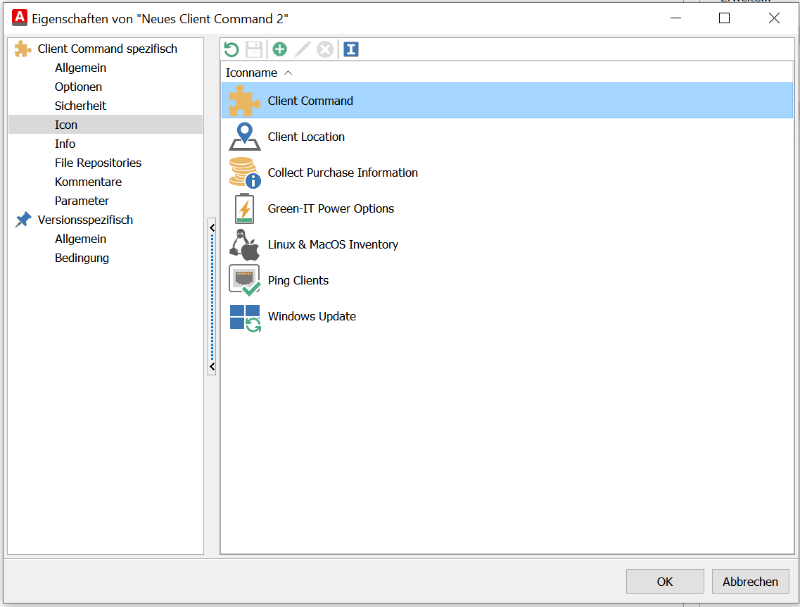
Selecting the Icon for the Client Command
If no icon is selected, the Client Command is automatically assigned the default icon.
Info
Here you can enter information about the Client Command if, for example, it comes from a third-party manufacturer and has been imported into acmp.
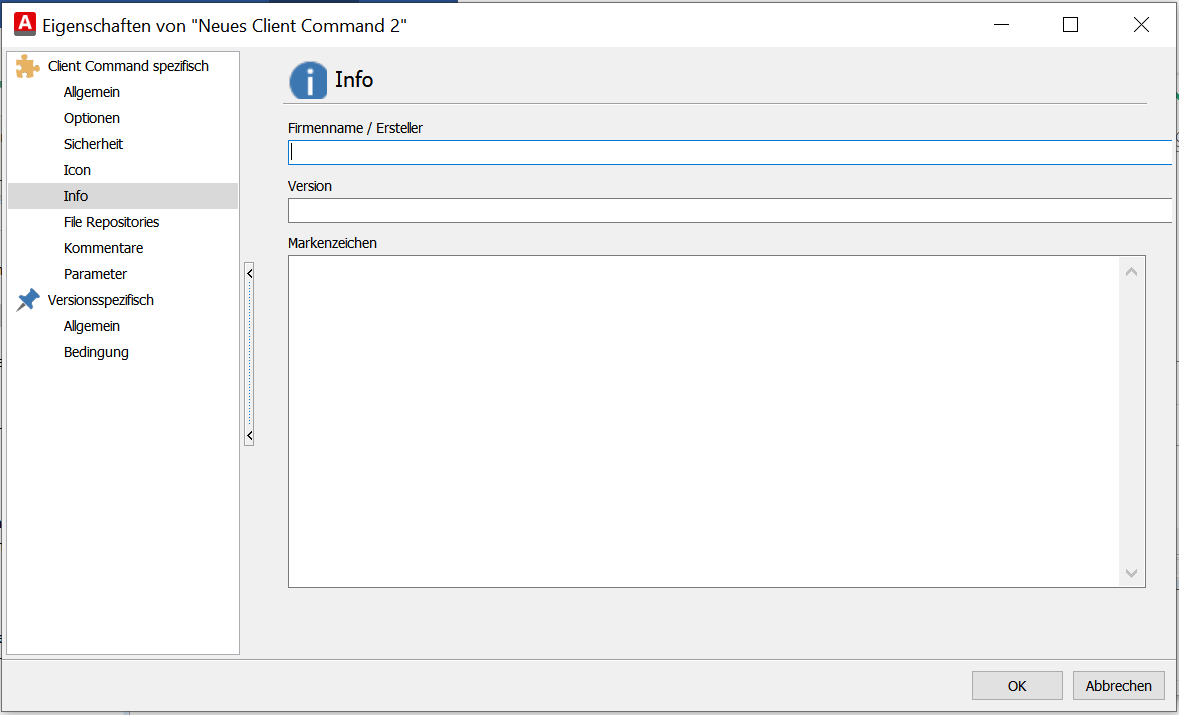
Specify additional information for the Client Command
In addition to the creator's name and the version, you can also add a note about the trademark.
File Repositories
These settings allow you to choose whether the Client Command should be synchronized with all file repositories or only with selected ones.
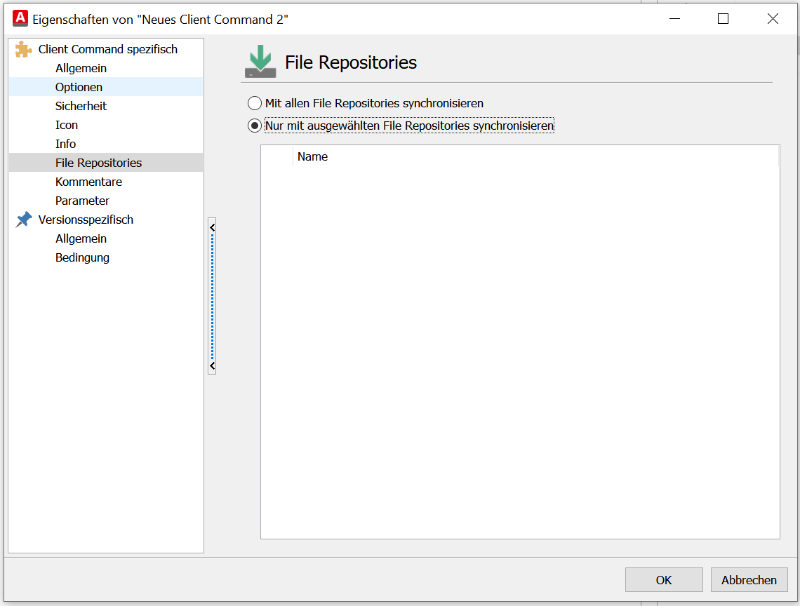
File repositories to be synchronized for the Client Command
Comments
The “Comments” section displays the comment that was added after a new Client Command version was created. You are usually prompted to add a comment there. This comment can be viewed here.
When a new Client Command version is created, you are automatically prompted to enter a comment. These comments can be viewed on this page.
Parameters
You can pass values to a Client Command using parameters based on Client Command project variables. This allows you to control Client Command jobs from the acmp Console via these parameters without first having to execute the Client Command’s console script.
The parameters themselves can be used anywhere in acmp where jobs are required and deployed:
- About manually running Jobs
- About integration into Job Collections
- About use in Containers
- About settings configured in advance in the ACMP Kiosk
- About the commands Enqueue ACMP Jobs and Run Client Command
Defining Custom Parameters
You can define parameters for a Client Command based on a Client Command project variable. These are Client Command-specific settings that apply only to that Client Command.
These parameters are defined in the Client Command Center or Editor. There are two ways to add parameter values:
1. In the navigation pane, go to Client Commands > Create > Right-click an existing Client Command > Properties > Client Command Specific > Parameters.
2. Double-click an existing Client Command or a newly created one > Above the commands, click Properties > Client Command Specific > Parameters.
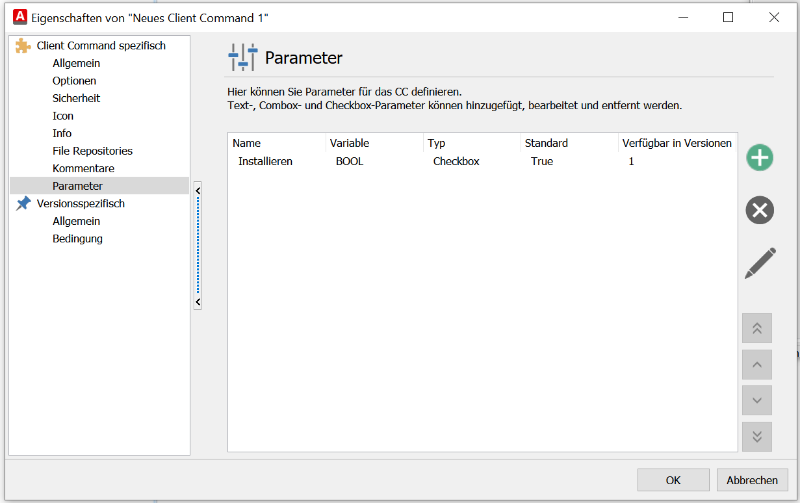
Define Parameter Values
This section displays all existing parameters. Use  to add a new parameter to the Client Command, use
  to delete a parameter, and use
  to edit parameters. When adding a parameter, you can choose from 3 types:
1. Text
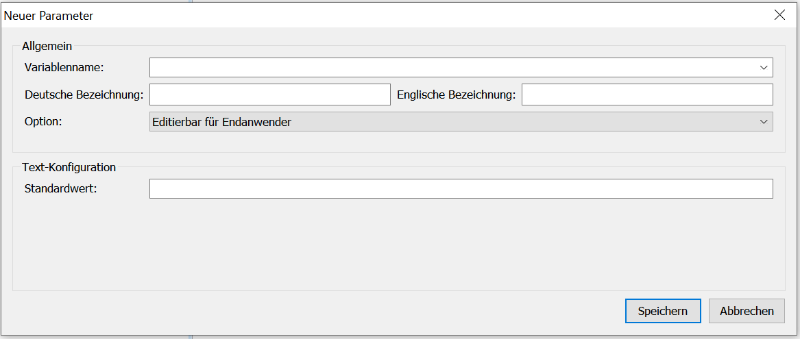
Parameter type: text
For this parameter type, you can specify the parameter values using free text.
Under variable name, you can select a Client Command project variable by opening the drop-down menu or by entering the name of the Client Command project variable directly.
Only
- writable project variables can be used, and
- a project variable already used by another parameter cannot be used with another parameter.
Then enter a German or English caption.
The Option setting controls the visibility of the Client Commands to end users in the acmp Kiosk. You can choose from Invisible to End Users, Read-Only for End Users, and Editable by End Users. Under Default Value, you can enter a value as free text that will be set by default.
2. Combo box
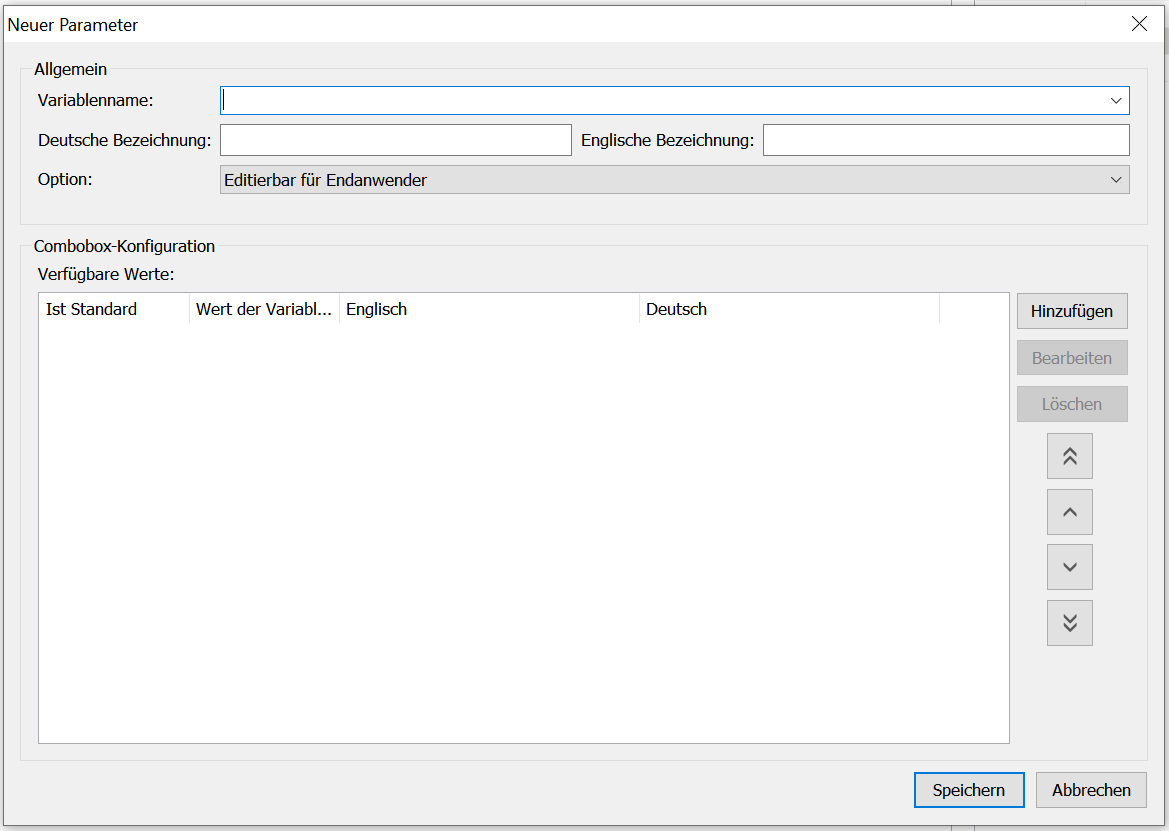
Parameter type: combo box
For this parameter type, you can specify the parameter values using a Combobox.
Under Variable Name, you can select a Client Command project variable by opening the drop-down menu or by entering the name of the Client Command project variable directly.
Only
- writable project variables can be used, and
- a project variable already used by another parameter cannot be used by a different parameter.
Then enter a German or English caption.
The Option setting controls the visibility of the Client Command to the end user in the acmp Kiosk. You can choose from Invisible to End Users, Read-Only for End Users, and Editable by End Users. In Combobox Configuration, you can configure the available combobox items.
Use Add to enter the value of the variable that will be written to the project variable when this Combobox entry is selected. Typically, this refers to software that is to be installed or uninstalled. Descriptive values for this would be “Install” and “Uninstall.”
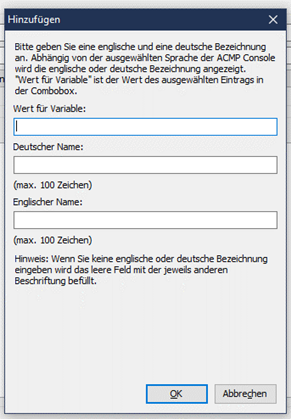
Configuration of the Combo box
You can customize the order in which the Combobox items are displayed when creating jobs, as well as which entry is the default value for the new job.
3. Checkbox
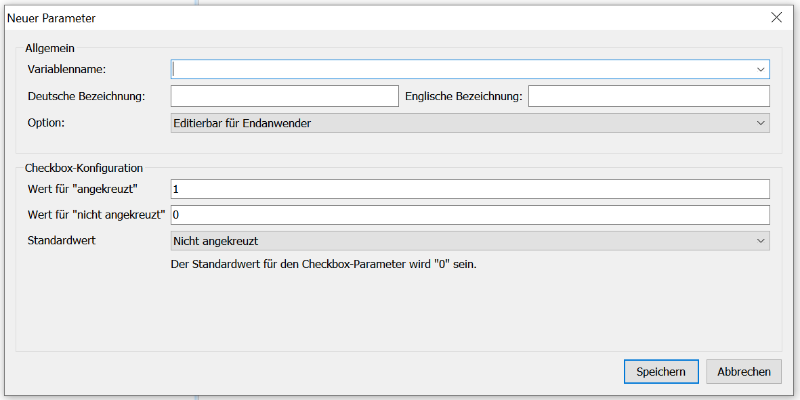
Parameter type: checkbox
For this parameter type, you can specify the parameter values using a checkbox. Under Variable Name, you can select a Client Command project variable by opening the drop-down menu or by entering the name of the Client Command project variable directly.
Only
- writable project variables can be used, and
- a project variable already used by another parameter cannot be used by a different parameter.
Then enter a German or English caption.
The Option setting controls the visibility of the Client Command to the end user in the acmp Kiosk. You can choose from Invisible to End Users, Read-Only for End Users, and Editable by End Users. In the checkbox configuration, you can specify which value—1 or 0—should be passed to the CC. Use the “Default Value” to specify whether the default setting is 1 for ‘checked’ or 0 for “unchecked.”
In all three cases for this parameter type, click Save. You can then apply the parameters by creating new Client Command Jobs or selecting existing ones.
Changes to the Parameters
Since parameters are specific to the Client Command, any changes always affect all versions of the Client Command. This can have the following implications for the Client Command:
| Changes | Effects |
|---|---|
| Parameter is added | For existing jobs, the default value of the new parameter that was in effect at the time the parameter was created is used. |
| Parameter will be removed | This parameter is no longer used, even for existing jobs. This may cause older versions of Client Command to fail. |
| The default value is being changed | Existing jobs will not be changed. For newly created jobs, the new default value will be applied.. |
| The parameter name is being changed | Existing jobs will not be changed. The name is not relevant to execution. |
| Possible values for the parameter are being changed | checkbox: The newly set values will be used, even for existing jobs. This may cause older versions of Client Commands to fail. |
text: Any changes to the free-text field will only change the default value. They will not affect existing jobs. The new default will then be applied to new jobs. | |
combo box: Add a new entry Existing jobs are not changed. The new entry is available for new jobs or when editing existing jobs. Delete an existing entry For jobs that used the deleted entry, the parameter’s default entry is used instead. Delete a default entry If the default entry is deleted, a new default entry must be selected. For jobs that used the deleted entry, the parameter’s new default entry will be used instead. Change the value of an entry The newly set value will be used, even for existing jobs. This may cause older versions of Client Commands to fail. Renaming an existing entry Existing jobs are not affected. The name has no impact on execution. Changing the default entry Existing jobs are not affected. For new jobs, the new default entry is preselected. |
Version specific
General
In the version settings, you can work with what are known as the “levels” of a Client Command. A level is intended for cases where a Client Command should be executed only once within a container.
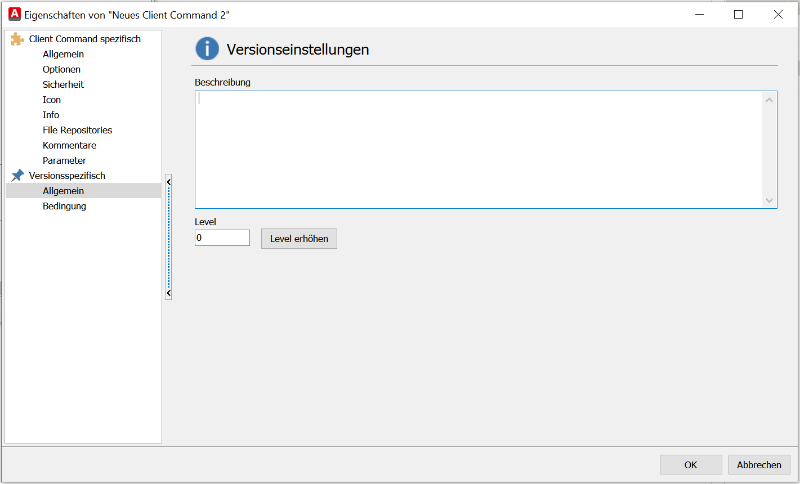
Versionseinstellungen des Client Commands
If you create a new version in which all clients in a container should execute the Client Command that has already been executed, you must increase the level as well as the version.
Increase the level of the Client Command by clicking Increase Level. The Client Command will then have level 1. Each Client Command that should be executed afterward will increase by +1.
You can add additional info to the description that may be important for a version.
Condition
Under Conditions, you can specify additional conditions that should be taken into account during the execution of the command.
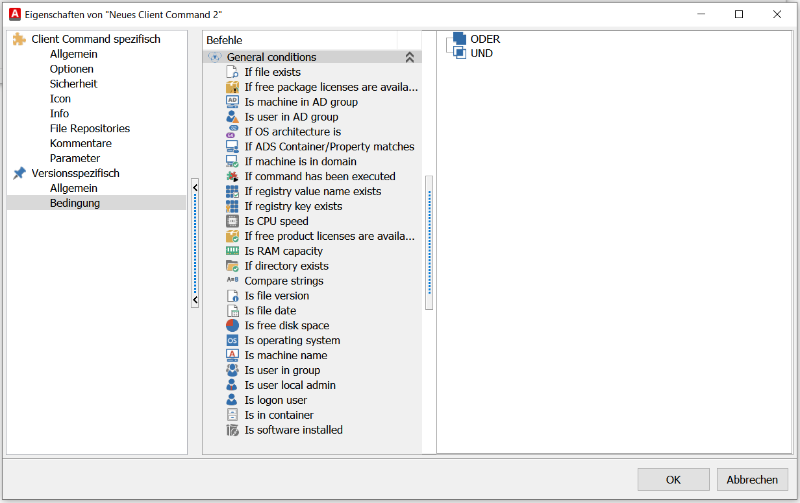
Version Specific Conditions of the Client Command
To do this, drag and drop a condition from the left side or double-click it to place it on the OR or AND condition on the right side. This is similar to the filters that can be set in a Query.
You can also nest conditions so that a condition is created according to the pattern X OR (Y AND Z), for example. For example, if you drag a condition onto an existing AND condition, these two conditions are placed within the context of an OR condition.
The various conditions are explained in more detail below:
| Conditions | Meaning |
| If file exists | You can use this condition to check whether a specific file exists. |
| Is machine in AD group | You can use this condition to check whether the machine belongs to the specified AD group. To do so, enter either a group in the format “domain name\group name” or the group’s SID. The button next to the input field lists all available domains. |
| Is user in AD group | You can use this condition to check whether a specific user belongs to the specified AD group. To do so, enter either a group in the format “domain name\group name” or the group’s SID. The button next to the input field lists all available domains. |
| If OS architecture is | You can use this condition to check whether the client is running a 32-bit or 64-bit operating system. |
| If ADS Container/Property matches | You can use this condition to check whether the current user or client is located in a specific AD container or has a specific property. To select the AD containers or properties, click the button to the right of the input field. |
| If machine is in domain | You can use this condition to check whether a client belongs to the specified domain. To do so, simply enter a domain. The button next to the input field lists all available domains. |
| If registry value name exists | This condition allows you to check whether a specific registry key exists and has a specific value. To do this, select the root key from the drop-down list, followed by the child key. Enter the value as well. |
| If registry key exists | You can use this condition to check whether a specific registry key exists. To do so, select the root key from the drop-down list, followed by the child key. Clicking the button below the input fields opens the Registry Editor, which allows you to select a key directly. |
| Is CPU speed | You can use this condition to check the CPU clock speed. To do so, use the mathematical operators and specify the appropriate clock speed in Hz (hertz). |
| If free product licenses are available | You can use this condition to check the availability of product licenses within License Management. |
| Is RAM capacity | You can use this condition to check the amount of available memory. To do so, you can use mathematical operators and specify the size of the RAM. |
| If directory exists | You can use this condition to check whether a specific directory exists. To do so, simply specify the directory in question. |
| Compare strings | You can use this condition to check whether two strings are equal. For example, you can enter an acmp system variable as the first string and a specific value as the second string. Variables are specified in the format %VariableName%. |
| Is file version | You can use this condition to check the file version. To do so, you can use mathematical operators; you'll also need to select the appropriate file and specify the file version. Only executable files have a version number. |
| Is file date | You can use this condition to check a file's modification date. To do so, use the mathematical operators, select the appropriate file, and specify the modification date in the format dd.mm.yy hh:mm:ss. |
| Is free disk space | This condition allows you to check the free space on a disk partition. To do so, you can use mathematical operators, along with the size of the memory and the partition. |
| Is operating system | You can use this condition to check whether the operating system is a specific version, such as Windows 10 or Windows 11. To do so, simply select the appropriate version from the drop-down field. |
| Is machine name | You can use this condition to check whether the machine name matches a specified name. To do so, click the button to the right of the input field. All machines in a domain will be listed there. If you click the button below it, only machines that are inventoried in acmp will be listed. |
| Is user local admin | You can use this condition to check whether the logged-in user is the administrator owner of the local system. |
| Is logon user | You can use this condition to check whether a specific user is logged in to the client. Click the button to the right of the input field, and a list of all existing and known users in a domain will appear. Select the appropriate user and click Add. Once you have added all the necessary users, click OK. |
| Is in container | You can use this condition to check whether the inventoried machine is located in a specific container. |
| Is software installed | You can use this condition to check whether a specific piece of software is installed. |