



Add New Client Commands
To create a new client command, choose the folder where the client command should be saved. Then click New Client Command in the Quick Access Toolbar. The Client Command Editor opens, allowing you to design the new client command. For more information about the Client Command Editor, see the chapter Client Command Editor.
The following section explains how to create and configure a Client Command based on the existing “Read Services” Client Command. The finished Client Command is intended to read and save a client’s services so that you can retrieve them later via a Query.
After clicking “New Client Command,” you’ll see the default interface of the Client Command Editor, and you can immediately begin creating the client command. In general, it’s recommended to first configure the properties of the new client command (see Properties). However, in the case of the “Read Services” client command, no further settings need to be made here.
Configuring the Console Script
A console script is not actually required to read the services on a client. However, in this case, a dialog box can be displayed, for example, for the user who executes the Client Command from a console. This would allow the user to see once again what task the Client Command is intended to perform and how it is executed. Such a dialog would also allow a Client Command that was selected incorrectly to be canceled.
To open this dialog, drag the “Dialogs” command from the command list on the left into the script area. A window will open where you can now configure the dialog.
On the General tab, enter “Information” as the description of the action. No further information is required here. Now switch to the Message Settings tab. Enter the title “Read Services” and a suitable message here. The following message has been entered in the existing Client Command:
The name, status, and start type of the installed services on the selected machines are now read and stored as individual fields in their Client Details. (Client Details > Software > Computer > Individual Fields).
You’ll learn more about what these Individual Fields are all about later when you’re putting together the Client Script or in the chapter on individual fields.
Since the user of the Client Command is supposed to receive information via the dialog you’re configuring here, select “Information” as the message type. Likewise, only the “OK” and “Cancel” buttons are needed, which you can enable using the corresponding checkboxes.
To allow the user to cancel the execution of the Client Command in case it was executed accidentally, the Cancel button is also linked to canceling the entire Client Command by checking the Cancel checkbox in the Cancel on Button(s) section.
A variable does not need to be specified, since the continuing execution of the Client Command depends solely on the buttons. Therefore, no user input needs to be processed.
No configurations are made under the Input Settings tab, since no user input other than clicking OK or cancel is expected.
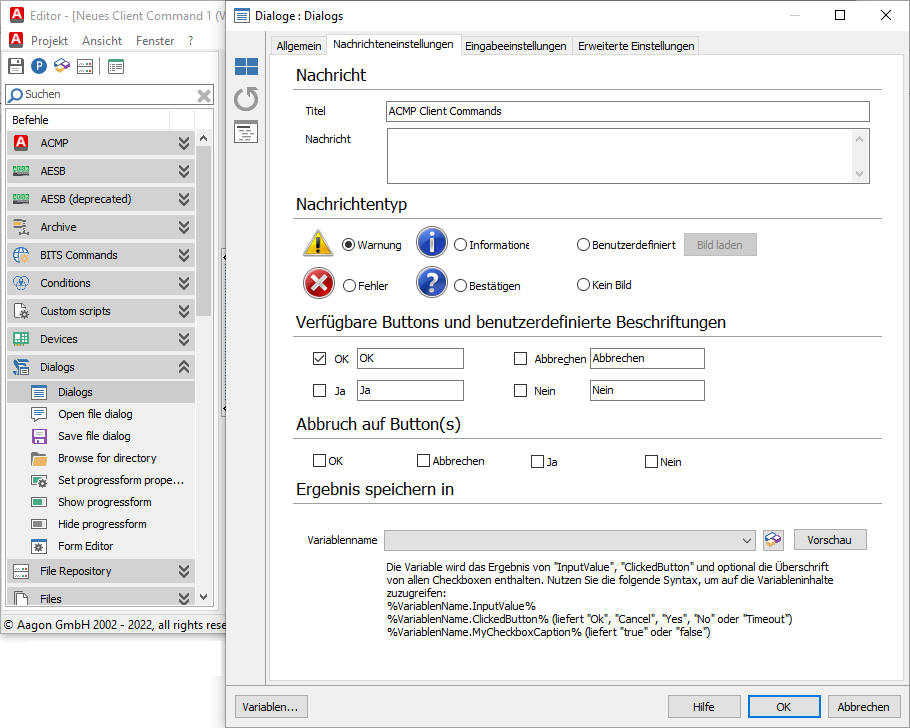
Under the Advanced Settings tab, the dialog is set to close automatically after 25 seconds. The Client Command will also exit if the user does not confirm this dialog within the specified time.
Click the OK button to apply the configuration. The command is now integrated into the Client Command. Use the tabs on the side to navigate to the Client Script.
Configure Client Script
This script runs on a client and, since the Client Command is designed to read the client’s services, must contain the appropriate commands. The concept here is to save the current date and time, as well as the service name, service status, and start type. This requires eight individual commands.
Set General Settings
Every block that you can add to your Client Command via drag-and-drop has a “General” tab. On this tab, you define basic settings for the block.
Description of the Action
Here, you can enter a name that will help you locate the command, even within a longer Client Command. By default, the name of the command is entered here. You can also add a comment that provides a more detailed description of the command and how it works.
Options
First, specify whether the block should be enabled in your Client Command or not. By default, this option is enabled.
Execution Options
Under Execution Options, specify the context in which the block should be executed. You can choose from the following options:
Context | Execution | Description |
| Always execute | Agent or console | The block is always executed. |
| Machine related | Agent | The block is executed only if it has not yet been executed on the machine. |
| Machine related | Console | The block is executed only if it has not yet been executed on the machine. |
| User-specific | Agent | The module is executed only if it has not yet been executed for the user. |
| User-specific | Console | The module is executed only if it has not yet been executed for the user. |
 Note:
Note: Also specify whether the module should execute as a service, as a user, or as a user with the highest possible rights.
Recording the Time
First, you should record the time. To do this, drag and drop the “Get date/time” command from the command list into the script area. In the Details tab, specify that you want to use the current time and date. Select the format dd.mm.yyyy, hh.nn. This will return, for example, the date 09.02.2017, 16.31, which is stored in a variable. Specify this variable in the lower dialog area. To do this, create a variable named TIME (see Variables).
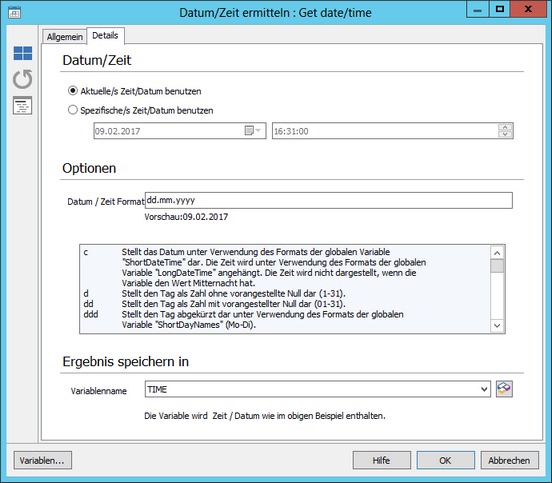
Track Time
Set a variable
Next, a variable must be set. This is necessary because the old data must be deleted before saving the first service that has been read, to avoid having duplicate or deprecated items. However, the newly read and entered services must not be deleted by the subsequent service when it is saved.
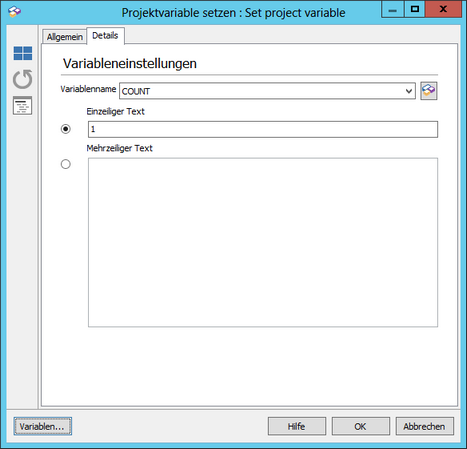
Set Variable
To set a variable, select the “Set project variable” command and drag and drop it into the script area. Use the dialog box that opens to create a variable named COUNT. Then enter 1 as its content.
Read Services
Now the client's services will be read. To do this, use the WMI Query command, which you can drag and drop into the script area.
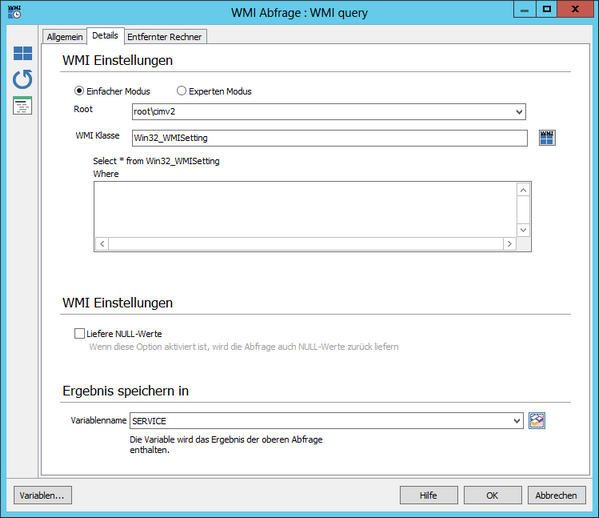
Reading the services
Under the Details tab, select simple mode. For the namespace, select the drop-down entry root\CIMV2. The corresponding WMI class is Win32_Service and can be entered manually or by clicking the button next to it. When you click the button, a dialog box appears listing all WMI classes in the selected namespace. It is not necessary to specify any conditions, since all service data is to be retrieved.
Specify the variable SERVICE as the result variable. A service is stored in this variable; all commands subordinate to this command are executed, and the next service is retrieved. No entries are required under the Remote Machine tab, since this command should be executed locally.
Set an If Condition
To delete the old data before saving the first recorded service, a branch is added to the script. To do this, drag the If command into the script and, under the Details tab, enter the value 1 by specifying the variable COUNT you just created (%COUNT%).
Since you want to test for equality with 1, select the corresponding operator and enter 1 as Value2. The options here do not matter, since these are numbers and not strings. Then use the arrow buttons to place this command under the WMI Query command, similar to a subfolder in File Explorer.
Then-Block / Save Data
If the just defined condition is true (Count=1), all commands that are placed under the If command (using the arrow buttons) will be executed.
Next Episode / Save Dates
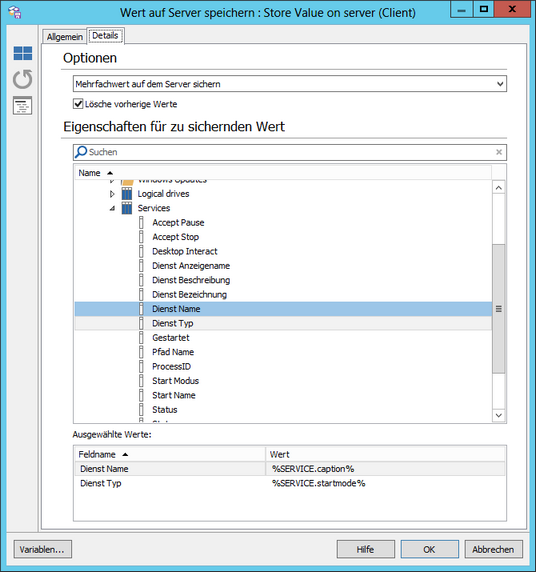
To save the data from the service you just read, drag the “Store Value on Server (Client)” command into the script. Under the ‘Details’ tab, set the option to “Save multiple values on the server.” It is very important to enable the “Delete old values” option. This ensures that the old service data is deleted before new data is saved. This option is also the reason for the COUNT variable and the If-Else branch.
Since the COUNT variable will be incremented later, this command will not be executed again. More on that later.
Now find the fields from the “Field” section where the data from the read services should be stored. Double-clicking displays a field in the lower section. Here, the fields “Service Name,” “Status,” “Start Type,” and “Last Read” are now used. However, these fields were previously created in the “Custom Fields” section.
Once all the required fields are present in the lower section (“Value”), the corresponding values can be assigned to them. The values were previously read into the variable SERVICE, which can now be used:
Service Name Status Start Type Last Read | %SERVICE.caption% %SERVICE.state% %SERVICE.startmode% %TIME% |
The properties of the SERVICE variable (caption, state, startmode) are determined by the data from the query (WMI Query command). The TIME variable was created at the beginning of the script.
Set Else Conditions
To also save all other services that are read, you first need an Else branch. Drag the corresponding command into the script and use the arrow buttons to place it in the same column as the If command.
Then Section / Save Data
Now all commands that are nested under the Else command (using the arrow buttons) will be executed.

To save the data from the service you just read, drag the “Store Value on Server (Client)” command into the script. Under the ‘Details’ tab, set the option to “Save multiple values on the server.” Do not enable the “Delete old values” option this time. This ensures that the new service data is saved without deleting the old data.
Now find the fields from the “Field” section where the data from the read services should be stored. Double-clicking displays a field in the lower section. Here, the fields “Service Name,” “Status,” “Start Type,” and “Last Read” are used. However, these fields were previously created in the “Custom Fields” section. Once all the required fields are present in the lower section (“Value”), the corresponding values can be assigned to them. The values were previously read into the variable “SERVICE,” which can now be used.
Service Name Status Start Type Last Read | %SERVICE.caption% %SERVICE.state% %SERVICE.startmode% %TIME% |
The properties of the SERVICE variable (caption, state, startmode) are determined by the data from the Query (WMI Query command). The TIME variable was already created at the beginning of the script.
Changing a Variable
To ensure that the old data is deleted only once—namely, during the first pass—the COUNT variable must be incremented. Only then will the entire structure using the If–Else construct work. To do this, drag the “Increase Variable” command into the script and use the arrow buttons to place it in the same column as the “If” command. Under the “Details” tab, enter ‘COUNT’ as the variable name and “1” as the first step.
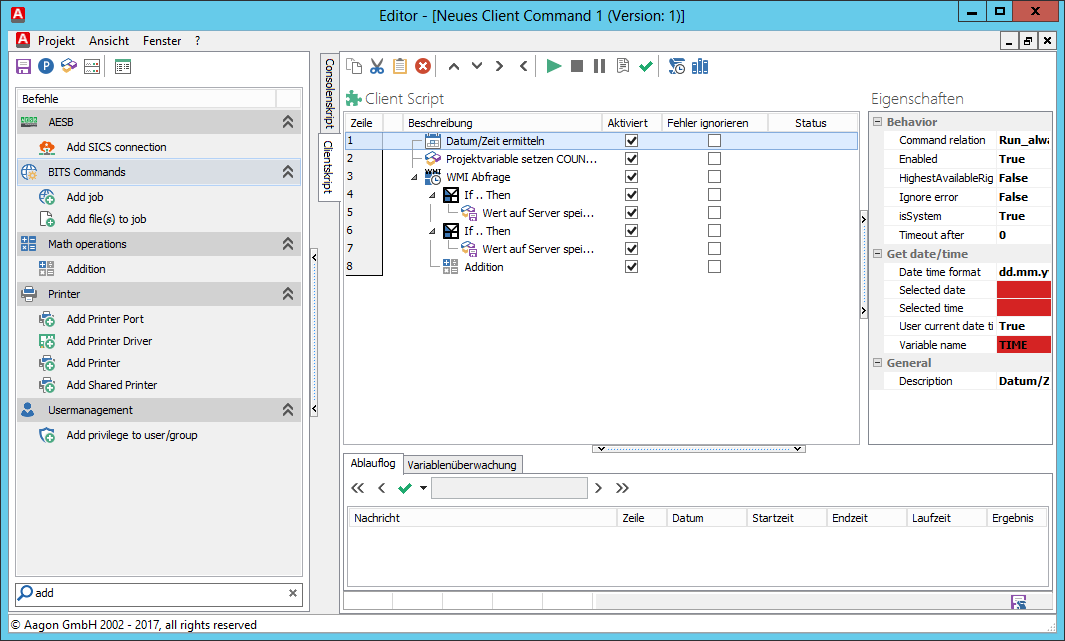
The Client Command is now full and can be tested locally.
Testing Scripts
To test whether the Client Command or the individual scripts are working properly, first run a syntax check. To do this, click the corresponding icon () in the quick access toolbar. The script’s syntax will then be checked automatically, and a dialog box will inform you of the result.
Set a breakpoint on the eighth (last) row. To do this, simply click next to the row number. A red dot will appear at that location. You can also add the variables used to the variable history by right-clicking. This allows you to display the variable values.

Set Breakpoint
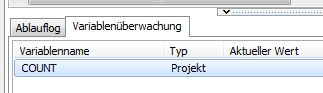
Set Variable
Now run the script by clicking the Start icon ( ). You can see from the status column in the script that only the first part of the if-else branch was executed; the actions taken so far are shown in the Run Log, and the current values are listed in the variable log.
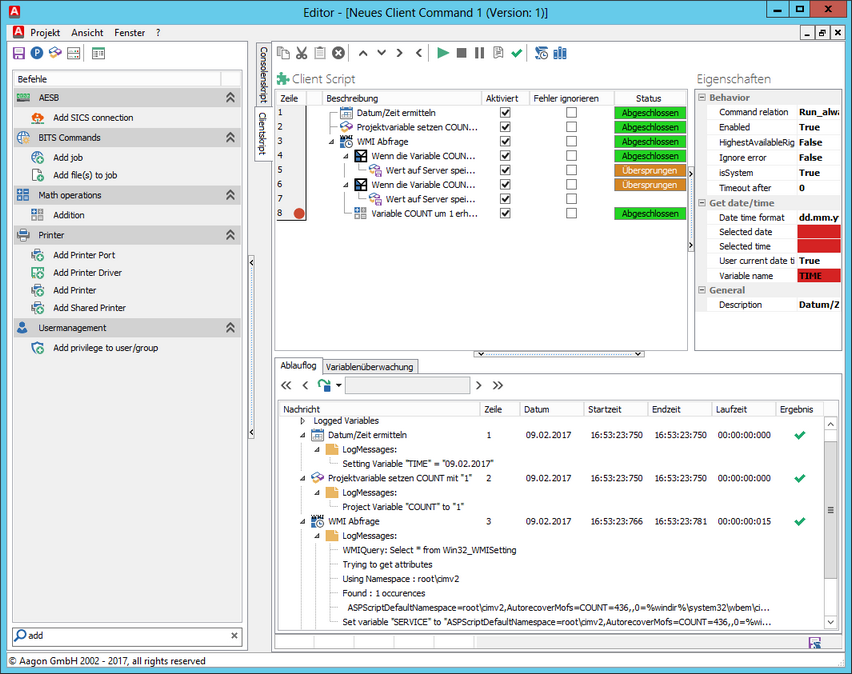
Click Start again, and you'll see from the script's status column that this time the second part of the if-else branch was executed. You can also review the actions taken so far and the current variable states. If the script or Client Command runs correctly, save it using the corresponding icon and, if desired, generate a summary. Now close the editor.