



Agent Installation
 Note:
Note: To install the acmp Agent on your network, you can either start the installation from the console or initiate it over the network.
Installation via the console
Open the Agent Installation in Client Management. Here, all domains and workgroups, along with the machines they contain, are displayed. The legend on the right explains the different icons.
| The acmp Agent can be installed on this machine. |
| It has not yet been verified whether the acmp Agent can be installed on this machine. |
| The acmp Agent cannot be installed on this machine. |
| Installation is possible, but has not yet been carried out. |
| The acmp Agent is currently being installed. |
The acmp Console is currently waiting for data from the machine. | |
| The installation could not be finished successfully. |


This page is divided into three tabs. The Network tab allows you to install the acmp Agent. This tab is displayed by default. The second tab, Installation Rules, allows you to add custom installation rules. On the third tab, Configuration, you can define custom scan sources.
Installation via network
Access the acmp network share via the network environment where the acmp Server is installed. There you will find a subdirectory named “Client.” In this subdirectory, you will find the file “Launcher.exe,” which you can simply run to install the client. This process can be executed, for example, using a login script.
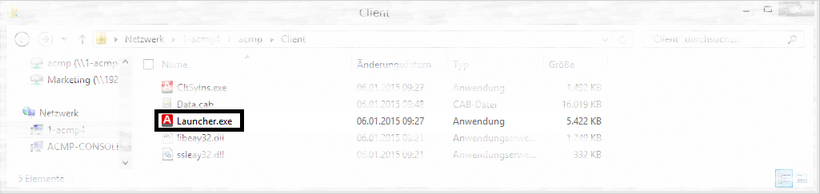
Manual Agent Installation via Launcher.exe
You can execute Launcher.exe in the “C:\Program Files (x86)\Aagon\ACMP Server\Clients\Client” directory or the corresponding network share to start the installation.
No additional information is required, as all settings are automatically retrieved from the Settings.ini file (C:\Program Files (x86)\Aagon\ACMP Server\Clients\).
Note regarding missing administrator rights:
If you do not have administrator rights to execute the agent installation, Launcher.exe will contact the Server and initiate a server-side push process, provided this has been configured accordingly.
Note for installation outside the internal company network on agents that are to connect via the acmp Gateway:
The shared directory can be copied to a USB drive, as long as the settings.ini file is present alongside the client directory. Launcher.exe can be executed as usual in this manner. If there is a ZIP file within the Launcher.exe directory that has the same name as the machine on which Launcher.exe is to be executed, the existing gateway certificate will also be installed on that machine. Make sure that a certificate has already been created for the machine in advance.
Customize the Launcher.exe parameters
Below is a list of some parameters that you can customize for Launcher.exe. Unless the parameter explicitly states that it launches the installation mechanism, the program should execute only that specific command. Note that the parameters are not case-sensitive.
| Parameter | Description |
| /MAKENEWCLIENTID | Sets the flag to Force a new ClientID for the installation mechanism.
|
| /RESTART | The logic from /TERMINATE (1) and the normal installation mechanism (as in (No Parameter)) (2) are invoked. |
| /FORCEREINSTALLATION | The logic from /TERMINATE (1) and “UnInst.exe /SILENT /VERYSILENT” (2) are executed. The normal installation process is then initiated, as in the case of (No Parameter) (3).
|
| /MARKFORPOSTDEPLOYMENT | The server request with the updated Rollout Status “Post Deployment” is sent. |
| /PREPAREPOSTDEPLOYMENT | The execution of the logic from /MARKFORPOSTDEPLOYMENT (1) and /RESTART (2) takes place.
|
| (No Parameter) | The standard installation process will begin. |
Passing Gateway Certificates via Launcher.exe
If you want to transfer acmp Gateway Certificates via Launcher.exe, you must place the %MACHINE_NAME%.zip file in the folder containing Launcher.exe. This file contains all the relevant files required for the acmp Gateway. Execute Launcher.exe as an administrator.