



Installing the Helpdesk Web Interface
In order to install the Helpdesk Web Interface, some preparations must be made. This includes fulfilling all installation requirements and ensuring compatibility with your system. Below, you will be guided through the process step by step.
Installation requirements
Ensure that the following components are installed on your system. If this is not yet the case, please install them.
- Internet Information Service (IIS) must be installed
- .NET Framework 4.6.2 is already installed or will be installed when you install Internet Information Service
- Port 80 or the port set in the IIS settings must be accessible.
To be able to use the helpdesk to its full extent, first install IIS and the .NET Framework. Only then should you enter the necessary configurations in the ACMP Console.
Installation under Windows Server 2016, 2019 or 2022
Start by opening Server Manager on your system.
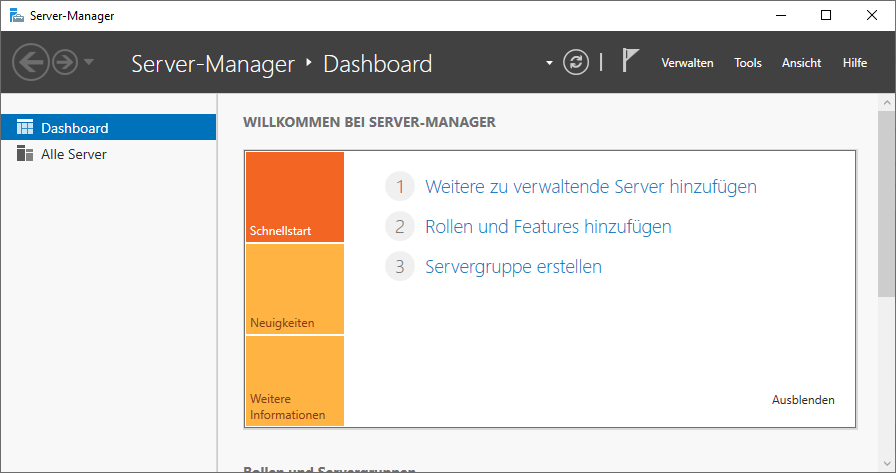
Server Manager
- Navigate to Quick Launch > Add Roles and Features. A wizard will open in which you must insert the roles and features.
- Under installation type, select Role-based or feature-based installation.
- Under Server Selection, select the target server on which IIS is to be installed.
- Under Server Roles, navigate to Web Server (IIS).
- Under Web Server and Management Tools, enable the following roles by ticking the boxes:
| Web Server | Hook-on roller |
| General HTTP features | Static content (installed) |
| Power | Compression of static content (installed) |
| Security | Requirement filtering (installed) |
| Windows Authentication (Installed) | |
| System status and diagnostics | HTTP logging (installed) |
| Requirement monitoring (installed) | |
| Application development | .NET extensibility 4.7 |
| ASP.NET 4.7 | |
| Administrative programmes | |
| IIS Management Console | |
| Compatibility with IIS6 management | IIS6 meta compatibility (installed) |
| Administration service (installed) | Administration service (installed) |
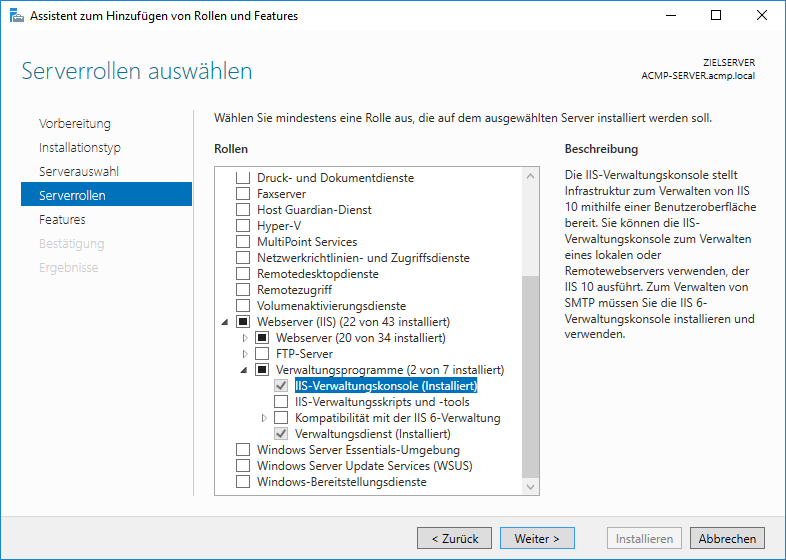
Select Server roles
6. Click Continuing.
7. On the next page, leave the features checked and then click Install. Only then will IIS installed.
Installing the Web Interfaces
The installation file for the Web Interfaces can be found at the path %ACMPServerInstallationDirectory%\Clients\WebInterfaceSetup. Execute the ‘WebSetups.msi’ file to install both web interfaces (Self Service and Self Service SSO) on an IIS. Follow the installation instructions to complete the installation. The Web Interfaces are now installed in the directory %programfiles%\Aagon\ACMP Web Interfaces.
Installation of Internet Information Services (IIS)
IIS is included as an additional Windows component by default, but must be installed in advance in order to be used. The following section therefore explains the installation of IIS for the following Windows Server versions: IIS 10: Windows Server 2016, Windows Server 2019 and Windows Server 2022.
Configurations in the ACMP Console
Follow the steps to complete the configuration for using the Web Interface in the ACMP Console.
1. Classify IP address as trusted
In the ACMP Console, navigate to System > Settings > ACMP Server > Networks. To allow all requests from the Web Interface, you must first classify the IP address of the web server as trusted. Under Trusted Web Servers, insert the server on which the Web Interface is installed and whose requests are to be allowed. If the Web Interface is installed on the same computer as the ACMP server, it is already entered with the address 127.0.0.1. If this is not the case, you must enter the network address manually. To do this, click on Add, enter the network address and then click on OK. The IP address now appears below the trusted web servers.
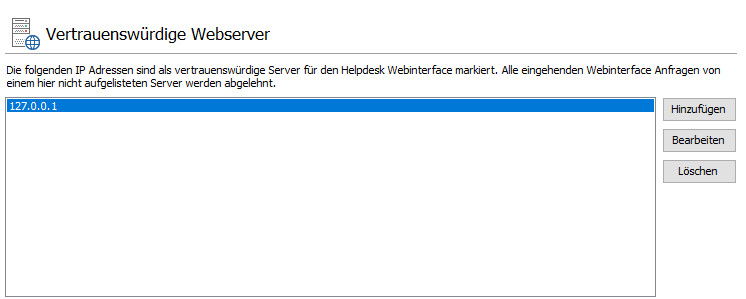
Enter IP address as trusted server
 Warning:
 2. Enable Web Interface
In the settings, open Web Interface > General. Enable the checkbox Helpdesk Web Interface is active and save the configuration via the ribbon bar.
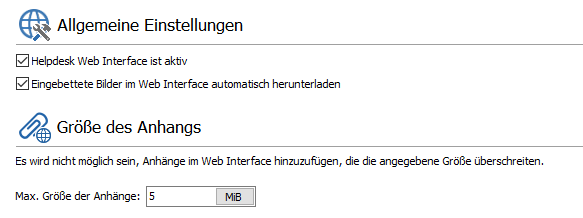
Activate Web Interface
3. Accessing the Web Interface
There are three ways to access the Web Interface:
| Access | Call | Description |
| Self Service | http://[Server-IP]/Self-Service/ | The Self Service Web Interface enables employees to create tickets, which can then be edited by helpdesk staff. To access the Self Service Web Interface, a user account must be created in the ACMP Console (see User Management). |
| Self Service SSO | http://[Server-IP]/Self-Service/SSO | You can enable Single Sign-On for the Self Service Web Interface. To do this, the user must be logged on to an Active Directory and AD authentication must also be activated in the ACMP Console. |
| Helpdesk | http://[Server-IP]/Helpdesk/ | As a helpdesk employee, you have access to the helpdesk and to the tickets assigned to you, which you can also edit. |
Updating the web interfaces
After installing an ACMP update, it may be necessary to update the web interface for the helpdesk. When patching to a new ACMP version, all solutions that you have installed are usually updated and upgraded. One exception is the web interface, as it is a standalone application. Therefore, if an ACMP update affects the web interface, it must also be updated. You can find out whether an update is required and necessary in the respective Release Notes.
Vorgehensweise für eine erneute Installation des Web Interfaces
1. Öffnen Sie den Windows Explorer C:\Program Files (x86)\Aagon\ACMP Server\Clients\WebInterfaceSetup , in der die Datei WebSetups.msi liegt. Führen Sie diese Datei aus, um die Web Interfaces auf dem IIS zu installieren.
2. Durchlaufen Sie den Installationswizard. Um die Web Interfaces in das von Ihnen gewählte Verzeichnis zu installieren, wählen Sie abschließend Install oder geben Sie einen anderen Installationspfad an. Die Installation beginnt.
3. Überprüfen Sie nach nach dem Update, ob der richtige Port und die korrekte IP-Adresse vom ACMP Server in die Config.-Dateien eingetragen wurden.
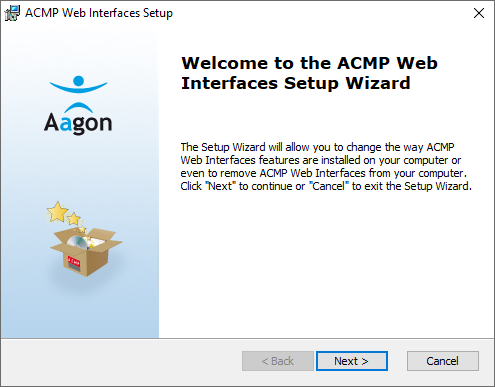
Installationswizard des Web Interface
 Note:
Note: 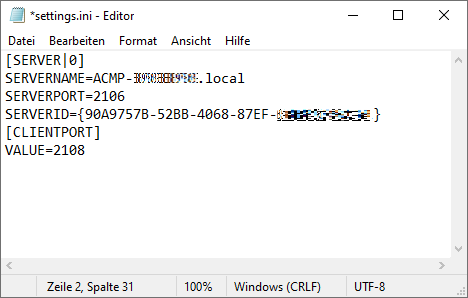
Werte der settings.ini
Öffnen Sie anschließend die Config-Datei des Web Interfaces (Web.config) und des SSO (web.config). Diese sind standardmäßig über folgende Pfade erreichbar:
| Web.config (Helpdesk Web Interface) | C:\Program Files (x86)\Aagon\ACMP Web Interfaces\Helpdesk Webinterface |
| web.config (SSO) | C:\Program Files (x86)\Aagon\ACMP Web Interfaces\SSO |
Prüfen Sie in beiden Dateien folgende Zeilen bzw. kontrollieren Sie, dass die Werte für die Server IP und Serverport korrekt sind:
<add key="ServerPort" value="2106" />
Sonderfall in der Web.config (Helpdesk Web Interface Config-Datei)
In der „Web.config“ (siehe oben) ist zusätzlich folgende Einstellung verfügbar:
Sollte diese Zeile nicht angezeigt werden, können Sie diese unter <appSettings> einfügen.
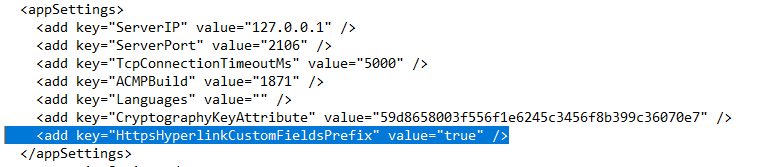
Eingefügte Zeile
Ist die Option auf „True“ gesetzt, werden die Hyperlink Adressen der CustomFields des Typens Hyperlink die keinen HTTP oder HTTPS Präfix haben, im Web Interface automatisch mit HTTPS versehen, sodass diese aufrufbar ist:
Webinterface CustomField Value = https://aagon.de
Im Falle von „False“ ist das Verhalten wie in älteren Versionen und der Hyperlink erweitert die aktuelle Adresse.
Webinterface CustomField Value = https://helpdesk.example.de/Self-Service/Pages/aagon.de
Das Update ist damit durchgeführt.