


In seltenen Fällen kann es nach einem Update auf die 6.5 vorkommen, dass der ACMP Agent bzw. die Console nicht startet.
Im Folgenden werden dafür mögliche Fehlerquellen aufgezeigt sowie Vorschläge bei der Fehlersuche gemacht. Erfahren Sie dann, welche Lösungen es für den Fehler gibt, damit der Agent bzw. die Console wieder fehlerfrei startet.
Fehler: Die Console oder der Agent startet seit dem Update auf die ACMP Version 6.5 nicht mehr
Ausgangslage
Mit dem Release der ACMP Version 6.5.0 wurde die Zertifikatsvalidierung aktiviert, sodass auf Systemen mit veralteten Zertifikaten nach einem Update auf die 6.5.0 der Start der ACMP Console oder des ACMP Agenten verhindert wird. Sollte dies bei Ihnen der Fall sein, können die Gründe dafür ein nicht aktualisiertes Root-Zertifikat, eine nicht vertrauenswürdige Einstufung des Root-Zertifikats oder eine nicht aktualisierte Gegensignatur sein.
Liegt einer dieser Gründe bei Ihnen vor, dann kann eine Gruppenrichtlinie verantwortlich sein, die eine automatische Aktualisierung der Zertifikate unterbindet.
Hier wird erklärt, wie Sie vorab prüfen, ob das Startproblem an ungültigen Zertifikaten liegt und wie Sie ggf. die Gruppenrichtlinie ändern, welche eine automatische Aktualisierung der Zertifikate unterbindet. Außerdem wird ein manueller Lösungsansatz aufgezeigt, welcher einen Export von einem Gerät mit validen Zertifikaten zu einem Import dieser auf dem betroffenen System ermöglicht.
Gehen Sie folgendermaßen vor:
Lösung 1: Zertifikate auf ihre Gültigkeit prüfen
1. Gehen Sie in das ACMP Client-Verzeichnis \Program Files (x86)\ACMP Client\ und öffnen Sie per rechter Maustaste die Eigenschaften der ACMPClientService.exe.
2. Wechseln Sie in den Tab Digitale Signaturen.
3. Führen Sie einen Doppelklick auf das Zertifikat aus. Ist das Zertifikat valide, steht dies unter Allgemein.
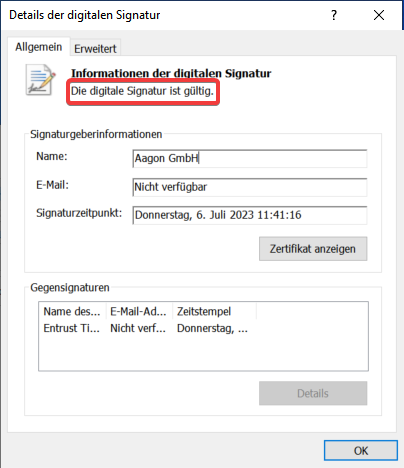
Prüfung des Zertifikatsstatus
Wird Ihnen das Zertifikat als ungültig angezeigt, dann liegt der Grund häufig bei einem ebenfalls ungültigen Root-Zertifikat des Zertifizierungspfades. Den Status des Root-Zertifikats sollten Sie auch prüfen:
1. Führen Sie die oben beschriebenen Schritte 1-3 aus.
2. Klicken Sie im Bereich Signaturgeberinformationen auf Zertifikat anzeigen.
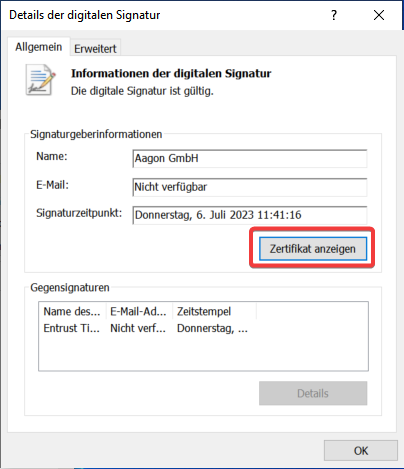
Root-Zertifikat anzeigen lassen
3. Wechseln Sie im neu geöffneten Fenster zum Tab Zertifizierungspfad.
4. Sie können nun den gesamten Zertifizierungspfad und somit die Herkunft des Root-Zertifikats einsehen sowie den Status des Zertifikats.
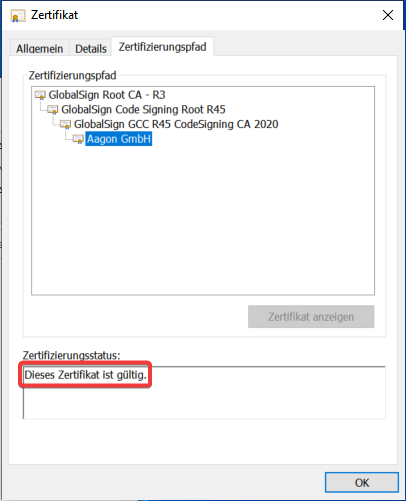
Den Status des Root-Zertifikats prüfen
Außerdem sollte der Status der Gegensignatur ebenfalls valide sein:
1. Führen Sie die oben beschriebenen Schritte 1-3 aus.
2. Führen Sie einen Doppelklick auf das Zertifikat unter Gegensignaturen aus.
3. Klicken Sie im Bereich Signaturgeberinformationen auf Zertifikat anzeigen.
4. Wechseln Sie im neu geöffneten Fenster zum Tab Zertifizierungspfad.
5. Sie können nun den gesamten Zertifizierungspfad der Gegensignatur und somit die Herkunft einsehen sowie den Status des Zertifikats.
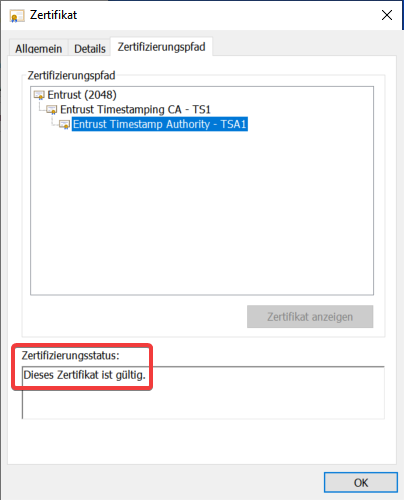
Den Status der Gegensignatur prüfen
Diese Zertifikatsprüfungen beziehen sich auf die ACMPClientService.exe. Um eine vollständige Prüfung durchzuführen, müssen Sie den Vorgang für folgende Dateien wiederholen, die ebenfalls im ACMP Client-Verzeichnis \Program Files (x86)\ACMP Client\ vorzufinden sind:
| Datei |
|---|
| Sectigo - Aagon.Core.AgentUninstall.dll |
| Entrust (2048) - Aagon.CustomImages.ClientModule.dll |
| GlobalSign Root CA - R6 - Aagon.Defender.Management.ClientModule.dll |
| Sectigo (AAA) - libcryptop-1_1.dll |
| Sectigo - libcryptop-1_1.dll |
Sollten alle diese Zertifikate gültig sein, dann hat das Startproblem der Console oder des Agenten andere Gründe.
Sollten diese Zertifikate jedoch ungültig sein, so haben Sie 2 Möglichkeiten, vorzugehen:
Lösung 2: Registrykey prüfen und ggf. die Gruppenrichtlinie ändern
1. In der Regel ist in diesem Problemfall folgender Registrykey gesetzt:
HKEY_LOCAL_MACHINE\Software\Policies\Microsoft\SystemCertificates\AuthRoot DisableRootAutoUpdate (1).
2. Navigieren Sie in den Gruppenrichtlinien-Editor zu Administrative Vorlagen > System > Internetkommunikationsverwaltung > Internetkommunikationseinstellungen.
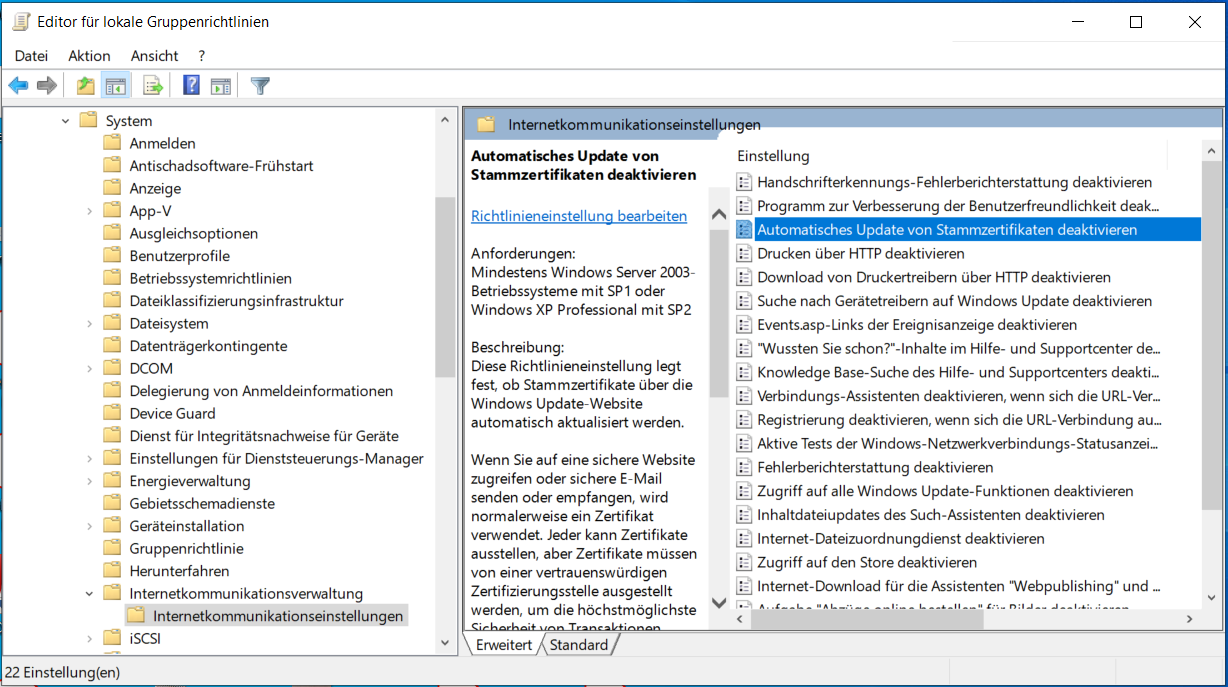
Editor für die Gruppenrichtlinien öffnen
3. Gehen Sie mit einem Doppelklick in die Einstellungen der GPO Automatisches Update von Stammzertifikaten deaktivieren.
4. Setzen Sie das Häkchen auf Deaktiviert. Mit dieser Einstellung aktivieren Sie die automatische Aktualisierung der Zertifikate.
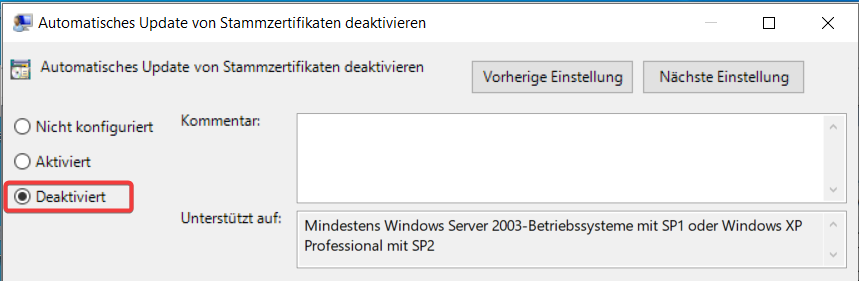
Die Einstellung der Gruppenrichtlinie zu "Deaktiviert" ändern
5. Ggf. muss ein System-Neustart durchgeführt werden, damit der ACMP Client Dienst wieder startet.
Lösung 3: Manueller Export und Import von validen Zertifikaten
Sie können auch einen manuellen Lösungsansatz verfolgen, indem Sie einen Export von den gültigen Zertifikaten von einem Gerät durchführen und diese auf dem betroffenen System importieren.
1. Führen Sie in einer administrativen CMD folgenden Befehl aus: certutil.exe -generateSSTfromWU c:\temp\root.sst
2. Führen Sie dann folgenden Befehl in einer administrativen PowerShell auf dem betroffenen Gerät aus: Import-Certificate -CertStoreLocation Cert:\LocalMachine\Root -FilePath "C:\temp\root.sst"
3. Ggf. muss ein System-Neustart durchgeführt werden, damit der ACMP Client Dienst wieder startet.