

Web Interface settings
The Web Interface settings allow you to define central configurations for many areas of the web interface that are essential for both you as the administrator and the end user (when using Self-Service). This area can be accessed via System > Settings > Web Interface and is divided into thematic subpages. Any changes must be saved before changing pages by clicking Save in the ribbon bar.
General
Under General, you can specify whether the Helpdesk Web Interface should be active. In addition, you can specify whether the embedded images in the Web Interface should be downloaded automatically or not. Both options can be enabled or disabled using the checkbox.
In the Attachment size section, you can specify a maximum size that may be attached to a ticket created in the Web Interface. The size refers to each individual file in the attachment. The default value here is five MiB.
If you want to set the visibility of new comments, you can check the box For new comments, enable the option "Comment visible in Self Service" by default. This allows you to control whether new comments can be viewed automatically (by both the administrator and users

Web Interface settings - General
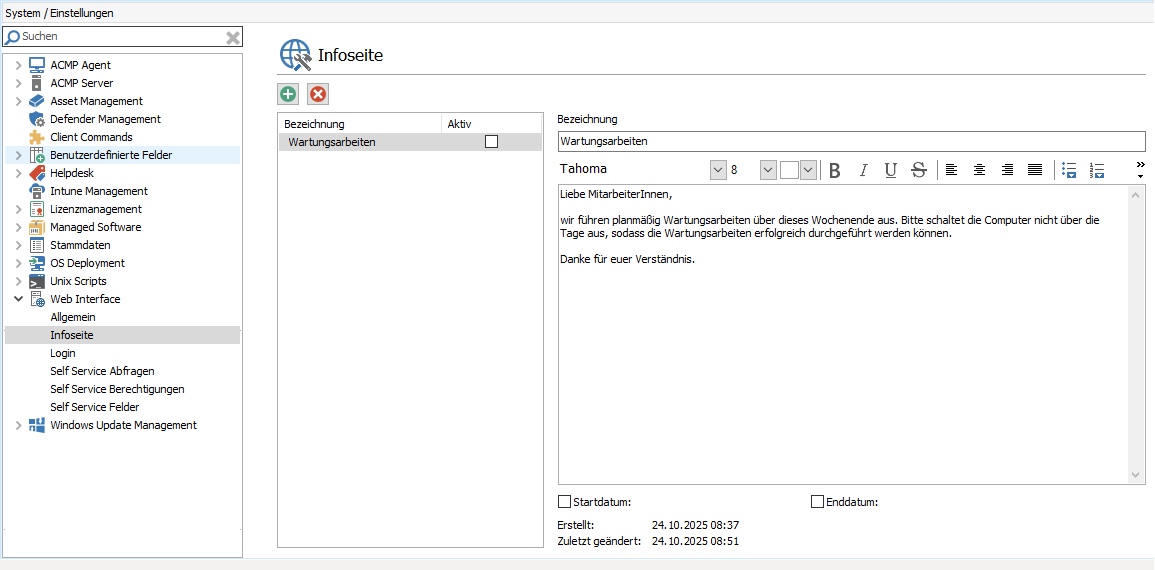
Info page
The Info page area allows you to create individual texts in which you can, for example, publish general notices, information or news, which are then displayed on the home page of the helpdesk or self-service web interface. You have the option of specifying a start and finish date for each item in order to define a validity period. This can be useful, for example, if you want to provide information about maintenance work. As soon as a user logs in during this period, your text will be displayed. You can create new information pages by using the  Add button and remove existing ones by using the
  Delete button. Common formatting options (font and font size selection as well as format settings) are stored on the right-hand side. You should also enable the checkboxes for the start or finish date if you want to provide users with info in advance.
Edit the information page of the Web Interface
If you have checked the Active box and saved the changes, the info will be active and displayed for the specified period. The next time the user logs in to the Self Service Web Interface or the Helpdesk, the text will be displayed. In this example, the user is informed about maintenance work (see graphic below).
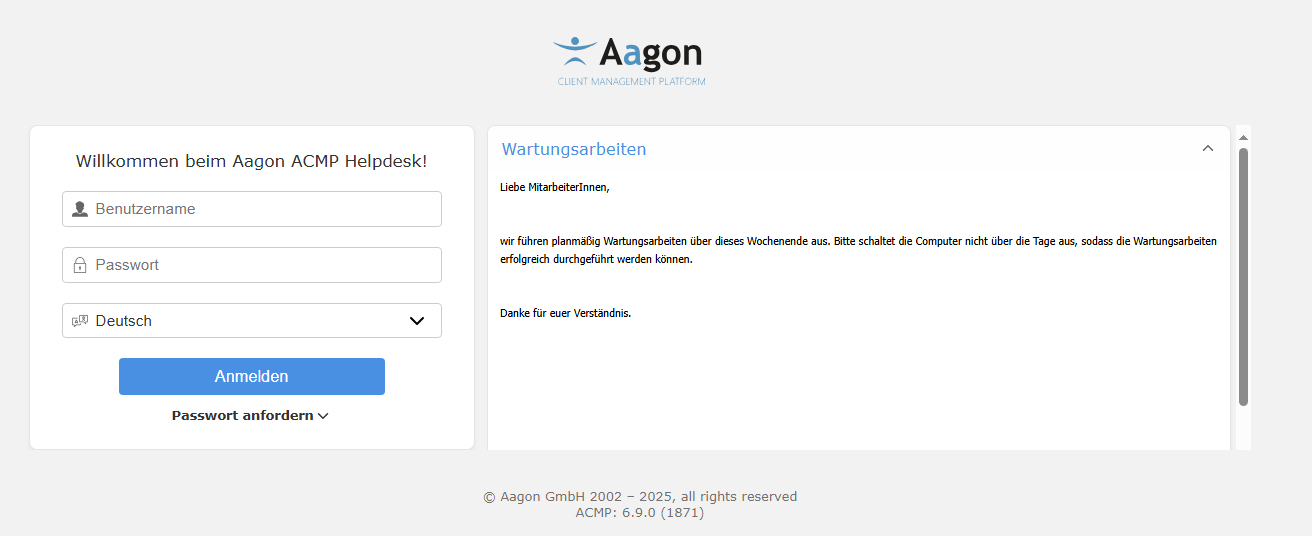
login page of the Web Interface after creating an information page
Login
On the Login page, you can configure settings for authenticating users on the web interface. The authentication settings are used to determine how a user must authenticate themselves.
Warning: For authentication via Active Directory, it is necessary to specify an account (System > Settings > ACMP Server > Active Directory). You can choose between two options:
| Option | Description |
| ACMP Username or contact email address and password | To log in to the Web Interface, users need their ACMP user name or contact email address, which ist sotred in the Master Data and their password. The ACMP account can be viewed via User Management or by contacting the Helpdesk, as this information must be entered here. |
| Active Directory Username and password | With this option, authentifaction is performed using the Active Directory user name and password. For licensing reasons, the data of users from Active Directory who wish to use the Web Interface or Helpdesk must also be entered as contacts in the ACMP Helpdesk (see Manage Contacts). To do this, keep the user data in Active Directory and the contact data in the ACMP Helpdesk consistent so that users can log in. |
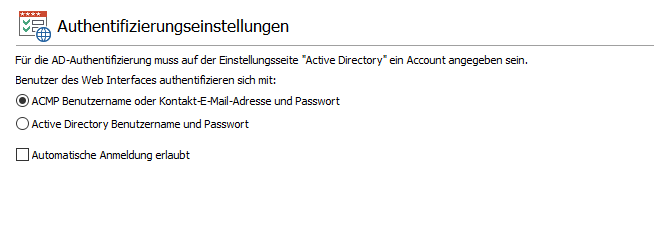
Authentication settings
Self Service queries
On the Self Service query page, you can define a query whose result will be displayed on the start page after you login to the web interface. To do this, you can select from the existing ticket fields in the base Query fields area and drag and drop them from the list on the left into the definition field on the right. You can also specify a sorting.
Of course, it is also possible to create base Query filters. This works in the same way as creating a filter for a normal query, allowing you to obtain more specific results. Here, too, you can use the corresponding filter criteria via drag and drop.
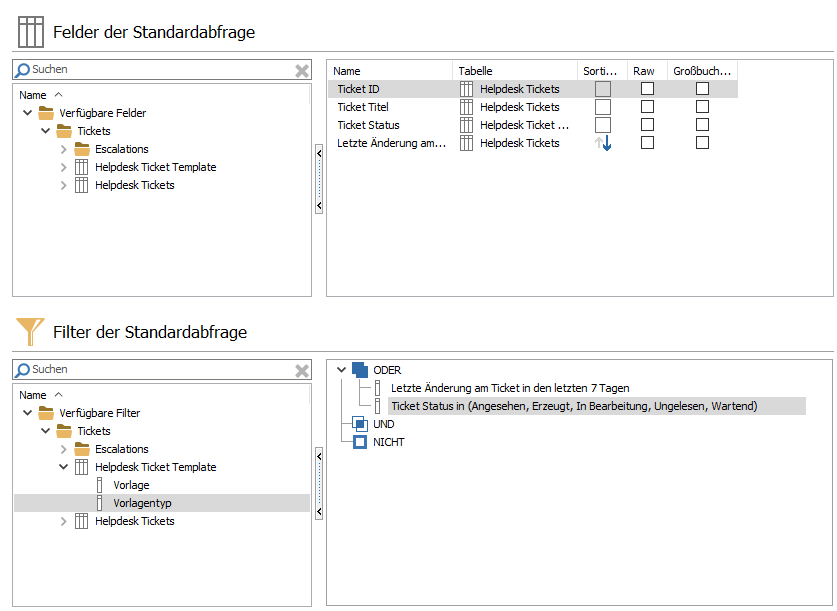
Self Service queries
Self Service permissions
The self-service permissions section contains several rights relating to the self-service web interface and its end users. Tick all the permissions you want to allow. Subordinate rights (e.g. ‘change category’) can only be selected if the level above has been activated. This allows you to customize the main rights to suit your circumstances and further restrict or extend the rights. Save your settings using the ribbon bar.
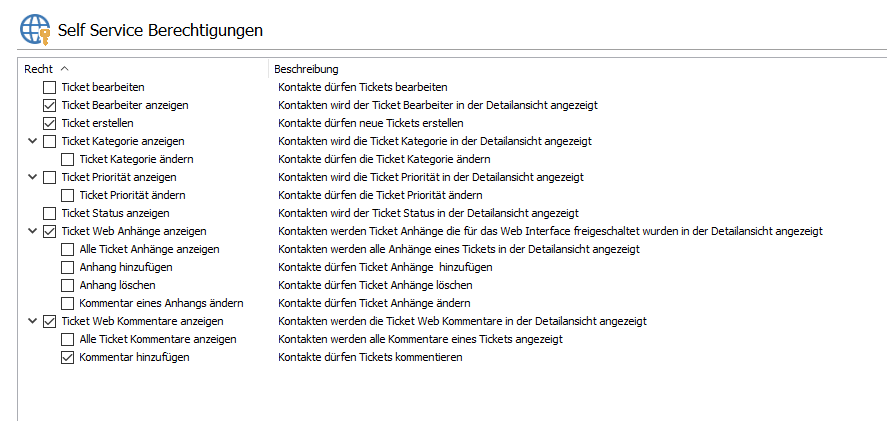
Self Service permissions
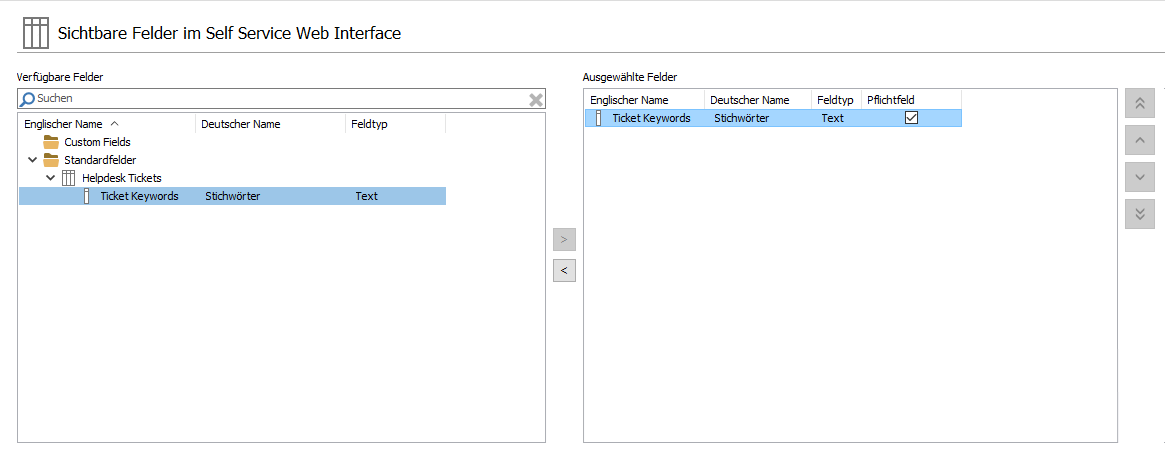
Self Service fields
Select the custom fields you want to use for self-service from here. These fields can then be displayed and used when creating a ticket via the web interface.
On the left-hand side, you will see all available custom fields within the view. These can be dragged and dropped into one or more fields in the selection box on the right-hand side, or you can use the arrows for this purpose. The selected fields are then listed on the right-hand side. Here you will see the German and English names, as well as the field types (e.g. text, number, etc.). If you want it to be a mandatory field, you can enable the checkbox. This makes it mandatory to fill in this field when creating a ticket before the ticket can be opened. The fields themselves will then be filled in at a later point in time, as soon as a ticket needs to be filled in.
Self Service fields