

Distributing ACMP Agent with Gateway Certificates via Intune
Initial situation
If you want to install an ACMP agent via Intune, you can also provide the gateway certificates directly so that the agent can connect to the ACMP server directly via the gateway (e.g. from your home office). The certificate only needs to be provided if the agent establishes the first connection via the ACMP gateway. To do this, all installation files for the agent and the corresponding certificates must be assembled into an INTUNEWIN package. Since only one file can be executed from the Intune package, a batch file is also required to execute all actions. Here, the certificates are copied to a storage location where the agent can access them, and in the next step, the agent is installed. This allows the agent to use the certificates to connect immediately after installation and the first start of the service.
Procedure
1. Make directory
For the following steps, you must first create a folder where the certificates and other files will be stored later. Select a storage location that you can access at any time and name the folder accordingly.
2. Copy the client directory
Now copy the client directory from the ACMP server (C:\Program Files (x86)\Aagon\ACMP Server\Clients\Client) to the folder you created earlier. Make sure that the client directory, consisting of the settings.ini and the client folder, is inserted full.
3. Create ACMP Gateway certificate
Now navigate to the ACMP Gateway (System > ACMP Gateway) in the open ACMP Console to create a client certificate. To do this, click on ‘Create – Manual Distribution’ in the ribbon bar under Client Certificates. A window will open in which you can select the client for which you want to create the certificate. Select the client and then click Finish. Since the certificate is used for multiple installations, you can also use a manual Client to create the certificate. In the next step, the certificate for manual deployment is created. To do this, select the certificate lifetime and the output directory for saving and confirm with Execute.
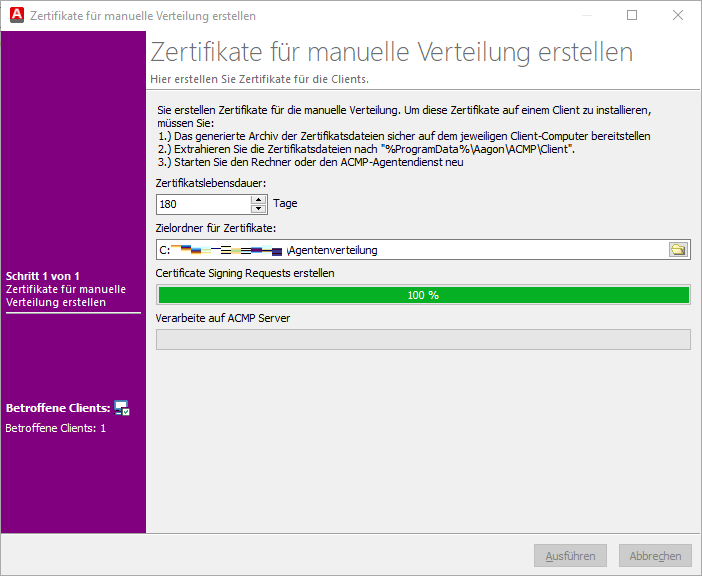
Create a manual certificate
Display the output directory containing the certificates by confirming the pop-up window with ‘Yes’. The certificate is stored in the folder as a zip file with the client's name. Copy the two files (ACMPGatewayCertificate.crt and ACMPGatewayCertificate.pem) from the ZIP file and save them at the same level as the settings.ini and the client directory from the prior step.
4. Create batch file
Create a batch file using a text editor and name it, for example, IntuneInstall.bat. Insert the following lines to the file:
set certDir="%ProgramData%\Aagon\ACMP\Client"
if not exist "%certDir%" mkdir "%certDir%"
copy "%source%ACMPGatewayCertificate.crt" "%certDir%"
copy "%source%ACMPGatewayCertificate.pem" "%certDir%"
"%source%Client\Launcher.exe"
The script shown here is written in such a way that the current directory in which the batch file is located is used.
Save the batch file in the folder you created or insert it there later if you used a different storage location.
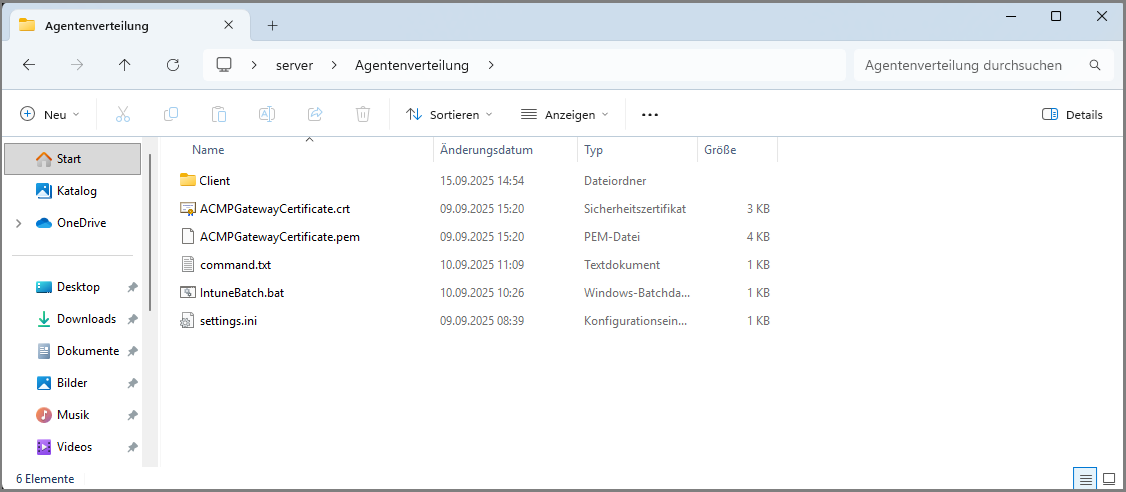
Completed folder
5. Create Intunewin
Use „IntuneWinAppUtil.exe“ to create an INTUNEWIN package (continuing explanations here). To do this, use the CMD shell command in the following format:
Explanations of the command:
- The parameter ‘-c’ specifies the directory where all the files required for installation are located (the ACMP Agent, the certificates and the batch file).
- The parameter ‘-s’ specifies the executable file that is started during the installation of the INTUNEWIM package (the batch file created previously).
- The parameter ‘-o’ specifies the directory in which the INTUNEWIM package is then created.
This could look like this, for example:
Execute the command. The finished Intune package will then be located under ‘C:\IntuneApp’.
6. Create the app in the Intune portal
Now that you have made all the necessary preparations, you need to create the app in the Intune portal. To do this, log in to the Microsoft Intune page (https://intune.microsoft.com) and open ‘Apps’ in the left-hand navigation bar. Then click on the ‘Windows’ platform. A new view of the existing Windows apps will open.
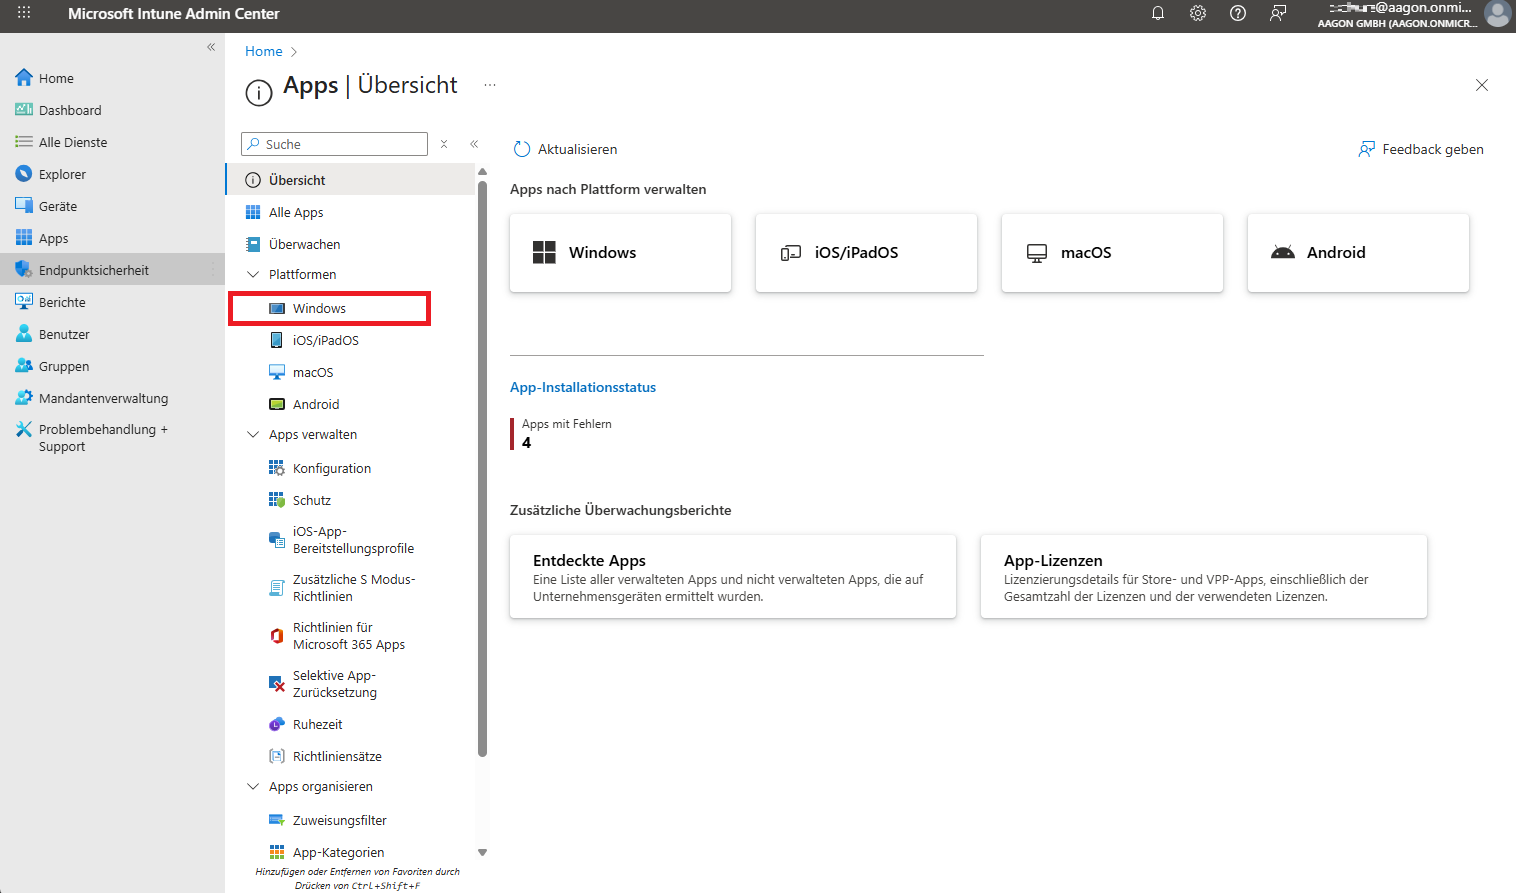
Add Windows app
Click on “Add” and select “Other” > “Windows app (Win32)” as the app type. You will now be guided step by step through a Microsoft wizard that spans several pages:
1.App information: On the first page, select the file you want to upload here. This is the app package file you created earlier (IntuneInstall.intunewin). Select the file in Explorer and click Open. Once the file has been successfully uploaded, the information it contains (name, platform, size) will be displayed. Click OK. Insert any additional information required or change existing fields if the details need to be corrected (e.g. to specify a different name or description). Then click continuing.
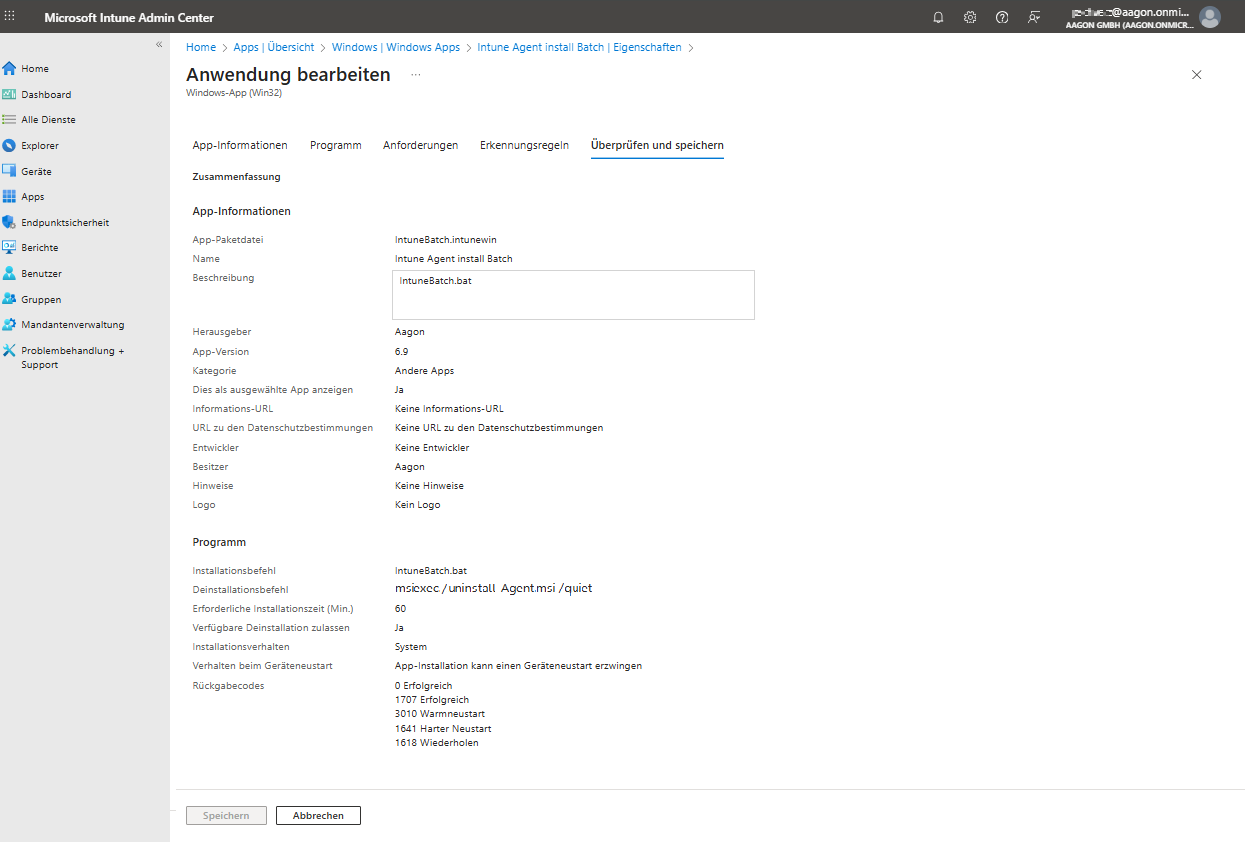
2. Program: Now enter the batch file you created (IntuneBatch.bat) under Installation command and add the Uninstall command (msiexec /uninstall Agent.msi /quiet) that you want to install. Other details are not mandatory; you can leave them unchanged here.
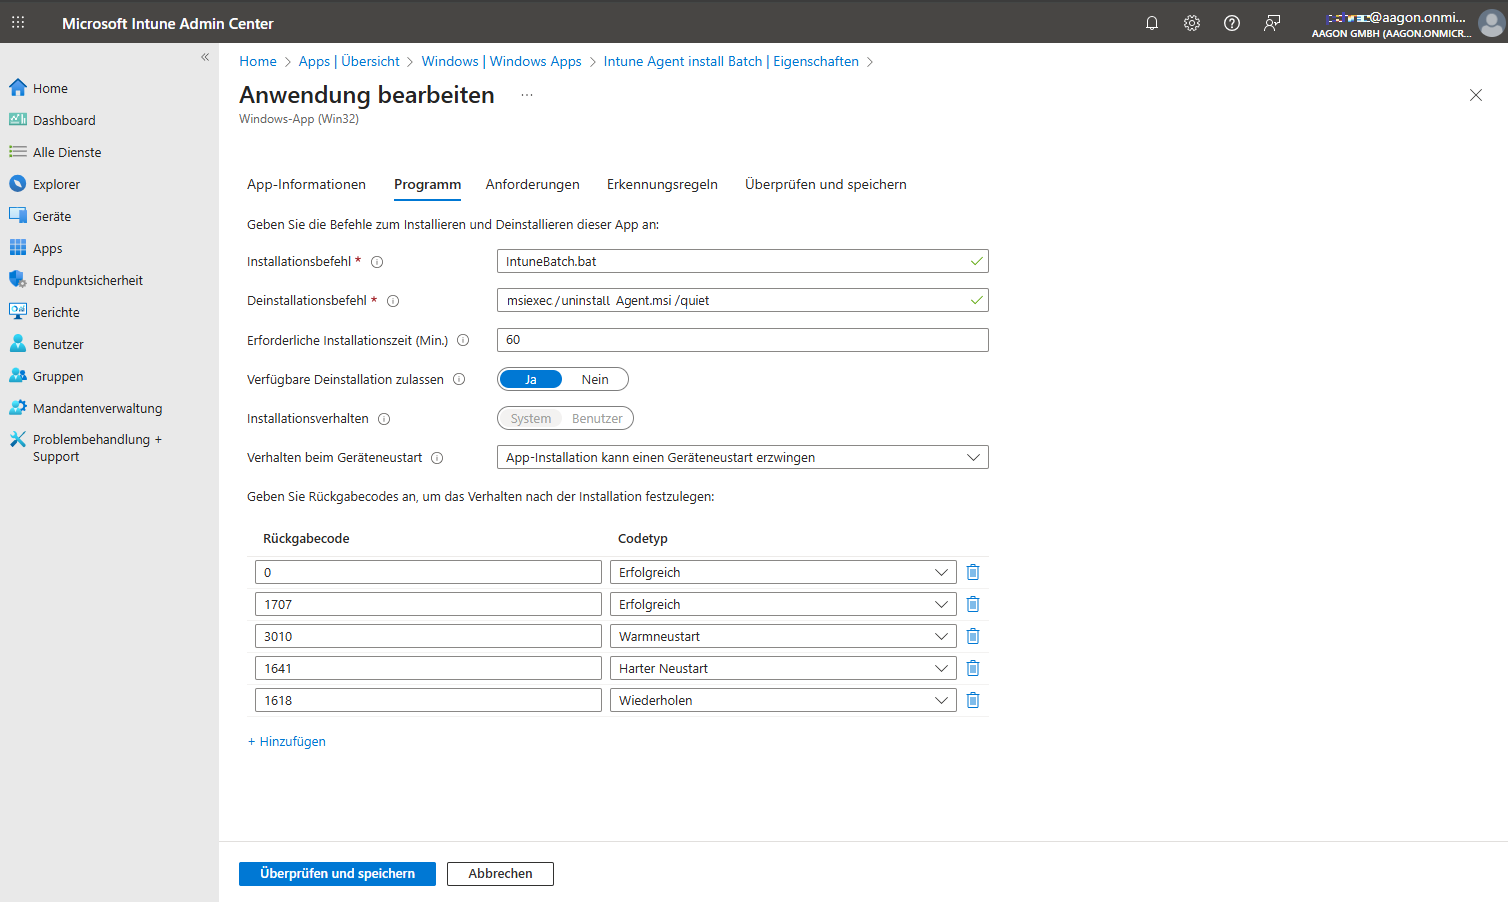
Intune app information
3. Requirements: Under Requirements, you must specify the requirements that devices must meet before installing the app. To do this, you must specify the operating system architecture to which it should apply and the minimum required operating system (e.g. Windows 10 1607).
4. Detection rules: Using the detection rules, you can specify the rule format to be used to determine whether or not the app is installed. To do this, select Configure detection rules manually and then click on “add”. Select the ‘File’ rule and enter the installation path (C:\Program Files (x86)\Client) and, as the file, e.g. ‘ACMPClientService.exe’.
Preview of the created app
The package will now be uploaded.
The app can now be installed on the managed Intune client.