

Structure of a grid in ACMP
General
A grid is a tabular display of result sets in the ACMP Console. These occur in various places in the ACMP Console in different plug-ins (see areas of application). A grid allows you to create custom views, sort, filter or group results according to your needs and to find specific information.
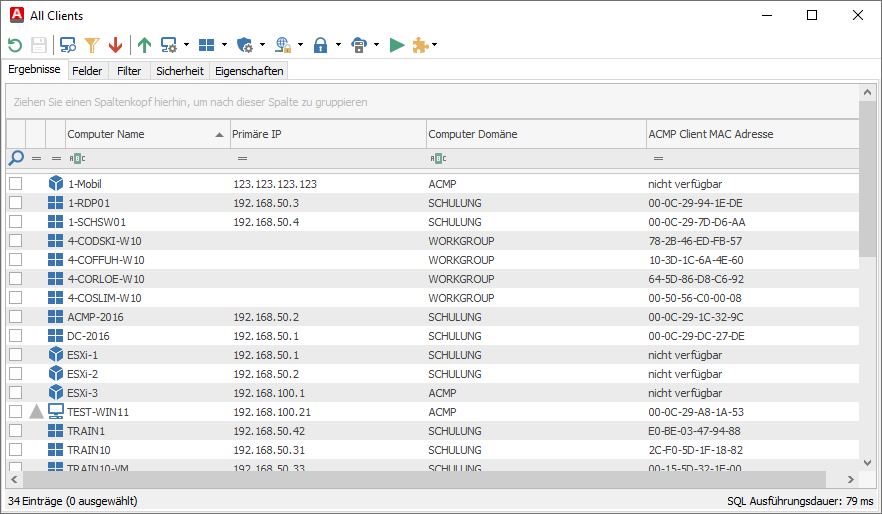
Example of a grid in the Query Management, which displays the results of the query All Clients
Areas of application
The areas in which grids are available in the ACMP Console are listed below.
| Plug-in | ACMP area |
| Query Management | Client Management > Query Management > Query executed |
| Windows Update Management | Patch Management > Windows Update Management > Dashboard Patch Management > Windows Update Management > Updates/ Declined Updates |
| Managed Software | Patch Management > Managed Software > Dashboard |
| Vulnerability Management | Security > Vulnerability Management > Dashboard Security > Vulnerability Management > Tabs Detected Vulnerabilities/ Globally excluded vulnerabilities |
| Defender Management | Security > Defender Management > Tabs Events/ Quarantine |
| Asset Management | Asset Management > Hardware Assets |
| Licence Management | Licence Management > Software Catalog > all listed tabs Licence Management > Licences Licence Management > Compliance |
| Helpdesk | Helpdesk > Ticket Management > Homepage |
The basis of all grids are the results of previously defined fields (Query). In some plugins, you will find pre-built ACMP Dashboards that can help you to quickly work with the results from the grid. You can customise the respective widgets in which the Dashboards are displayed in a tile. To do this, click on the corresponding icon ( ) and then on Select Widget. In the window that opens, you will find widgets based on Query Results that you can also insert here.
Structure of a grid
The grids are always structured similarly, regardless of where they are used in the ACMP Console. In the grid, you have various options for sorting, filtering or grouping the results individually. The results refer specifically to the selected fields, which you have either previously selected in a query (e.g. in Query Management) or which are predefined by ACMP to support you in your daily work. Example: On the Asset Management start page (Asset Management > Hardware Assets) you will find a list of all Assets listed in the ACMP Console. The predefined fields are static and cannot be changed. This ensures that the asset name, inventory number, user and asset status are always used as the source in the view. You can only sort, filter or group the entries according to your requirements.
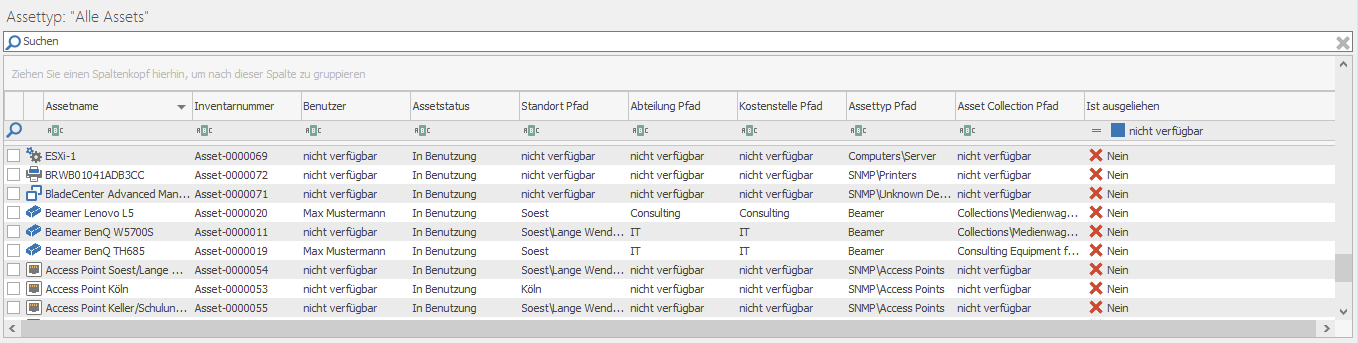
Example of the grid in Asset Management
Sorting in the grid
Results can be sorted individually. To do this, select the desired row in the column header (e.g. Computer Name) that you want to sort. To do this, either click on the downward icon ( ) to sort the results from A to Z or on Up (
 ) to sort them from Z to A. (Special) characters and numbers are included in the sorting and listed at the beginning or end according to their sorting. You can sort in this way for each column.
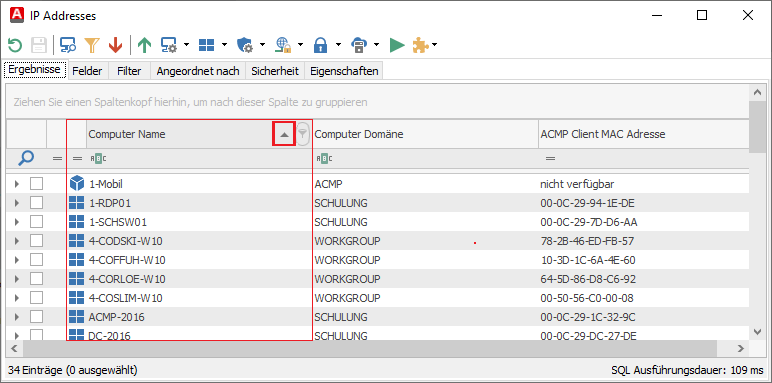
Sorting option in the respective column
Filters in the grid
There are two ways to filter the results in the Grid: either you filter the results using the quick filters (All, Custom... or Duplicates), or you use a free text filter to define conditions using relational operators.For the first option, click on a column in the open grid (e.g. within an open query). The following icon ( ) is displayed on the right side of the field. As soon as you click on it, various filter options are displayed based on the column content: (All), (Custom...) or (Duplicates). The following figure shows an Asset Collection Query that allows you to filter by asset name. The (All) option is selected in the view.
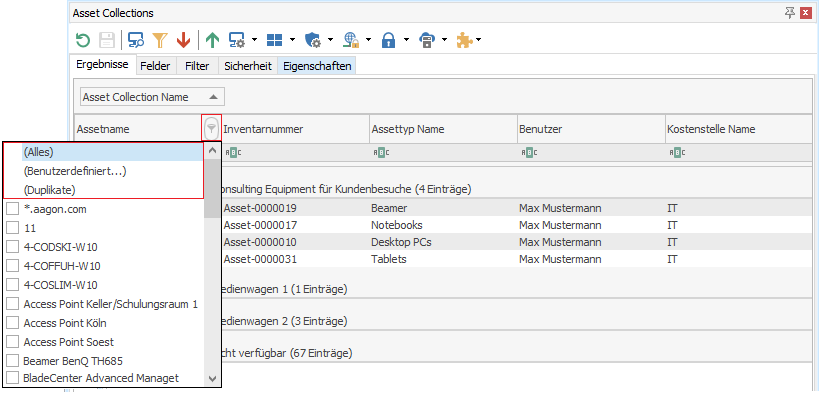
Filter option of a selected column
| Quick filter options | Descpription |
| (All) | With (All), all entries in the selected column are displayed. The entries are not filtered continuing. |
| (Custom...) | The (Custom...) option allows you to create custom filters to filter and display the results in the grid. |
| (Duplicate) | If you select this option, only duplicate entries with the same caption will be displayed via (Duplicates). |
Filter configuration options (Custom...)
The Filter (Custom...) allows you to display only those rows that match your specific criteria. To do this, click on the filter of the same name and a new window will open where you can specify exactly what you want to filter. In the following example, we only want to see results in the Asset Name column where the name is 'Notebooks'. Optional: If you want to link a second filter to this one, select an operator (AND or OR) and specify another condition below it. Otherwise, click OK and close the window.
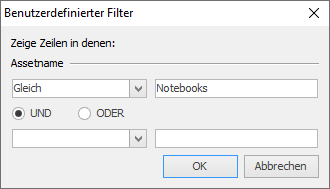
Custom filter
The filtered list of results is now displayed in the grid.
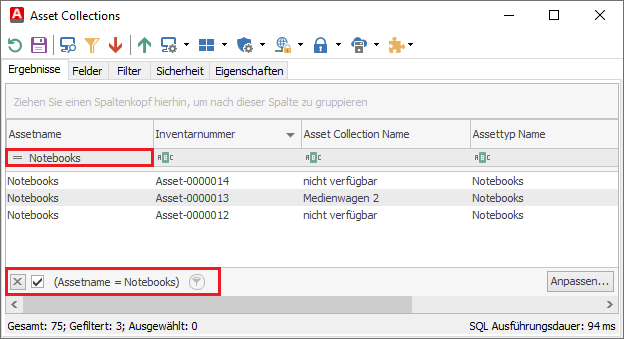
Filtered results in the grid
Filter configuration options (Duplicates)
Once you have selected the (Duplicates) filter, only the duplicates will be displayed, i.e. items with duplicate descriptions. Duplicates are often identified by name or user, but not by display fields such as inventory number, as this would eliminate the unique assignment. You can identify duplicates by the number next to 'Filtered'. Otherwise, uncheck the box if you want to see all entries in the found set for the column.
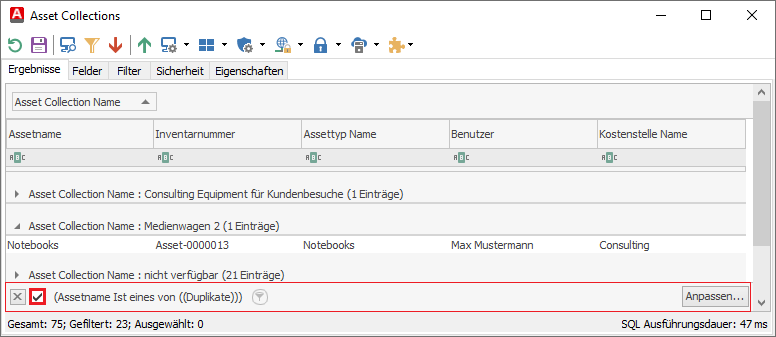
Enabling or disabling duplicates from a query
Free text filter in the grid
The free text filter allows you to filter entries by specific comparison operators. See below for a list of available options.
| Filter | Description |
| Equals | The value entered must match the other value exactly. |
| Does not equal | The value entered must not be the same. |
| Is less than | True if the left value is less than the right value. |
| Is less than or equal to | Is true if the value is less than or equal to the specified value. |
| Is greater than | True if the left value is greater than the right value. |
| Is greater than or equal to | True if the left value is greater than or equal to the specified value. |
| Is like | Compare the values based on similarity. |
| Is not like | Compare the values with exclusions of similar values that you can enter. |
| Contains | Contains the character you entered. |
| Does not contain | Does not contain the character you entered. |
| Begins with | Starts with the character you specify (e.g. a specific start letter). |
| Ends with | Specifies a character with which the entry must end when you enter it. |
To use one of the filters, click on the icon in the line (e.g. the equal sign (=)) and then click on the filter you want in the list. Then type a character or value to filter the results.
Grouping within the grid
In some cases it may be useful to display items grouped by a particular criterion. For example, if you want to see all Assets assigned to a particular User, you can drag the User field from the table into the upper column header. To do this, move the mouse over the entry in the table (User in this example) and drag it into the column header.
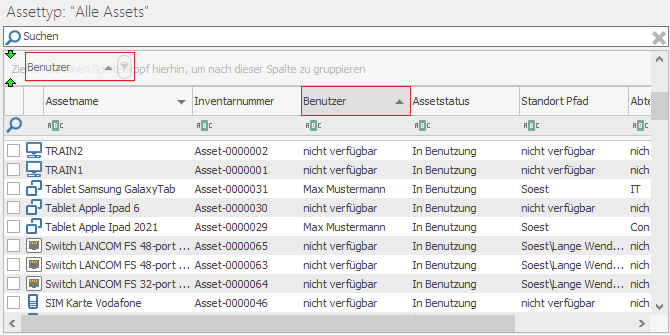
Grouping Assets in the grid
This causes all list entries to be grouped by that column and the entry disappears from the table. The remaining entries move up in the view. The grid itself now displays all entries according to the user criterion. The following figure shows the user Max Mustermann, who has a total of seven Assets assigned to him. Double-click on the User: Max Mustermann (7 Assets) row to open the listing. From this view, you can see all the relevant information about the Assets grouped here for this particular user.
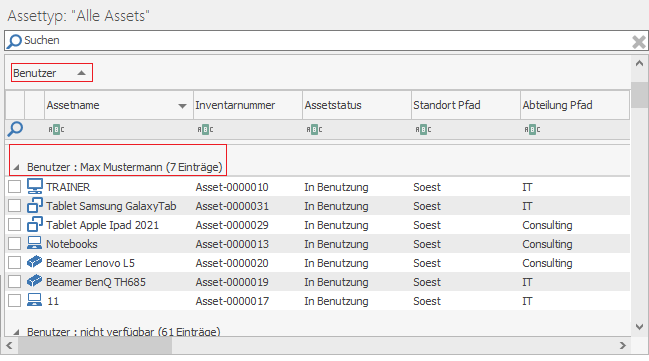
Grouping Assets by User
To undo the grouping, simply drag the User entry back to any position in the row of column headers in the table.