


Full Microsoft Defender system scan uses too much CPU
It may be the case that all full Defender scans created and started via the Scan Collections in Defender Management cause too much CPU usage, resulting in many side processes coming to a near or complete standstill.
This problem can be solved in ACMP using the Scheduled System Scan in the Defender configuration profile settings. In addition to using a maximum CPU utilisation during the system scan, you can also make continuing settings that define the scan. You can avoid the problem by removing all previously created scheduled scans from the Scan Collections and only creating new scheduled scans using the configuration profile settings.
To do this, proceed as follows:
- Go to Security > Defender Management and select the Configuration Profiles tab.
- Select a configuration profile and double click it. The configuration profile settings will open.
- In these settings, go to the Scheduled Scans tab. Remove all system scans from here. The quick scans can be retained.
- Go back to the Settings tab and select Scan Settings > Scheduled System Scan.
- This is where you create new system scans. In addition to scheduling the day of the week, time and maximum CPU usage during a scan, you can define some other settings that affect this system scan.
- Click Save.
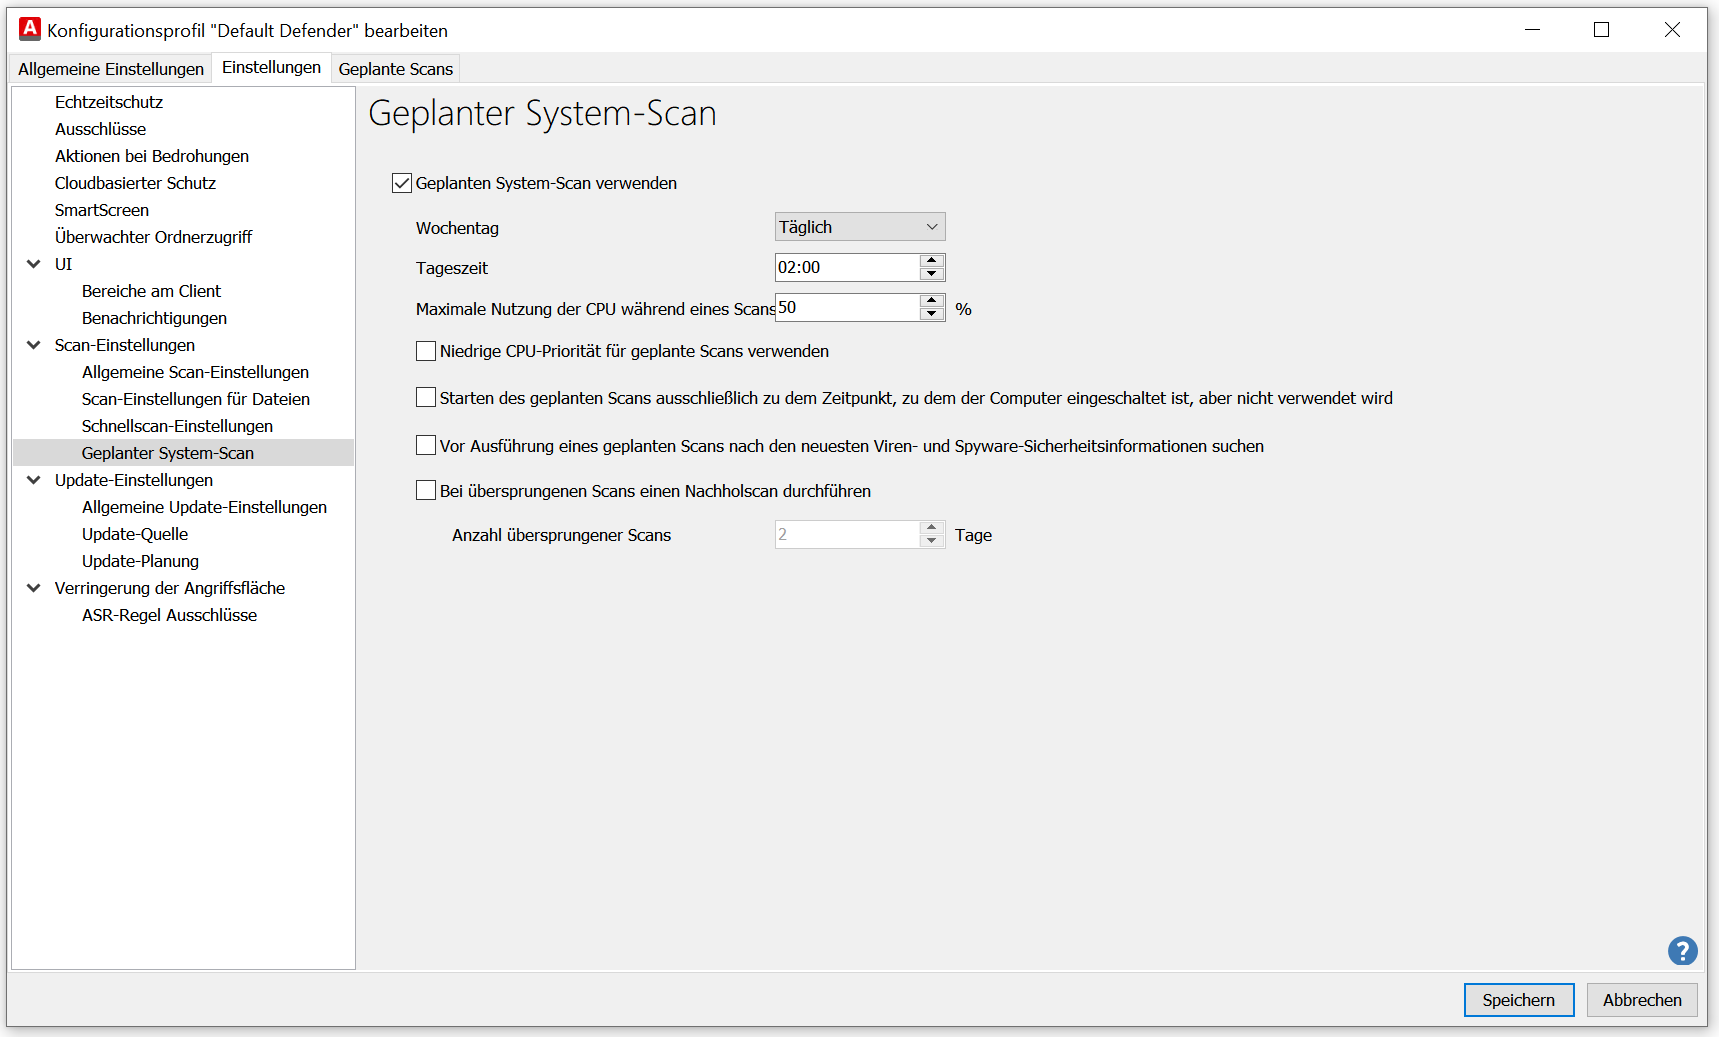
Settings for a scheduled system scan
With the scheduled full system scan, you can set when and how the scan should run, so that it can be customised to all other processes on the Clients. This helps to avoid an almost full CPU load and thus the restriction of other tasks.