

Executing Queries
You can execute a query at any time via the ribbon bar under the Query Actions or directly from Query Management. To do this, select one of the available queries by clicking on the Execute button or start it by double-clicking. The results are displayed immediately on the right window edge, even if you start the query from the ribbon bar from a different plug-in. If you want to move the query, you can release it from the console and display it in a separate window.
Structure of the result display
As soon as you have executed a query and are in the query window, you will see a menu bar with various options for action at the top. You can use these to continue working with the results you have received. To do this, select the Clients and start the desired action.
| Symbol | Description |
| Updates the current window. If you change Clients, fields or filters in an already open Query, it is essential to update it so that the ACMP Server takes the changes into account. |
| Saves the possible changes to the Query. |
| The Client Details of the selected Client will open. Alternatively, you can also open the client details by right-clicking or double-clicking on the respective client. If you have selected several clients, you can also display several details at the same time. |
| This is needed if you want to filter results. An extra window will open where you can add further conditions to achieve even more specific results. The filter template can also be saved separately. |
| This is where you can export results. To do this, select the dates for export and explicitly specify which rows should be included. CSV or XML are available as export formats. |
| Select the ACMP Offline Scanner files you want to import. This function also allows you to capture non-inventoried clients that are not on the network but should still be included in a Query. |
| A submenu for managing Clients will open. The system selection provides you with quick access to the most common Query Actions. |
| A submenu for managing Windows Update Actions opens. In this menu, you can make specific changes from Windows Update Management and, among other things, install or uninstall Updates. |
| Choose action Defender Management if you want to start a Defender Scan or Update via the quick access or assign or remove Configuration Profiles. |
| You can create and distribute certificates for selected clients or revoke them via the ACMP Gateway. |
| You can use BitLocker Management to disable BitLocker or change drive passwords on selected Clients. In addition, you can also assign or remove Configuration Profiles. |
| A submenu opens with all the Intune-specific actions that you can execute on a Client.. |
| This opens a wizard for the execution of jobs. This allows you to distribute Client Commands, Job Collections, System Jobs, Managed Software or Windows Update Collections, which are then to be executed on the selected Clients. |
| A submenu opens, in which the most frequently used Client Commands can be found. |


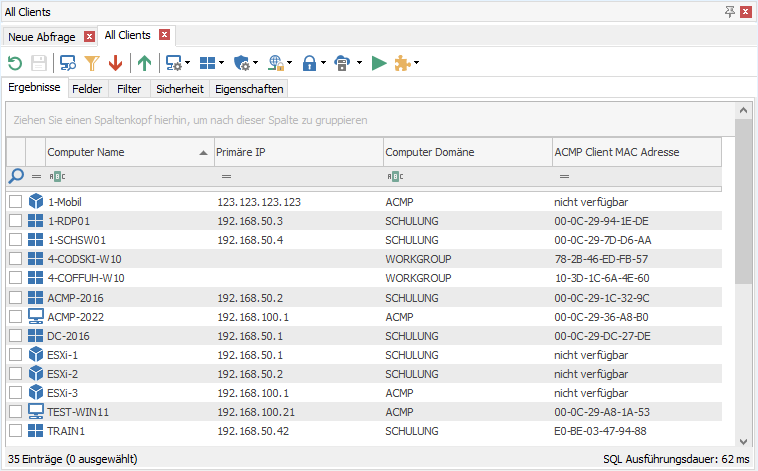
You can also select most actions via the context menu (right-click in the executed Query). ACMP displays the results in tables, in the so-called grid. In the topmost columns you will find the respective field entry with the results below it. You can drag and drop individual columns into the header row to group the results by that column. If there are several results for a column value, you can open them by clicking the  /
/  button in front of the displayed column value.
In addition, you can select the option Set optimal column width, which divides the available space equally among all the columns to be displayed. This is useful, for example, if you have created a query with many items and cannot see all the results at a glance. In the following graphic, the results have been sorted by computer name (see first column) in the grid. Read on to find out how you can use the grid for your individual work.
For more complex Queries (advanced queries), there are even more ways to organise the results.
Open Client Details with Query Results
If you want to select several Clients from the Query Result, you can select the checkbox in front of each Client and then mark it to execute a Client action (see section above).