


Create a desktop shortcut
Initial situation
The Client Command module ‘Create Shortcut’ allows you to distribute a shortcut on the desired Clients. The desired shortcut could link to a central application or to a URL, e.g. to the company intranet. This allows every employee to access the intranet directly from the desktop of any Client to obtain information or documents.
In this example, the script checks whether the „ACMP Kiosk“ shortcut already exists on the public desktop of a client. If the shortcut does not exist, it is created. If the shortcut already exists on the client desktop, the command to create the shortcut is skipped and the script exits without making any changes to the system.
How to proceed:
Select Script
- Navigate to the Client Commands > Create module.
- Click on Add. The Client Commands Editor opens, where you can decide in advance whether the command should be executed on the Client or on the Console side. In this example, select the Client Script.
Insert and customize Command If file (not) exist
- In the command list, select Conditions > If file (not) exist.
- Double-click on this condition to open the command properties, which can be customized for each case.
- In the Details tab, enable the If file does not exist radio button.
- In the settings, insert the path of the file that should appear as a shortcut on the desktop, in this case, for example, %SHELLFOLDER_COMMON_DESKTOP%ACMP KIOSK.Ink
- Click on OK. The first command appears in row 1.
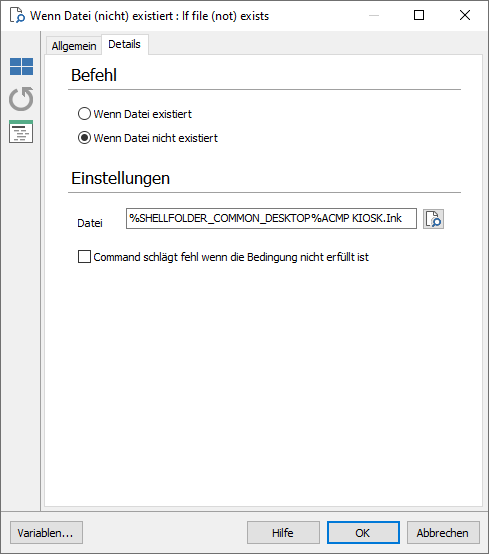
Customised If file (not) exist command
Insert Command Create Shortcut
- Then go to Files > Create shortcut in the command list.
- In the General tab, enter a description of the action, e.g. „Create Shortcut“ in Description of action. All other settings can be left as they are.
- The following items are entered in the Action Details tab:
| Description | ACMP Kiosk |
| Command line | C:\Program Files (x86)\ACMPClient\Acmpkiosk.exe |
| Location | %SHELLFOLDER_COMMON_DESKTOP% |
| Start | Normal window |
| Working file | C:\Program Files (x86)\ACMPClient\ |
4. Click OK. The command should appear in row 2.
Optional: Adding a Command Comment
This step is optional and can be added if you want to add a comment to the Client Command to provide a more detailed explanation.
- Select the Miscellaneous > Comment command from the command bar.
- Insert the desired comment in the free text field, such as: This is the public desktop.
The editor should then look like this:
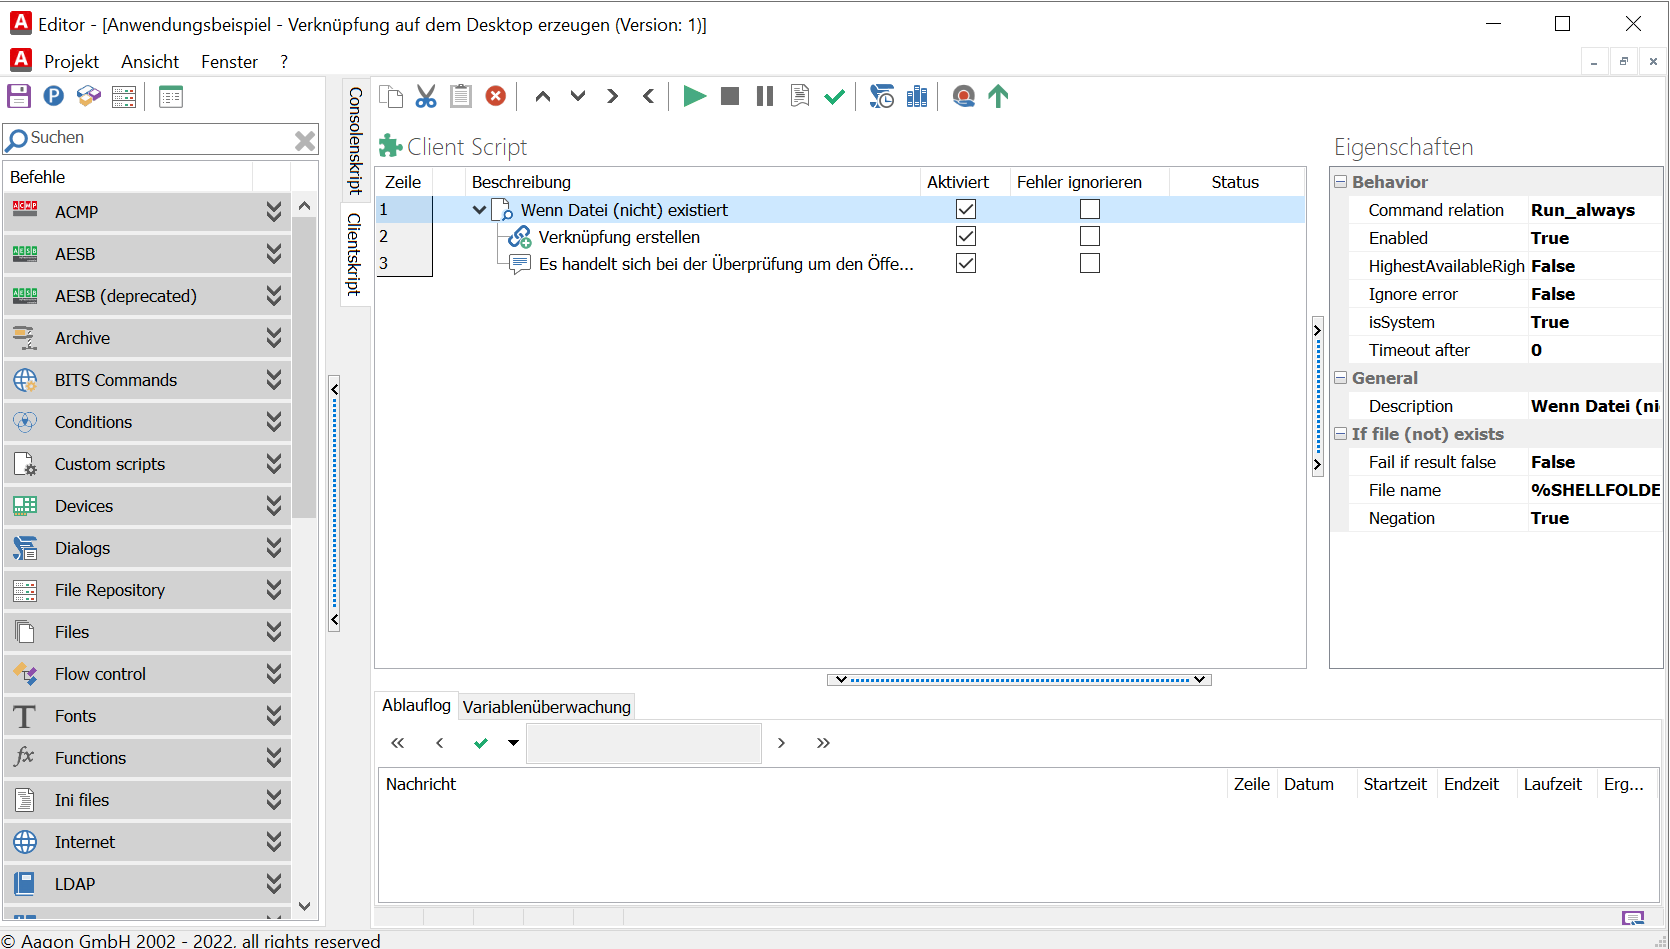
Client Command Editor
3. Save the Client Command.
Running Client Command phases
The Client Command can now be moved through the Test, Synchronise, Release and Execute phases. Only then can the link on the desktop be checked and added if necessary.