

Einem Client Command spezifische Parameter für die Softwareverteilung am Beispiel von 7-ZIP übergeben
Ausgangslage
Für den Fall, dass Sie Software an gewisse Clients verteilen möchten, haben Sie die Möglichkeit, ein Client Command zu bauen und ihm dann Parameterwerte mitzugeben, die nur für dieses Client Command gelten. Mit diesen Parametern können Sie innerhalb des Client Commands verschiedene Aufgaben ausführen lassen, ohne dafür mehrere Client Commands erstellen zu müssen. So können Sie vor der Ausführung mithilfe der Parameter des Client Commands festlegen, ob die Software beispielsweise installiert oder deinstalliert werden soll
In diesem Fall soll 7-ZIP (64 Bit) installiert werden. Dazu wird für das Bauen des Client Commands der Paket Wizard genutzt. Dadurch wird ein Client Command erzeugt, welches die vorgesehenen Funktionen erfüllt und automatisch die passenden Parameter beinhaltet.
In einem späteren Schritt wird das gebaute Client Command an einen Container übergeben, der die Clients beinhaltet, auf denen 7-ZIP installiert werden soll.
Paket Wizard öffnen
1. Navigieren Sie ins Modul Client Commands > Erstellen.
2. Gehen Sie in der Ribbonleiste unter Paket Wizard und wählen Sie aus Windows, Mac und Linux das gewünschte Betriebssystem aus. In diesem Fall wird das Windows-Betriebssystem ausgewählt.
Paket Wizard durchlaufen
1. Vergeben Sie im ersten Schritt den Namen und ggf. eine Beschreibung des Paketes, hier z.B. 7-Zip. Wählen Sie den Ordner, in dem das Client Command erscheinen soll sowie den Installationstypen. In diesem Fall MSI/MSP-Dateien, da die vorliegende Software aus einer MSI-Datei besteht. Klicken Sie auf Weiter >.
2. Fügen Sie dann über Datei hinzufügen die MSI-Datei hinzu. Es erscheint der Dateipfad der MSI-Datei. Klicken Sie auf Weiter >.
3. Im nächsten Schritt können Sie die Ausführungsreihenfolge angeben und ggf. eine Transformationsdatei per Drag-and-Drop einbinden. In diesem Fall soll es bei der Ausführung belassen werden. Klicken Sie auf Weiter >.
4. Im letzten Schritt können benutzerdefinierte Eigenschaften des Pakets angegeben werden. Mit einem Klick auf Generieren wird das Paket erzeugt.
5. Sie erhalten dann im Wizard Auskunft darüber, ob das Paket erfolgreich generiert wurde. Ist dies nicht der Fall, sehen Sie das an dem jeweiligen Schritt und dem roten Kreuz unter Status.

Client Command im Paket Wizard erstellen
6. Damit Sie die Parameterwerte einsehen können, müssen Sie den Radiobutton unter Client Command jetzt im Editor öffnen setzen.
Parameterwerte im CC Editor editieren
1. Im Skript sehen Sie das im Paket Wizard erstellte Client Command.
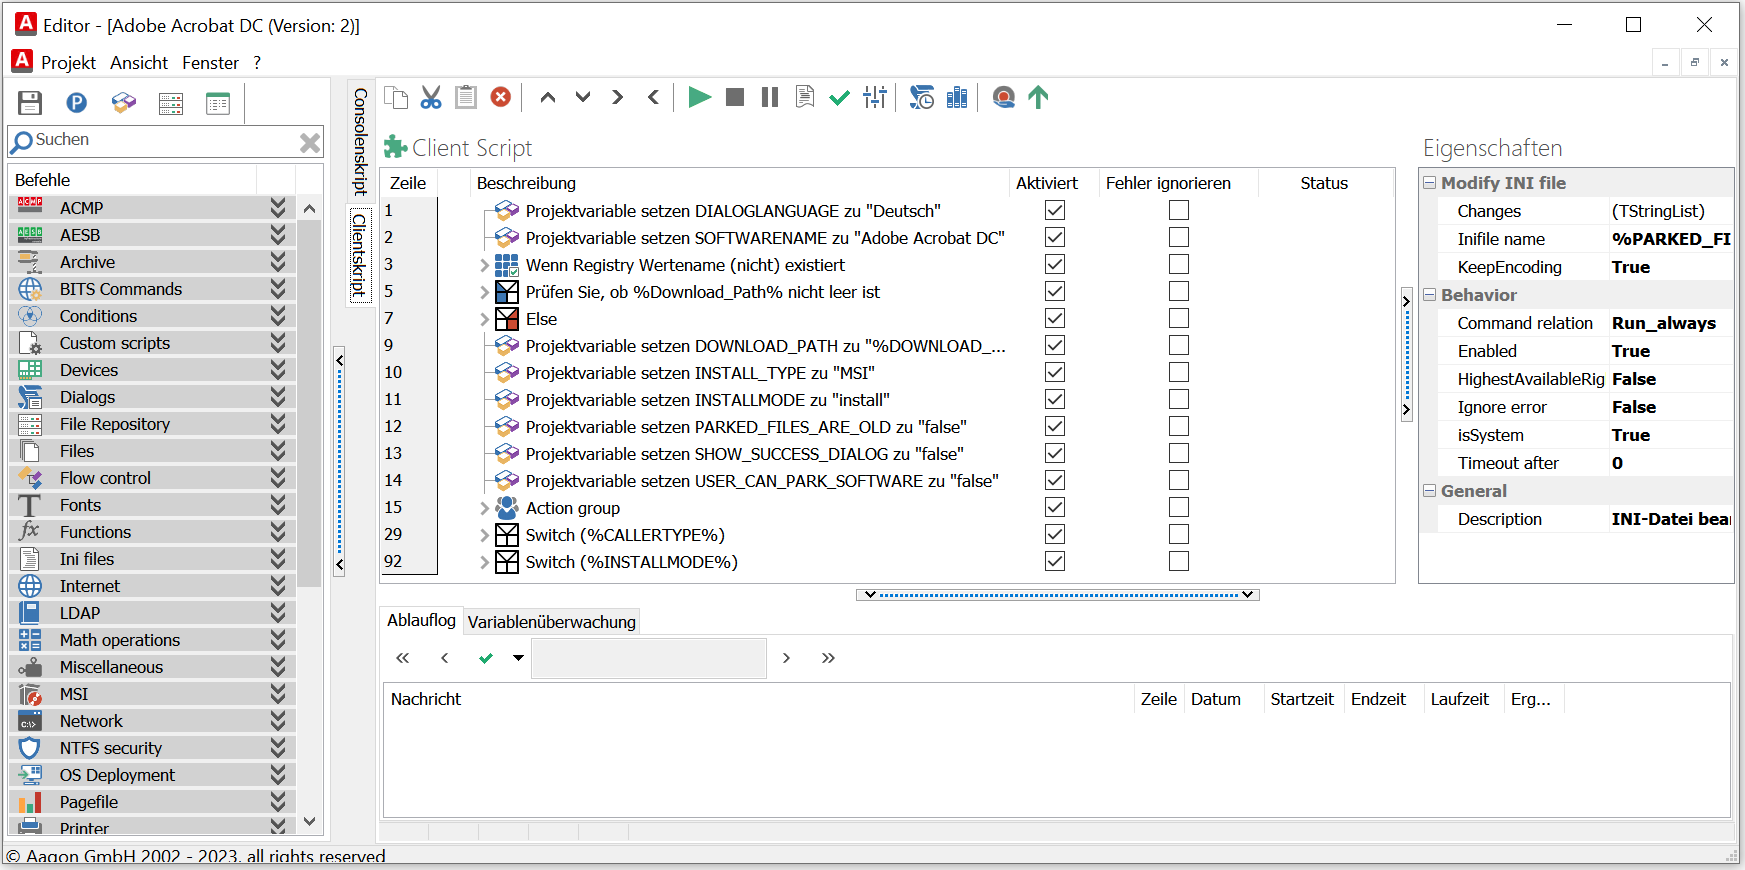
Im Client Command Skript kann das erstellte Client Command eingesehen werden
2. Navigieren Sie zur Menüleiste > Eigenschaften > Client Command spezifisch > Parameter.
3. Dort sehen Sie einen bereits bestehenden Parameter, den Sie nun ggf. passend zu der Aktion, die die Software auf den Clients ausführen soll, editieren können.
4. Führen Sie einen Doppelklick auf den Parameter durch. Sie können den deutschen und englischen Namen sowie die ACMP Kiosk Option ändern.
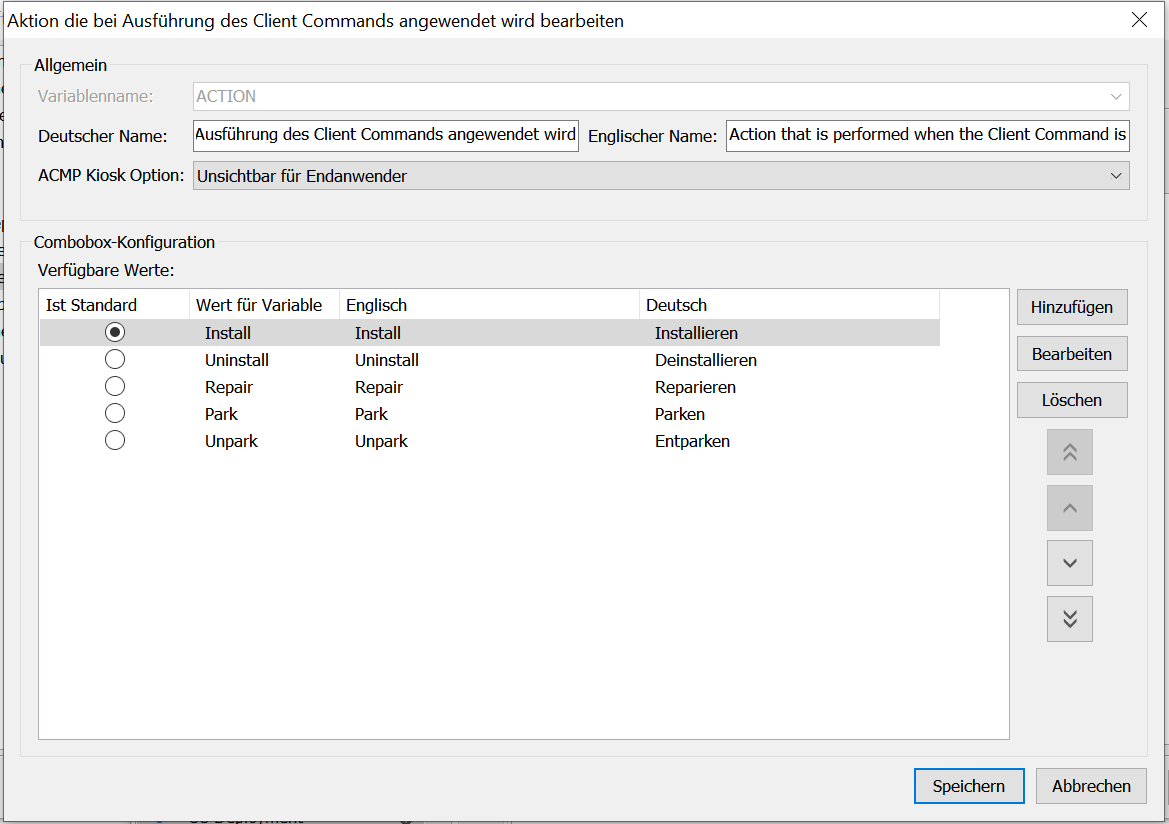
Parameter editieren
5. Unter Combobox-Konfiguration sehen Sie folgende Werte:
| Wert | Bedeutung |
| Installieren | Die Software soll installiert werden. |
| Deinstallieren | Die Software soll deinstalliert werden. |
| Reparieren | Die Software soll im Falle eines Defekts repariert werden. |
| Parken | Die Software wird vorab auf dem Client kopiert und abgelegt, jedoch nicht installiert. |
| Entparken | Die Software wird von dem Client, auf dem sie vorab abgelegt wurde, wieder entfernt. |
Über den Wert Ist-Standard geben Sie den Standardwert an, der beim Ausführen des Client Skripts übergeben werden soll.
6. Klicken Sie auf Speichern.
Client Command-Phasen durchlaufen lassen
Das Client Command kann nun durch die Phasen Testen, Synchronisieren, Freigeben und Ausführen geschoben werden.
Parameter innerhalb eines Containers an Client Commands übergeben
1. Wechseln Sie zu Client Management > Container.
2. Wählen Sie den Container aus, der die Clients enthält, bei denen die Aktionen ausgeführt werden sollen oder erstellen Sie einen neuen. Beachten Sie bei letzterem, dass Sie dem Container dann die Clients hinzufügen müssen.
3. Wählen Sie im Arbeitsbereich den Tab Jobs und klicken Sie dann in der Ribbonleiste auf Hinzufügen, um dem Container einen Job anzuhängen.
4. Es erscheint ein neues Fenster. Wählen Sie unter Art des Jobs den Job Client Command aus und wählen Sie dann über einen Doppelklick darunter den Client Command aus, der gerade erstellt wurde, in diesem Fall das Client Command7-Zip.
5. Das CC erscheint in der Liste unter Verfügbare Client Commands. Klicken Sie das Client Command an, damit darunter die Parameter angezeigt werden. In den Parametern erscheinen nun zum einen feste Parameter, welches jedes CC besitzt und welche nicht vom Anwender konfiguriert werden können und zum anderen variable Parameter, die vom Anwender hinzugefügt und gelöscht sowie konfiguriert werden können. Diese wurden z.B. in diesem Use Case vorab durch den Paket Wizard im Client Command hinzugefügt.
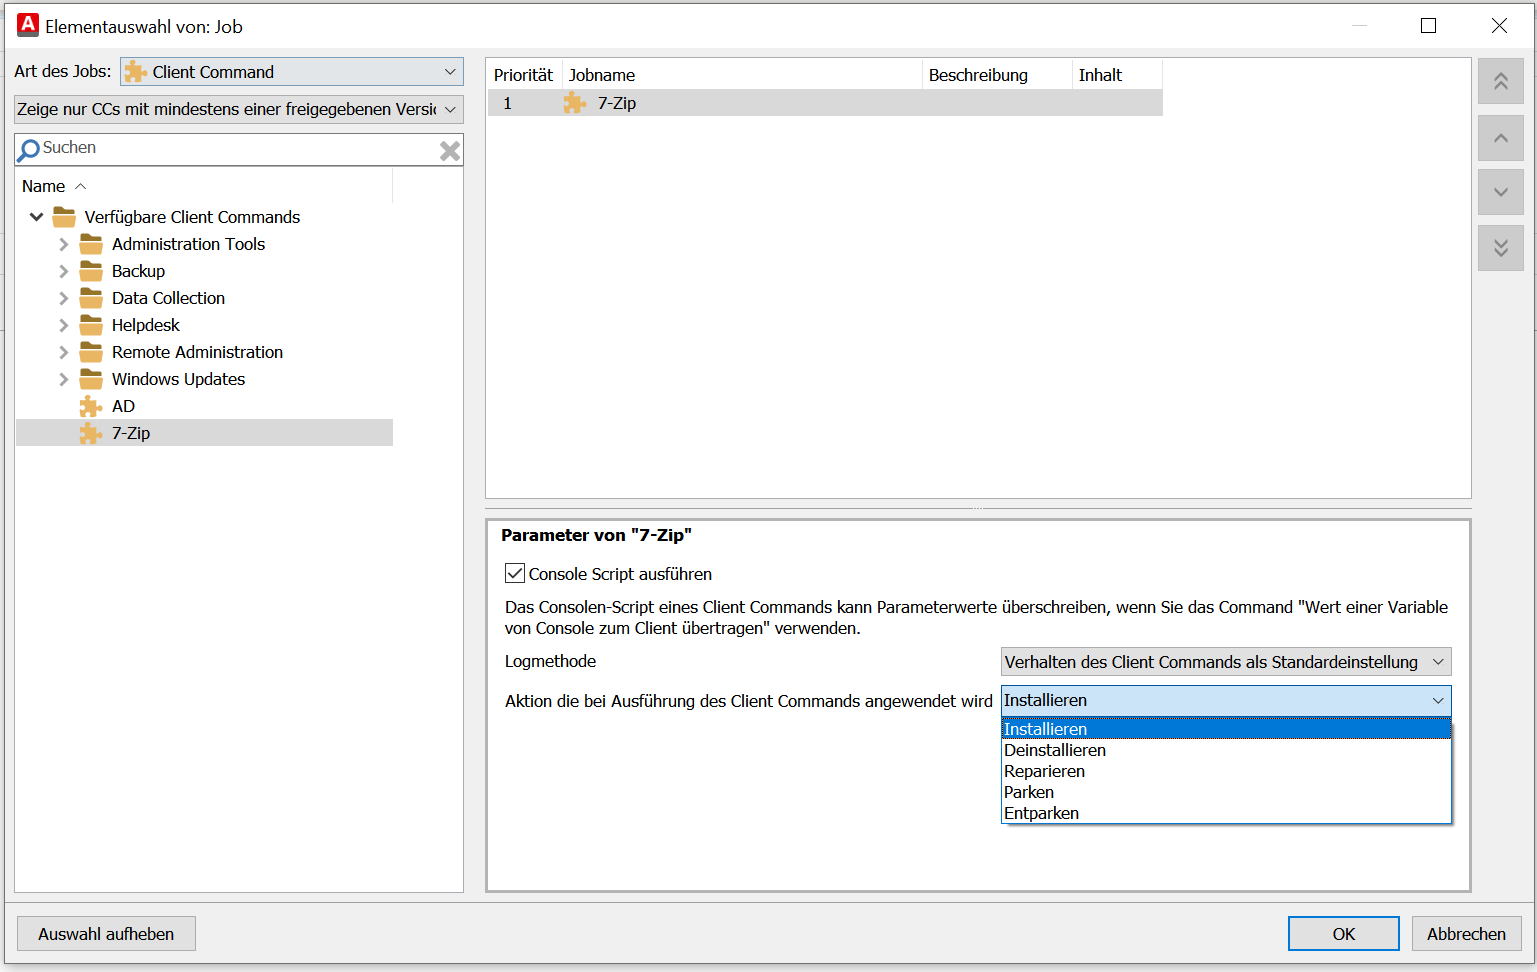
Client Command Job erstellen
6. Wählen Sie aus den Werten die Aktion aus, die bei der Ausführung des CCs angewendet werden soll, in diesem Fall Installieren.
7. Klicken Sie dann auf OK.
8. Wählen Sie dann noch eine Startbedingung aus.
Sie haben nun dem Container einen Client Command Job angehangen, der eine Ausführung mit der 7-ZIP auf den gewünschten Clients ermöglicht. Sie können über den Parameter Aktion, die bei der Ausführung des Client Commands angewendet wird individuell entscheiden, ob diese installiert, deinstalliert, repariert, geparkt oder entparkt werden soll