


Network Boot Service
General information
The Network Boot Service is the central point responsible for the network boot of client computers.
Components of the Network Boot Service are a DHCP Proxy Service, which responds to DHCP requests from Boot Clients, and a TFTP Service, which is responsible for downloading files through the TFTP Client of the Network Boot Clients.
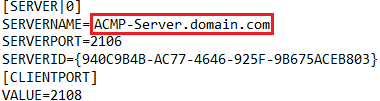
The installation file for the Network Boot Service can be found on the ACMP share in the NetworkBoot directory. Executions the file ACMP Network Boot Service.msi to start the installation. First enter the name of the ACMP Server and the port.
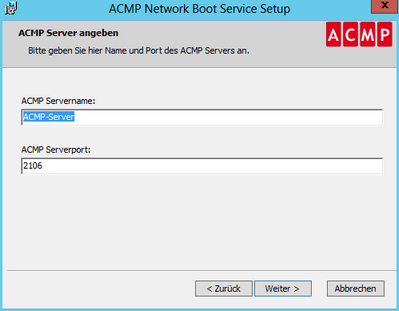
Enter server name and server port
Once you have confirmed your details by clicking on Next, you can start the installation. Once the installation is complete, the Network Boot Service that has just been installed is entered and must be configured.
Configuration of the Network Boot Service
Navigate to the configuration in the ACMP Console to System > Settings > OS Deployment > Network Boot Service.
The upper area of the window deals with general settings for the Network Boot. Firstly, specify whether Clients should be imported automatically. Choose between the following options:
- Only import Network Boot requests
Only Clients for which the network boot has been performed are imported. These are displayed in the inventory with the computer name [NetworkBoot].
- Import all DHCP requests
All devices are imported. It is irrelevant whether the PXE boot was performed or not.
- Disable
No Clients are imported.
You can also enter MAC addresses from which the network boot should ignore all requests. To create a filter, select Add and enter the address mask. You can use '*' (asterisk key) as a wildcard to specify address patterns. You can also enter an explanatory description. The filter is only applied after you enable it. You can enable the filter directly in the overview or select the Edit button when the filter is selected.
The Client on which you have just carried out the installation appears in the Network Boot Service area at the bottom. Select the entry and click on Edit. A file repository must be integrated to use the Network Boot Service, which you can integrate here.
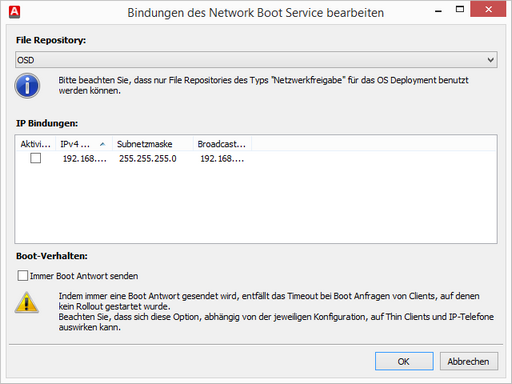
Bindungen des Network Boot Services bearbeiten
All network cards of the Client are displayed. Enable the checkbox only for the IP address that is to use the Network Boot Service.
Always send boot response is used if no Rollout has been started for boot requests from Clients. A timeout is prevented.
Confirm your customisations and save the changes. You will be prompted to restart the Network Boot Service on the Client. You will find the service in the local services with the name ACMP Network Boot.
Firewall settings
The firewall must be configured accordingly for the Network Boot Service to function properly. No additional information is required when using the Windows firewall. All items are already entered during the installation of the Network Boot Service.
If you are using a firewall from another manufacturer, the following information must be entered.
Inbound Rule
| Field | Indication |
| Name | ACMP Network Boot Service Proxy DHCP (UDP) |
| Group | ACMP Network Boot Service |
| Protocol | UDP |
| Local Port | 67,4011 |
| Remote Port | Any |
| Name | ACMP Network Boot Service TFTP Server (UDP) |
| Group | ACMP Network Boot Service |
| Protocol | UDP |
| Local Port | 69 |
| Remote Port | Any |
Outbound Rule
| Field | Indication |
| Name | ACMP Network Boot Service (TCP) |
| Group | ACMP Network Boot Service |
| Protocol | TCP |
| Local Port | Any |
| Remote Port | 2106 (You specified this port during the installation of the Server) |
| Name | ACMP Network Boot Service Proxy DHCP (UDP) |
| Group | ACMP Network Boot Service |
| Protocol | UDP |
| Local Port | 67,4011 |
| Remote Port | Any |
| Name | ACMP Network Boot Service TFTP Server (UDP |
| Group | ACMP Network Boot Service |
| Protocol | UDP |
| Local Port | 69 |
| Remote Port | Any |
NBS in Subnets
There are different scenarios in which the NBS is used. Two common cases are described below.
Operation in another subnet
If you have multiple subnets / VLANs, you must set up IP helpers on the routers/switches, which forward the DHCP requests to the NBS in addition to your DHCP Server. This ensures that the blocked broadcasts are forwarded to the subnets according to the IP helper configuration.
Alternatively, an NBS must be installed in each subnet in which you want to roll out. This ensures direct communication between the NBS and the ACMP Server.
However, if you do not have the option of forwarding multiple broadcast requests across the subnet and configuring them, you can install the NBS on the DHCP Server directly.
For this to be possible, the DHCP area options 60 and 66 must be configured. Option 66 can be set in the DHCP GUI. Option 60 is not displayed in the DHCP GUI by default. It must therefore be enabled via CMD.
The commands for this are:
netsh
dhcp server
add optiondef 60 PXEClient STRING 0 comment=Option added for PXE support
set optionvalue 60 STRING PXEClient
set optionvalue 66 STRING (Hostname DHCP Server)
exit
The host name of the DHCP Server must be inserted in the row, unless option 66 has already been set accordingly in the GUI.
Operation at another location
To be able to operate the NBS at a different location, you must first create a deployed file repository (Verteiltes File Reposititory) You install an NBS at this location.
The NBS of the location is configured to the deployed file repository. This saves your bandwidth and requests are edited more quickly.
Error messages during Rollout via the Network Boot Service
If you start up the Network Boot Service at your site, you may receive various error messages. There may be different reasons for these error messages. The most important error messages, what they mean and how you can identify and solve the problem are described below.
In the event of an error message on the Rollout Client, you must open the command line using the key combination "SHIFT + F10" in the foreground of your screen. If you are working with a notebook, you may also need to press the "FN" key ("SHIFT" + "FN" + "F10") due to the shift key.
Then find the relevant error message and follow the suggested solutions to correct the condition.
| Error message | Description | Problem identification | Proposed solution |
| "Error while downloading OSInstaller" (network card driver missing) | For example, if you want to transfer an operating system to a new Client via a Rollout Templates, the error message "Error while downloading OSInstaller" may appear. This message indicates that a driver is missing from the Boot Images. | Use the command line (SHIFT + F10) to call up the command "IPCONFIG /ALL" and check whether the network card has been assigned an IP address. If this is not the case, the driver is missing. | Download the manufacturer's network card driver and integrate it into the Boot Images. Recurrence the Rollout by starting it again. |
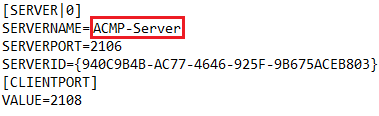
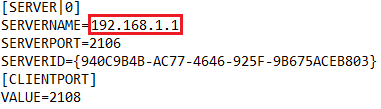
| "Error while downloading OSInstaller" (Naming scheme of the ACMP Server is not correct) | An error occurred when downloading the OSInstaller. This may be due to the name not being stored correctly and therefore not working. Once you have ensured that an IP address has been assigned to the Client, the next step is to check whether the ACMP Server can be reached via the network. The information is stored in the Settings.ini in the Boot Images. | Open the command line ("SHIFT + F10") and enter the command "notepad X:\Settings.ini". This can be used to determine which server name is stored. The "Ping" command is then used to check whether the Client can be reached with the specified name. If this is not the case, you can try the ping again with the FQDN and the IP address. Computer name:
IP-Adress:
FQDN:
| To enable the client to reach the ACMP server, the Settings.ini must be adjusted so that the server can be reached via the IP address or the FQDN. The Settings.ini is copied into a boot image when it is created in the ACMP Console. |
| "Error while downloading OSInstaller" (Incorrect time stamp (date/time) in the BIOS) | An error occurred when downloading the OS installer. This may be due to an incorrect date or time being stored in the BIOS. Similar to the previous source of error, it is possible that the client has been assigned an IP address and can also reach the name stored in Settings.ini, but an incorrect date and/or time is set in the BIOS. If there is a difference between the server and client, the server certificate is not recognised as valid and the client cannot establish a connection. | Open the BIOS of the client and check whether the current time stamp, which is also displayed in the boot image, matches. | Adjust the date and time so that the certificate check can work correctly. |
| "PXE Boot - Request does not arrive at the Network Boot Service" | The request sent by the booting client does not reach the Network Boot Service. This may be the case, for example, if you want to roll out to a new subnet in your company and the client cannot send the PXE broadcast to the ACMP Network Boot Server via a router. | There may be several reasons why the request does not arrive. Either the request from the booting client does not reach the Network Boot Service or the response from the Network Boot Service is not sent to the booting client. Use the "Wireshark" application to retrieve all connections and requests. This allows you to check where exactly the request is not arriving: If you start a Wireshark on the computer on which the Network Boot Service is installed, you can check whether the request arrives there and whether it sends a response. If a Wireshark is started in the network segment of the booting client, you can see whether the DHCPOFFER of the Network Boot Service arrives there. | To ensure that the request arrives, you can either configure an IP helper on the switches or install an additional network boot service in the respective subnet. |
| "PXE-E55“ – „Proxy DHCP service did not reply to request on port 4011“ | The proxy service is not responding to the request for port 4011. | Check whether options are set on the DHCP server that are related to ACMP. | The Network Boot Service does not support DHCP options, which is why you must either configure an IP helper on the switches or install another Network Boot Service in the respective subnet. |
| "PXE-E53“ – „No Boot Filename Received" | No boot file name was recipients. | Check whether the Network Boot Service is installed on a domain controller or another Server with DHCP service. | The Network Boot Service (NBS) is a DHCP proxy that works on port 67. If you have installed the NBS on a host with an active DHCP service, the following configurations must be set in the DHCP service on the host or the NBS must be installed on another device. Configure the DHCP range with Options 60 and 66. Option 60 is not displayed in the DHCP GUI by default and must be enabled via CMD. Option 66 can be set by you in the DHCP GUI. The problem occurs when both options are set and the DHCP must be forwarded to the port. The required commands are netsh dhcp server add optiondef 60 PXEClient STRING 0 comment="Option added for PXE support" set optionvalue 60 STRING PXEClient set optionvalue 66 STRING (Hostname DHCP Server) exit If option 66 has not yet been set via the GUI, insert the host name of the DHCP Server in the row. |
| Windows Setup Failed (Hard drives are not recognised) | An error occurred during Windows setup. | Use the command line ("SHIFT + F10") to call up the "Diskpart" and "List Disk" commands. You can use these two commands to check whether the disk is recognised. | If no disk is recognised, you must integrate a hard drives controller driver into the Boot Images. This is often SCSI. With Dell devices, the error can also be rectified if the settings for RAID ON are set in the BIOS. |
| Windows Setup Failed (No correct partitions) | The Windows setup has failed although a disk has been recognised. This may be because the settings in the response file do not match. | Open the command line ("SHIFT + F10"). If a hard drive has been recognised, you can enter the commands "set disk 0""list part" to display the partitioning of hard drive 0. This allows you to check whether this corresponds to the settings in the response file. | If the settings do not correspond to the response file or the Client's prior configuration is identical to the new setting, it may not be possible to recognise whether the partitioning has been applied correctly.enter the "clean" command after entering "sel disk 0", which will cleanup the partition and allow the Rollout to be tested again. Alternatively, you can change the response file to a DiskPart script execution in the tab Partitioning |
Updating the Network Boot Service
After installation of an ACMP Updates, it may be necessary to update the Network Boot Service.
If a new version of the Network Boot Service is available in the ACMP Updates, you can update your existing installation as follows:
- Navigate to the installation file on the ACMP share in the NetworkBoot directory.
- Executions the file ACMP Network Boot Service.msi.
- After the update, check the status of the Network Boot Service by navigating to System > Settings > OS Deployment > Network Boot Service in the ACMP Console. If the configuration has been completed correctly and the Network Boot Service is active, it will be displayed with a green tick.