Adding a Job Collection to the ACMP Kiosk
Initial situation
Job Collections can be dynamically stored in some areas of ACMP to assist you with task and job distribution. For example, it is possible to include Job Collections in the ACMP Kiosk so that Clients can independently execute items that you have previously approved.
This example shows you how to enable a Client to independently find and install Windows Updates.
If you want to add a new Job Collection to the ACMP Kiosk, proceed as follows:
Prepare the Job Collections
- Optional: Check that you have completed all the preliminary work (creating a Client Command and a Windows Collection).
- Then navigate to the Job Collections (Jobs > Job Collections).
- Add a new Collection.
- Work through the individual steps in the chapter Adding Job Collections.
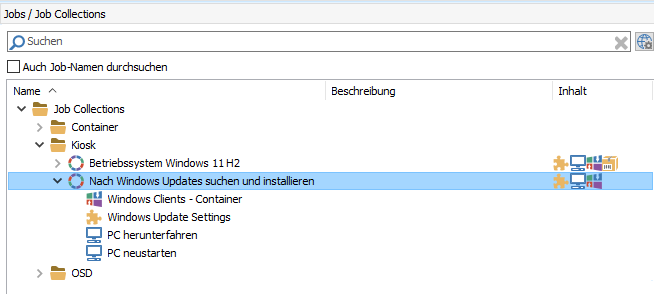
- Add all the required elements to the Job Collections.
For this example, by creating a Job Collection to check for Windows Updates, you will need a Windows Update Collection, a Client Command and two system Jobs.
6. Once the changes have been saved, the Collection is stored in the ACMP Kiosk.

Preparing the Job Collection for the ACMP Kiosk
With these steps you have completed the first preparations of a Job Collection for the ACMP Kiosk.
Preparations in ACMP Kiosk
- Navigate to ACMP Kiosk (Client Management > ACMP Kiosk).
- Then choose the directory under which the Job Collection should fall. In this example, the directory is called Windows Updates.
- Open the menu item Add in the ribbon bar and then click on the Job Collection.
- Select the appropriate Collection from the content selection for the Kiosk entry.
- Confirm your selection with a double click or with Select.
- Optional: Correct the output directory and/or the name in the wizard, if desired.
- Confirm your entries and click on Continuing >.
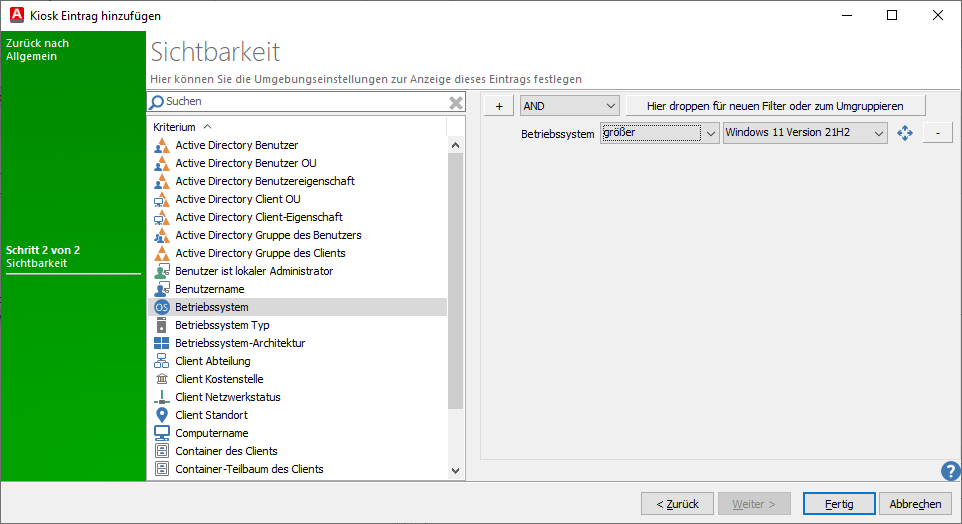
- Set some environment settings for the visibility of the Kiosk entry. For example, you can specify that this Job Collection should only be displayed to Clients who are using a specific operating system. Customize the filter options to suit your needs.
In this example, Clients should only display the Job Collection in the ACMP Kiosk if they are using an operating system larger than Windows 11 version 21H2.

Set visibility for entry in ACMP Kiosk
9. Exit the wizard by clicking on Done.
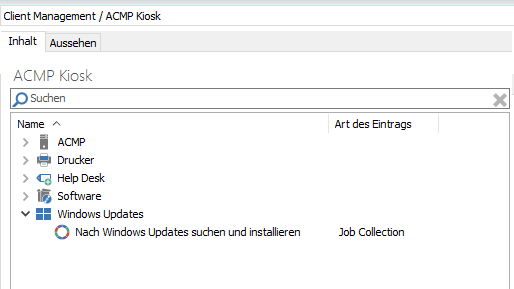
10. The new entry appears in your console under the Content tab.

Add Job Collection to ACMP Kiosk
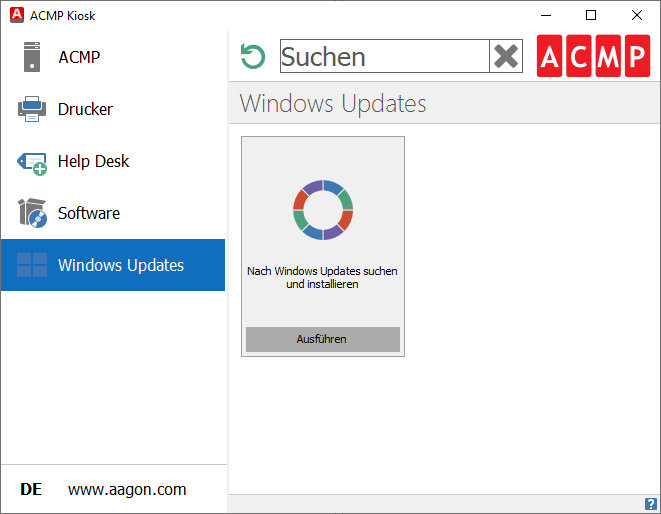
The logged-in Client, which can only see the items released for it due to the limited visibility, can now open the sub-application independently via the ACMP Kiosk tray icon. The left-hand navigation column Windows Updates can be used to open and execute the Job Collection Find and install Windows Updates.

ACMP Kiosk - Execute Windows Updates


