


Example of deploying and running a file from the File Repository (MSI file)
Initial situation
During the course of a normal working day, you often need to deploy new software to your company's employees. You can either manually distribute the installation resources to each individual client or you can simply deploy the files as a client command so that everyone can access them.
In this example you will learn how to deploy an MSI file to Clients. For example, the 7-Zip file compressor will be uploaded and made available via your Agent. There are several ways in which you can distribute such a file. At this point we will only show you how to do this using ACMP's File Repositories. The file repository ensures that all employees receive the resource despite different or changing locations. Proceed as follows:
Select Script
- Navigate to the Client Commands > Create module.
- Click Add on the ribbon bar. The Client Command Editor will open and you will need to decide whether it is a Console or Client Script. In this case select Client Script.
Uploading files to the File Repository
To start working on the Client Command, you must first place the installation resource in the File Repository.
- Open the File Repository from the Command List (
 ).
). - Click on the File Repository column to open the subfolders.
- Select the Private folder.
4. Add the file to the Private File Repository by clicking on the corresponding icon ( ).
).
5. A dialogue will open. Select the installation resource you wish to make available in the Client Commands. In this example, 7-Zip is used.
6. Double click to load the MSI file.
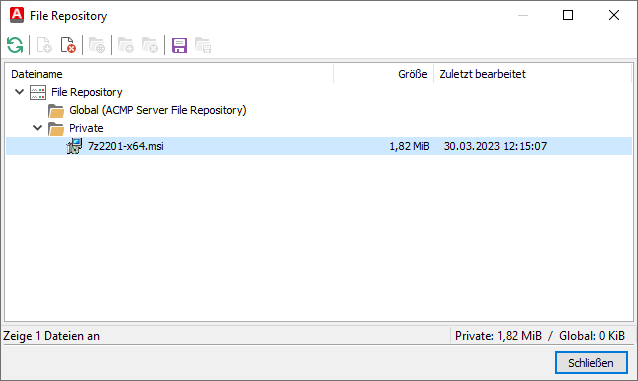
A progress bar will appear to inform you of the progress. In this example, the 7x2201-x64.msi file from 7-Zip has been successfully loaded into the file repository.
7. Click Close.
Store the installation resource in the file repository
Insert and customise Command Download File
- Navigate to the Command List and select File Repository > Download File.
- Double click to open the Command.
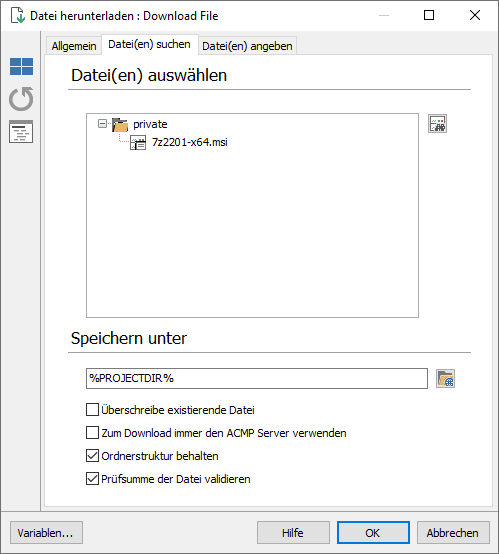
- Under Select File(s), click the icon to the right of the fields.
- Open the added file (7x2201-x64.msi) in the File Repository under the Private directory by ticking the box in front of the file. The File Repository, Private and 7x2201-x64.msi items should now be checked.
- Click Close to return to the previous window.
- Navigate to Save as. Here you can either select the path where the file is to be saved from the icon to the right of the fields. Alternatively, you can use the %PROJECTDIR% variable.
7. Access the %PROJECTDIR% variable using CTRL + Space.
8. Switch to the General tab.
9. Enter a new description of the action, e.g. "Download 7-Zip to %PROJECTDIR%".
10. Finish your work on the Command by clicking OK.
Download file
Inserting and editing the Install MSI package Command
- Load the Install MSI Package (MSI) Command into the script by double-clicking it in the Command List, just like the previous Commands.
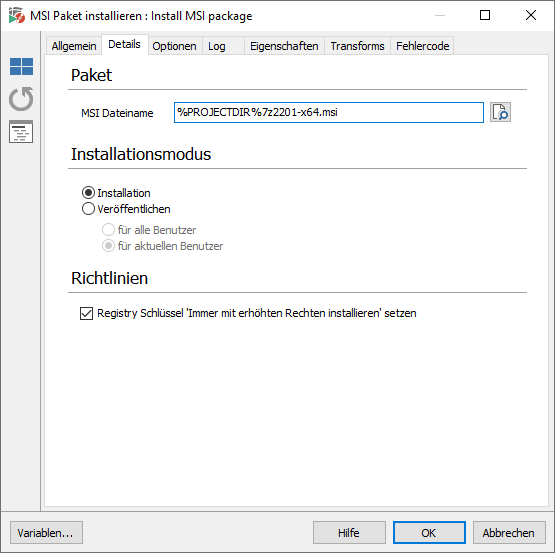
- Click the Browse icon in the Package area.
- Select the 7-Zip installation file and click Open.
- Remove the path except for the filename and replace it with the %PROJECTDIR% variable. To do this, select the %PROJECTDIR% variable with CTRL + space. You should now see "%PROJECTDIR%7z2201-x64.msi".
5. Check the 'Always installed elevated' registry keys under the policies.
6. Click OK to close the Command.
Install MSI package
Inserting and editing the Run Client Task Command
You can add this Command to your Client Command to start the software scanner immediately. This ensures that the new software is immediately inventoried and available in the console.
- Select ACMP > Run Client Task from the Command List.
- Open the General tab.
- In the Description of action field, enter a name, e.g. „Run software scanner as a scheduled task“.
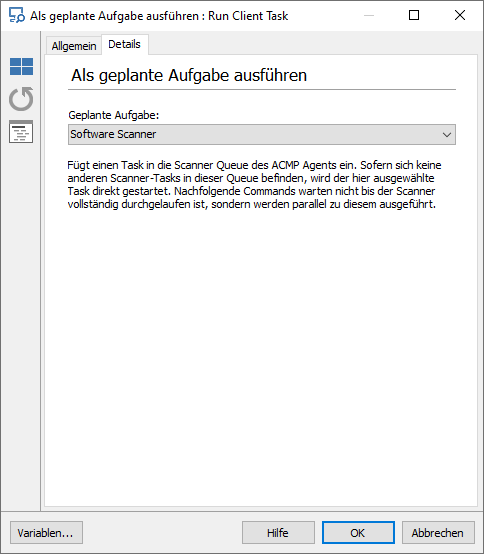
- Return to the Details tab.
- Under Run as a scheduled task, select the software scanner. This will inventory the system and update the newly added software in the console.
- Click OK.
Execute software scanner as scheduled execution
Save your Client Command. Depending on the size of your environment, you may wish to give it a suitable name so that you can easily find it again. This example is called "7-Zip 7x2201-x64 Installation" and is made up of the name of the software and the version number.
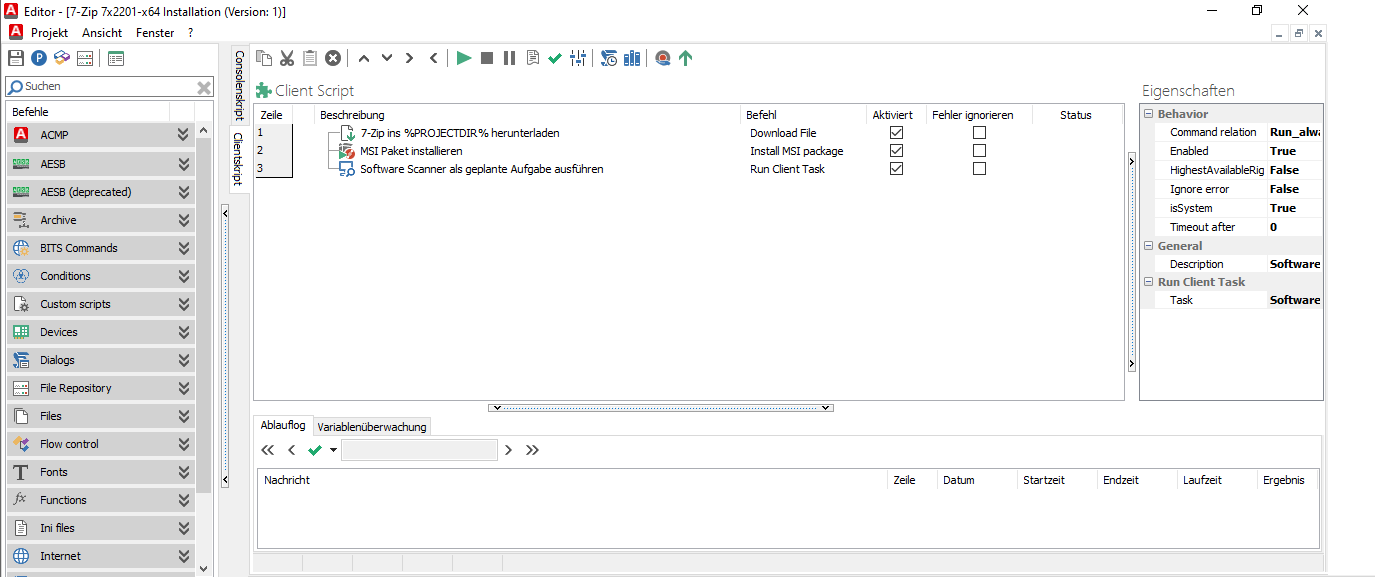
Client Commands - Execute: Exemplary provision and execution of a file via the file repository (MSI file)
Running through Client Command phases
Finally, the Client Commands must go through the Test, Synchronize, Release and Execute phases before they can be used. You can then distribute and run the 7-Zip software installation resource to your Clients.