Uninstalling an MSI file
Initial situation
case, you may need to remove software that has already been installed from the Clients. This is where the fact that uninstalling an MSI file in a Client Command takes very little time comes in handy. All you need is an unique ID that has already been read by ACMP during the inventory scan and that you can access. This means that the entry is already in the list, which you just need to access and select.
This use case explains how to uninstall installed software. This use case is related to the "Installing an MSI file" use case, so we will continue with the example and uninstall the data compression utility 7-Zip.
If you want to uninstall a different MSI package at a later date, you can use this example as a template and replace the information where appropriate. To uninstall a MSI file, follow these steps:
Select Script
- Navigate to the Client Commands > Create module.
- Click Add on the ribbon bar. The Client Command Editor will open and you will need to decide whether it is a Console or Client Script. In this case select Client Script.
Select and edit the Uninstall MSI package Command
- Double click the Uninstall MSI Package (MSI) Command to load it into the Script.
- Under Product Information, click the Browse icon next to the product code.
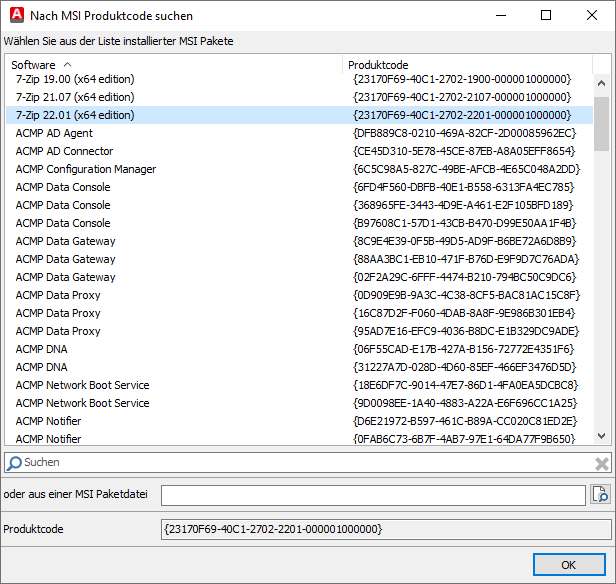
A new window will open. - From the list of installed MSI packages, select the software you want to remove from the Clients.
In this example, the software 7-Zip 22.01 (x64 Edition) is selected.

Find product code
4. Click OK.
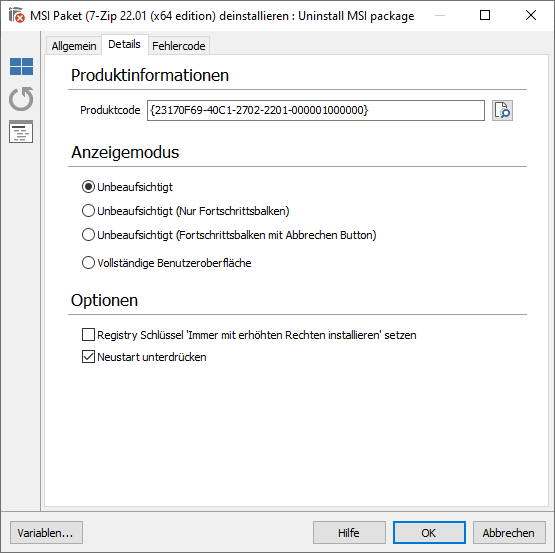
5. You will be returned to the previous window where the product code field was filled in. This is the product code stored internally by the 7-Zip software.
6. Select Unattended under the display mode.
7. Under Options, you can select Suppress restart. If the uninstaller requires a reboot, it will not reboot immediately. This means that other open programs or files will not simply be closed without you having saved them.
8. Change to the Error Code tab.
9. Insert error codes 1605 and 3010 one below the other so that they are added to the list of exceptions that will be ignored when the command is processed.
10. Optional: Switch to the General tab.
11. Optional: Change the description of the action, for example by adding the name, e.g. "Uninstall MSI package (7-Zip 22.01 (x64 edition)".
12. Click OK to close the Command.

Product information on how to uninstall an MSI package
To insert and edit Run Client Task Command
- Select ACMP > Run Client Task from the Command List.
- Open the General tab.
- In the Description of actions box, enter a name. It is recommended that you add the name of the scanner, e.g. „Run software scanner as a scheduled task“.
- Return to the Details tab.
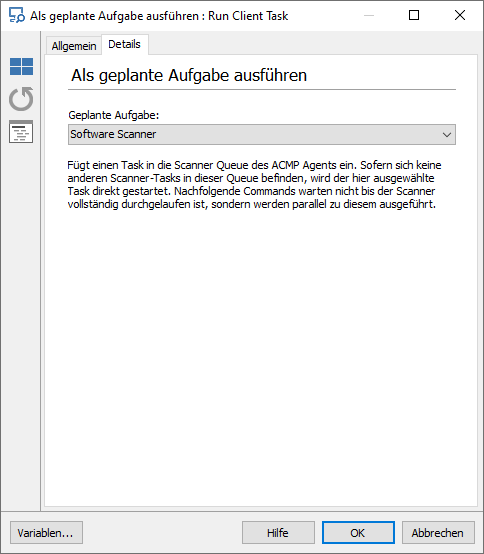
- Under Run as a scheduled task, select the software scanner. This will update the system, delete the software from the inventory and it will no longer appear on the Clients.
- Click OK.

Run Software scanner as a scheduled task
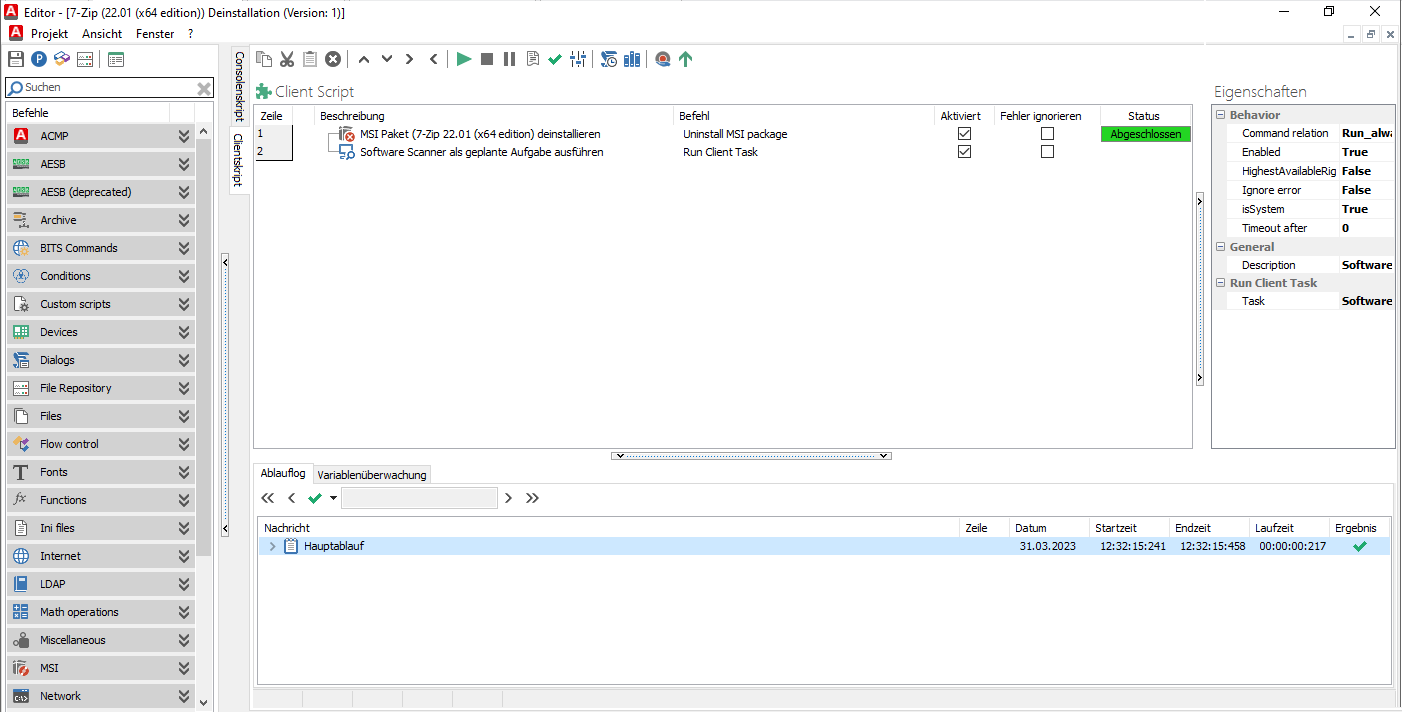
The final step is to save your Client Commands in the Editor.

Client Command Editor: Uninstall MSI Package
Client Command-Phasen durchlaufen lassen
The Client Commands must then go through the Test, Synchronize, Release and Execute phases before they can be used. During the execution of the Client Command, the 7-Zip software is uninstalled from the Clients.


