


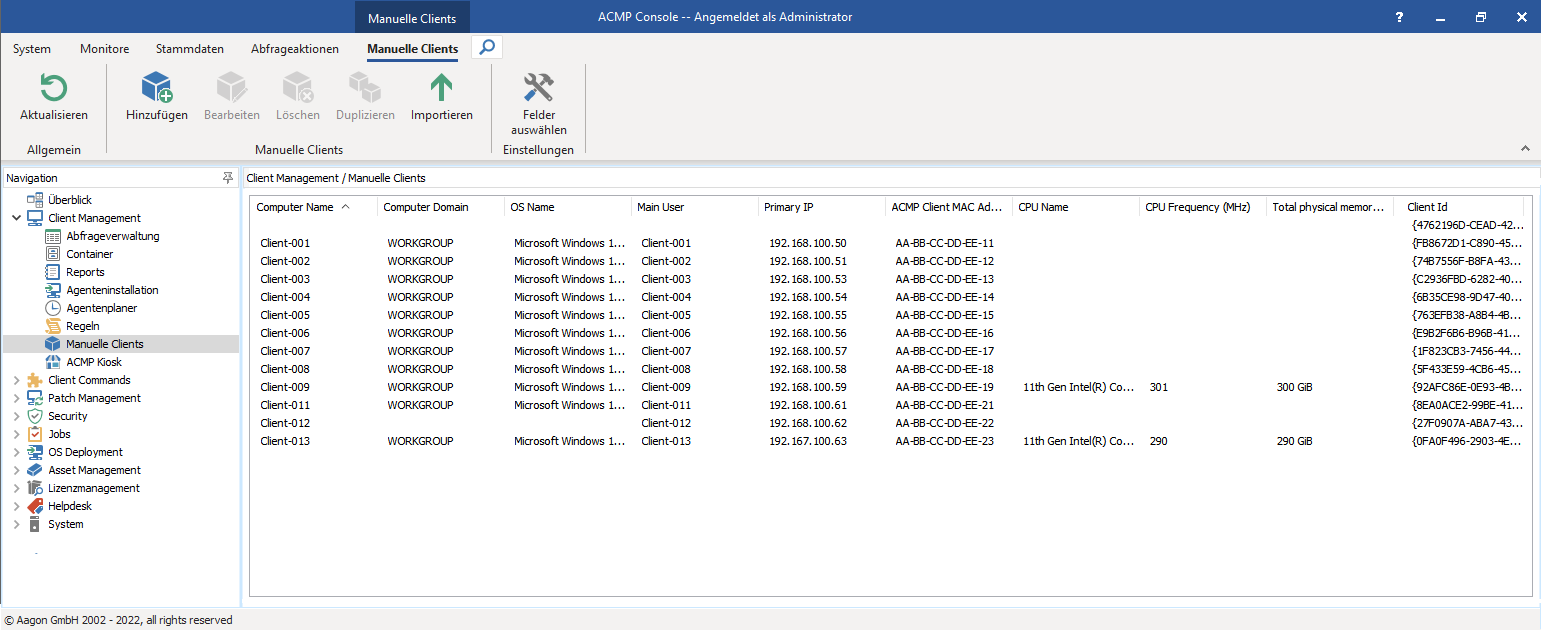
Manual Clients
Manual Clients allow you to inventory devices that cannot be reached over the network for various reasons but should be included in the inventory. Manual Clients are, for example, devices that are not in your network or on which an operating system that is no longer supported is installed. They can also be end devices or machines that contain sensitive data and therefore must not be scanned automatically. A continuing reason would be to capture devices that are to be inventoried for statistical or administrative purposes only.
Another continuing option for taking inventory of terminal devices is the Offline Scanner or the OneScanClient.
Manual Clients
The Use Case for the manual Clients shows you a concrete example of how you can use them for the import in preparation for a Rollout.
Manage Manual Clients
In order to be able to manage Clients, various actions are available to you. In addition to adding new manual Clients, you can also edit or delete existing ones. You can also duplicate one or more Clients or import a CSV file with all relevant data to add them to the ACMP system.
Adding Manual Clients
To add a new manual Client, click Add () in the ribbon bar and then enter the Client values in the dialogue box.
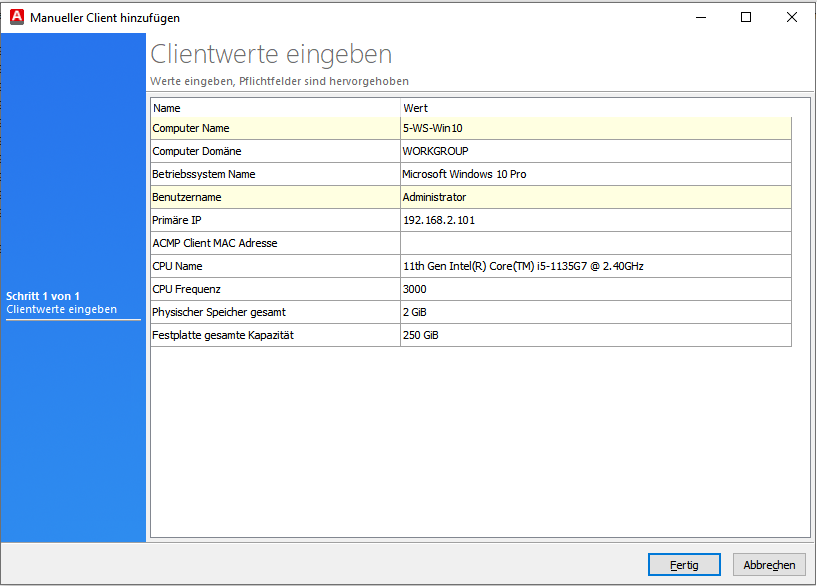
Enter client values
You can influence which data fields can be specified when creating a manual Client in the settings for field selection. In the illustration above you can see which 10 fields these are by default. Please note that only so-called 1:1 fields are available for manual Clients. The mandatory fields are highlighted in the console, which you can define yourself in the configuration. If there are already dates in the system, they can be read out via a drop-down field. Once you have completed the entries, click on Done. The Client is then added and appears in the list.
Editing Manual Clients
To edit a Client, open it with a double click or select the entry in the list and navigate to the Edit (![]() ) button. Change or add the desired client values and confirm the changes with Done. Please note that the mandatory fields are highlighted and must be filled in, otherwise a warning message will appear.
) button. Change or add the desired client values and confirm the changes with Done. Please note that the mandatory fields are highlighted and must be filled in, otherwise a warning message will appear.
Deleting Manual Clients
If you want to delete one or more Clients, select the corresponding number and click on Delete (![]() ).
).
Duplicate Manual Clients
If you want to take over a Client or some specified values from it, you can duplicate a Client. To do so, find the desired entry and click on Duplicate (). Alternatively, you can duplicate a manual Client by pressing Ctrl + D. Enter all the required values and confirm the changes with Done.
Importing Manual Clients
To import manual Clients, you need a CSV file containing all relevant data. If you select Import () you will be guided through the actions in a wizard.
Select the prepared CSV file. Then specify which symbols delimiters and decimal separators you used in the uploaded CSV file. When selecting, specify whether the file contains column names and whether a character encoding is to be enforced. To do this, use one of the listed encoding types.
In the next step, you can see the imported CSV file and define the Mapping for the import. Continue the import and click Next > to display the import log and exit the import.