



Web Interfaces
The Web Interface is an application that allows you to control the most important helpdesk actions via a browser. A distinction is made between the Helpdesk Web Interface and the Self Service Web Interface. The difference between the two versions is that the Helpdesk Web Interface can only be used by helpdesk staff, while the Self Service Web Interface is available to all other employees.
The following distinguishing criteria are central to this:
| Helpdesk Web Interface | After login, this allows you to open all queries that are accessible via the ticket management administration (see the chapter on Administration. In addition, you can view and edit tickets, create new ones, and add comments and close them. The knowledge base can also be used. |
| Self Service Web Interface | After login, the user is displayed all the tickets they have created themselves in the Self Service Web Interface by default. This list can be changed using a standard query (see Standard query). New tickets can be created and existing ones can be viewed. It is also possible to access the Knowledge Base. |
Installation, Configuration and updating of Web Interfaces
If you haven't yet started the installation of one of the Web Interfaces, you can read here about how a correct installation and update look like and which settings you need to configure.
Authentication and Right Management
Authentication
Users can log in to the Web Interface in two ways: They can either log in with their ACMP account (see user management) or authenticate themselves to an Active Directory so that they are granted access. For the latter option, you must have specified an AD account. You can configure the authentication in the Settings (System > Settings > Web Interface > Login > Authentication settings).
Select one of the two options. Save your changes by clicking Save in the ribbon bar. The updated conditions will take effect the next time you log in.
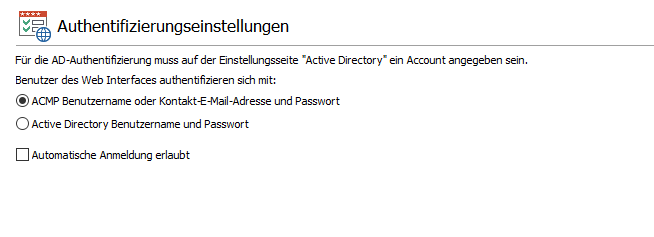
Authentication settings
Right Management for the Helpdesk
In principle, rights for the Helpdesk and use of the Web Interface are assigned via User Management (System > User Management). For maximum flexibility, there are three different points of contact where you can explicitly assign rights to Helpdesk users or employees.
Self Service permissions
Under Self Service permissions (System > Settings > Web Interface > Self Service permissions), you will find several rights relating to the self-service web interface and its end users. Tick all the permissions you want to allow. Subordinate rights (e.g. ‘"Change ticket category") can only be selected if the level above has been enabled. This allows you to customize the main rights to suit your circumstances and further restrict or extend the rights. Save your settings via the ribbon bar.
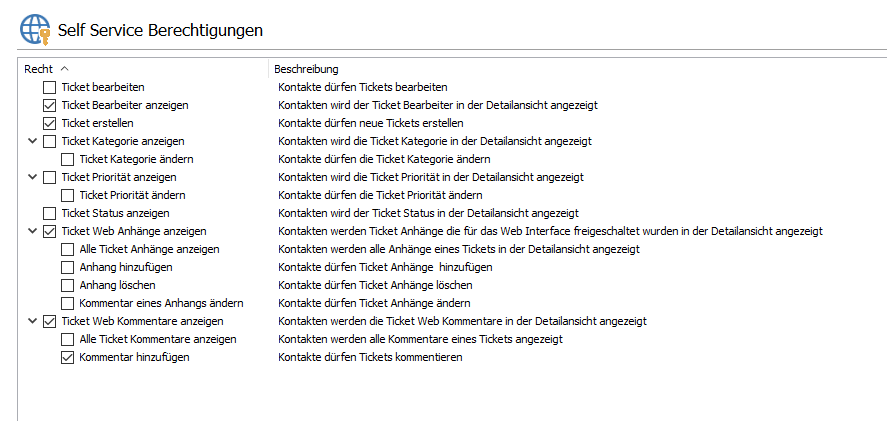
Self Service permissions
Rights of an ACMP or helpdesk employee
As soon as you create a new user via user management or edit one at a later date, you will inevitably reach the point in the wizard in step three where you can define the rights. This allows you to set restrictions that then apply directly to the current selected ACMP User. This generally applies to all rights in ACMP, but special rights can also be assigned for the helpdesk and the web interface.
To do this, open the item Helpdesk > Web Interface in the list on the left. Here you can modify the visibility of data in the Helpdesk web interface so that the created user is not allowed to view comments on a ticket in the web interface or view any ticket attachments, for example. You can set restrictions by assigning these rights. In addition, you can also allow a user to change possible solution suggestions, if desired.
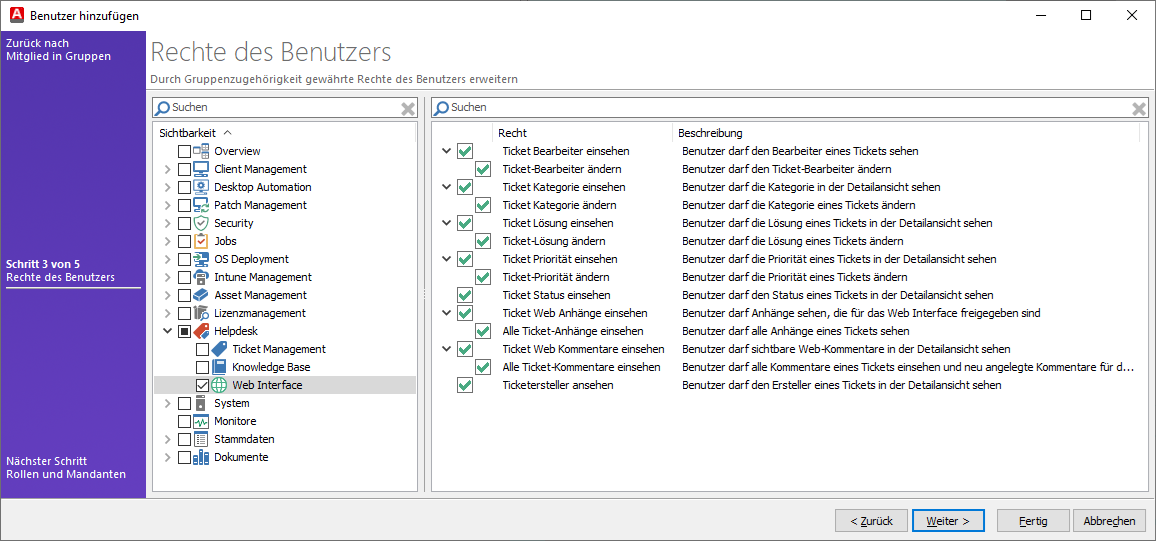
Select rights of User (Web Interface)
To grant a user a right, you must tick the corresponding checkbox and continue with the wizard (Next >). On the next page ("Roles and Clients"), you must now assign the "Helpdesk" role to the ACMP User. Tick the corresponding checkbox so that the previously specified rights can be applied.
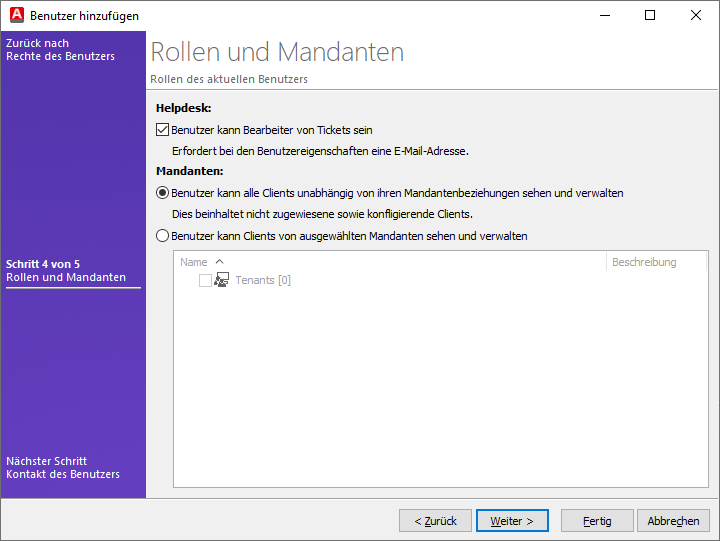
Select roles and tenants for the current user
Complete your work in the wizard and exit it by clicking Finish.
Special feature of the "Visible in Self Service" option
When writing comments in tickets and/or knowledge base articles, as well as when creating knowledge base articles, you will find the ‘Visible in Self Service’ option in the top right-hand corner. This is a checkbox that you must tick manually each time to enable the option and make the comment or article globally visible in the web interface. Please note that the comment or article is only visible to ACMP users and self-service users who have the appropriate right (right: "View ticket web comments").
Anpassungen an Grafiken und Textelementen
Möchten Sie die Web Interfaces sowohl grafisch als auch textuell an Ihre Corporate Identity anpassen, benötigen Sie hierfür nur wenige Handgriffe. Gehen Sie dafür wie folgt vor:
Grafiken austauschen
1. Öffnen Sie zunächst den Windows Explorer und navigieren Sie zum Installationsverzeichnis der Web Interfaces. Standardmäßig lautet der %Programfiles%\Aagon\ACMP Web Interfaces\Helpdesk Webinterface\
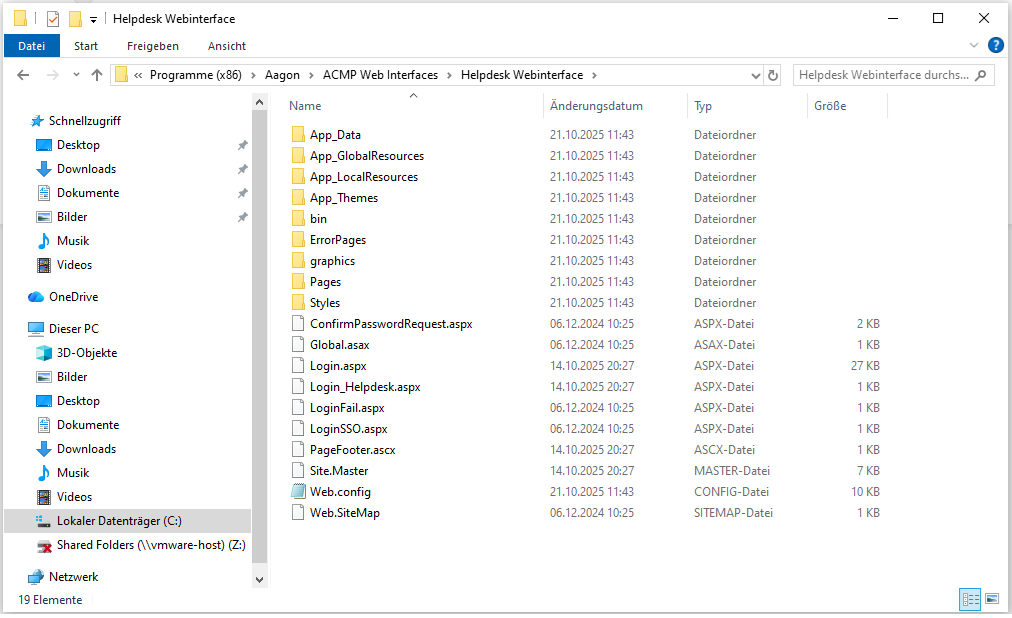
Ordner mit dem Zugriff auf die Grafiken
2. Im darunterliegendem Verzeichnis App_Themes\ACMP\graphics sind Grafiken hinterlegt, die in den Web Interfaces verwendet werden können.
 Note:
Note: 3. Tauschen Sie die Grafiken nach Bedarf aus (Logo per Datei austauschen, zu finden unter: App_Themes\ACMP\graphics\logo.svg).
Achten Sie darauf, dass Sie bei einem solchen Austausch die Benennung der Originalgrafiken übernehmen, sodass diese korrekt eingelesen werden können.
CSS Anpassungen
 Warning:
 Damit Sie CSS Anpassungen machen können, ist es notwendig, dass Sie im Ordner „Styles“ (C:\Program Files (x86)\Aagon\ACMP Web Interfaces\Helpdesk Webinterface\Styles) die Datei „Custom.css“ haben. Erstellen Sie dazu die Datei in einem Texteditor Ihrer Wahl und achten Sie darauf, dass die Endung „.css“ lautet.
Die Datei ist zunächst noch leer und muss nun gefüllt werden. Es lassen sich neue Inhalte einfügen, bestehende bearbeiten und anpassen. Sichern Sie danach die Änderung über Speichern. Die Datei wird immer als letztes für das Web Interface geladen, wodurch die Einträge dieser Datei die höchste Priorität bei individuellen Anpassungen haben.
Generell gilt: Die Custom.css Datei erweitert den Code und ersetzt diesen nicht!
Möchten Sie beispielsweise das Logo überarbeiten, muss „.site-logo“ überschrieben werden:
background: url("../App_Themes/ACMP/graphics/logo.svg") left top no-repeat;
width: var(--logo-width);
height: var(--header-height);
}
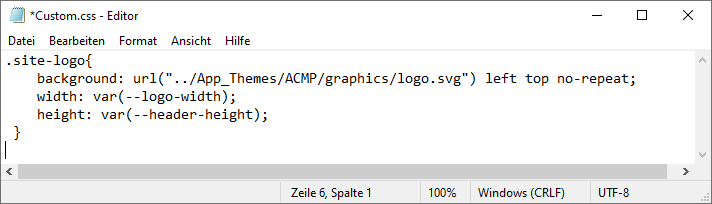
Änderungen an der Custom.css
Schauen Sie sich für die verschiedenen Klassen die unterschiedlichen .css-Dateien in dem Ordner „Styles“ an.
Beispiel „Farbänderungen“: Wollen Sie Änderungen an den Farben vornehmen, dann sollten Sie die entsprechenden Variablen aus der Theme.css kopieren und in die Custom.css innerhalb eines :root { } mithilfe von Tags einfügen und anpassen.
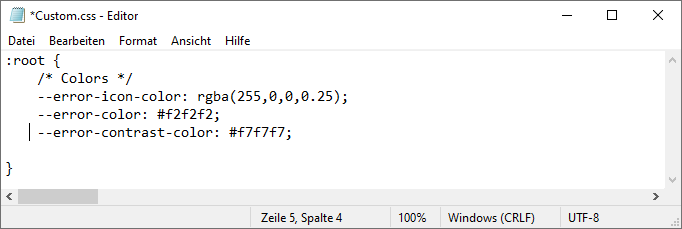
Farbänderung der Error-Farben innerhalb der Custom.css
Texte farblich anpassen
Um Texte farblich anzupassen, folgen Sie den nachfolgenden Schritten:
1. Öffnen Sie den Installationspfad (Standard: %Programfiles%\Aagon\ACMP Web Interfaces\Helpdesk Webinterface\App_Themes\ACMP).
2. Öffnen Sie nun die Datei Custom.css, die in diesem Verzeichnis hinterlegt ist.
Mögliche Änderungen müssen extra erfolgen.
3. Innerhalb der Datei befinden sich die individuellen und „Klassen“-basierten Definitionen für die Textdarstellung. Passen Sie hier den jeweiligen Bereich die Farbe an, indem Sie den Hexadezimalwert austauschen.
color: #ff0000;
}
Texte anpassen
Um einen Text im Web Interface ändern zu können, müssen Sie die entsprechende .resx-Datei anpassen. Diese finden Sie unter den nachfolgenden Pfaden und Unterordnern. Jede Datei gibt es in drei Sprachversionen (Deutsch, Englisch und Tschechisch).
- C:\Program Files (x86)\Aagon\ACMP Web Interfaces\Helpdesk Webinterface\App_GlobalResources
- C:\Program Files (x86)\Aagon\ACMP Web Interfaces\Helpdesk Webinterface\App_LocalResources
- C:\Program Files (x86)\Aagon\ACMP Web Interfaces\Helpdesk Webinterface\ErrorPages\App_LocalResources
- C:\Program Files (x86)\Aagon\ACMP Web Interfaces\Helpdesk Webinterface\Pages\App_LocalResources
- C:\Program Files (x86)\Aagon\ACMP Web Interfaces\Helpdesk Webinterface\Pages\Dialogs\App_LocalResources
- C:\Program Files (x86)\Aagon\ACMP Web Interfaces\Helpdesk Webinterface\Pages\imageuploader\App_LocalResources
- C:\Program Files (x86)\Aagon\ACMP Web Interfaces\Helpdesk Webinterface\Pages\UserControls\App_LocalResources
Öffnen Sie die Ressourcendatei mit einem Texteditor (z.B. Notepad++) und passen Sie den Text nach Ihren Wünschen an. Speichern Sie danach die Datei.
Benutzerdefinierte Felder für das Self Service Web Interface erstellen
Für das Self Service Web Interface können Sie als Helpdesk Mitarbeiter bzw. als Administrator zusätzlich benutzerdefinierte Felder erstellen, die beim Anlegen eines neuen Tickets vom Ticketersteller ausgefüllt werden können bzw. sollen. Hierdurch ist es möglich, individuelle Felder und Informationen abzurufen, die die Arbeit erleichtern können.
Möchten Sie von den benutzerdefinierten Feldern Gebrauch machen, navigieren Sie in der geöffneten ACMP Console zu System > Einstellungen > Benutzerdefinierte Felder > Tickets. Führen Sie die notwendigen Schritte aus, um ein Feld hinzuzufügen. Speichern Sie anschließend die neu erstellten Felder und wechseln Sie innerhalb der Systemeinstellungen zu Web Interface > Self Service Felder.
Öffnen Sie die Ordnerhierarchie, in der Sie zuvor das neue Feld hinzugefügt haben. Ziehen es anschließend entweder per Mausklick in die rechte Seite oder nutzen Sie den Pfeil dafür. Für die rechtsliegenden Felder können Sie zusätzlich noch festlegen, ob es sich um ein Pflichtfeld handelt, was der Benutzer im Self Service explizit ausfüllen muss, um ein Ticket anzulegen. Setzen Sie optional einen Haken und speichern Sie die Änderungen in der Ribbonleiste. Mit dem nächsten Aufruf des Web Interface Self Service werden Ihre neu hinzugefügten Felder bei der Erstellung eines neuen Tickets berücksichtigt.