Performing a full ACMP backup
Initial situation
It may happen that the installation or distribution of an ACMP update fails for various reasons. In this case, a full backup of ACMP should be made beforehand. The server database should be backed up first, followed by the server files.
Proceed as follows:
Backing up the server database
All ACMP components, if present, must be disabled beforehand so that they do not continue to write to the database during the backup and cause content loss.
1. Navigate to Windows Services. Disable the components present on your system. This will depend on the ACMP solutions you are using.
These may be the following:
| Components |
| ACMP AD Agent |
| ACMP AD Connector |
| ACMP Data Gateway |
| ACMP Network Boot |
| ACMP WMI Scanner |
| ACMP XML Importer |
| ACMP Server |
2. Switch to the Microsoft SQL Server Management Studio to back up the ACMP database.
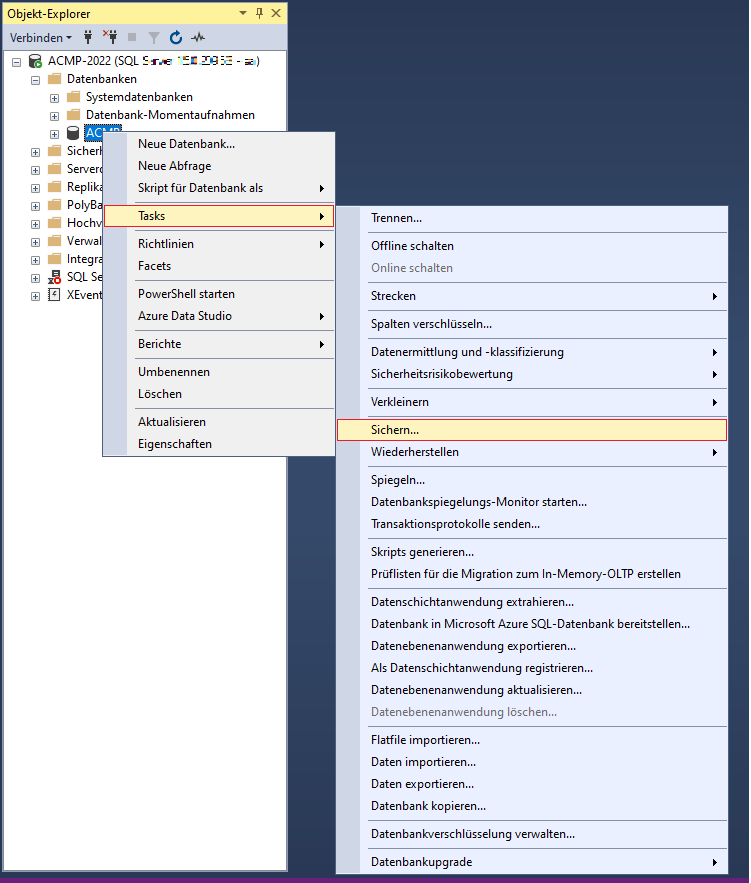
3. Open the tree for the ACMP database, in this example ACMP > Databases > ACMP.
4. Right click on ACMP and navigate to Tasks > Backup.

Save database
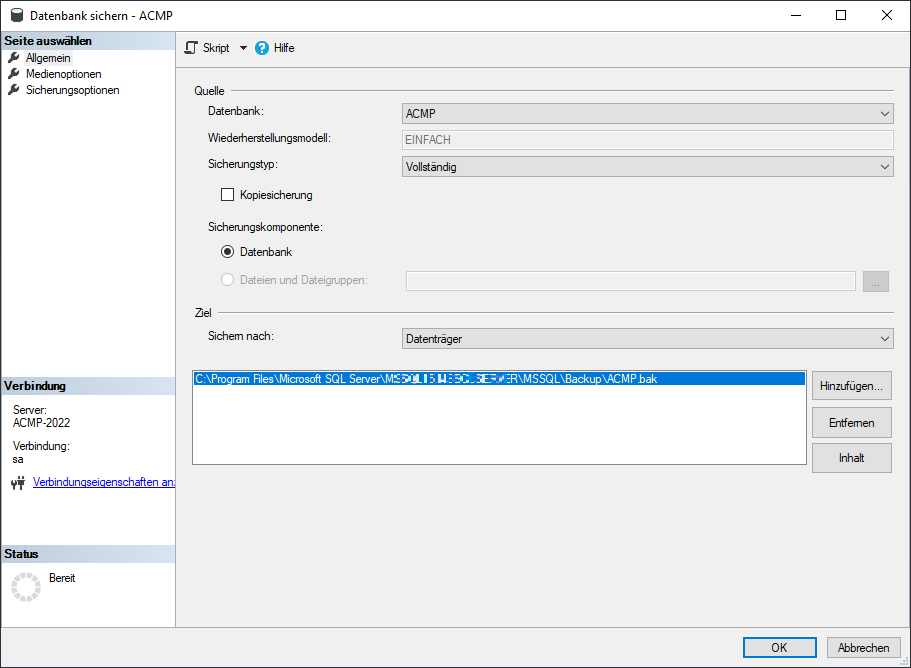
5. A new window opens where you can select various settings for the backup.

Backup settings
6. Under Source you will see the selected ACMP database and the backup type Full.
7. Under Destination, specify the directory where the database backup will be saved.
8. Click OK to start the backup. You will receive a message when the backup is complete.
Backup of the ACMP server directory
Independent of the ACMP database, the ACMP server files should also be backed up for a full backup.
1. Navigate to the ACMP Server directory (e.g. C:\Program Files (x86)\Aagon\ACMP Server).
2. Copy this directory and save it as a ZIP folder if necessary.
These steps complete a data backup for a backup.


