ACMP Console installieren
Wenn Sie ACMP bei sich installieren, wird standardmäßig eine Console auf dem Server installiert. Sollten Sie sich jedoch zu einem späteren Zeitpunkt entscheiden, von einem anderen Computer aus mit der Console arbeiten zu wollen, können Sie die Console dort ebenfalls separat installieren.
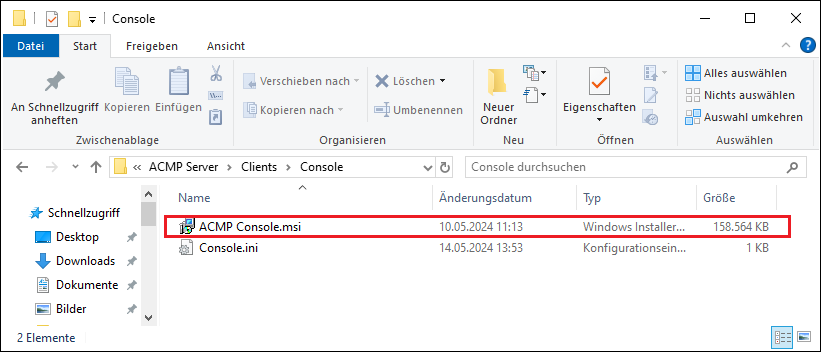
Um die ACMP Console auf weiteren Computern zu installieren, melden Sie sich mit einem Administrator auf dem entsprechenden Computer an. Navigieren Sie mit dem Explorer zu der Freigabe des ACMP Servers „\\%ACMP-Server%\acmp\“. Ersetzen Sie die Variable %ACMP-Server% mit dem Namen oder der IP Ihres ACMP Servers. In dem Unterverzeichnis mit dem Namen Console befindet sich die Datei ACMP Console.msi. Öffnen Sie diese per Doppelklick und folgen Sie den nachfolgenden Installationsschritten. Nach dem erfolgreichen Abschluss der Installation können Sie die Console auf dem Computer verwenden.

Setup Datei der ACMP Console
ACMP Console Installer MSI
Öffnen Sie die Datei ACMP Console.msi im oben genannten Ordnerpfad. Es öffnet sich wie bereits bei der Agenteninstallation ein Wizard, der Sie Schritt für Schritt durch die Installation führt. Klicken Sie auf Next, um mit der Installation zu beginnen.
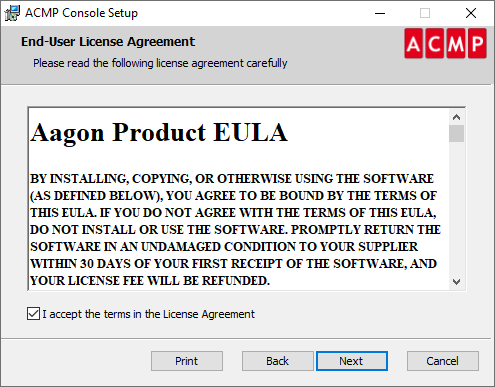
Lesen Sie sich auf der ersten Seite die Lizenzvereinbarungen für den Endverbraucher durch (Aagon Product EULA). Sie müssen die EULA akzeptieren, um fortzufahren, andernfalls können Sie die ACMP Console nicht installieren. Optional können Sie sich die Vereinbarungen auch ausdrucken oder als Datei speichern. Setzen Sie den Haken in der Checkbox und klicken Sie danach auf Next.

Lizenzvereinbarungen EULA akzeptieren
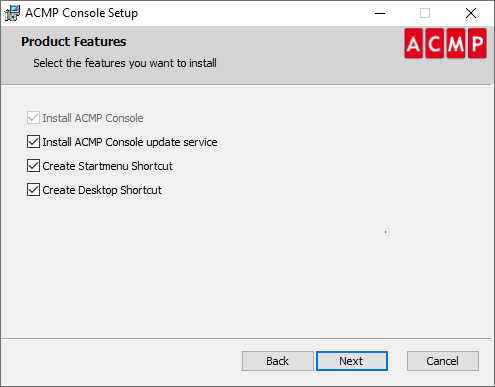
Setzen Sie für jedes Produkt Feature einen Haken oder entfernen Sie diese, sollten Sie beispielsweise keine Verknüpfungen auf dem Desktop oder im Startmenü oder den ACMP Console Update Service installieren wollen. Die Installation der ACMP Console können Sie nicht abwählen. Führen Sie Ihre Arbeiten fort, indem Sie erneut auf Next klicken.

Produkt Features auswählen
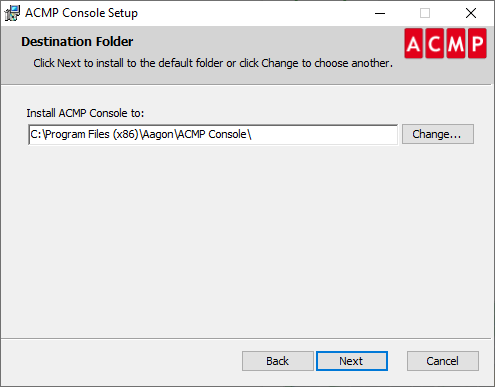
Ändern Sie nach Bedarf den Zielordner der Installation, indem Sie auf Change klicken und dort einen neuen Pfad angeben. Klicken Sie auf OK und danach auf Next.

Zielordner anpassen
Geben Sie die ACMP Server Adresse und den Port an, womit sich die Console verbinden soll. Klicken Sie auf Next und anschließend auf Install, um mit der Installation zu beginnen. Sollten Sie Ihre Eingaben nochmals überprüfen wollen, können Sie zu jeder Seite zurückkehren oder direkt mit der Installation beginnen. Sie werden anhand eines Ladebalkens und den Mitteilungen in der Statuszeile über den Fortschritt informiert. Beenden Sie den Einrichtungsassistenten, indem Sie die Checkboxen nach Belieben (de)aktivieren und nachfolgend auf Finish klicken.
Parameter des ACMP Console MSIs
| Parameter | Beschreibung |
| SERVERNAME | Geben Sie hier den Computernamen oder die IP-Adresse des ACMP Servers ein (z.B. 192.168.1.23). Der standardmäßige Wert ist 127.0.0.1. |
| SERVERPORT | Hinterlegen Sie hier den Port, auf dem der ACMP Server läuft (z.B. SERVERPORT 2110). Der standardmäßige Wert ist 2106. |
| INSTALLATIONDIR | Legt das Installationsverzeichnis fest, z.B. INSTALLATIONDIR D:\Aagon\ACMP Console. Das Standard-Installationsverzeichnis ist %ProgramFiles(x86)%\Aagon\ACMP Console. |
| UPDATESERVICE | Der Service kann mit installiert werden (1), mit dem Wert (0) wird der Service nicht installiert. Standardmäßig wird der Service mit installiert, daher ist der Wert (1). |
| STARTMENUSHORTCUT | Es wird ein Shortcut im Startmenü angelegt (1) oder nicht (0). Standardmäßig wird eine solche Verknüpfung angelegt, daher ist der Wert (1). |
| DESKTOPSHORTCUT | Es wird ein Shortcut auf dem Desktop angelegt (1) oder nicht (0). Standardmäßig wird eine solche Verknüpfung angelegt, daher ist der Wert (1). |
| /qn | Es wird eine komplette Silent Installation ohne Änderungen in der UI vorgenommen. |
Führen Sie danach die Silent Installation der ACMP Console aus.
Im Kapitel First Steps im ACMP erhalten Sie zusätzlich weitere Informationen zu den nächsten Schritten.


