Connecting ACMP Server to SQL Server
Establishing an encrypted connection between ACMP Server and SQL Server
It is possible to establish an encrypted connection between the ACMP Server and the SQL Server. There are two ways to use transport encryption:
- Use Transport Layer Security to encrypt the data.
- Set up an IPSec tunnel in which the communication data is routed.
Transport Layer Security
An SQL Server can use Transport Layer Security (TLS) to encrypt data as it travels.
Create a certificate
The easiest way to create a certificate is to use the following PowerShell script. However, you must have administrator rights to do this:
Powershell script to create a certificate
$dnsname = ([System.Net.Dns]::GetHostByName((hostname)).HostName)
#Create SSL Certificate (replace with PKI function)
New-SelfSignedCertificate -CertStoreLocation Cert:\LocalMachine\My -subject
$Subject -DnsName $dnsname -FriendlyName SQLServer -NotAfter (Get-Date).AddMonths(24) -KeySpec KeyExchange
If you take a different route and use certificates from MakeCert.exe, OpenSSL or another CA, you must ensure that the certificate has certain properties:
- The FQDN of the SQL Server must be included in the Subject CN and in the SAN extension.
- Digital Signature and Key Encryption must be listed in the Key Usage extension.
- Server Authentication (1.3.6.1.5.5.7.3.1) must be listed in the Enhanced Key Usage extension.
The certificate and private key must be stored in the Windows Certificate Store Personal for Local Machine. In addition, the user running SQL Server must have read access to the private key.
Granting read permission to the SQL Server service
Typically, the SQL Server service runs in a virtual account rather than as a local service account. The virtual account has limited rights.
Specifying the SQL Server service account
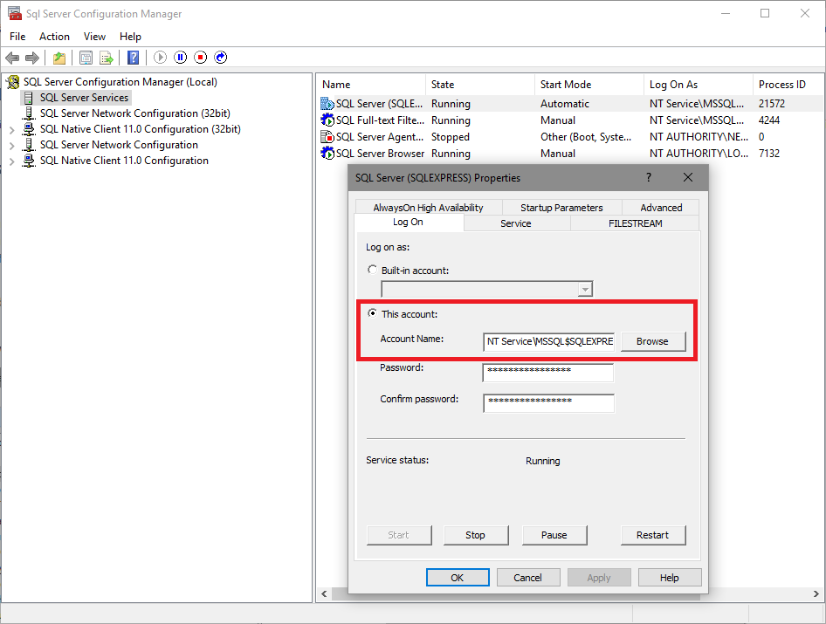
To find the SQL Server service account, you must first open the SQL Server Configuration Manager. Then select and open the SQL Server services. Open the SQL Server instance properties. The account name used is stored in the Log-on tab.
Enabling Read Permissions
If you want to establish an encrypted connection between the ACMP Server and the SQL Server, you need to enable read rights for the SQL Server service account.
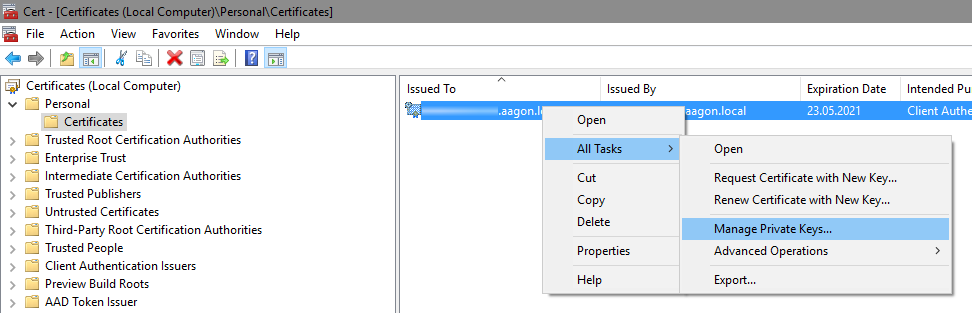
To do this, first open the Cert Manager for the local computer (e.g. open mmc.exe and add the snap-in) and then select the Personal > Certificates directory. Locate the certificate for which you want to enable read rights and right-click on it. In the menu that opens, select All Tasks > Manage Private Keys....
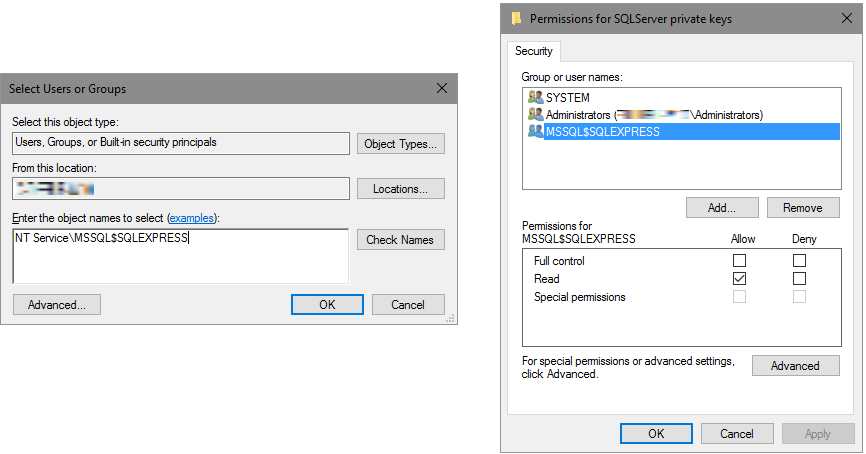
Then add the SQL Server account. In the following picture, the account is NT Service\MSSQL$SQLEXPRESS. Once you have added the account, you must give it the appropriate permissions. Enable read-only and confirm with OK.
Assigning the certificate to SQL Server
Once you make changes to the settings, you will need to restart the SQL service for them to take effect.
A Stack Overflow answer not only details how the settings dialogue determines whether a certificate can be selected, but also explains the alternative way via the registry. It also explains that wildcard certificates are generally supported, but in some cases cannot be selected through the interface. If you choose the registry method anyway, the association will still work.
Manually
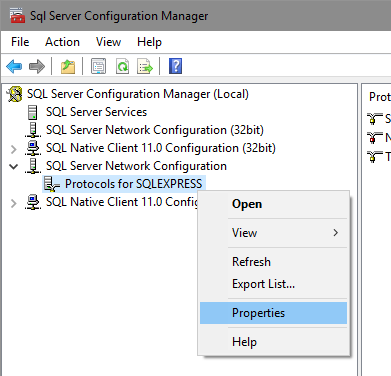
To assign a certificate to SQL Server manually, you need to follow a few steps. First, open the SQL Server Configuration Manager and expand the SQL Server Network Configuration menu item. There you will find Protocols for SQLEXPRESS, which you must open by right-clicking and selecting Properties.
In the window that opens, navigate to the Certificate tab and select the appropriate certificate. In the figure below it is the SQLServer certificate. Then go back to the first tab Flags and select the option Force Encryption by setting it to Yes.

Via the registry
The certificate can also be set via the registry (as part of a script). To do this, create a string called Certificate at HKLM:\SOFTWARE\Microsoft\Microsoft SQL Server\MSSQL14.%Instance%\MSSQLServer\SuperSocketNetLib (replace %Instance% with the instance name). The value (in lower case) must be the thumbprint (usually SHA1) of the certificate to be used. Next, create a DWord called ForceEncryption and set it to 1.
Distribute the certificate
In order for the remote peer to accept the offered certificate, it must be recognised as trustworthy. To do this, it must be imported into the Windows Certificate Store. Note that this must be done for each machine that will access the SQL Server via the secure connection, even if this is done locally.
Testing with SSMS
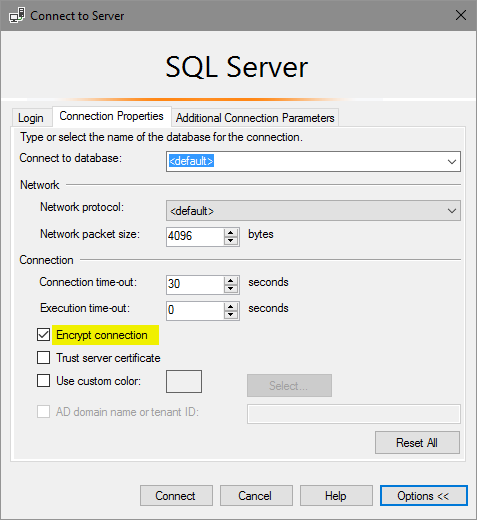
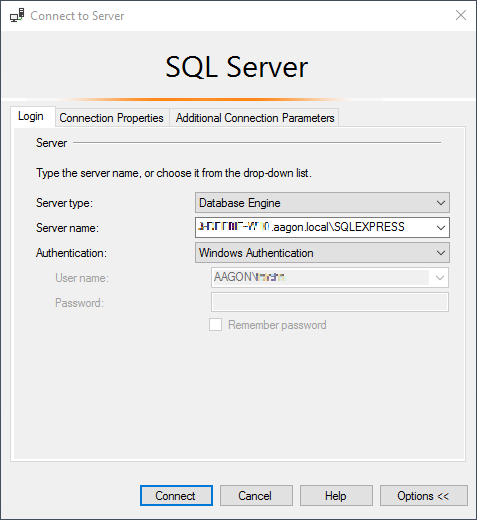
You can use SQL Server Management Studio to test that the secure connection is indeed successful. To do this, start the application, navigate to the Connection Properties tab under Options and select the Encrypt connection check box.
If you select the Trust server certificate checkbox, any certificate will be considered valid. This is not recommended for production use!
Adjusting the ACMP server connection string
You can also customise the connection settings in SQL Server Management Studio using the ACMP server connection string:
Provider=SQLNCLI11.1;Password=MeinGeheimesPW;Persist Security Info=True;User ID=ACMPDBUser;Initial Catalog=ACMP;
Data Source=ServerNamenEingeben.aagon.local\SQLEXPRESS;Use Encryption for Data=True;MARS Connection=False;DataTypeCompatibility=80;Trust Server Certificate=False
This requires the Use Encryption for Data property to be set to True.
If the Trust Server Certificate property is also set to True, any certificate will be considered valid.
IPSec
Alternatively, if you want to use an IPSec tunnel to establish an encrypted connection between the ACMP Server and the SQL Server, read the procedure here.